Page 263 of 536

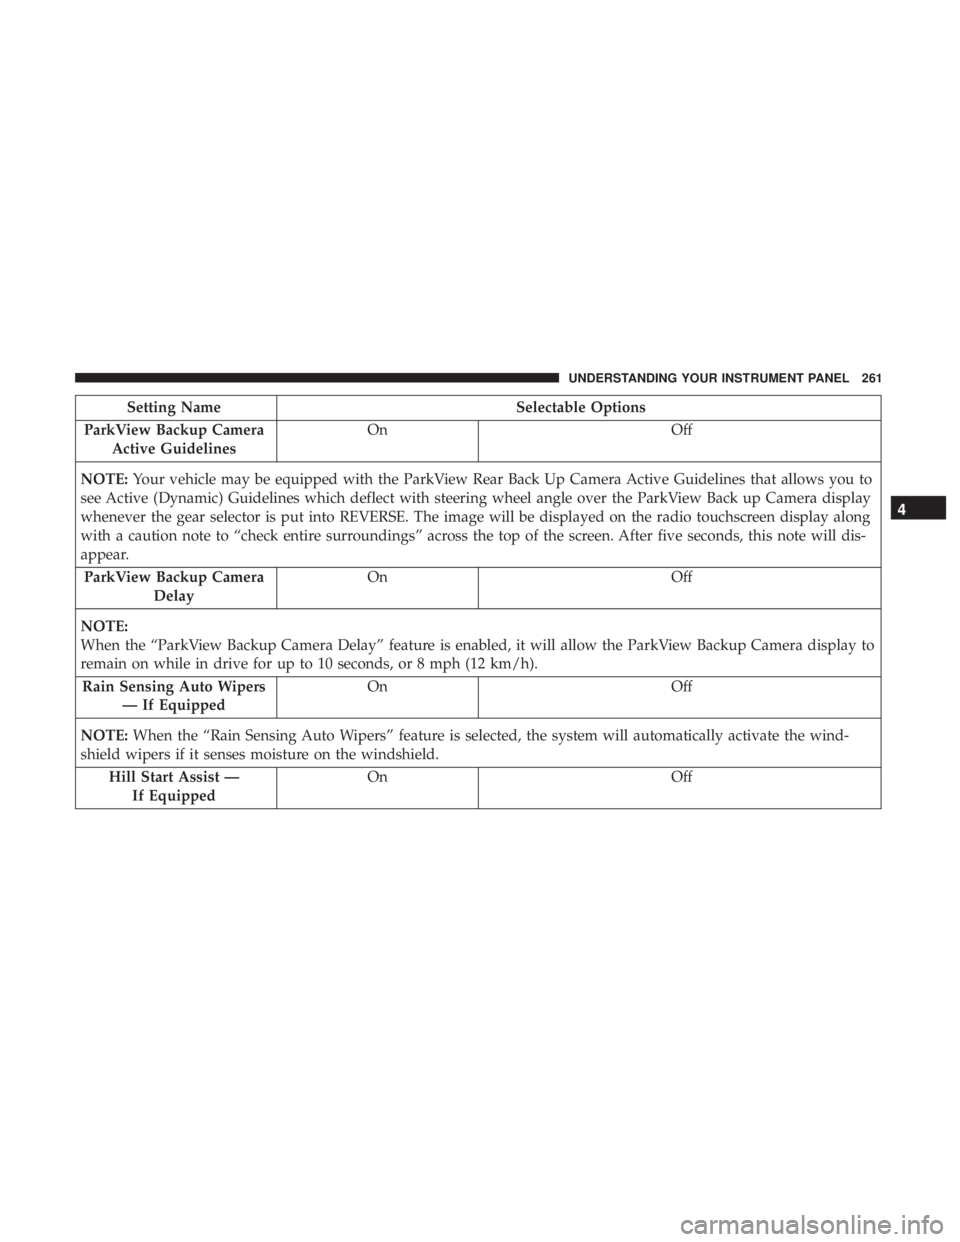
Setting Name Selectable Options
ParkView Backup Camera
Active Guidelines On Off
NOTE: Your vehicle may be equipped with the ParkView Rear Back Up Camera Active Guidelines that allows you to
see Active (Dynamic) Guidelines which deflect with steering wheel angle over the ParkView Back up Camera display
whenever the gear selector is put into REVERSE. The image will be displayed on the radio touchscreen display along
with a caution note to “check entire surroundings” across the top of the screen. After five seconds, this note will dis-
appear.
ParkView Backup Camera
Delay On Off
NOTE:
When the “ParkView Backup Camera Delay” feature is enabled, it will allow the ParkView Backup Camera display to
remain on while in drive for up to 10 seconds, or 8 mph (12 km/h).
Rain Sensing Auto Wipers
— If Equipped On Off
NOTE: When the “Rain Sensing Auto Wipers” feature is selected, the system will automatically activate the wind-
shield wipers if it senses moisture on the windshield.
Hill Start Assist —
If Equipped On Off 4UNDERSTANDING YOUR INSTRUMENT PANEL 261
Page 268 of 536
Auto Comfort Systems — If Equipped
After pressing the “Auto-On Comfort” button on the
touchscreen, the following settings will be available:
Setting Name Selectable Options
Auto-On Driver Heated/
Ventilated Seat & Steering
Wheel With Vehicle Start
— If Equipped Off Remote Start All Starts
NOTE: When the “Auto-On Driver Heated/Ventilated Seat & Steering Wheel With Vehicle Start” feature is selected
the driver’s heated seat and heated steering wheel will automatically turn on when temperatures are below 40° F
(4.4° C). When temperatures are above 80° F (26.7° C), the driver vented seat will turn on. 266 UNDERSTANDING YOUR INSTRUMENT PANEL
Page 276 of 536

STEERING WHEEL AUDIO CONTROLS — IF
EQUIPPED
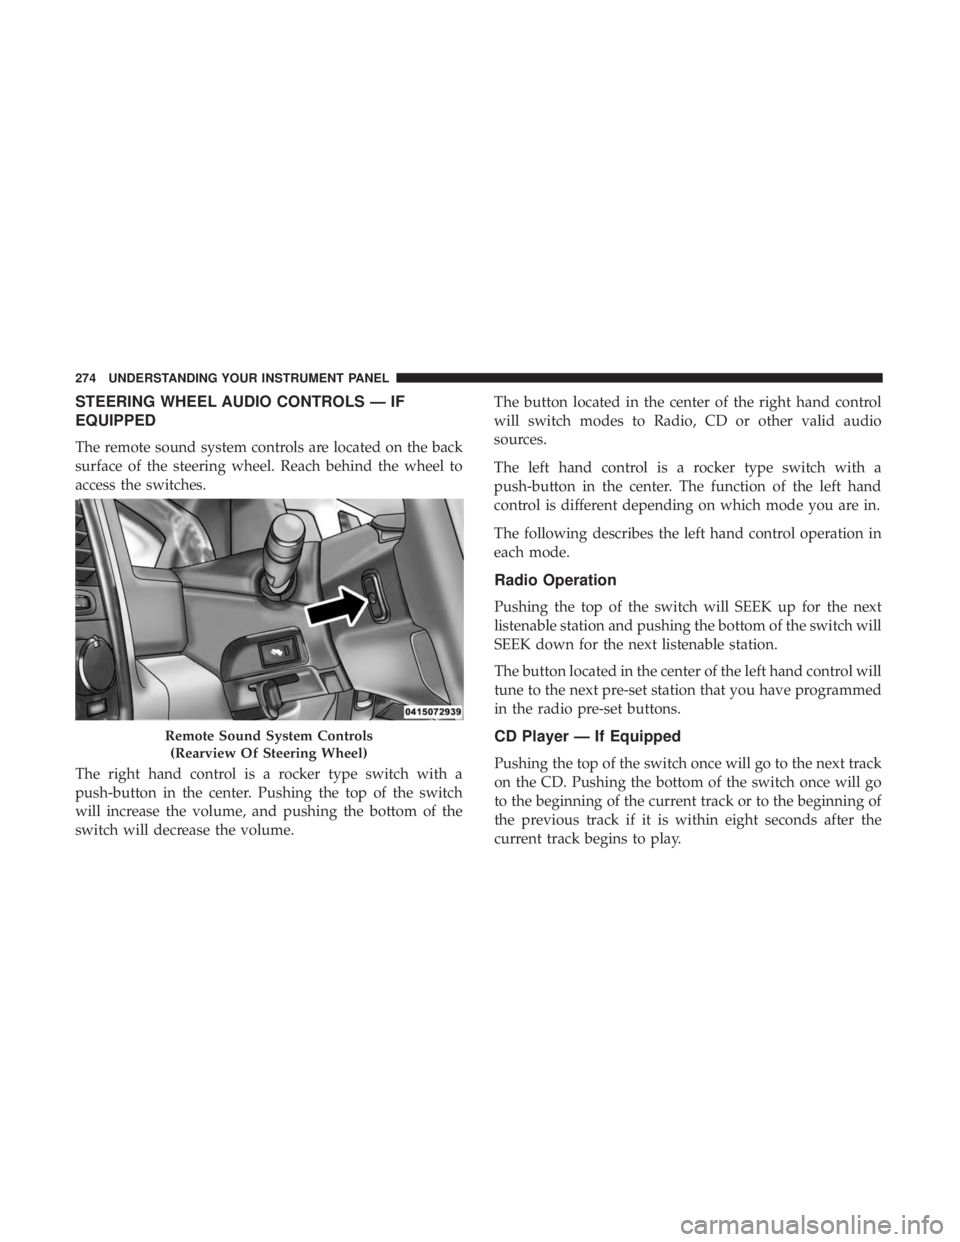
The remote sound system controls are located on the back
surface of the steering wheel. Reach behind the wheel to
access the switches.
The right hand control is a rocker type switch with a
push-button in the center. Pushing the top of the switch
will increase the volume, and pushing the bottom of the
switch will decrease the volume. The button located in the center of the right hand control
will switch modes to Radio, CD or other valid audio
sources.
The left hand control is a rocker type switch with a
push-button in the center. The function of the left hand
control is different depending on which mode you are in.
The following describes the left hand control operation in
each mode.
Radio Operation
Pushing the top of the switch will SEEK up for the next
listenable station and pushing the bottom of the switch will
SEEK down for the next listenable station.
The button located in the center of the left hand control will
tune to the next pre-set station that you have programmed
in the radio pre-set buttons.
CD Player — If Equipped
Pushing the top of the switch once will go to the next track
on the CD. Pushing the bottom of the switch once will go
to the beginning of the current track or to the beginning of
the previous track if it is within eight seconds after the
current track begins to play.Remote Sound System Controls
(Rearview Of Steering Wheel)274 UNDERSTANDING YOUR INSTRUMENT PANEL
Page 282 of 536

Icon Description
Modes Control: Rotate the Mode Control Knob to change the airflow distribution mode. The airflow distribution
mode can be adjusted so air comes from the instrument panel outlets, floor outlets, defrost outlets and demist outlets.
The Mode settings are as follows:
Panel Mode Panel Mode
Air comes from the outlets in the instrument panel. Each of these outlets can be individually
adjusted to direct the flow of air. The air vanes of the center outlets and outboard outlets can be
moved up and down or side to side to regulate airflow direction. There is a shut off wheel lo-
cated below the air vanes to shut off or adjust the amount of airflow from these outlets.
Bi-Level Mode Bi-Level Mode
Air comes from the instrument panel outlets and floor outlets. A slight amount of air is directed
through the defrost and side window demister outlets.
NOTE: BI-LEVEL mode is designed under comfort conditions to provide cooler air out of the
panel outlets and warmer air from the floor outlets.
Floor Mode Floor Mode
Air comes from the floor outlets. A slight amount of air is directed through the defrost and side
window demister outlets.
Mix Mode Mix Mode
Air is directed through the floor, defrost, and side window demister outlets. This setting works
best in cold or snowy conditions that require extra heat to the windshield. This setting is good
for maintaining comfort while reducing moisture on the windshield.280 UNDERSTANDING YOUR INSTRUMENT PANEL
Page 290 of 536

Icon Description
Panel Mode Panel Mode
Air comes from the outlets in the instrument panel. Each of these outlets can be individually
adjusted to direct the flow of air. The air vanes of the center outlets and outboard outlets can be
moved up and down or side to side to regulate airflow direction. There is a shut off wheel lo-
cated below the air vanes to shut off or adjust the amount of airflow from these outlets.
Bi-Level Mode Bi-Level Mode
Air comes from the instrument panel outlets and floor outlets. A slight amount of air is directed
through the defrost and side window demister outlets.
NOTE: BI-LEVEL mode is designed under comfort conditions to provide cooler air out of the
panel outlets and warmer air from the floor outlets.
Floor Mode Floor Mode
Air comes from the floor outlets. A slight amount of air is directed through the defrost and side
window demister outlets.
Mix Mode Mix Mode
Air is directed through the floor, defrost, and side window demister outlets. This setting works
best in cold or snowy conditions that require extra heat to the windshield. This setting is good
for maintaining comfort while reducing moisture on the windshield.
Climate Control OFF Button
Press and release this button on the touchscreen, or push the faceplate button, to turn the Cli-
mate Control System off.288 UNDERSTANDING YOUR INSTRUMENT PANEL
Page 307 of 536

TIP: Voice Text Reply is not compatible with iPhone, but if
your vehicle is equipped with Siri Eyes Free, you can use
your voice to send a text message.
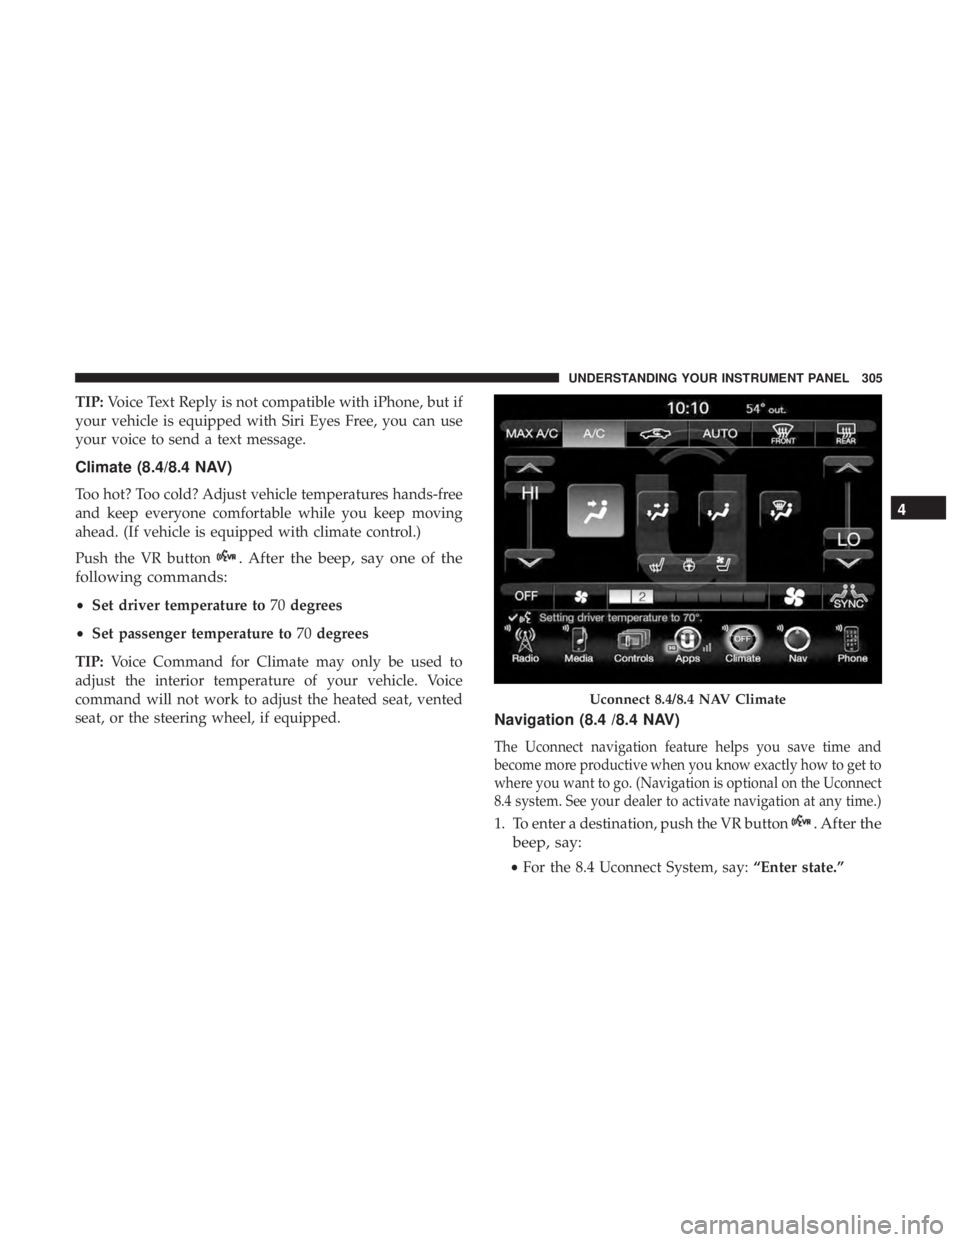
Climate (8.4/8.4 NAV)
Too hot? Too cold? Adjust vehicle temperatures hands-free
and keep everyone comfortable while you keep moving
ahead. (If vehicle is equipped with climate control.)
Push the VR button . After the beep, say one of the
following commands:
• Set driver temperature to 70 degrees
• Set passenger temperature to 70 degrees
TIP: Voice Command for Climate may only be used to
adjust the interior temperature of your vehicle. Voice
command will not work to adjust the heated seat, vented
seat, or the steering wheel, if equipped.
Navigation (8.4 /8.4 NAV)
The Uconnect navigation feature helps you save time and
become more productive when you know exactly how to get to
where you want to go. (Navigation is optional on the Uconnect
8.4 system. See your dealer to activate navigation at any time.)
1. To enter a destination, push the VR button . After the
beep, say:
• For the 8.4 Uconnect System, say: “Enter state.”Uconnect 8.4/8.4 NAV Climate 4UNDERSTANDING YOUR INSTRUMENT PANEL 305
Page 313 of 536
SiriusXM Travel Link (8.4/8.4 NAV)
Need to find a gas station, view local movie listings, check
a sports score or the 5 - day weather forecast? SiriusXM
Travel Link is a suite of services that brings a wealth of
information right to your Uconnect 8.4 NAV system. (Not
available for 8.4 system or vehicles sold in the Canadian
market.)
Push the VR button . After the beep, say one of the
following commands:
• Show fuel prices
• Show 5 - day weather forecast
• Show extended weather
TIP: Traffic alerts are not accessible with Voice Command.
Siri Eyes Free — If Equipped
Siri lets you use your voice to send text messages, select
media, place phone calls and much more. Siri uses your
natural language to understand what you mean and will
respond back to confirm your requests. The system is
designed to keep your eyes on the road and your hands on
the wheel by letting Siri help you perform useful tasks. SiriusXM Travel Link 4UNDERSTANDING YOUR INSTRUMENT PANEL 311
Page 314 of 536
To enable Siri push and hold, then release the Uconnect
Voice Recognition (VR) button on the steering wheel. After
you hear a double beep, you can ask Siri to play podcasts
and music, get directions, read text messages, and many
other useful requests. Getting Started
Ensure Siri is enabled on your iPhone.
1. Pair your Siri enabled device to the vehicles sound
system. Refer to your Uconnect Owner ’s Manual
Supplement for a detailed pairing procedure.Siri Eyes Free Available Siri Enable Screens1 — Select Settings On Your
iPhone
2 — Select General 3 — Select Siri
4 — Enable Siri312 UNDERSTANDING YOUR INSTRUMENT PANEL