Page 61 of 252

23
Each press of the button on the end of the
wiper control stalk allows you to scroll through
the various trip computer information displays,
depending on the screen.
The "vehicle" tab with the range, current fuel
consumption and remaining distance to travel.
The "1" tab (trip 1) with the average speed,
average fuel consumption and distance
travelled in trip 1 .
The "2" tab (trip 2) with the same information
for a 2
nd trip.
Zero reset
F When the desired trip is displayed, press the control for more than two seconds.
A few definitions
Range: displays the distance that can still be
travelled with the fuel detected in the tank on
the basis of the average consumption over the
last few miles (kilometres) travelled. If dashes instead of figures continue to
be displayed when driving, contact a
PEUGEOT dealer.
This displayed value can vary greatly
following a change in the vehicle's driving
conditions or the terrain. When the range falls below 19
miles (30 km),
dashes are displayed. After filling with at least
10 litres of fuel, the range is recalculated and is
displayed if it exceeds 62 miles (100 km).
Current fuel consumption: calculated
and displayed only when exceeding 19 mph
(30
km/h).
Average consumption: this is the average
fuel consumption since the last trip computer
zero reset.
Distance travelled: calculated from the last
trip computer zero reset.
Remaining distance: calculated according
to the final destination entered by the user. If
navigation is activated, the navigation system
calculates it instantaneously.
Average speed: this is the average speed
calculated since the last trip computer zero
reset (with the ignition on).
Date and time setting
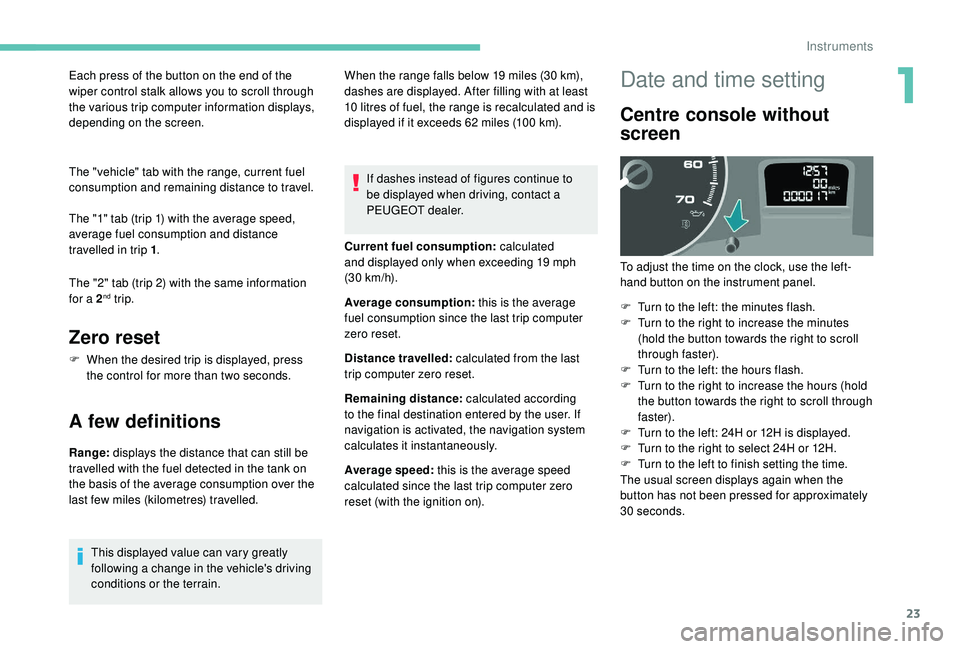
Centre console without
screen
To adjust the time on the clock, use the left-
hand button on the instrument panel.
F
T
urn to the left: the minutes flash.
F
T
urn to the right to increase the minutes
(hold the button towards the right to scroll
through faster).
F
T
urn to the left: the hours flash.
F
T
urn to the right to increase the hours (hold
the button towards the right to scroll through
faster).
F
T
urn to the left: 24H or 12H is displayed.
F
T
urn to the right to select 24H or 12H.
F
T
urn to the left to finish setting the time.
The usual screen displays again when the
button has not been pressed for approximately
30
seconds.
1
Instruments
Page 66 of 252
28
Front doors
From outside
From inside
Sliding side door(s)From outside
F Pull the handle towards you, then backwards and open the side door, guiding
it as it slides backwards until it passes the
point of resistance and it stays open.
A mechanical system prevents the
left side door being opened when
the fuel filler flap is open.
From inside
F Unlock and open the side door using this handle, guiding it to the rear until it reaches
the point of resistance. Pass this point to
keep the door open.
Close the side door again using
the handle to start sliding and
pass the point of resistance. Then
use the shaped recess at the top
of the door pillar to guide the door
until it locks.
Do not use the grab handle to
slide the door.
F
U
se the remote control to lock /unlock the
vehicle.
F
I
f the remote control does not work, insert
the metal part of the key into the driver's
door lock.
F
U
se the door opening control to unlock and
open the respective door.
Access
Page 69 of 252

31
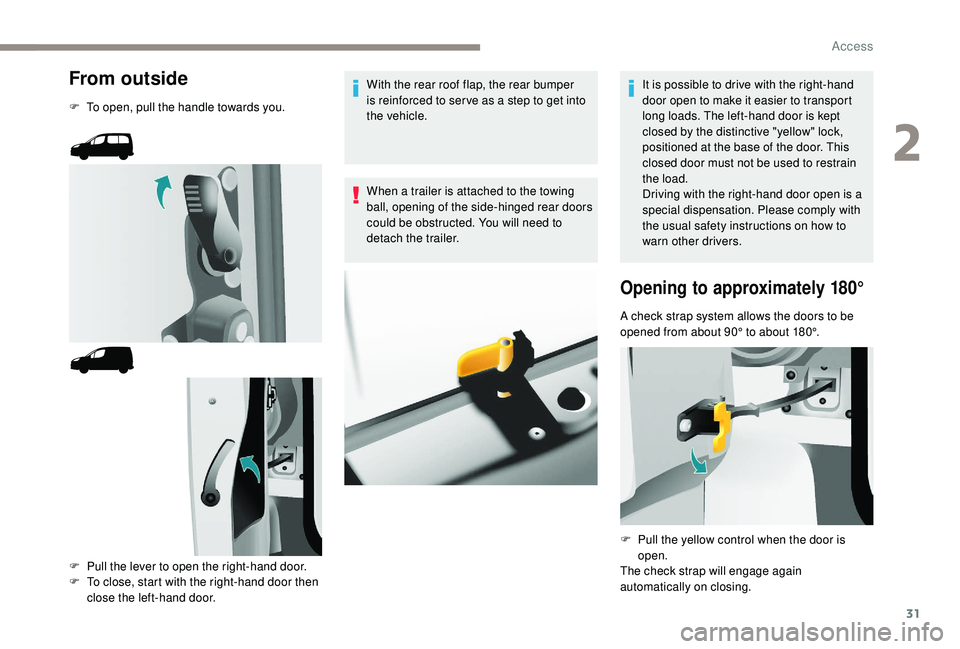
From outside
F To open, pull the handle towards you.F
P
ull the lever to open the right-hand door.
F
T
o close, start with the right-hand door then
close the left-hand door. With the rear roof flap, the rear bumper
is reinforced to ser ve as a step to get into
the vehicle.
When a trailer is attached to the towing
ball, opening of the side-hinged rear doors
could be obstructed. You will need to
detach the trailer.
It is possible to drive with the right-hand
door open to make it easier to transport
long loads. The left-hand door is kept
closed by the distinctive "yellow" lock,
positioned at the base of the door. This
closed door must not be used to restrain
the load.
Driving with the right-hand door open is a
special dispensation. Please comply with
the usual safety instructions on how to
warn other drivers.
Opening to approximately 180°
A check strap system allows the doors to be
opened from about 90° to about 180°.
F
P
ull the yellow control when the door is
open.
The check strap will engage again
automatically on closing.
2
Access
Page 70 of 252

32
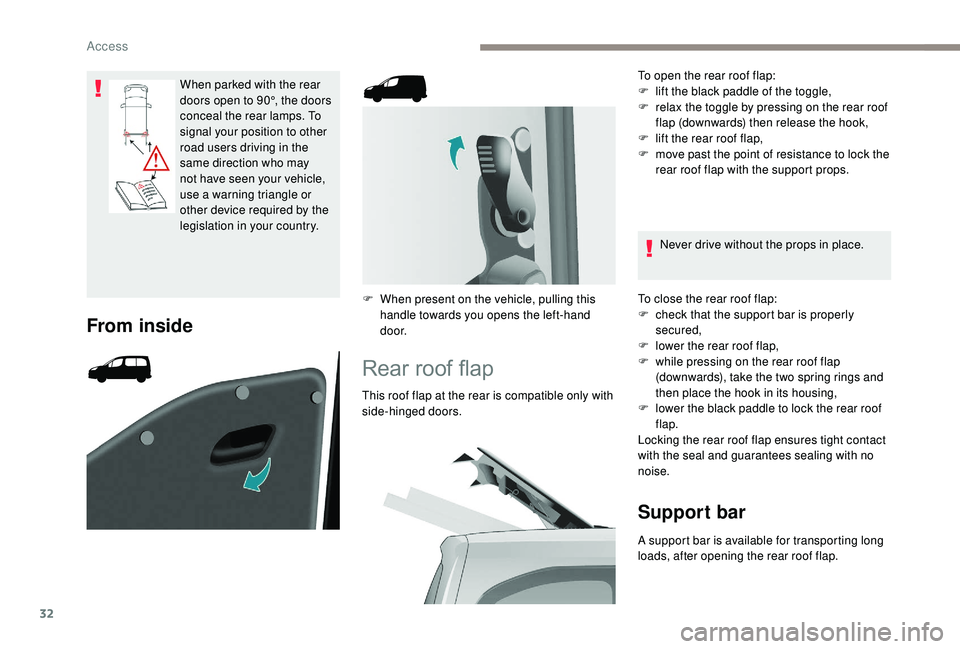
When parked with the rear
doors open to 90°, the doors
conceal the rear lamps. To
signal your position to other
road users driving in the
same direction who may
not have seen your vehicle,
use a warning triangle or
other device required by the
legislation in your country.
From inside
F When present on the vehicle, pulling this handle towards you opens the left-hand
d o o r.
Rear roof flap
This roof flap at the rear is compatible only with
side-hinged doors. To open the rear roof flap:
F
l
ift the black paddle of the toggle,
F
r
elax the toggle by pressing on the rear roof
flap (downwards) then release the hook,
F
l
ift the rear roof flap,
F
m
ove past the point of resistance to lock the
rear roof flap with the support props.
Never drive without the props in place.
To close the rear roof flap:
F
c
heck that the support bar is properly
secured,
F
l
ower the rear roof flap,
F
w
hile pressing on the rear roof flap
(downwards), take the two spring rings and
then place the hook in its housing,
F l ower the black paddle to lock the rear roof
flap.
Locking the rear roof flap ensures tight contact
with the seal and guarantees sealing with no
noise.
Support bar
A support bar is available for transporting long
loads, after opening the rear roof flap.
Access
Page 87 of 252
49
Ensure that the centre seat belt is stowed
correctly in its housing in the headlining.
Operating the Row 2 seats
Removing the seat
Refitting the seat
The label on the seat indicates the position in
which it must be installed.
F
P
ull the red strap to place the seat in the
fully folded position.
F
T
ilt the entire seat for wards.
F
E
xit via the side door. F
I
f necessary, move the front seats for ward.
F
L
ower the head restraint.
F
P
lace the seat in the fully folded position.
F
T
ilt the entire seat for wards then lift it.
Ensure that no object or foot of a
passenger seated in the rear is obstructing
the anchorage points or preventing correct
locking of the seat.Operating the Row
3 seats
Removing the seat
F Place the hooks of the feet between the two
bars.
F
F
old the seat backwards to secure the rear
anchorage points.
F
O
perate the control to raise the seat
backrest to its initial position.
F
Ra
ise the head restraint.
3
Ease of use and comfort
Page 88 of 252

50
Refitting the seat
The label on the seat indicates the position in
which it must be installed. F
L
ower the head restraint.
F
P
lace the seat in fully folded position.
F
T
ilt the assembly forwards.
F
T
ake hold of each side of the uprights of the
folded seat while tilting it gently for wards
and lift it.
F
P
lace the hooks of the front feet between
the two bars.
F
E
nsure that no object or feet are obstructing
the rear anchorage points and that the seat
belt is properly positioned and available.
F
F
old the seat backwards to fix its rear
anchorage feet.
F
O
perate the control to raise the backrest
into the initial position.
F
R
efit the head restraint. Do not place hard or heavy objects on
the backrests forming a table. They could
become dangerous projectiles in the event
of sharp braking or collision.
Following the various operations:
-
d
o not remove a head restraint without
stowing it; secure it inside the vehicle,
-
e
nsure that passengers can always
access the seat belts and fasten them
easily,
-
p
assengers must never take their seat
without adjusting and fastening their
seat belt.
-
a p
assenger seated in row 3 must
ensure that they do not obstruct the
row 2 seat anchorage points,
-
a p
assenger seated in row 3 must
not have the seat in front of them in
row 2 in the fully folded position; this
is in case the seat tips towards the
passenger unexpectedly, which could
cause injury.
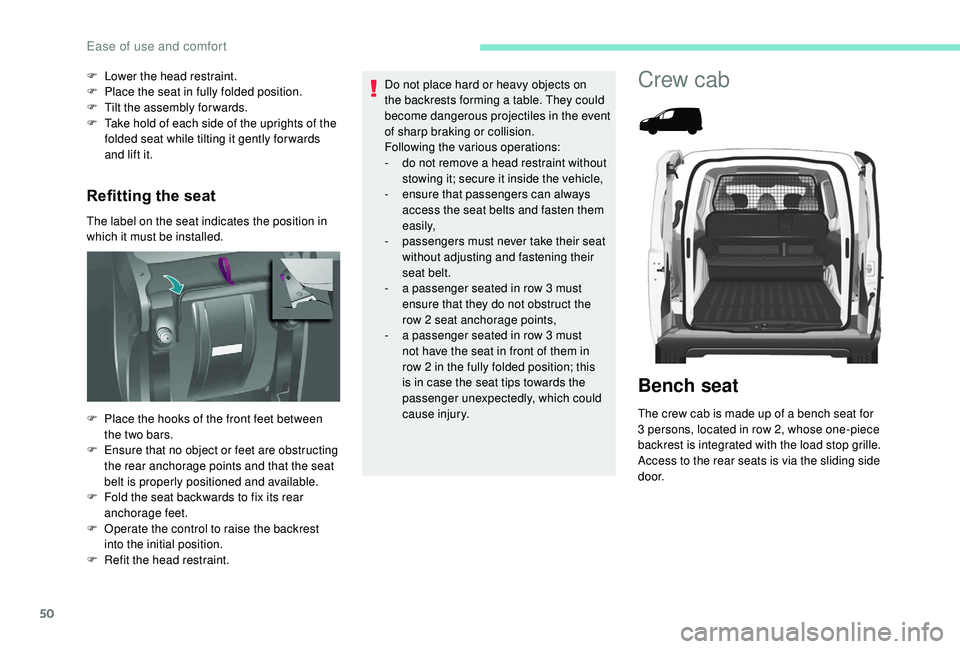
Crew cab
Bench seat
The crew cab is made up of a bench seat for
3 persons, located in row 2, whose one-piece
backrest is integrated with the load stop grille.
Access to the rear seats is via the sliding side
d o o r.
Ease of use and comfort
Page 90 of 252
52
Seat modularity and configurations
The various operations must be carried
out when stationary.
5-seat configuration
Head restraints and seat
belts
The three seats are equipped with seat belts
with inertia reels. The seat belts of the side
seats are secured on the panels, while the
seat belt of the central seat is secured on the
backrest of the bench seat.
Each seat has a head restraint, screwed to the
load stop grille, which can be removed.
Do not place a head restraint inside the
vehicle without stowing it or securing it to a
support.
Do not drive with rear passengers without
having the head restraints screwed in place.
There is no need to assist, guide or retain
it by the arm that remains free during the
tilting movement.
The rear seat belt fittings are not designed
to secure the load. Use only the stowing
rings on the floor.
The crew cab bench seat is not suitable
for the installation of a child seat.
Ease of use and comfort
Page 98 of 252
60
Rear fittings (5 seats)
Load space cover
To fold it
F Fold the half-shelf from the boot, lifting it up to release it from the catch C .
To remove it
To refit it
F Place the load space cover in front of A and B .F Push for ward to insert the lugs into the
catches.
F
U
nfold and clip into catches C .
To store it
(depending on version)
There is a space in the rear seat backrest to
accommodate the folded load space cover.
This rigid shelf conceals the items stored in the
boot.
F
F
old it.
F
R
elease it from catches A and B by pulling
towards you.
F
L
ift it up and remove the assembly.
When sharp deceleration occurs, objects
placed on the luggage cover can turn into
projectiles.
12 volt socket (120 W max)
F Slide it vertically between the side guides
located at mid-height of the backrests.
F
I
nsert the hinge first with the floating folds
facing upwards.
It is advisable to limit its use to avoid
discharging the battery.
Ease of use and comfort