2017 PEUGEOT 5008 wipers
[x] Cancel search: wipersPage 4 of 404
2
.
.
Head-up digital screen 8
I ndicator and warning lamps 1 2
Indicators
28
Manual test
3
4
Distance recorders
3
5
Lighting dimmer
3
5
Trip computer
3
6
Monochrome screen C
3
8
Touch screen
4
0
Remote control
4
9
K
eyless Entry and Starting
5
2
Back-up procedures
5
7
Anti-intrusion security
6
0
Central locking
6
0
Alarm
61
Doors
63
Boot
64
Hands-free tailgate
6
5
Electric windows
6
9
Panoramic opening sunroof
7
0Driving position
7
4
Front seats
7
6
Steering wheel adjustment
8
3
Mirrors 83
Second row seats
8
5
Third row seats
8
8
Seat modularity
9
2
i- Cockpit Amplify function
9
3
Heating and Ventilation 9 4
Manual air conditioning 9 6
Semi-automatic mono-zone air conditioning
9
7
Automatic dual-zone air conditioning
9
9
Recirculation of interior air
1
03
Front demist – defrost
1
03
Heated windscreen
1
04
Rear screen demist – defrost
1
04
Programmable heating
1
05
Front fittings
1
10
Courtesy lamps
1
16
Interior ambient lighting
1
17
Rear fittings
1
18
Boot fittings
1
20Exterior lighting control stalk
1
24
Direction indicators
1
27
Headlamp adjustment
1
28
Automatic illumination of headlamps
1
28
Automatic headlamp dipping
1
31
Cornering lighting
1
33
Wiper control stalk
1
34
Automatic rain sensitive wipers
1
36
General safety recommendations
1
38
Hazard warning lamps
1
39
H or n
13
9
Emergency or assistance call
1
39
Electronic stability control (ESC)
1
42
Advanced Grip Control
1
45
Hill Assist Descent Control
1
47
Seat belts
1
48
Airbags
1
53
Child seats
1
57
Deactivating the passenger front airbag
1
58
ISOFIX mountings and child seats
1
66
i-Size child seats
1
70
Manual child lock
1
73
Electric child lock
1
74
Over view
Dashboard instruments Ease of use and comfort
Safety
Access Lighting and visibility
Eco-driving
Contents
Page 41 of 404
39
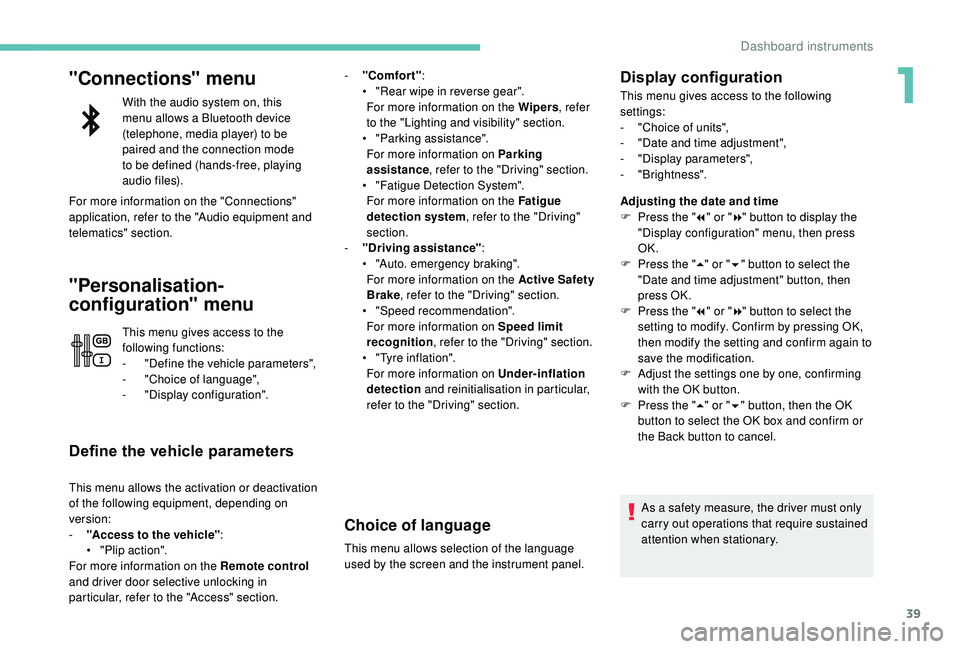
"Connections" menu
With the audio system on, this
menu allows a Bluetooth device
(telephone, media player) to be
paired and the connection mode
to be defined (hands-free, playing
audio files).
For more information on the "Connections"
application, refer to the "Audio equipment and
telematics" section.
"Personalisation-
configuration" menu
This menu gives access to the
following functions:
-
"
Define the vehicle parameters",
-
"
Choice of language",
-
"
Display configuration".
Define the vehicle parameters
This menu allows the activation or deactivation
of the following equipment, depending on
version:
-
"
Access to the vehicle" :
•
"
Plip action".
For more information on the Remote control
and driver door selective unlocking in
particular, refer to the "Access" section. -
"
Comfort"
:
•
"
Rear wipe in reverse gear".
For more information on the Wipers , refer
to the "Lighting and visibility" section.
•
"
Parking assistance".
For more information on Parking
assistance , refer to the "Driving" section.
•
"
Fatigue Detection System".
For more information on the Fatigue
detection system , refer to the "Driving"
section.
-
"
Driving assistance"
:
•
"
Auto. emergency braking".
For more information on the Active Safety
Brake , refer to the "Driving" section.
•
"
Speed recommendation".
For more information on Speed limit
recognition , refer to the "Driving" section.
•
"
Tyre inflation".
For more information on Under-inflation
detection and reinitialisation in particular,
refer to the "Driving" section.
Choice of language
This menu allows selection of the language
used by the screen and the instrument panel.
Display configuration
This menu gives access to the following
settings:
-
"
Choice of units",
-
"
Date and time adjustment",
-
"
Display parameters",
-
"Brightness".
Adjusting the date and time
F
P
ress the " 7" or " 8" button to display the
"Display configuration" menu, then press
OK.
F
P
ress the " 5" or " 6" button to select the
"Date and time adjustment" button, then
press OK.
F
P
ress the " 7" or " 8" button to select the
setting to modify. Confirm by pressing OK,
then modify the setting and confirm again to
save the modification.
F
A
djust the settings one by one, confirming
with the OK button.
F
P
ress the " 5" or " 6" button, then the OK
button to select the OK box and confirm or
the Back button to cancel.
As a safety measure, the driver must only
carry out operations that require sustained
attention when stationary.
1
Dashboard instruments
Page 106 of 404
104
Heated windscreenSwitching on
Switching off
Pressing the button again switches
off the system; its indicator lamp
goes off.
Rear screen demist –
defrost
Switching on
F Press this button to demist /defrost the rear screen and,
depending on version, the door
mirrors.
The indicator lamp associated with the button
comes on.
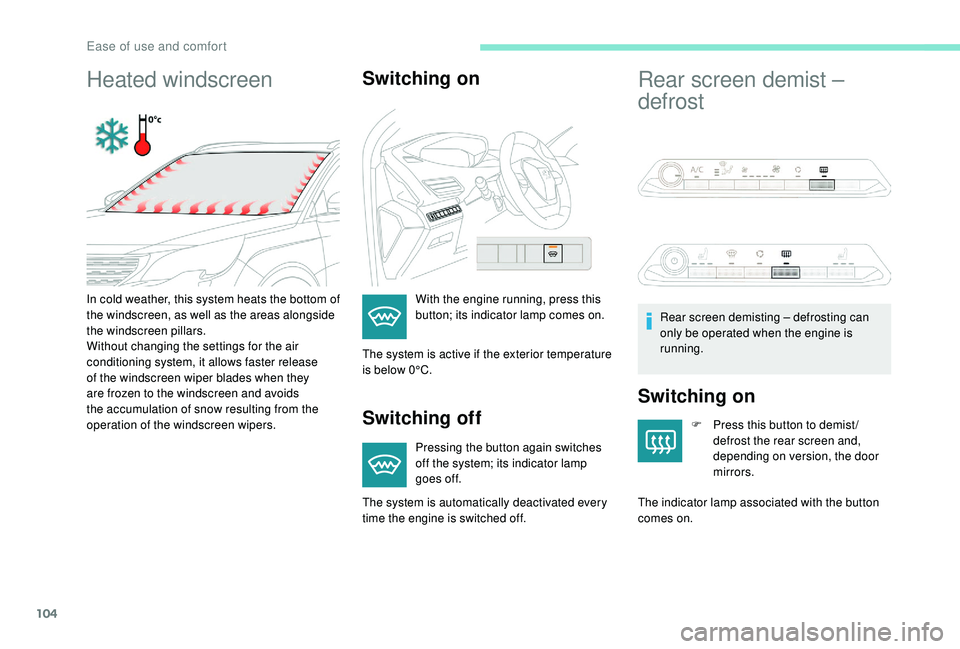
In cold weather, this system heats the bottom of
the windscreen, as well as the areas alongside
the windscreen pillars.
Without changing the settings for the air
conditioning system, it allows faster release
of the windscreen wiper blades when they
are frozen to the windscreen and avoids
the accumulation of snow resulting from the
operation of the windscreen wipers.
With the engine running, press this
button; its indicator lamp comes on.
The system is active if the exterior temperature
is below 0°C.
The system is automatically deactivated every
time the engine is switched off. Rear screen demisting – defrosting can
only be operated when the engine is
running.
Ease of use and comfort
Page 130 of 404
128
Headlamp adjustment
Manual adjustment of the
halogen headlamps
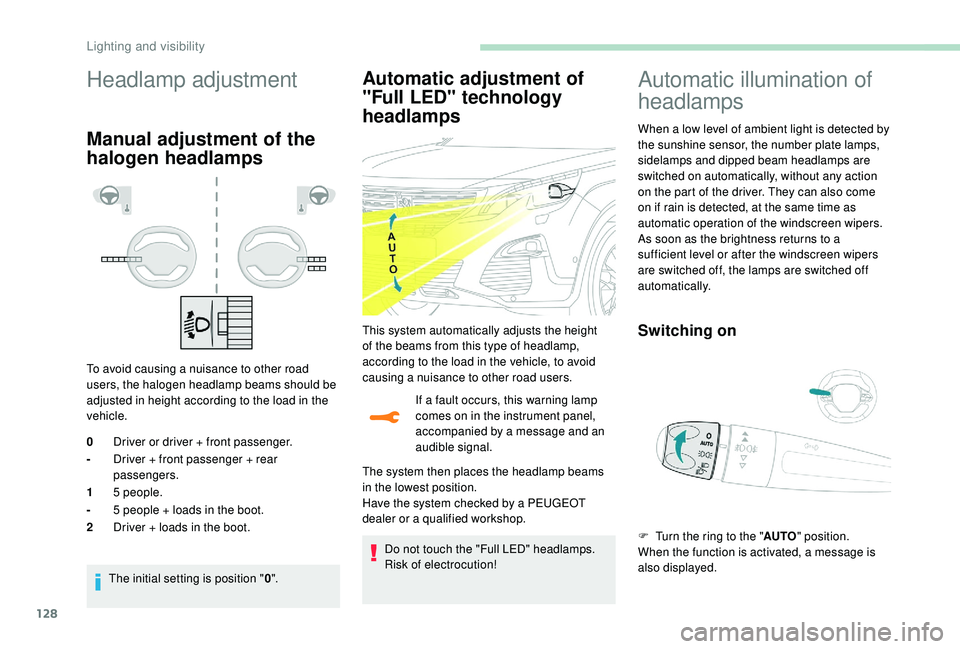
To avoid causing a nuisance to other road
users, the halogen headlamp beams should be
adjusted in height according to the load in the
vehicle.The initial setting is position " 0".
Automatic adjustment of
"Full LED" technology
headlamps
If a fault occurs, this warning lamp
comes on in the instrument panel,
accompanied by a message and an
audible signal.
The system then places the headlamp beams
in the lowest position.
Have the system checked by a PEUGEOT
dealer or a qualified workshop.
Do not touch the "Full LED" headlamps.
Risk of electrocution!
0
Driver or driver + front passenger.
- Driver + front passenger + rear
passengers.
1 5
people.
- 5
people + loads in the boot.
2 Driver + loads in the boot.
Automatic illumination of
headlamps
When a low level of ambient light is detected by
the sunshine sensor, the number plate lamps,
sidelamps and dipped beam headlamps are
switched on automatically, without any action
on the part of the driver. They can also come
on if rain is detected, at the same time as
automatic operation of the windscreen wipers.
As soon as the brightness returns to a
sufficient level or after the windscreen wipers
are switched off, the lamps are switched off
automatically.
Switching onThis system automatically adjusts the height
of the beams from this type of headlamp,
according to the load in the vehicle, to avoid
causing a nuisance to other road users.
F
T
urn the ring to the "AUTO" position.
When the function is activated, a message is
also displayed.
Lighting and visibility
Page 136 of 404
134
Wiper control stalk
Programming
Your vehicle may also include some functions
that can be configured:
-
a
utomatic rain sensitive windscreen wipers,
-
r
ear wiping on engaging reverse gear.
In wintry conditions, remove snow, ice or
frost present on the windscreen, around
the wiper arms and blades and the
windscreen seal, before operating the
wipers.
Do not operate the wipers on a dry
windscreen. Under extremely hot or cold
conditions, ensure that the wiper blades
are not stuck to the windscreen before
operating the wipers.
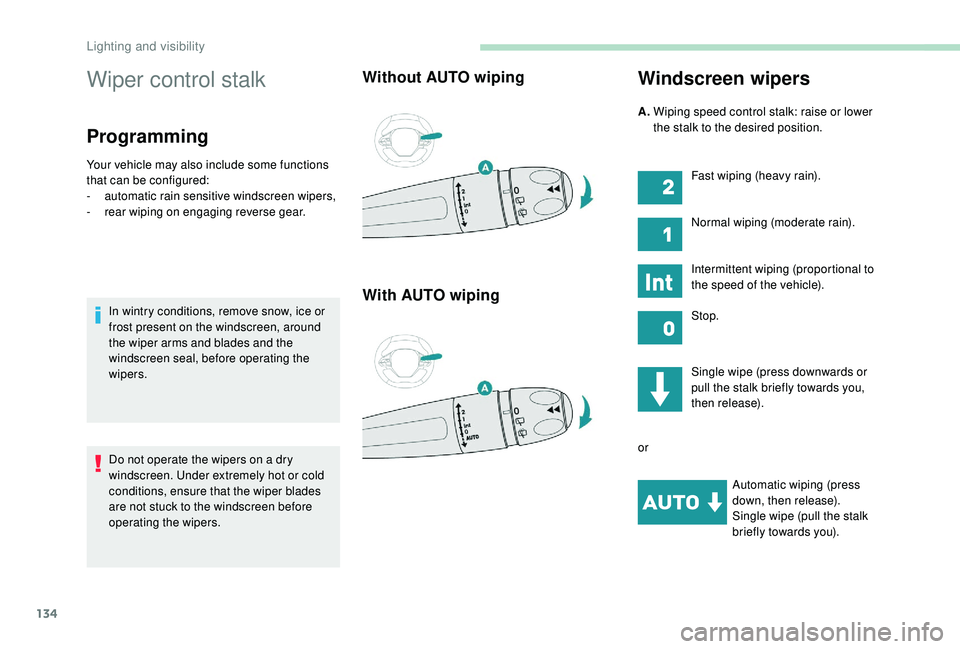
Without AUTO wiping
With AUTO wipingWindscreen wipers
Single wipe (press downwards or
pull the stalk briefly towards you,
then release).
or Automatic wiping (press
down, then release).
Single wipe (pull the stalk
briefly towards you).
A.
W
iping speed control stalk: raise or lower
the stalk to the desired position.
Fast wiping (heavy rain).
Normal wiping (moderate rain).
Intermittent wiping (proportional to
the speed of the vehicle).
Stop.
Lighting and visibility
Page 137 of 404
135
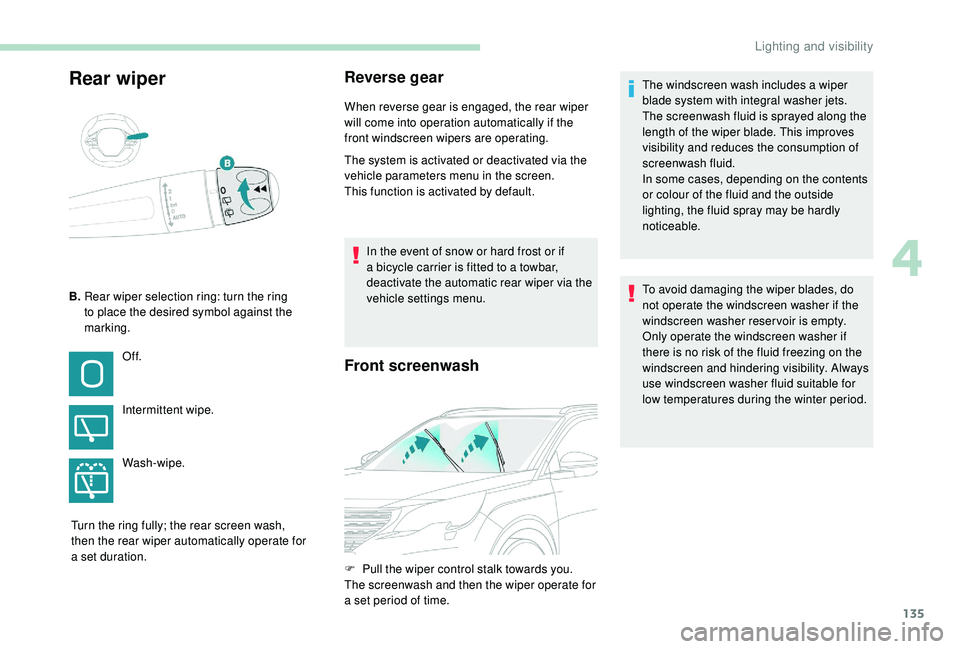
Rear wiperReverse gear
When reverse gear is engaged, the rear wiper
will come into operation automatically if the
front windscreen wipers are operating.
The system is activated or deactivated via the
vehicle parameters menu in the screen.
This function is activated by default.In the event of snow or hard frost or if
a bicycle carrier is fitted to a towbar,
deactivate the automatic rear wiper via the
vehicle settings menu.
Front screenwash
B. Rear wiper selection ring: turn the ring
to place the desired symbol against the
marking.
Of f.
Intermittent wipe.
Wash-wipe.
Turn the ring fully; the rear screen wash,
then the rear wiper automatically operate for
a set duration. To avoid damaging the wiper blades, do
not operate the windscreen washer if the
windscreen washer reservoir is empty.
Only operate the windscreen washer if
there is no risk of the fluid freezing on the
windscreen and hindering visibility. Always
use windscreen washer fluid suitable for
low temperatures during the winter period.
F
P
ull the wiper control stalk towards you.
The screenwash and then the wiper operate for
a set period of time. The windscreen wash includes a wiper
blade system with integral washer jets.
The screenwash fluid is sprayed along the
length of the wiper blade. This improves
visibility and reduces the consumption of
screenwash fluid.
In some cases, depending on the contents
or colour of the fluid and the outside
lighting, the fluid spray may be hardly
noticeable.
4
Lighting and visibility
Page 138 of 404
136
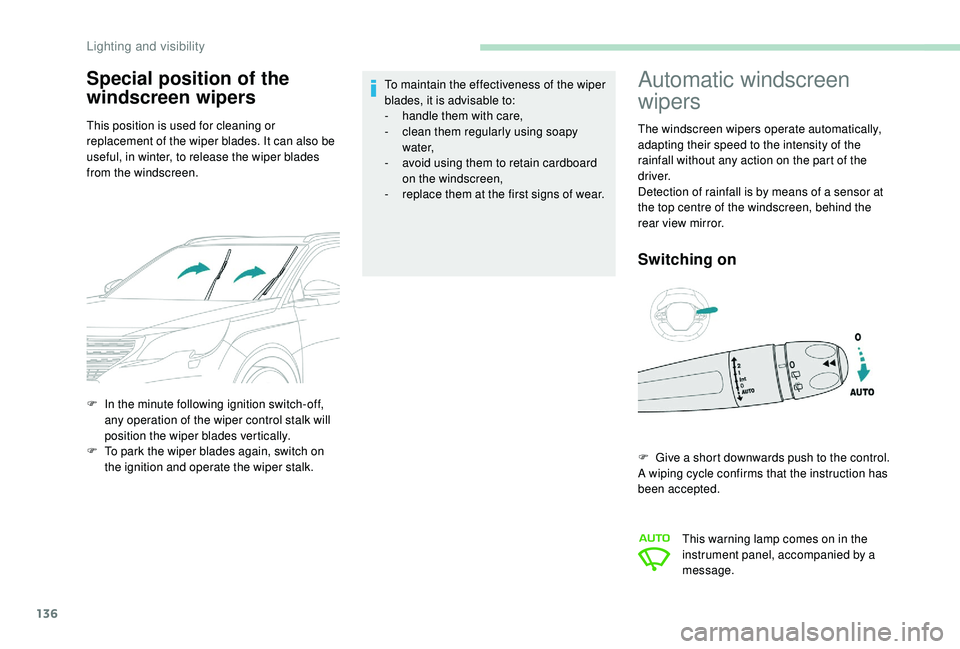
Special position of the
windscreen wipers
This position is used for cleaning or
replacement of the wiper blades. It can also be
useful, in winter, to release the wiper blades
from the windscreen.
Automatic windscreen
wipers
The windscreen wipers operate automatically,
adapting their speed to the intensity of the
rainfall without any action on the part of the
driver.
Detection of rainfall is by means of a sensor at
the top centre of the windscreen, behind the
rear view mirror.
Switching on
F In the minute following ignition switch-off, any operation of the wiper control stalk will
position the wiper blades vertically.
F
T
o park the wiper blades again, switch on
the ignition and operate the wiper stalk. To maintain the effectiveness of the wiper
blades, it is advisable to:
-
h
andle them with care,
-
c
lean them regularly using soapy
water,
-
a
void using them to retain cardboard
on the windscreen,
-
r
eplace them at the first signs of wear.
F
G
ive a short downwards push to the control.
A wiping cycle confirms that the instruction has
been accepted.
This warning lamp comes on in the
instrument panel, accompanied by a
message.
Lighting and visibility
Page 139 of 404
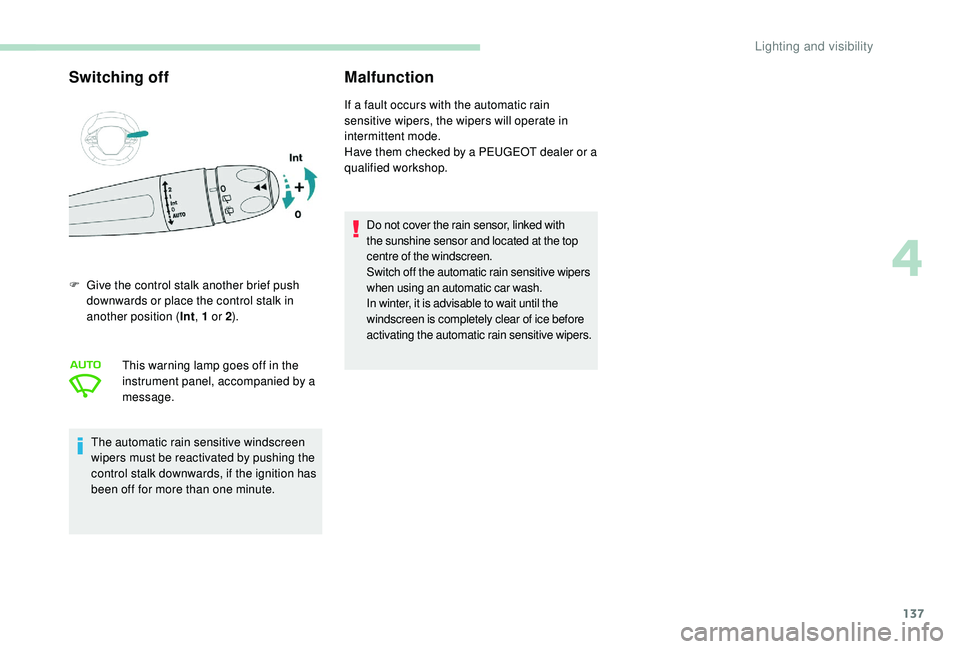
137
Switching offMalfunction
F Give the control stalk another brief push
downwards or place the control stalk in
another position ( Int, 1
or 2).
This warning lamp goes off in the
instrument panel, accompanied by a
message.
The automatic rain sensitive windscreen
wipers must be reactivated by pushing the
control stalk downwards, if the ignition has
been off for more than one minute. If a fault occurs with the automatic rain
sensitive wipers, the wipers will operate in
intermittent mode.
Have them checked by a PEUGEOT dealer or a
qualified workshop.
Do not cover the rain sensor, linked with
the sunshine sensor and located at the top
centre of the windscreen.
Switch off the automatic rain sensitive wipers
when using an automatic car wash.
In winter, it is advisable to wait until the
windscreen is completely clear of ice before
activating the automatic rain sensitive wipers.
4
Lighting and visibility