2017 Peugeot 308 engine
[x] Cancel search: enginePage 110 of 392
108
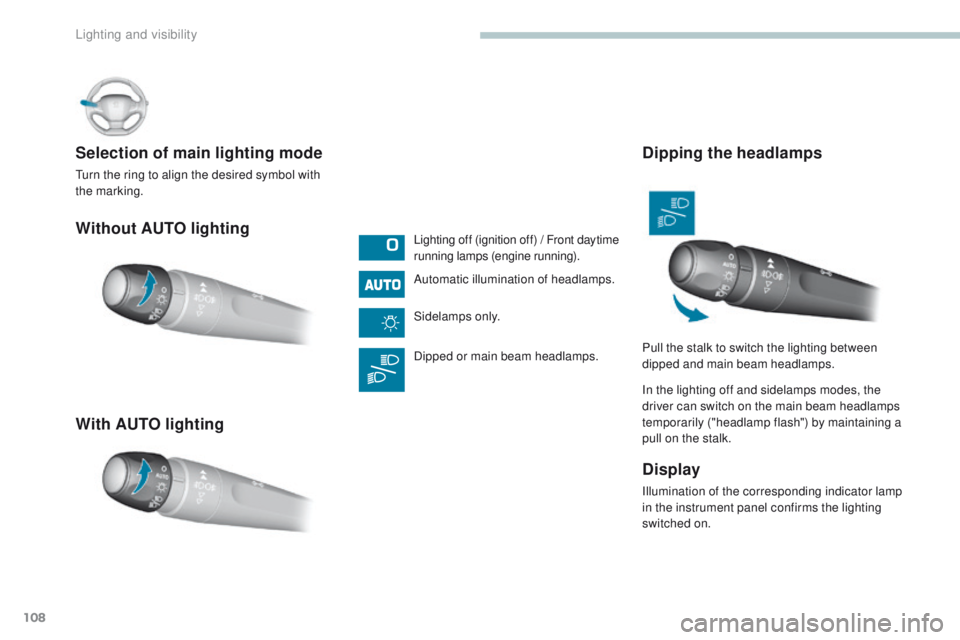
Without AUTO lighting
With AUTO lighting Selection of main lighting mode
turn the ring to align the desired symbol with
the marking.Lighting off (ignition off) / Front daytime
running lamps (engine running).
Automatic illumination of headlamps.
Sidelamps only.
Dipped or main beam headlamps.
Dipping the headlamps
In the lighting off and sidelamps modes, the
driver can switch on the main beam headlamps
temporarily ("headlamp flash") by maintaining a
pull on the stalk.
Display
Illumination of the corresponding indicator lamp
in the instrument panel confirms the lighting
switched on. Pull the stalk to switch the lighting between
dipped and main beam headlamps.
Lighting and visibility
Page 112 of 392
110
In good or rainy weather, by both day
and night, the front foglamps and the
rear foglamps are prohibited. In these
situations, the power of their beams
may dazzle other drivers. t
he
y should
only be used in fog or falling snow.
In these weather conditions, you should
switch on the foglamps and dipped
beam headlamps manually, as the
sunshine sensor may detect sufficient
light.
Do not forget to switch off the front and
rear foglamps when they are no longer
necessary.Switching off the lighting
when switching off the ignition
When the ignition is switched off, all of the
lamps switch off immediately, except for
the dipped beam headlamps if automatic
guide-me-home lighting is activated.
Switching on the lighting
when switching on the
ignition
to reactivate the lighting control stalk,
turn the ring A to position "0" - lighting
off, then to the position of your choice.
When the driver's door is opened, a
temporary audible signal warns you that
the vehicle's lighting is on.
th
ey switch off automatically after a
period which depends on the state of
charge of the battery (entry to energy
economy mode).
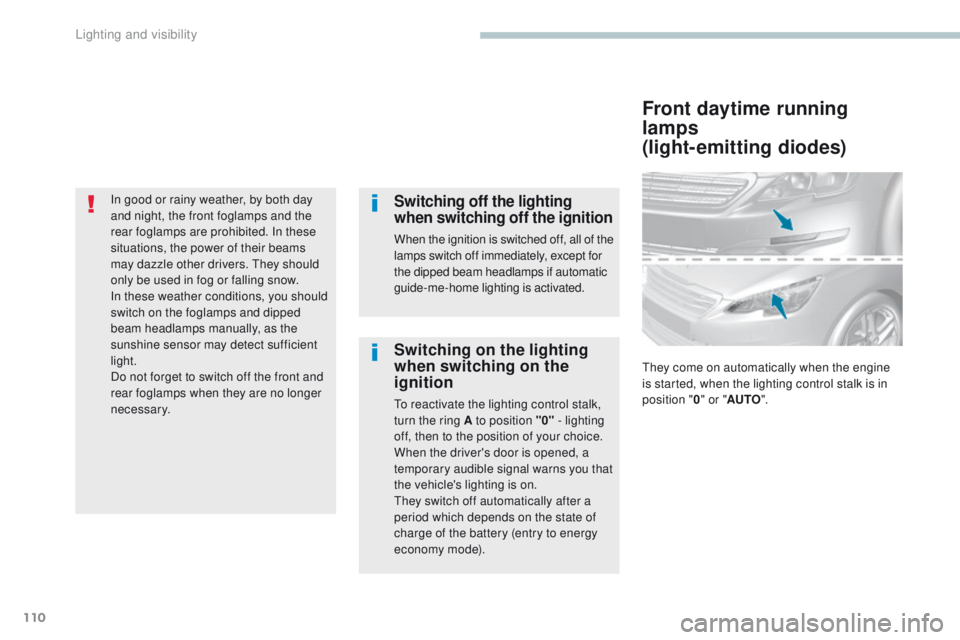
Front daytime running
lamps
(light-emitting diodes)
they come on automatically when the engine
is started, when the lighting control stalk is in
position " 0" or " AUTO ".
Lighting and visibility
Page 119 of 392
117
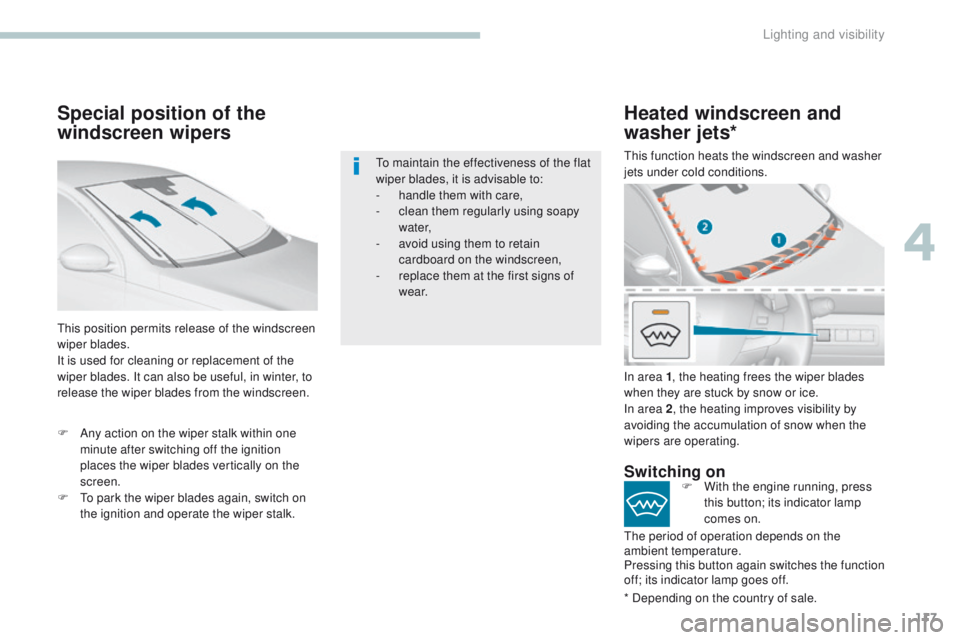
Special position of the
windscreen wipers
this position permits release of the windscreen
wiper blades.
It is used for cleaning or replacement of the
wiper blades. It can also be useful, in winter, to
release the wiper blades from the windscreen.
to m
aintain the effectiveness of the flat
wiper blades, it is advisable to:
-
h
andle them with care,
-
c
lean them regularly using soapy
water,
-
a
void using them to retain
cardboard on the windscreen,
-
r
eplace them at the first signs of
w e a r.
F
A
ny action on the wiper stalk within one
minute after switching off the ignition
places the wiper blades vertically on the
screen.
F
t
o p
ark the wiper blades again, switch on
the ignition and operate the wiper stalk.
Heated windscreen and
washer jets*
* Depending on the country of sale. In area 1 , the heating frees the wiper blades
when they are stuck by snow or ice.
In area 2 , the heating improves visibility by
avoiding the accumulation of snow when the
wipers are operating.
Switching onF With the engine running, press this button; its indicator lamp
comes on.
th
e period of operation depends on the
ambient temperature.
Pressing this button again switches the function
off; its indicator lamp goes off.
th
is function heats the windscreen and washer
jets under cold conditions.
4
Lighting and visibility
Page 123 of 392
121
electronic stability control (eSC) incorporating
the following systems:
-
a
nti-lock braking system (ABS) and
electronic brake force distribution (
eB
FD),
-
em
ergency braking assistance (
eBA
),
-
w
heel anti-slip regulation (ASR) or traction
control,
-
d
ynamic stability control (DSC).
electronic stability control (eS C)
Definitions
Anti-lock braking system (ABS)
and electronic brake force
distribution (EBFD)
this system improves the stability and
manoeuvrability of your vehicle when braking
and contributes towards improved control on
corners, in particular on poor or slippery road
surfaces.
th
e ABS prevents wheel lock in the event of
emergency braking.
th
e e
B
FD manages the braking pressure
wheel by wheel.
Emergency braking assistance
(EBA)
In an emergency, this system enables you to
reach the optimum braking pressure more
quickly and therefore reduce the stopping
distance.
It is triggered according to the speed at which
the brake pedal is pressed.
t
h
is is felt by a
reduction in the resistance of the pedal and an
increase in the effectiveness of the braking.
Anti-slip regulation (ASR)
the ASR system (also known as tr action
Control) optimises traction in order to limit
wheel slip by acting on the brakes of the driving
wheels and on the engine. It also improves
the directional stability of the vehicle on
acceleration.
Dynamic stability control (DSC)
If there is a difference between the path
followed by the vehicle and that required by
the driver, the DSC monitors each wheel and
automatically acts on the brake of one or more
wheels and on the engine to return the vehicle
to the required path, within the limits of the laws
of physics.
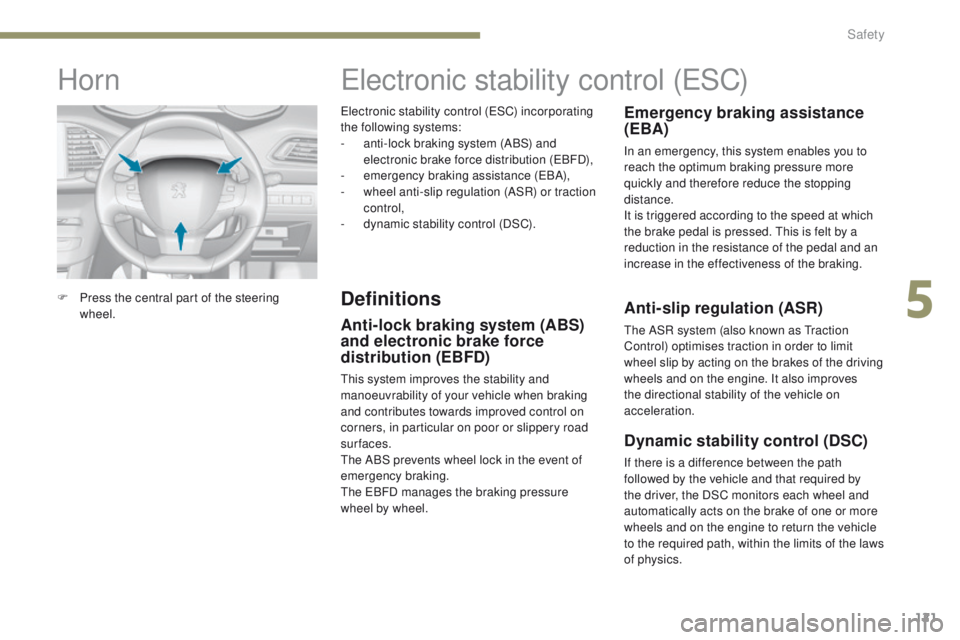
Horn
F Press the central part of the steering wheel.
5
Safety
Page 125 of 392
123
Dynamic stability control (DSC)
and anti-slip regulation (ASR)
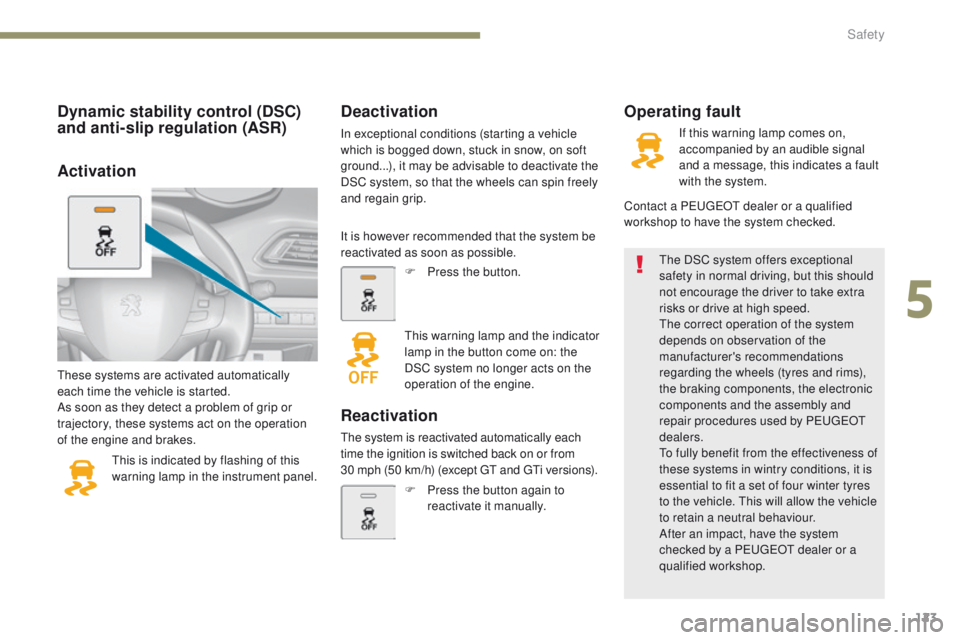
these systems are activated automatically
each time the vehicle is started.
As soon as they detect a problem of grip or
trajectory, these systems act on the operation
of the engine and brakes.
th
is is indicated by flashing of this
warning lamp in the instrument panel.
th
e DSC system offers exceptional
safety in normal driving, but this should
not encourage the driver to take extra
risks or drive at high speed.
th
e correct operation of the system
depends on observation of the
manufacturer's recommendations
regarding the wheels (tyres and rims),
the braking components, the electronic
components and the assembly and
repair procedures used by P
e
uge
Ot
dealers.
to f
ully benefit from the effectiveness of
these systems in wintry conditions, it is
essential to fit a set of four winter tyres
to the vehicle.
t
h
is will allow the vehicle
to retain a neutral behaviour.
After an impact, have the system
checked by a P
e
uge
Ot
dealer or a
qualified workshop.
Deactivation
In exceptional conditions (starting a vehicle
which is bogged down, stuck in snow, on soft
ground...), it may be advisable to deactivate the
DSC system, so that the wheels can spin freely
and regain grip.
Operating fault
It is however recommended that the system be
reactivated as soon as possible.
F
P
ress the button.
th
is warning lamp and the indicator
lamp in the button come on: the
DSC system no longer acts on the
operation of the engine.
Reactivation
the system is reactivated automatically each
time the ignition is switched back on or from
30
mph (50 km/h) (except gt and gt
i v
ersions).
F
P
ress the button again to
reactivate it manually. If this warning lamp comes on,
accompanied by an audible signal
and a message, this indicates a fault
with the system.
Contact a P
e
uge
Ot
dealer or a qualified
workshop to have the system checked.
Activation
5
Safety
Page 148 of 392
146
Driving recommendations
Observe the driving regulations and remain
vigilant whatever the traffic conditions.
Pay close attention to the traffic and keep your
hands on the wheel so that you are ready to
react at any time to any eventuality.
On a long journey, a break every two hours is
strongly recommended.
In difficult weather, drive smoothly, anticipate
the need to brake and increase the distance
from other vehicles.Never drive with the parking brake
applied - Risk of overheating and
damage to the braking system!
Risk of fire!
As the exhaust system of your vehicle
is very hot, even several minutes after
switching off the engine, do not park
or run the engine over areas where
inflammable substances and materials
are present: grass, leaves, etc.
Never leave a vehicle unsupervised
with the engine running. If you have
to leave your vehicle with the engine
running, apply the parking brake
and put the gearbox into neutral or
position
N or P, depending on the type
of gearbox.
Driving on flooded roads
We strongly advise against driving on flooded
roads, as this could cause serious damage
to the engine or gearbox, as well as to the
electrical systems of your vehicle.
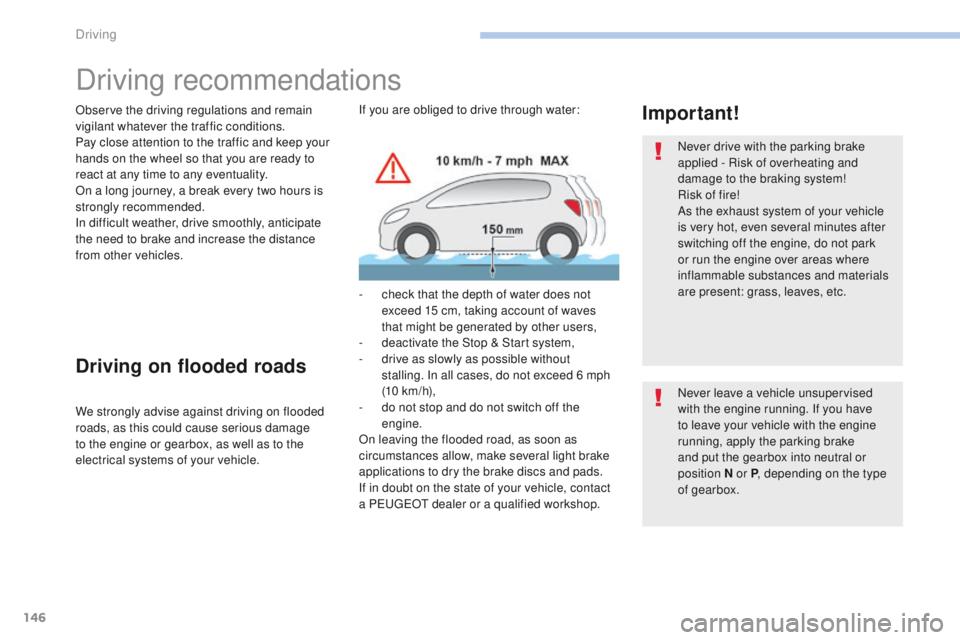
Important!If you are obliged to drive through water:
-
c
heck that the depth of water does not
exceed 15 cm, taking account of waves
that might be generated by other users,
-
d
eactivate the Stop & Start system,
-
d
rive as slowly as possible without
stalling. In all cases, do not exceed 6 mph
(10
km/h),
-
d
o not stop and do not switch off the
engine.
On leaving the flooded road, as soon as
circumstances allow, make several light brake
applications to dry the brake discs and pads.
If in doubt on the state of your vehicle, contact
a P
e
uge
Ot
dealer or a qualified workshop.
Driving
Page 149 of 392
147
When towing
Distribution of loads
F Distribute the load in the trailer so that the
heaviest items are as close as possible to
the axle and the nose weight approaches
the maximum permitted without exceeding it.
Air density decreases with altitude, thus
reducing engine performance. Above
1 000 metres, the maximum towed load must
be reduced by 10
% for every 1 000 metres of
altitude.
Side wind
F take into account the increased sensitivity to side wind.
Cooling
towing a trailer on a slope increases the
temperature of the coolant.
As the fan is electrically controlled, its cooling
capacity is not dependent on the engine speed.
F
t
o l
ower the engine speed, reduce your
speed.
th
e maximum towed load on a long incline
depends on the gradient and the ambient
temperature.
In all cases, keep a check on the coolant
temperature.
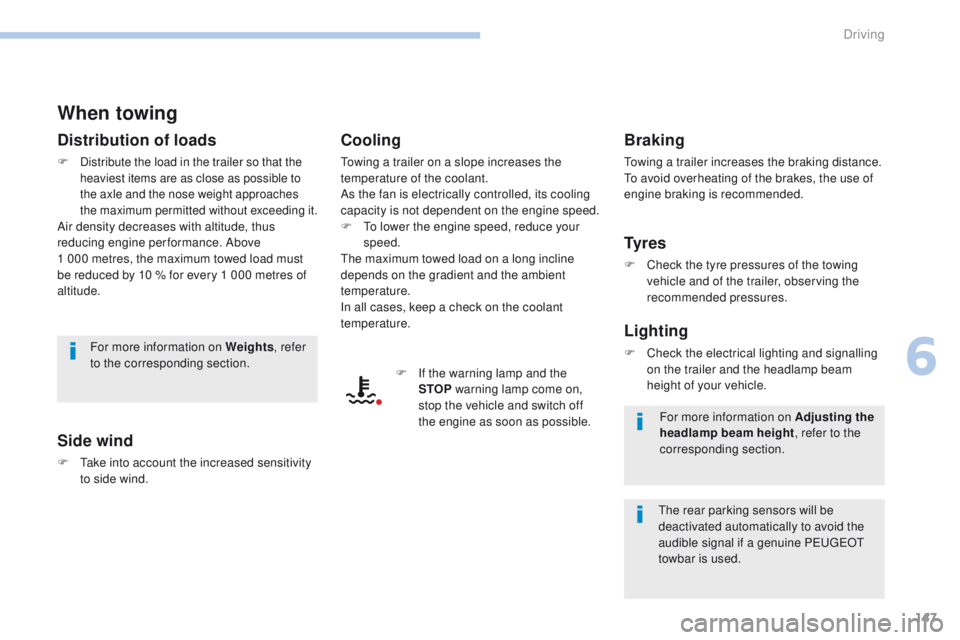
F
I
f the warning lamp and the
STOP warning lamp come on,
stop the vehicle and switch off
the engine as soon as possible.
Braking
towing a trailer increases the braking distance.to a void overheating of the brakes, the use of
engine braking is recommended.
Ty r e s
F Check the tyre pressures of the towing vehicle and of the trailer, observing the
recommended pressures.
Lighting
F Check the electrical lighting and signalling on the trailer and the headlamp beam
height of your vehicle.
For more information on Weights
, refer
to the corresponding section.
th
e rear parking sensors will be
deactivated automatically to avoid the
audible signal if a genuine P
e
uge
Ot
towbar is used. For more information on Adjusting the
headlamp beam height
, refer to the
corresponding section.
6
Driving
Page 150 of 392
148
Starting-switching off the engine, remote control
Put the gear lever into neutral.
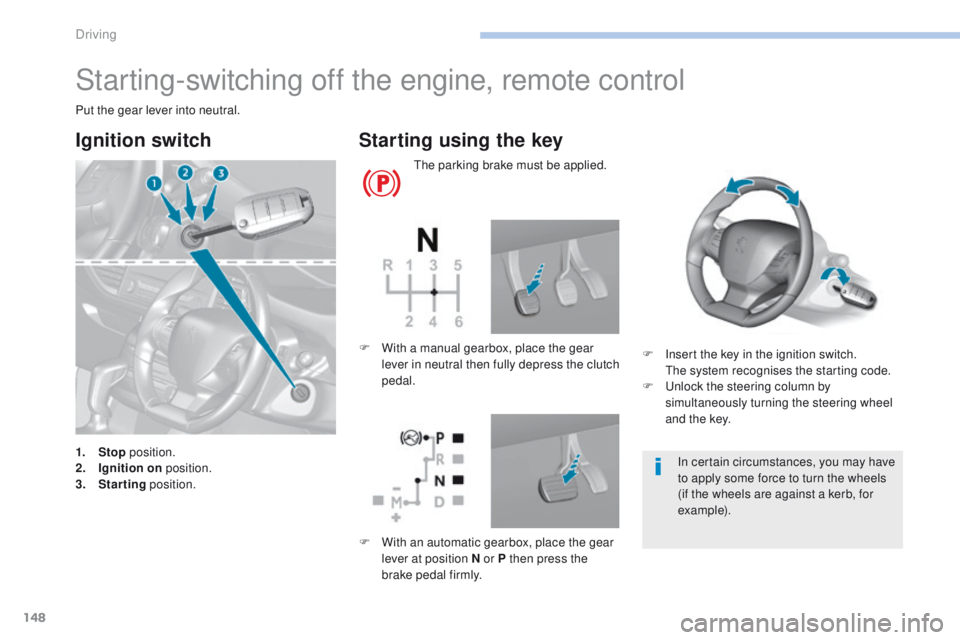
Ignition switch
1. Stop position.
2. I gnition on position.
3.
S
tarting position.
Starting using the key
the parking brake must be applied.
F
I
nsert the key in the ignition switch.
t
h
e system recognises the starting code.
F
u
n
lock the steering column by
simultaneously turning the steering wheel
and the key.
F
W
ith a manual gearbox, place the gear
lever in neutral then fully depress the clutch
pedal.
In certain circumstances, you may have
to apply some force to turn the wheels
(if the wheels are against a kerb, for
example).
F
W
ith an automatic gearbox, place the gear
lever at position N or P then press the
brake pedal firmly.
Driving