2017 Peugeot 3008 Hybrid 4 steering wheel
[x] Cancel search: steering wheelPage 216 of 566
214
3008-2_en_Chap06_conduite_ed01-2016
The vehicle must be stationary to switch off the
ignition.
To put the vehicle into free-wheel with the
engine off:
F
v
ehicle stationary, engine running,
select
N,
F
s
witch off the engine,
F
s
witch the ignition on within five seconds,
F
w
ith your foot on the brake pedal, push the
selector for ward or rear ward and release to
confirm N and release the electric parking
brake manually,
F
s
witch off the ignition.
If you exceed the period of five seconds, the
gearbox goes into P mode; you must then start
the procedure again from the beginning.
Special aspects of automatic
mode
The gearbox selects the gear that offers
optimum per formance, taking account of the
ambient temperature, the profile of the road,
the load on the vehicle and the style of driving.
For maximum acceleration without touching
the selector, press the accelerator fully down
(kick-down). The gearbox changes down
automatically or holds the gear selected until
the maximum engine speed is reached.
When braking, the gearbox changes down
automatically to provide effective engine
braking.
The steering mounted controls allow the driver
to temporarily select a gear, if the road and
engine speed permit.
Special aspects of manual mode
The change from one gear to another takes
place only if the if the road speed and engine
speed permit.
If the engine speed is too high or too low, the
gear selected flashes for a few seconds, then
the gear actually engaged is displayed.
With N engaged, opening the driver's
door results in an audible signal.
Closing the driver's door stops the
signal.
Moving off
From P mode:
F
P ress the brake pedal firmly.
F
S
tart the engine.
F
M
aintaining pressure on the brake pedal,
press the Unlock button.
F
P
ush twice rear ward going beyond
the point of resistance to select the
automatic
D mode, or for ward to engage
reverse R .
From neutral N :
F
P
ress the brake pedal firmly.
F
S
tart the engine.
F
M
aintaining pressure on the brake
pedal, push rear ward to select the
automatic
D mode, or for ward, while
pressing the Unlock
button to engage
reverse R .
Then, from P or N :
F
R
elease the brake pedal.
F
A
ccelerate progressively to automatically
release the electric parking brake.
F
W
ith the parking brake released, the
vehicle then moves off.
Driving
Page 217 of 566

215
3008-2_en_Chap06_conduite_ed01-2016
In severe wintry conditions (temperature
below -23°C), it is recommended that
the engine be allowed to run for a few
minutes before moving off, to ensure
the correct operation and durability of
the engine and gearbox.
Stopping the vehicle
Whatever the state of the gearbox when the
ignition is switched off, P mode is engaged
automatically, with the exception of N, in which
case P
mode will be engaged after a delay of
5 seconds (allowing the change to free-wheel).
Check that P mode has been engaged and
that the electric parking brake was applied
automatically; if not, apply it manually.
Operating faults
Malfunction of the gearbox Malfunction of the selector
In the event of a minor fault
In the event of a serious fault
Stop as soon as it is safe to do so, away
from the traffic, and call a PEUGEOT
dealer or a qualified workshop.
When the ignition is switched off,
the gearbox goes into P mode
automatically.You are alerted by the illumination of
this warning lamp.
The corresponding indicator lamps
for the selector panel and the electric
parking brake control lever must
be on, as well as the ones in the
instrument panel.
This is signalled by the illumination of
this warning lamp, accompanied by the
display of a message and an audible
signal, when the ignition is switched on.
The gearbox goes into back-up mode: D mode
stays in third gear, the steering mounted control
paddles are inoperative, M mode is no longer
available. You may feel a pronounced jolt when
engaging reverse. This does not present any
risk for the gearbox.
Do not drive faster than 62 mph (100 km/h),
keeping to the speed limit.
Go to a PEUGEOT dealer or a qualified
workshop.
You are alerted by the illumination of this
warning lamp, accompanied by the display
of a message and an audible signal.
In certain cases, the selector lamps may not
come on, but the state of the gearbox is still
displayed in the instrument panel.
Drive cautiously and go to a PEUGEOT or a
qualified workshop.
6
Driving
Page 226 of 566
224
3008-2_en_Chap06_conduite_ed01-2016
It is necessary to reinitialise the system every
time one or more tyre pressures are adjusted,
and after changing one or more wheels.
Reinitialisation
This is given by fixed illumination of
this warning lamp, accompanied by
an audible signal and, depending on
equipment, the display of a message.
Under-inflation alert
F Reduce speed immediately, avoid excessive steering movements and sudden
braking.
F
S
top the vehicle as soon as it is safe
to
do so. F
I
f you have a compressor, such as the one
in the temporary puncture repair kit, check
the pressures of the four tyres when cold.
F
I
f it is not possible to make this check
immediately, drive carefully at reduced
speed.
or
F
I
n the event of a puncture, use the
temporary puncture repair kit or the spare
wheel (depending on equipment).
The loss of pressure detected does not
always cause visible bulging of the tyre.
Do not satisfy yourself with just a visual
check. The alert is maintained until the system
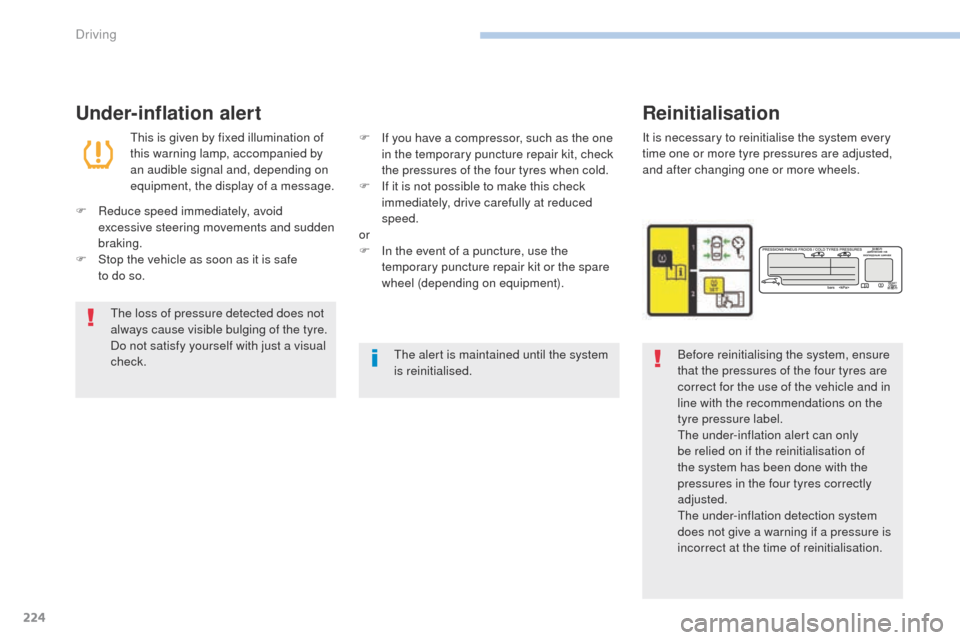
is reinitialised.Before reinitialising the system, ensure
that the pressures of the four tyres are
correct for the use of the vehicle and in
line with the recommendations on the
tyre pressure label.
The under-inflation alert can only
be relied on if the reinitialisation of
the system has been done with the
pressures in the four tyres correctly
adjusted.
The under-inflation detection system
does not give a warning if a pressure is
incorrect at the time of reinitialisation.
Driving
Page 231 of 566
229
3008-2_en_Chap06_conduite_ed01-2016
Memorising the speed
setting
This memorisation is in addition to the display
of Speed limit recognition.
The driver can choose to adapt the speed
setting to the speed limit suggested, by
pressing the memorisation button for the speed
limiter, the standard cruise control and the
dynamic cruise control with Stop function.
This speed setting then replaces the previous
speed setting for the speed limiter and/or cruise
control. For more information on the Speed
limiter, Cruise control , or Dynamic
cruise control with Stop function ,
refer to the corresponding sections.
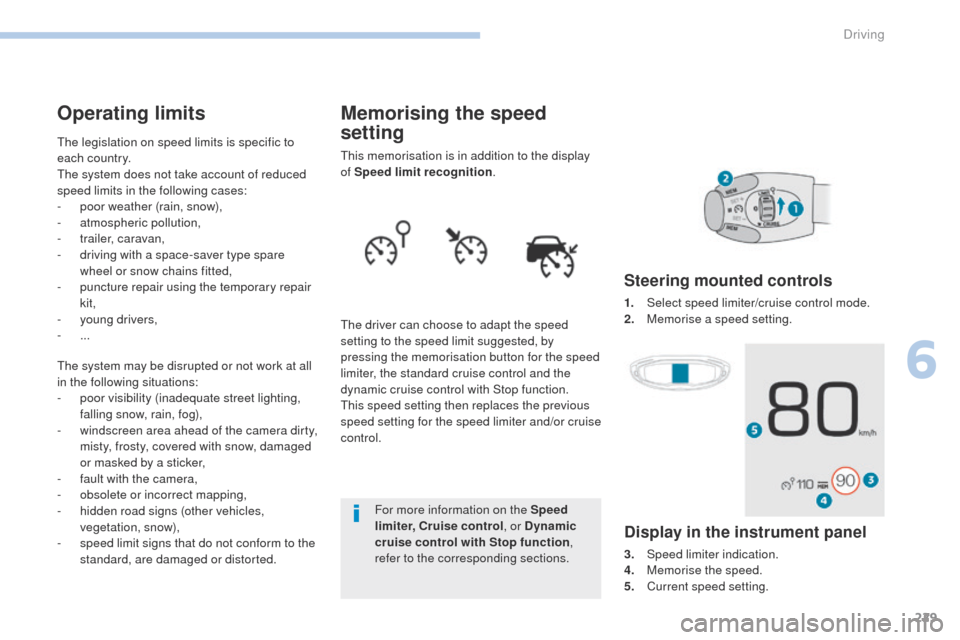
Steering mounted controls
1. Select speed limiter/cruise control mode.
2. M emorise a speed setting.
Operating limits
The legislation on speed limits is specific to
each country.
The system does not take account of reduced
speed limits in the following cases:
-
p
oor weather (rain, snow),
-
a
tmospheric pollution,
-
t
railer, caravan,
-
d
riving with a space-saver type spare
wheel or snow chains fitted,
-
p
uncture repair using the temporary repair
kit,
-
y
oung drivers,
-
...
The system may be disrupted or not work at all
in the following situations:
-
p
oor visibility (inadequate street lighting,
falling snow, rain, fog),
-
w
indscreen area ahead of the camera dirty,
misty, frosty, covered with snow, damaged
or masked by a sticker,
-
f
ault with the camera,
-
o
bsolete or incorrect mapping,
-
h
idden road signs (other vehicles,
vegetation, snow),
-
s
peed limit signs that do not conform to the
standard, are damaged or distorted.
Display in the instrument panel
3. Speed limiter indication.
4. M emorise the speed.
5.
C
urrent speed setting.
6
Driving
Page 252 of 566
250
3008-2_en_Chap06_conduite_ed01-2016
Active Safety Brake
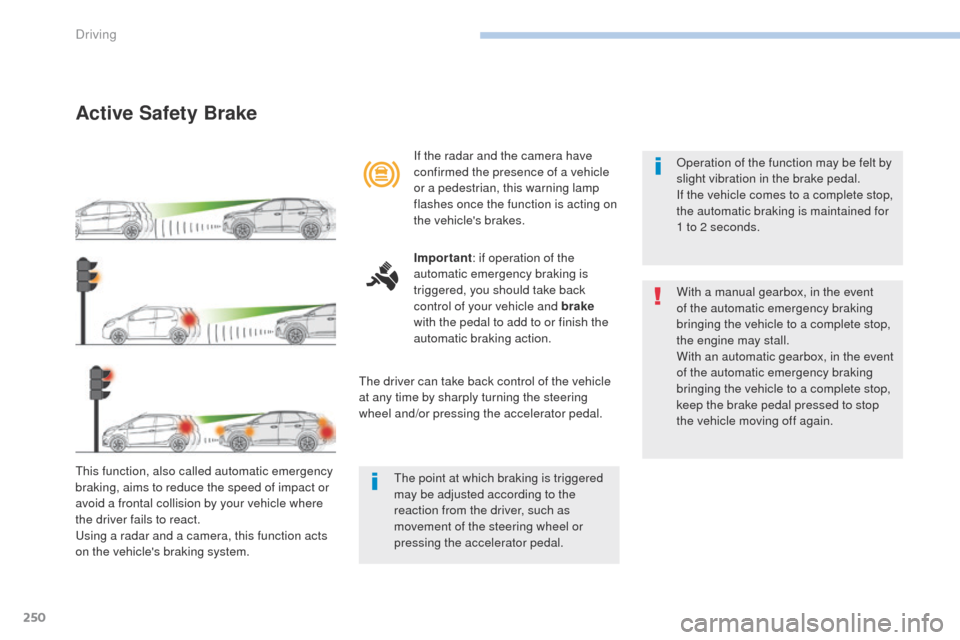
This function, also called automatic emergency
braking, aims to reduce the speed of impact or
avoid a frontal collision by your vehicle where
the driver fails to react.
Using a radar and a camera, this function acts
on the vehicle's braking system.If the radar and the camera have
confirmed the presence of a vehicle
or a pedestrian, this warning lamp
flashes once the function is acting on
the vehicle's brakes.
Important
: if operation of the
automatic emergency braking is
triggered, you should take back
control of your vehicle and brake
with the pedal to add to or finish the
automatic braking action.
The driver can take back control of the vehicle
at any time by sharply turning the steering
wheel and/or pressing the accelerator pedal. Operation of the function may be felt by
slight vibration in the brake pedal.
If the vehicle comes to a complete stop,
the automatic braking is maintained for
1 to 2 seconds.
With a manual gearbox, in the event
of the automatic emergency braking
bringing the vehicle to a complete stop,
the engine may stall.
With an automatic gearbox, in the event
of the automatic emergency braking
bringing the vehicle to a complete stop,
keep the brake pedal pressed to stop
the vehicle moving off again.
The point at which braking is triggered
may be adjusted according to the
reaction from the driver, such as
movement of the steering wheel or
pressing the accelerator pedal.
Driving
Page 257 of 566
255
3008-2_en_Chap06_conduite_ed01-2016
Assisted Lane Departure Warning System
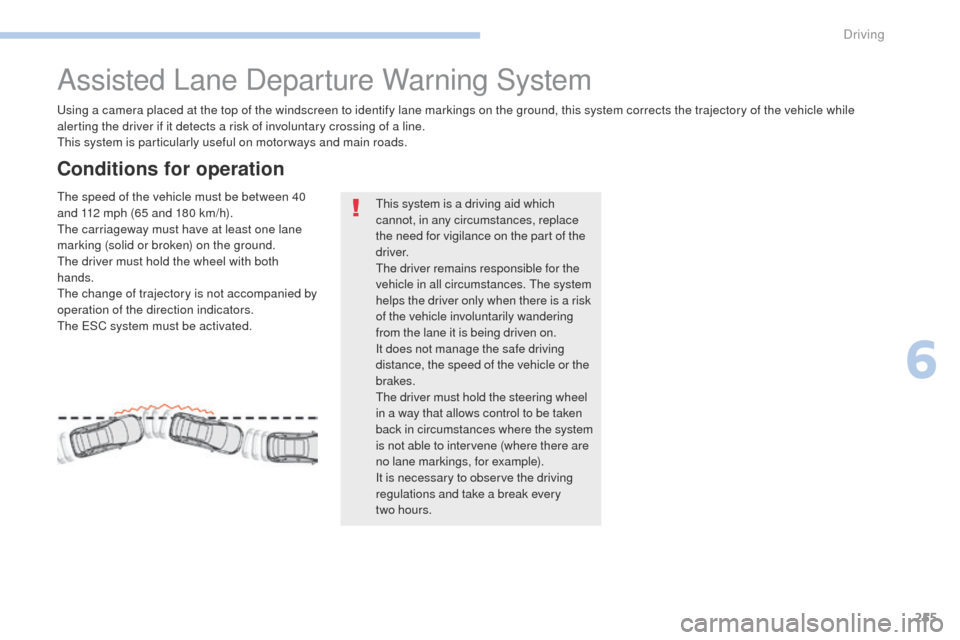
Using a camera placed at the top of the windscreen to identify lane markings on the ground, this system corrects the trajectory of the vehicle while
alerting the driver if it detects a risk of involuntary crossing of a line.
This system is particularly useful on motor ways and main roads.
Conditions for operation
The speed of the vehicle must be between 40
and 112 mph (65 and 180 km/h).
The carriageway must have at least one lane
marking (solid or broken) on the ground.
The driver must hold the wheel with both
hands.
The change of trajectory is not accompanied by
operation of the direction indicators.
The ESC system must be activated.This system is a driving aid which
cannot, in any circumstances, replace
the need for vigilance on the part of the
driver.
The driver remains responsible for the
vehicle in all circumstances. The system
helps the driver only when there is a risk
of the vehicle involuntarily wandering
from the lane it is being driven on.
It does not manage the safe driving
distance, the speed of the vehicle or the
brakes.
The driver must hold the steering wheel
in a way that allows control to be taken
back in circumstances where the system
is not able to intervene (where there are
no lane markings, for example).
It is necessary to observe the driving
regulations and take a break every
two
hours.
6
Driving
Page 258 of 566
256
3008-2_en_Chap06_conduite_ed01-2016
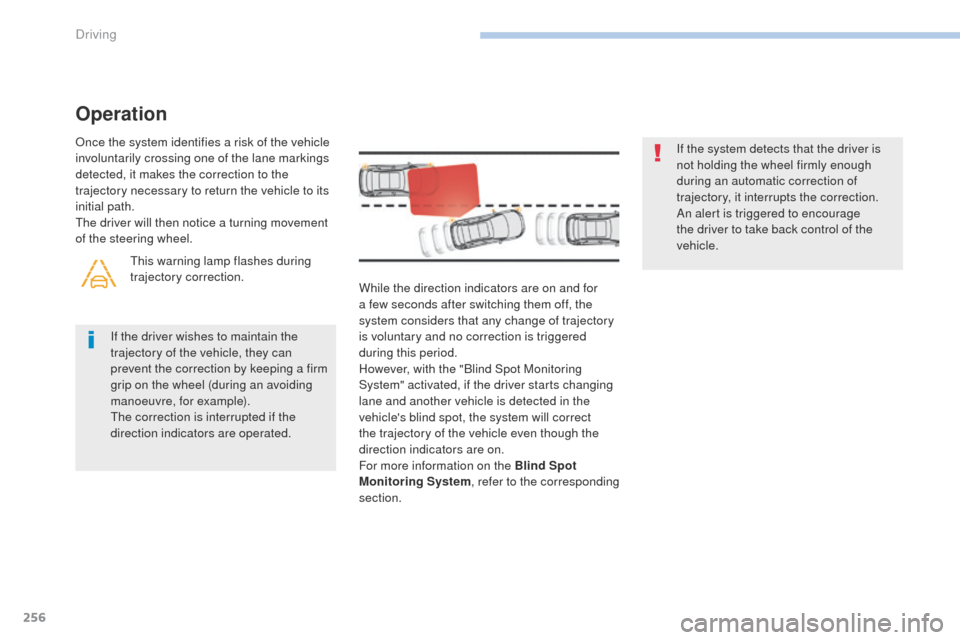
While the direction indicators are on and for
a few seconds after switching them off, the
system considers that any change of trajectory
is voluntary and no correction is triggered
during this period.
However, with the "Blind Spot Monitoring
System" activated, if the driver starts changing
lane and another vehicle is detected in the
vehicle's blind spot, the system will correct
the trajectory of the vehicle even though the
direction indicators are on.
For more information on the Blind Spot
Monitoring System, refer to the corresponding
section. If the system detects that the driver is
not holding the wheel firmly enough
during an automatic correction of
trajectory, it interrupts the correction.
An alert is triggered to encourage
the driver to take back control of the
vehicle.
If the driver wishes to maintain the
trajectory of the vehicle, they can
prevent the correction by keeping a firm
grip on the wheel (during an avoiding
manoeuvre, for example).
The correction is interrupted if the
direction indicators are operated.
Operation
Once the system identifies a risk of the vehicle
involuntarily crossing one of the lane markings
detected, it makes the correction to the
trajectory necessary to return the vehicle to its
initial path.
The driver will then notice a turning movement
of the steering wheel. This warning lamp flashes during
trajectory correction.
Driving
Page 269 of 566

267
3008-2_en_Chap06_conduite_ed01-2016
Visiopark 1
Rear vision
To activate the camera, located in the tailgate,
engage reverse and keep the speed of the
vehicle below 6 mph (10 km/h).
The system is deactivated:
-
a
utomatically above about 6 mph
(10 km/h),
-
a
utomatically on opening the tailgate,
-
w
hen coming out of reverse (the image
remains displayed for 7 seconds),
-
b
y pressing the red cross in the top left-
hand corner of the touch screen.
AUTO mode
This mode is activated by default.
Using sensors in the rear bumper, the
automatic view changes from a rear view to a
view from above, as an obstacle is approached
during a manoeuvre.
Standard view
The area behind the vehicle is displayed in the
screen.
The blue lines represent the width of your
vehicle, with the mirrors unfolded; their
direction changes with the position of the
steering wheel.
The red line represents a distance of 30 cm
from the rear bumper, and the two blue lines,
1 m and 2 m respectively.
This view is available with AUTO mode or in the
view selection menu.
6
Driving