2017 Peugeot 3008 Hybrid 4 sunroof
[x] Cancel search: sunroofPage 87 of 578
85
3008-2_en_Chap02_ouvertures_ed01-2016
If the sunroof is wet, following a shower
or washing the vehicle, wait until it is
completely dry before opening.
Do not operate the sunroof if it is
covered by snow or ice - Risk of
damage!
Use only plastic scrapers to remove
snow or ice.
Do not extend your head or arms
through the open sunroof when driving -
Risk of serious injury!
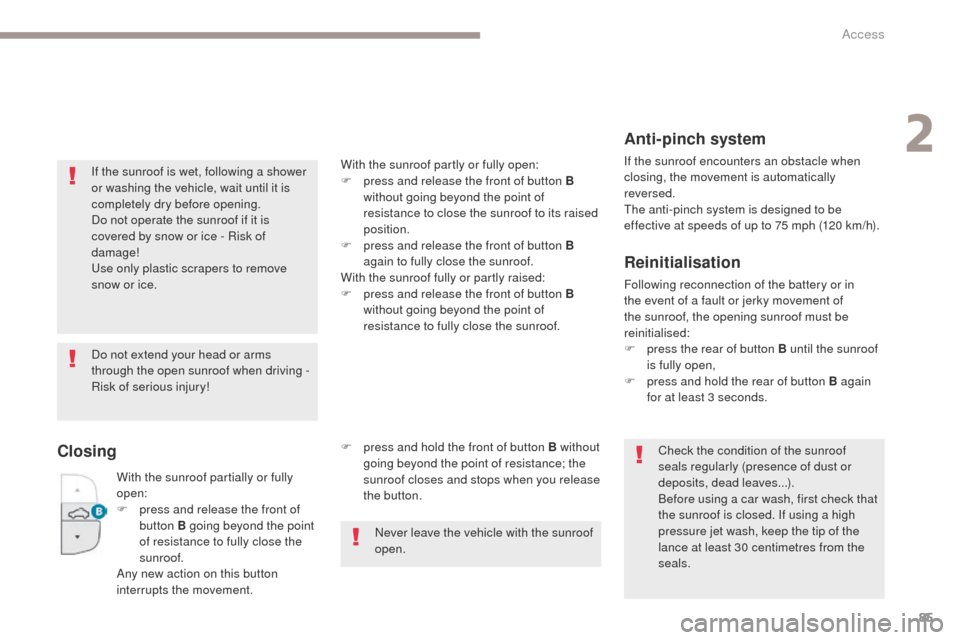
ClosingF press and hold the front of button B without going beyond the point of resistance; the
sunroof closes and stops when you release
the button.
Never leave the vehicle with the sunroof
open.
Anti-pinch system
If the sunroof encounters an obstacle when
closing, the movement is automatically
reversed.
The anti-pinch system is designed to be
effective at speeds of up to 75 mph (120 km/h).
Reinitialisation
Following reconnection of the battery or in
the event of a fault or jerky movement of
the sunroof, the opening sunroof must be
reinitialised:
F
p
ress the rear of button B until the sunroof
is fully open,
F
p
ress and hold the rear of button B again
for at least 3 seconds.
Check the condition of the sunroof
seals regularly (presence of dust or
deposits, dead leaves...).
Before using a car wash, first check that
the sunroof is closed. If using a high
pressure jet wash, keep the tip of the
lance at least 30 centimetres from the
seals.
With the sunroof partially or fully
open:
F
p
ress and release the front of
button B going beyond the point
of resistance to fully close the
sunroof.
Any new action on this button
interrupts the movement. With the sunroof partly or fully open:
F
p
ress and release the front of button
B
without going beyond the point of
resistance to close the sunroof to its raised
position.
F
p
ress and release the front of button B
again to fully close the sunroof.
With the sunroof fully or partly raised:
F
p
ress and release the front of button
B
without going beyond the point of
resistance to fully close the sunroof.
2
Access
Page 88 of 578
86
3008-2_en_Chap02_ouvertures_ed01-2016
Operating the sunroof blind
Opening
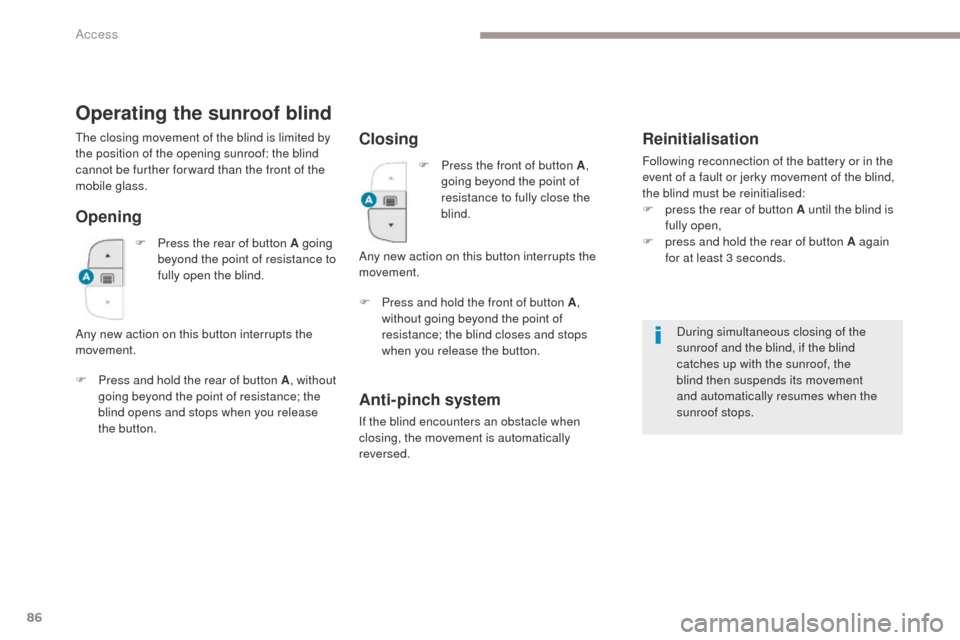
F Press and hold the rear of button A, without
going beyond the point of resistance; the
blind opens and stops when you release
the button. During simultaneous closing of the
sunroof and the blind, if the blind
catches up with the sunroof, the
blind then suspends its movement
and automatically resumes when the
sunroof stops.
The closing movement of the blind is limited by
the position of the opening sunroof: the blind
cannot be further for ward than the front of the
mobile glass.
Closing
Any new action on this button interrupts the
movement.
Anti-pinch system
If the blind encounters an obstacle when
closing, the movement is automatically
reversed.
Reinitialisation
Following reconnection of the battery or in the
event of a fault or jerky movement of the blind,
the blind must be reinitialised:
F
p
ress the rear of button A until the blind is
fully open,
F
p
ress and hold the rear of button A again
for at least 3 seconds.
F
P
ress the rear of button A going
beyond the point of resistance to
fully open the blind.
Any new action on this button interrupts the
movement. F
P
ress the front of button A ,
going beyond the point of
resistance to fully close the
blind.
F
P
ress and hold the front of button
A ,
without going beyond the point of
resistance; the blind closes and stops
when you release the button.
Access
Page 89 of 578
87
3008-2_en_Chap02_ouvertures_ed01-2016
When locking the vehicle, pressing
and holding the locking button also
closes the windows and the sunroof
and then the blind. The movements
are interrupted when you release the
locking button.
Never leave the electronic key inside
the vehicle if you get out of the vehicle,
even for a short time.
If something is trapped when closing
the sunroof or blind, you should reverse
the movement of the sunroof or blind.
To do this, press the control button in
question.
The driver must ensure that passengers
use the sunroof and blind correctly.
Be particularly aware of children when
operating the sunroof or blind.
2
Access
Page 131 of 578
129
3008-2_en_Chap03_ergonomie-et-confort_ed01-2016
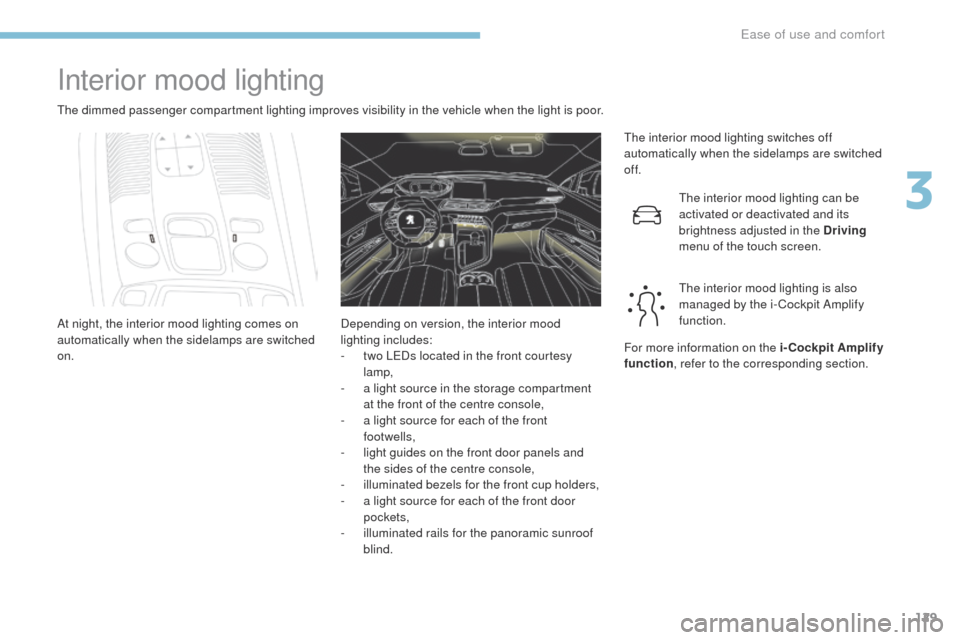
Interior mood lighting
The dimmed passenger compartment lighting improves visibility in the vehicle when the light is poor.The interior mood lighting switches off
automatically when the sidelamps are switched
of f.
At night, the interior mood lighting comes on
automatically when the sidelamps are switched
on. The interior mood lighting can be
activated or deactivated and its
brightness adjusted in the Driving
menu of the touch screen.
The interior mood lighting is also
managed by the i- Cockpit Amplify
function.
Depending on version, the interior mood
lighting includes:
-
t
wo LEDs located in the front courtesy
lamp,
-
a l
ight source in the storage compartment
at the front of the centre console,
-
a l
ight source for each of the front
footwells,
-
l
ight guides on the front door panels and
the sides of the centre console,
-
i
lluminated bezels for the front cup holders,
-
a l
ight source for each of the front door
pockets,
-
i
lluminated rails for the panoramic sunroof
blind. For more information on the i-Cockpit Amplify
function
, refer to the corresponding section.
3
Ease of use and comfort
Page 337 of 578
335
3008-2_en_Chap08_en cas-de-panne_ed01-2016
Disconnecting the battery
The Stop & Start system may not be
operational during the trip following the
first engine start.
In this case, the system will only be
available again after a continuous
period of immobilisation of the vehicle,
a period which depends on the ambient
temperature and the state of charge of
the battery (up to about 8 hours).
In order to maintain an adequate state of charge
for starting the engine, it is recommended that
the battery be disconnected if the vehicle is
taken out of service for a long period.
Before disconnecting the battery:
F
c
lose all openings (doors, tailgate, windows,
sunroof),
F
s
witch off all electrical consumers (audio
system, wipers, lighting, ...),
F
s
witch off the ignition and wait for
four
minutes.
At the battery, it is only necessary to disconnect
the (+) terminal.
Following reconnection of the
battery
After reconnecting the battery, switch on the
ignition and wait 1 minute before starting to
allow initialisation of the electronic systems.
However, if minor problems persist following
this operation, contact a PEUGEOT dealer or a
qualified workshop.
Referring to the corresponding section, you
must yourself initialise or reset certain systems,
such as:
-
t
he remote control or electronic key
(depending on version),
-
t
he sunroof and its electric blind,
-
t
he electric windows,
-
t
he date and time,
-
t
he radio preset stations.
Quick-release terminal clamp
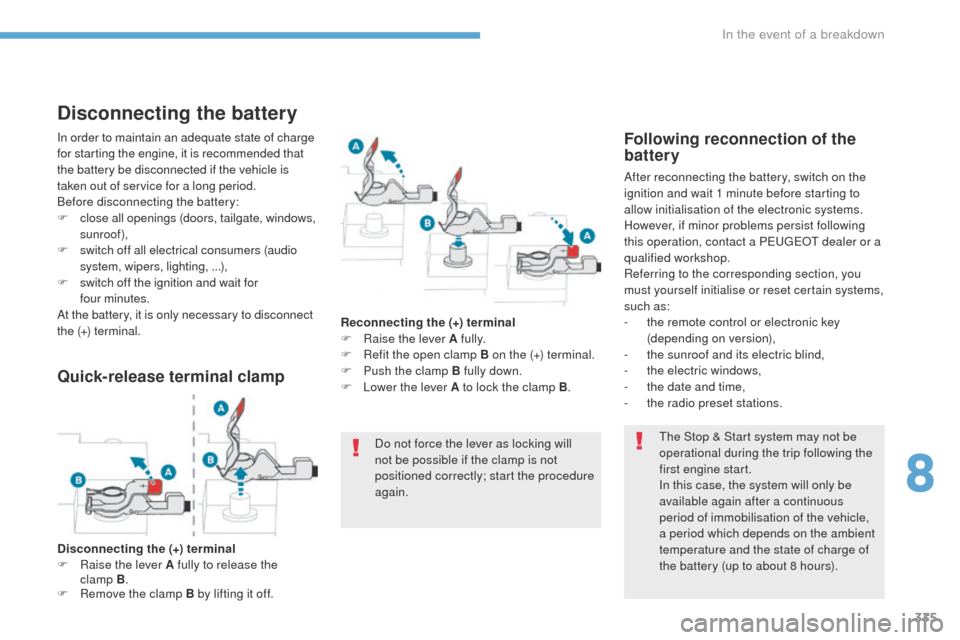
Disconnecting the (+) terminal
F Ra ise the lever A fully to release the
clamp
B.
F
R
emove the clamp B by lifting it off. Reconnecting the (+) terminal
F
Ra
ise the lever A fully.
F
R
efit the open clamp B on the (+) terminal.
F
P
ush the clamp B fully down.
F
L
ower the lever A to lock the clamp B
.
Do not force the lever as locking will
not be possible if the clamp is not
positioned correctly; start the procedure
again.
8
In the event of a breakdown
Page 352 of 578
350
3008-2_en_Chap11_index-alpha_ed01-2016
Range, AdBlue .................................... 30, 37 , 38
Rear screen, demisting .................................118
Recharging the battery
................................. 33
4
Reduction of electrical load
..........................290
Regeneration of the particle filter
.......................................... 301
Reinitialisation of the under-inflation detection system
.................................224 , 225
Reinitialising the remote control
........................................................... 67
R
eminder, key in ignition ...............................19 9
Remote control
........................ 5
4-56, 60, 62, 63
Removing a wheel
........................................ 319
Removing the mat
......................................... 127
Replacing bulbs
........................... 323, 328 , 330
Replacing fuses
..............................
..............331
Replacing the air filter
...................................301
Replacing the oil filter
................................... 3
01
Replacing the passenger compartment filter
...................................... 301
Reservoir, screenwash
................................. 29
9
Resetting the service indicator
.......................35
Resetting the trip recorder
..............................41
Reset trip
......................................................... 43
R
ev counter
..................................................... 12
Reversing lamps
........................................... 328
Roof bars
....................................................... 2
93
Running out of fuel (Diesel)
..........................3
08 Table of weights
....................................339,
342
Table position
..................................................92
Tables of engines
.................................338, 340
Tailgate
................
............................................75
Ta n k , f u e l
...............................................281, 282
Technical data
...............................338-340, 342
Telephone
.....................................................12 2
Temperature, coolant
......................................32
Third brake lamp
...........................................330
Three flashes (direction indicators)
...................................14 4
T
Starting using another
battery ................................................ 2
02, 333
Stay, bonnet
.................................................. 294
Steering wheel, adjustment
.................................................... 99
S
topping the vehicle
.....................197, 200 , 2 11
Stop & Start
........................ 18, 21 , 44 , 105 , 11 6,
219 , 281 , 294 , 301, 335
Storage
.......................... 11 9, 120 , 124, 13 4 , 13 5
Storage box
................................................... 13
9
Storage compartments
................................. 11
9
Storage wells
........................................ 13 5, 13 9
Storing driving positions
.................................96
Stowing rings
................................................ 13 5
Sunroof, panoramic
........................................ 84
Sun visor
....................................................... 120
Switching off the engine
............................... 19
7
Synchronising the remote control
........................................................... 67
S
aturation of the particle
filter (Diesel)
............................................... 301
Scented air freshener
........................... 12
5 , 126
Screen, monochrome
..................................... 45
Screens, very cold conditions
.................................................. 291
Screenwash, front
......................................... 153
Screenwash, rear
.......................................... 153
SCR (Selective Catalytic Reduction)
............................................ 31,
303
SCR system
............................................ 31, 303
Seat belts
....................................... 1
6 8 -171 , 183
Seat belts, rear
...................................... 169, 170
Seats, electric
................................................. 96
Seats, front
...............................
................. 90, 96
Seats, heated
.................................................. 97
Seats, rear
..................................................... 13 0
Selector, gear
................................................ 2 11
Serial number, vehicle
.................................. 3
45
Service indicator
....................................... 33, 40
Servicing
...............................
.................... 10, 33
Settings, equipment
........................... 45, 48 , 50
Sidelamps
.................... 143, 14 4 , 323 , 324, 328
Side repeater
..............................
.................. 327
Ski flap
..............................
............................ 13 4
Snow chains
......................................... 2
23 , 292
Snow screen
................................................. 291
Socket, 12V
................................................... 314
Socket, 12 V accessory
........ 12
0 , 13 3 , 13 6 , 314
Socket, 230 V
...............................
................. 13 3
Speakers
....................................................... 12 2
Speed limiter
................................ 226, 229 , 231
Speed limit recognition
................................. 227
Speedometer
.................................................. 12
Spotlamps, side
.................................... 148, 327
Stability control (ESC)................... 160, 163 , 16 4
Starting the vehicle
....................... 197, 200 , 2 11
R
Safety, children ..................... 17 3, 17 7 , 178 , 182 ,
18 4 , 18 6 -188 , 19 0
S
Alphabetical index
Page 542 of 578
2
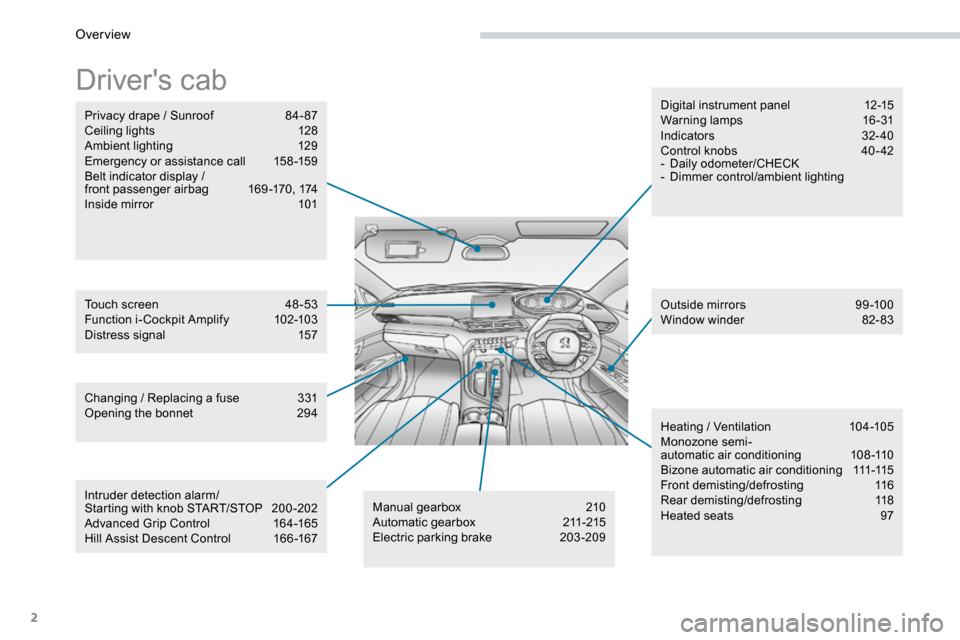
Driver's cab
Digital instrument panel 12-15
Warning lamps 16-31
Indicators 32- 40
Control knobs 40 - 42
- Daily odometer/CHECK
- Dimmer control/ambient lighting
Outside mirrors 99-100
Window winder 82-83
Changing / Replacing a fuse 331
Opening the bonnet 294
Privacy drape / Sunroof
84- 87
Ceiling lights 128
Ambient lighting 129
Emergency or assistance call 158-159
Belt indicator display /
front passenger airbag 169 -170, 174
Inside mirror 101
Manual gearbox 210
Automatic gearbox 211-215
Electric parking brake 203-209
Touch screen
48 -53
Function i- Cockpit Amplify 102-103
Distress signal 157
Heating / Ventilation 104-105
Monozone semi-
automatic air conditioning 108 -110
Bizone automatic air conditioning 111-115
Front demisting/defrosting 116
Rear demisting/defrosting 118
Heated seats 97
Intruder detection alarm/
Starting with knob START/STOP
200 -202
Advanced Grip Control 164-165
Hill Assist Descent Control 166 -167
Over view
Page 569 of 578
29
Disconnecting the battery
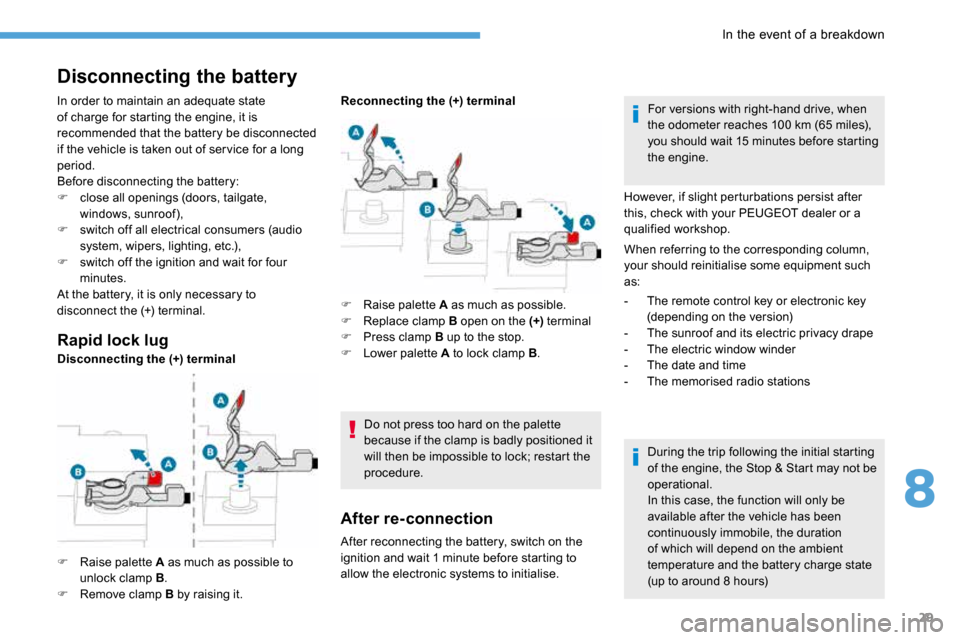
Rapid lock lug
F Raise palette A as much as possible to
unlock clamp B .
F Remove clamp B by raising it. F
Raise palette A as much as possible.
F Replace clamp B open on the (+) terminal
F Press clamp B up to the stop.
F Lower palette A to lock clamp B .
Do not press too hard on the palette
because if the clamp is badly positioned it
will then be impossible to lock; restart the
procedure.
After re-connection
During the trip following the initial starting
of the engine, the Stop & Start may not be
operational.
In this case, the function will only be
available after the vehicle has been
continuously immobile, the duration
of which will depend on the ambient
temperature and the battery charge state
(up to around 8 hours)
After reconnecting the battery, switch on the
ignition and wait 1 minute before starting to
allow the electronic systems to initialise. For versions with right-hand drive, when
the odometer reaches 100 km (65 miles),
you should wait 15 minutes before starting
the engine.
However, if slight perturbations persist after
this, check with your PEUGEOT dealer or a
qualified workshop.
When referring to the corresponding column,
your should reinitialise some equipment such
as:
- The remote control key or electronic key
(depending on the version)
- The sunroof and its electric privacy drape
- The electric window winder
- The date and time
- The memorised radio stations
Disconnecting the (+) terminal Reconnecting the (+) terminal
In order to maintain an adequate state
of charge for starting the engine, it is
recommended that the battery be disconnected
if the vehicle is taken out of ser vice for a long
period.
Before disconnecting the battery:
F close all openings (doors, tailgate,
windows, sunroof),
F switch off all electrical consumers (audio
system, wipers, lighting, etc.),
F switch off the ignition and wait for four
minutes.
At the battery, it is only necessary to
disconnect the (+) terminal.
8
In the event of a breakdown