Page 9 of 88
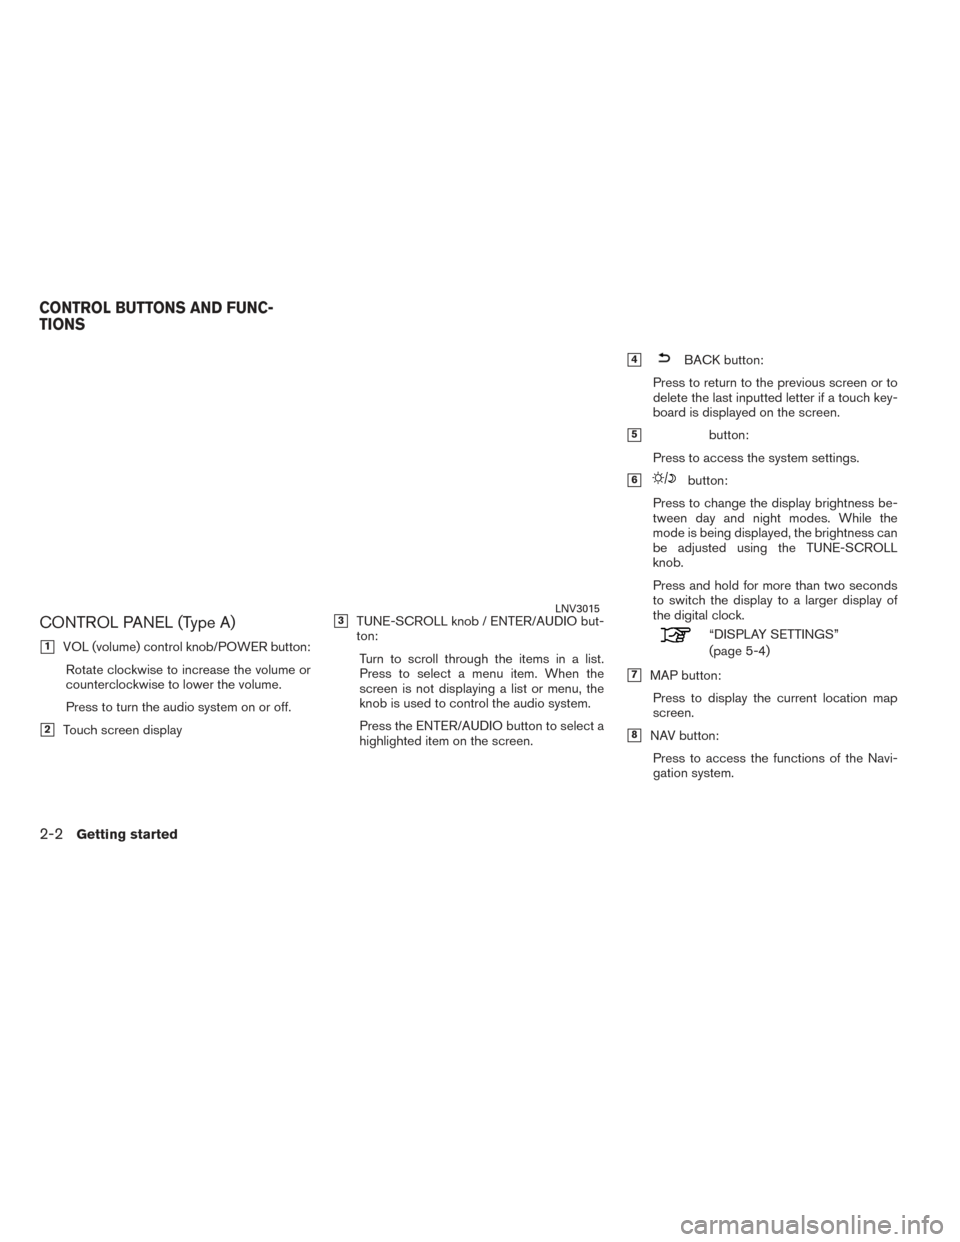
CONTROL PANEL (Type A)
�1VOL (volume) control knob/POWER button:Rotate clockwise to increase the volume or
counterclockwise to lower the volume.
Press to turn the audio system on or off.
�2Touch screen display
�3TUNE-SCROLL knob / ENTER/AUDIO but-
ton:
Turn to scroll through the items in a list.
Press to select a menu item. When the
screen is not displaying a list or menu, the
knob is used to control the audio system.
Press the ENTER/AUDIO button to select a
highlighted item on the screen.
�4BACK button:
Press to return to the previous screen or to
delete the last inputted letter if a touch key-
board is displayed on the screen.
�5button:
Press to access the system settings.
�6button:
Press to change the display brightness be-
tween day and night modes. While the
mode is being displayed, the brightness can
be adjusted using the TUNE-SCROLL
knob.
Press and hold for more than two seconds
to switch the display to a larger display of
the digital clock.
“DISPLAY SETTINGS”
(page 5-4)
�7MAP button: Press to display the current location map
screen.
�8NAV button:Press to access the functions of the Navi-
gation system.
LNV3015
CONTROL BUTTONS AND FUNC-
TIONS
2-2Getting started
Page 10 of 88
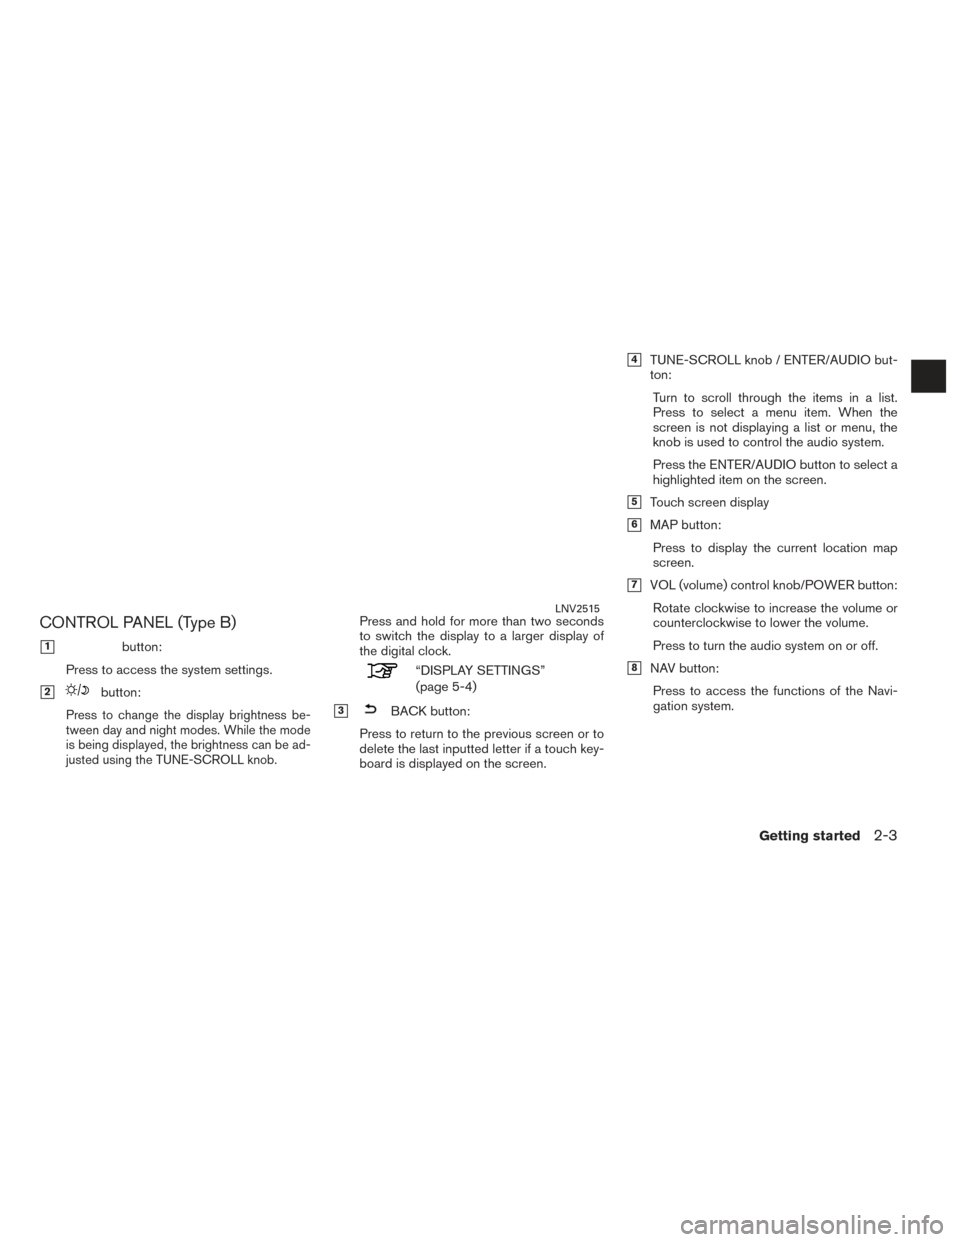
CONTROL PANEL (Type B)
�1button:
Press to access the system settings.
�2button:
Press to change the display brightness be-
tween day and night modes. While the mode
is being displayed, the brightness can be ad-
justed using the TUNE-SCROLL knob.
Press and hold for more than two seconds
to switch the display to a larger display of
the digital clock.
“DISPLAY SETTINGS”
(page 5-4)
�3BACK button:
Press to return to the previous screen or to
delete the last inputted letter if a touch key-
board is displayed on the screen.
�4TUNE-SCROLL knob / ENTER/AUDIO but-
ton:
Turn to scroll through the items in a list.
Press to select a menu item. When the
screen is not displaying a list or menu, the
knob is used to control the audio system.
Press the ENTER/AUDIO button to select a
highlighted item on the screen.
�5Touch screen display
�6MAP button:Press to display the current location map
screen.
�7VOL (volume) control knob/POWER button:Rotate clockwise to increase the volume or
counterclockwise to lower the volume.
Press to turn the audio system on or off.
�8NAV button:Press to access the functions of the Navi-
gation system.
LNV2515
Getting started2-3
Page 11 of 88
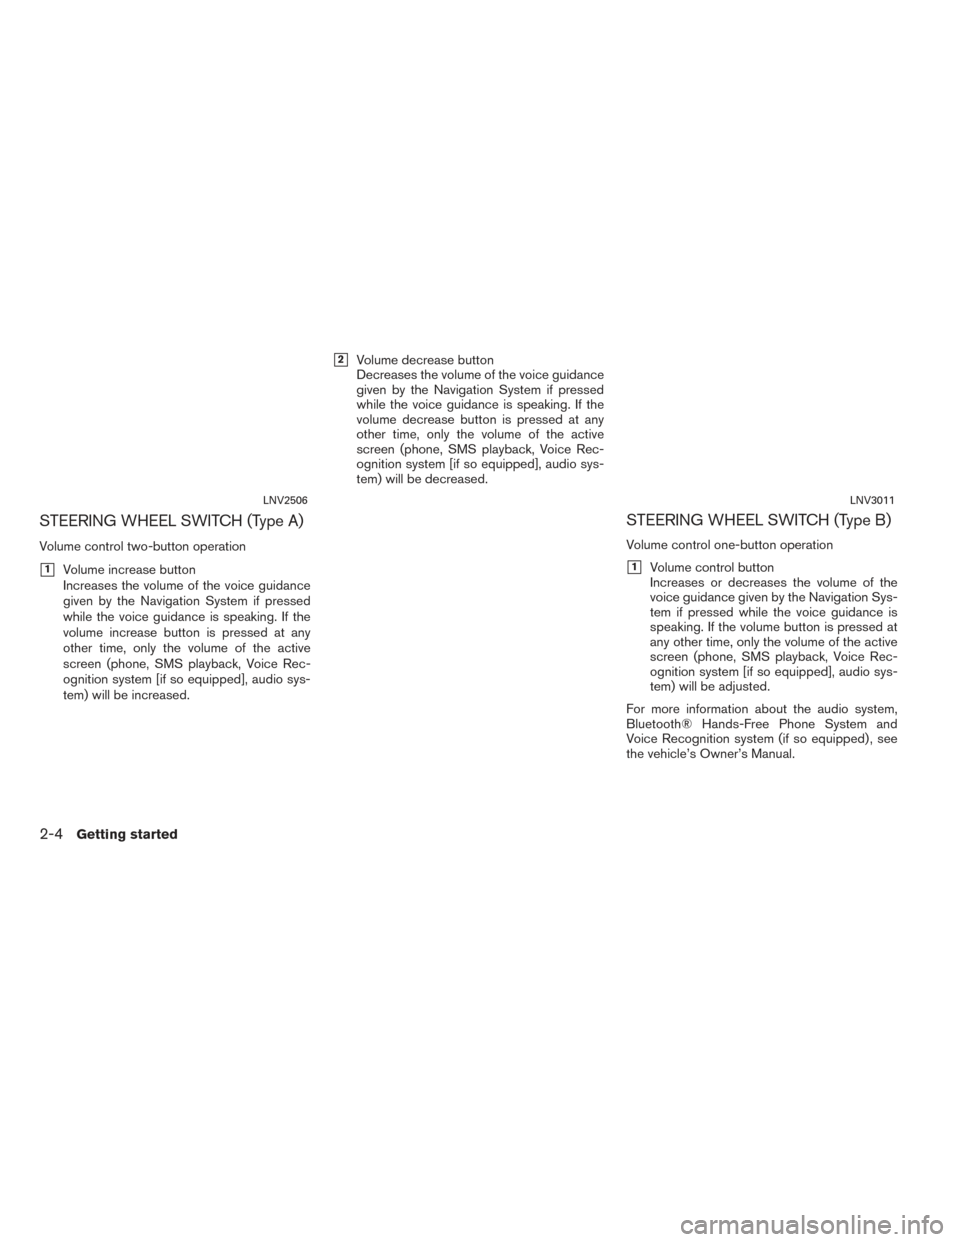
STEERING WHEEL SWITCH (Type A)
Volume control two-button operation
�1Volume increase button
Increases the volume of the voice guidance
given by the Navigation System if pressed
while the voice guidance is speaking. If the
volume increase button is pressed at any
other time, only the volume of the active
screen (phone, SMS playback, Voice Rec-
ognition system [if so equipped], audio sys-
tem) will be increased.
�2Volume decrease button
Decreases the volume of the voice guidance
given by the Navigation System if pressed
while the voice guidance is speaking. If the
volume decrease button is pressed at any
other time, only the volume of the active
screen (phone, SMS playback, Voice Rec-
ognition system [if so equipped], audio sys-
tem) will be decreased.
STEERING WHEEL SWITCH (Type B)
Volume control one-button operation
�1Volume control button
Increases or decreases the volume of the
voice guidance given by the Navigation Sys-
tem if pressed while the voice guidance is
speaking. If the volume button is pressed at
any other time, only the volume of the active
screen (phone, SMS playback, Voice Rec-
ognition system [if so equipped], audio sys-
tem) will be adjusted.
For more information about the audio system,
Bluetooth® Hands-Free Phone System and
Voice Recognition system (if so equipped) , see
the vehicle’s Owner’s Manual.
LNV2506LNV3011
2-4Getting started
Page 12 of 88
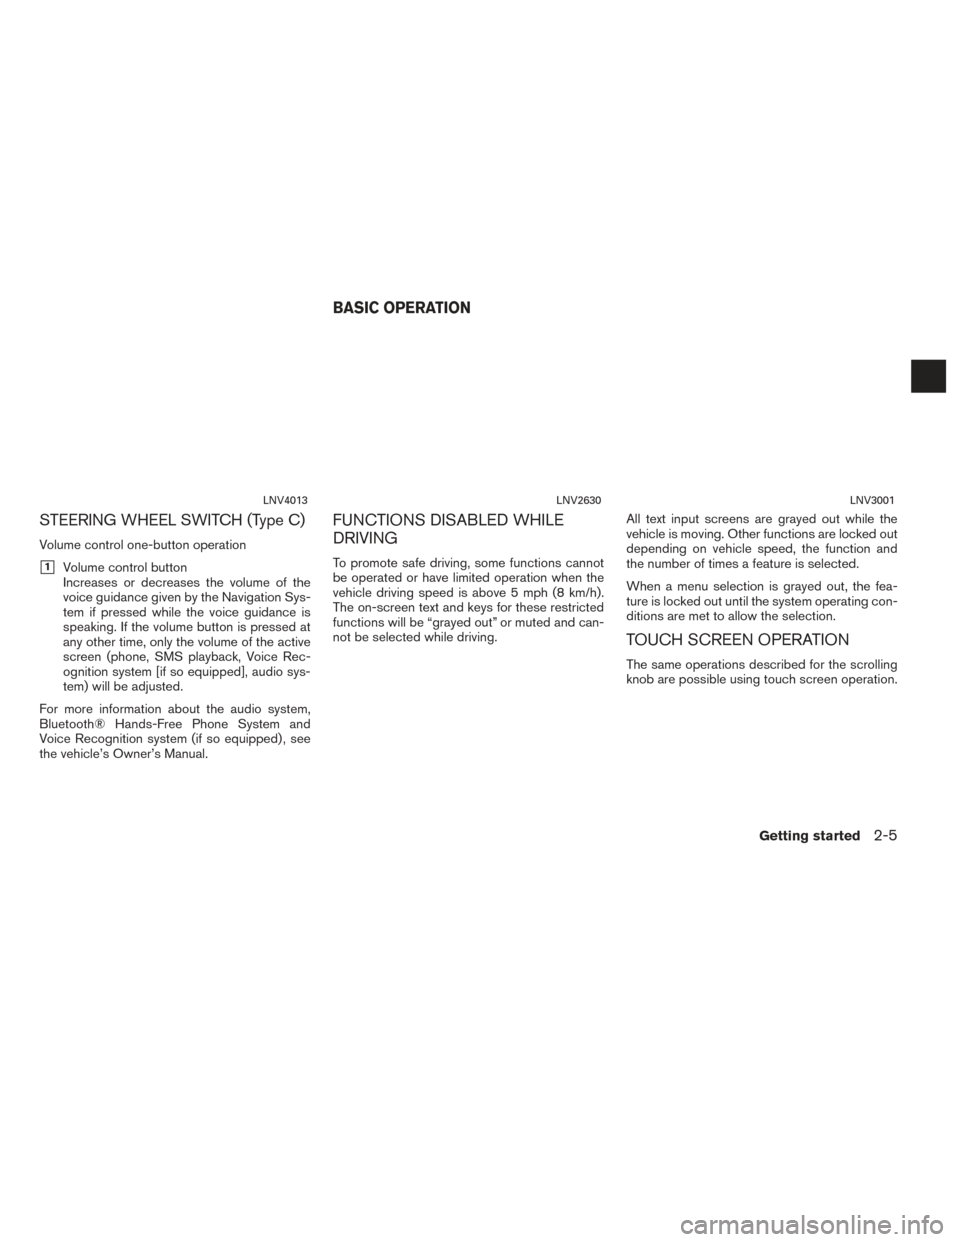
STEERING WHEEL SWITCH (Type C)
Volume control one-button operation
�1Volume control button
Increases or decreases the volume of the
voice guidance given by the Navigation Sys-
tem if pressed while the voice guidance is
speaking. If the volume button is pressed at
any other time, only the volume of the active
screen (phone, SMS playback, Voice Rec-
ognition system [if so equipped], audio sys-
tem) will be adjusted.
For more information about the audio system,
Bluetooth® Hands-Free Phone System and
Voice Recognition system (if so equipped) , see
the vehicle’s Owner’s Manual.
FUNCTIONS DISABLED WHILE
DRIVING
To promote safe driving, some functions cannot
be operated or have limited operation when the
vehicle driving speed is above 5 mph (8 km/h).
The on-screen text and keys for these restricted
functions will be “grayed out” or muted and can-
not be selected while driving. All text input screens are grayed out while the
vehicle is moving. Other functions are locked out
depending on vehicle speed, the function and
the number of times a feature is selected.
When a menu selection is grayed out, the fea-
ture is locked out until the system operating con-
ditions are met to allow the selection.
TOUCH SCREEN OPERATION
The same operations described for the scrolling
knob are possible using touch screen operation.
LNV4013LNV2630LNV3001
BASIC OPERATION
Getting started2-5
Page 13 of 88
Examples of touch screen operation
Selecting an item:
When any item is touched, the next screen is
displayed.Adjusting:
Touch the “+”, “-”, “>” or “<” key to adjust a
setting.
Scrolling through a message or list:
Turn the TUNE-SCROLL knob to scroll through
a message or a list. When scrolling a lengthy list,
you can also touch the screen and slide your fin-
ger along the scroll bar where shown to scroll
more quickly. Touching the up or down arrow will
move between pages of the list.
LNV3008LNV2440LNV3014
2-6Getting started
Page 14 of 88
MENU SCREEN OPERATION Menu screens and their purpose
Press one of the application buttons to activate
the corresponding menu screen:
●NAV (Navigation)
●
How to select a menu item
1. As an alternative to using the touch screen, turn the TUNE-SCROLL knob clockwise or
counter-clockwise to scroll through the
menu items until the preferred item is
highlighted.
2. To select the preferred item, press the TUNE-SCROLL knob.
3. Press the BACK or
BACK button.
The previous screen will be displayed and
the changes will be saved.(Type A)LNV2448(Type B)LNV2509
Getting started2-7
Page 15 of 88
HOW TO INPUT CHARACTERS
Alphanumeric characters are used when setting
a destination, searching for an address, editing
stored locations, etc.
Character (letter and number) input
screen
1. Touch characters on the touch keyboardand they will appear in the field at the top of
the screen. When the entry is complete,
touch the “OK” key.
Alternatively, use the scrolling knob to high-
light a character and press the knob to se-
lect that character.
NOTE:
● Press the
BACK button to delete the
last inputted character or to return to the pre-
vious screen if no characters have been
inputted.
● On every character entry screen, the touch
keyboard will display only the letters that are
possible to enter after the current letter.
● Symbol and number keys are available when
the “123/ABC” key is touched.
● Touch the “123/ABC” key to toggle the dis-
play between the touch keyboard for letters
and the touch keyboard for numbers and
symbols.
2. To delete the last entry, touch the “Delete” key or hold it to delete all entries at once.
3. After finalizing the entries, touch the “OK” key or touch the “List” key for the completed
list screen.
NOTE:
● If a phrase is being entered that has been pre-
viously entered into the system, the matched
text may appear in light gray. Touch “OK” to
search for the matched text. Touch “List” to
search for both the matched text and entered
text.
LNV2415
2-8Getting started
Page 16 of 88
3 Map settings
Screen information................................3-2 ..........3-2
Map types ........................................3-3
2-Dimensional (2D) view . .......................3-3
2-Dimensional North Up (2DN) view ..............3-4
3-Dimensional (3D) view . .......................3-4
Moving a map .....................................3-4
Returning to the current vehicle location ...........3-5
Map options menu screen ..........................3-5
Changing the map scale............................3-6 Map scale .....................................3-6 Looking at information on the map
...................3-7
Map symbols. . .................................3-7
Map settings for the map screen ....................3-9
Lane information .................................. 3-11
Map SD-card . ................................... 3-11
How to handle the SD-card .....................3-12
SD-card replacement .......................... 3-12
How to order map data updates .................3-12
About the map data ............................ 3-12
End-user terms ................................ 3-14