2017 NISSAN ROGUE ECO mode
[x] Cancel search: ECO modePage 486 of 547
WARNING
●Although you can continue driving with
a punctured run-flat tire, remember that
vehicle handling stability is reduced,
which could lead to an accident and
personal injury. Also, driving a long dis-
tance at high speeds may damage the
tire.
● Do not drive at speeds above 50 mph
(80 km/h) and do not drive more than
approximately 93 miles (150 km) with a
punctured run-flat tire. The actual dis-
tance the vehicle can be driven on a flat
tire depends on outside temperature,
vehicle load, read conditions and other
factors.
● Drive safely at reduced speeds. Avoid
hard cornering or braking, which may
cause you to lose control of the vehicle.
● If you detect any unusual sounds or
vibrations while driving with a punc-
tured run-flat tire, pull off the road to a
safe location and stop the vehicle as
soon as possible. The tire may be seri-
ously damaged and need to be
replaced.
CAUTION
● Never install tire chains on a punctured
run-flat tire, as this could damage your
vehicle.
● Avoid driving over any projection or pot-
hole, as the clearance between the ve-
hicle and the ground is smaller than
normal.
● Do not enter an automated car wash
with a punctured run-flat tire.
● Have the punctured tire inspected by a
NISSAN dealer or other authorized re-
pair shop. Replace the tire as soon as
possible if the tire is seriously
damaged.
● Always use tires of the same type, size,
brand, construction (bias, bias-belted
or radial) , and tread pattern on all four
wheels. Failure to do so may result in a
circumference difference between tires
on the front and rear axles which will
cause excessive tire wear and may dam-
age the transmission, transfer case and
differential gears (AWD models) .
● ONLY use spare tires specified for the
AWD model. ●
If excessive tire wear is found, it is rec-
ommended that all four tires be re-
placed with tires of the same size,
brand, construction and tread pattern.
The tire pressure and wheel alignment
should also be checked and corrected
as necessary. It is recommended that
you visit a NISSAN dealer for this
service.
TIRE CHAINS
Use of tire chains may be prohibited according to
location. Check the local laws before installing
tire chains. When installing tire chains, make sure
they are the proper size for the tires on your
vehicle and are installed according to the chain
manufacturer’s suggestions. Use only SAE
class “S” chains. Class “S” chains are used on
vehicles with restricted tire to vehicle clearance.
Vehicles that can use Class “S” chains are de-
signed to meet the minimum clearances between
the tire and the closest vehicle suspension or
body component required to accommodate the
use of a winter traction device (tire chains or
cables) . The minimum clearances are determined
using the factory equipped tire size. Other types
may damage your vehicle. Use chain tensioners
when recommended by the tire chain manufac-
turer to ensure a tight fit. Loose end links of the
tire chain must be secured or removed to prevent
Do-it-yourself8-37
Page 489 of 547
●For 2WD models, if your vehicle was
originally equipped with four tires that
were the same size and you are only
replacing two of the four tires, install
the new tires on the rear axle. Placing
new tires on the front axle may cause
loss of vehicle control in some driving
conditions and cause an accident and
personal injury
● If the wheels are changed for any rea-
son, always replace with wheels which
have the same off-set dimension.
Wheels of a different off-set could
cause premature tire wear, degrade ve-
hicle handling characteristics, affect the
VDC system and/or interference with
the brake discs/drums. Such interfer-
ence can lead to decreased braking ef-
ficiency and/or early brake pad/shoe
wear. For additional information on
wheel off-set dimensions, refer to
“Wheels and tires” in the “Technical and
consumer information” section of this
manual. ●
Since the spare tire is not equipped with
the TPMS, when a spare tire is mounted
or a wheel is replaced, tire pressure will
not be indicated, the TPMS will not
function and the low tire pressure warn-
ing light will flash for approximately
1 minute. The light will remain on after
1 minute. Have your tires replaced
and/or TPMS system reset as soon as
possible. It is recommended that you
visit a NISSAN dealer for this service.
● Replacing tires with those not originally
specified by NISSAN could affect the
proper operation of the TPMS.
● The TPMS sensor may be damaged if it
is not handled correctly. Be careful
when handling the TPMS sensor.
● When replacing the TPMS sensor, the
ID registration may be required. It is
recommended that you visit a NISSAN
dealer for ID registration.
● Do not use a valve stem cap that is not
specified by NISSAN. The valve stem
cap may become stuck.
● Be sure that the valve stem caps are
correctly fitted. Otherwise the valve may
be clogged up with dirt and cause a
malfunction or loss of pressure. ●
Do not install a damaged or deformed
wheel or tire even if it has been re-
paired. Such wheels or tires could have
structural damage and could fail with-
out warning.
● The use of retread tires is not
recommended.
● For additional information regarding
tires, refer to “Important Tire Safety In-
formation” (US) or “Tire Safety Informa-
tion” (Canada) in the Warranty Informa-
tion Booklet.
CAUTION
Always use tires of the same type, size,
brand, construction (bias, bias-belted or
radial) , and tread pattern on all four
wheels. Failure to do so may result in a
circumference difference between tires on
the front and rear axles which will cause
excessive tire wear and may damage the
transmission, transfer case and differen-
tial gears (AWD models) .
8-40Do-it-yourself
Page 530 of 547
Trailer lights
CAUTION
When splicing into the vehicle electrical
system, a commercially available power-
type module/converter must be used to
provide power for all trailer lighting. This
unit uses the vehicle battery as a direct
power source for all trailer lights while
using the vehicle tail light, stoplight and
turn signal circuits as a signal source. The
module/converter must draw no more that
15 milliamps from the stop and tail lamp
circuits. Using a module/converter that
exceeds these power requirements may
damage the vehicle’s electrical system. It
is recommended that you visit a reputable
trailer retailer to obtain the proper equip-
ment and to have it installed.
Trailer lights should comply with federal and/or
local regulations. For assistance in hooking up
trailer lights, contact a NISSAN dealer or repu-
table trailer retailer. Vehicles equipped with the
optional trailer tow package are equipped with a
7-pin trailer harness connector. If your trailer is
equipped with a flat 4-pin connector, an adapter
will be needed to connect the trailer lights to the
vehicle. Adapters are available at auto parts
stores and hitch retailers.
Pre-towing tips
● Be certain your vehicle maintains a level
position when a loaded and/or unloaded
trailer is hitched. Do not drive the vehicle if it
has an abnormal nose-up or nose-down
condition; check for improper tongue load,
overload, worn suspension or other possible
causes of either condition.
● Always secure items in the trailer to prevent
load shift while driving.
● Keep the cargo load as low as possible in
the trailer to keep the trailer center of gravity
low.
● Load the trailer so approximately 60% of the
trailer load is in the front half and 40% is in
the back half. Also make sure the load is
balanced side to side.
● Check your hitch, trailer tire pressure, ve-
hicle tire pressure, trailer light operation, and
trailer wheel lug nuts every time you attach a
trailer to the vehicle.
● Be certain your rearview mirrors conform to
all federal, state or local regulations. If not,
install any mirrors required for towing before
driving the vehicle. ●
Determine the overall height of the vehicle
and trailer so the required clearance is
known.
Trailer towing tips
In order to gain skill and an understanding of the
vehicle’s behavior, you should practice turning,
stopping and backing up in an area which is free
from traffic. Steering stability and braking perfor-
mance will be somewhat different than under
normal driving conditions.
● Always secure items in the trailer to prevent
load shift while driving.
● Lock the trailer hitch coupler with a pin or
lock to prevent the coupler from inadver-
tently becoming unlatched.
● Avoid abrupt starts, acceleration or stops.
● Avoid sharp turns or lane changes.
● Always drive your vehicle at a moderate
speed.
● When backing up, hold the bottom of the
steering wheel with one hand. Move your
hand in the direction in which you want the
trailer to go. Make small corrections and
back up slowly. If possible, have someone
guide you when you are backing up.
Technical and consumer information10-23
Page 539 of 547
C
Capacities and recommended
fuel/lubricants ..................10-2
Cargoareastoragebin.............2-58
Cargocover...................2-59
Cargo (See vehicle loading information) . . .10-13
Car phone or CB radio .............4-81
CD care and cleaning ..............4-74
CD player (See audio system) ......4-55,4-62
Chassiscontrol.................5-107
Checkingbulbs .................2-11
Check tire pressure ...............2-31
Child restraints .......1-23,1-24,1-25,1-27
LATCH (Lower Anchors and Tethers for
CHildren) System ..............1-27
Precautions on child
restraints.........1-25,1-32,1-38,1-43
Top tether strap anchor point locations . .1-30
Child restraint with top tether strap .......1-30
Child safety rear door lock ............3-7
Chimes, audible reminders ...........2-19
Cleaningexteriorandinterior........7-2,7-4
Clock setting
(models with Navigation System) ........4-7
Clock setting
(models without Navigation System) ......4-53
C.M.V.S.S. certification label .........10-11
Cold weather driving ..............5-111
Compact disc (CD) player ........4-55,4-62
Connect phone .................4-76
Consolebox...................2-55
Consolelight...................2-67 Continuously Variable Transmission (CVT) . . .5-20
Continuously Variable Transmission (CVT)
fluid.......................8-9
Driving with Continuously Variable
Transmission (CVT) .............5-20
Control panel buttons ...............4-4
Brightness/contrast button .........4-10
Enterbutton..................4-4
Setting button .................4-7
Controls Audio controls (steering wheel) .......4-75
Heater and air conditioner
controls................4-33,4-41
Coolant Capacities and recommended
fuel/lubricants ................10-2
Changingenginecoolant...........8-5
Checking engine coolant level ........8-5
Engine coolant temperature gauge .....2-6
Corrosion protection ...............7-6
Cruisecontrol..................5-55
Cupholders...................2-56
D
Daytime Running Light System .........2-44
Daytime running light system (Canada only) . .2-44
Defroster switch Rear window and outside mirror defroster
switch.....................2-38
Dimensionsandweights ............10-9
Dimmer switch for instrument panel ......2-45
Display......................2-20
Display controls (see control panel buttons) . .4-4
Door locks .....................3-5 Drive belt
.....................8-13
Drive positioner, Automatic ........3-41,3-43
Driving Cold weather driving ............5-111
Driving with Continuously Variable
Transmission (CVT) .............5-20
Precautions when starting and
driving ..................5-4,5-11
Driving the vehicle ................5-20
E
ECO mode switch ................5-26
Economy-fuel..................5-98
Emergency engine shutoff ............5-16
Emission control information label ......10-11
Emission control system warranty .......10-27
Engine Before starting the engine ..........5-18
Capacities and recommended
fuel/lubricants ................10-2
Changing engine coolant ...........8-5
Changingengineoil..............8-7
Changing engine oil filter ...........8-8
Checking engine coolant level ........8-5
Checking engine oil level ...........8-6
Engine
compartment check locations ....8-3
Engine coolant temperature gauge .....2-6
Engine cooling system ............8-4
Engineoil ...................8-6
Engine oil and oil filter recommendation . .10-6
Engine oil viscosity ..............10-7
Engine serial number ............10-11
Engine specifications ............10-8
Starting the engine .............5-18
11-2
Page 543 of 547
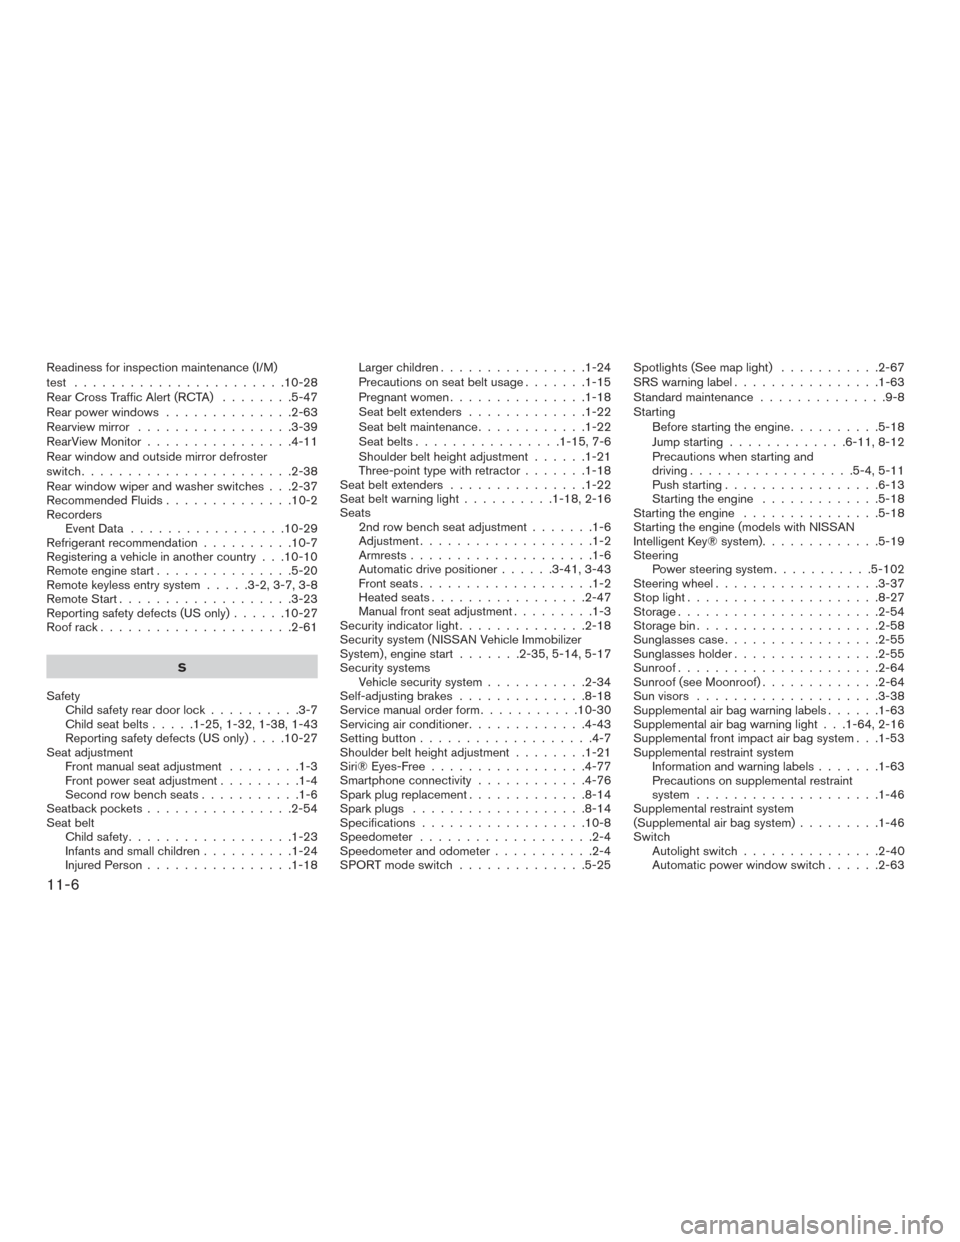
Readiness for inspection maintenance (I/M)
test .......................10-28
Rear Cross Traffic Alert (RCTA)........5-47
Rear power windows ..............2-63
Rearview mirror .................3-39
RearViewMonitor................4-11
Rear window and outside mirror defroster
switch .......................2-38
Rear window wiper and washer switches . . .2-37
Recommended Fluids ..............10-2
Recorders EventData .................10-29
Refrigerant recommendation ..........10-7
Registering a vehicle in another country . . .10-10
Remote engine start ...............5-20
Remote keyless entry system .....3-2,3-7,3-8
Remote Start ...................3-23
Reporting safety defects (US only) ......10-27
Roof rack .....................2-61
S
Safety Child safety rear door lock ..........3-7
Childseatbelts.....1-25,1-32,1-38,1-43
Reporting safety defects (US only) ....10-27
Seat adjustment Front manual seat adjustment ........1-3
Front power seat adjustment .........1-4
Second row bench seats ...........1-6
Seatback pockets ................2-54
Seat belt Childsafety..................1-23
Infantsandsmallchildren..........1-24
Injured Person ................1-18 Larger children
................1-24
Precautions on seat belt usage .......1-15
Pregnant women ...............1-18
Seat belt extenders .............1-22
Seatbeltmaintenance............1-22
Seatbelts................1-15,7-6
Shoulder belt height adjustment ......1-21
Three-point type with retractor .......1-18
Seatbeltextenders ...............1-22
Seat belt warning light ..........1-18,2-16
Seats 2nd row bench seat adjustment .......1-6
Adjustment...................1-2
Armrests ....................1-6
Automatic drive positioner ......3-41,3-43
Frontseats...................1-2
Heatedseats.................2-47
Manual front seat adjustment .........1-3
Security indicator light ..............2-18
Security system (NISSAN Vehicle Immobilizer
System) , engine start .......2-35,5-14,5-17
Security systems Vehicle security system ...........2-34
Self-adjusting brakes ..............8-18
Service manual order form ...........10-30
Servicing air conditioner .............4-43
Setting button ...................4-7
Shoulder belt height adjustment ........1-21
Siri® Eyes-Free .................4-77
Smartphone connectivity ............4-76
Sparkplugreplacement.............8-14
Sparkplugs ...................8-14
Specifications ..................10-8
Speedometer ...................2-4
Speedometer and odometer ...........2-4
SPORT mode switch ..............5-25 Spotlights (See map light)
...........2-67
SRSwarninglabel................1-63
Standard maintenance ..............9-8
Starting Before
starting the engine ..........5-18
Jump starting .............6-11,8-12
Precautions when starting and
driving ..................5-4,5-11
Push starting .................6-13
Starting the engine .............5-18
Starting the engine ...............5-18
Starting the engine (models with NISSAN
Intelligent Key® system) .............5-19
Steering Power steering system ...........5-102
Steering wheel ..................3-37
Stoplight.....................8-27
Storage......................2-54
Storagebin....................2-58
Sunglasses case .................2-55
Sunglasses holder ................2-55
Sunroof......................2-64
Sunroof(seeMoonroof).............2-64
Sun visors ....................3-38
Supplemental air bag warning labels ......1-63
Supplemental air bag warning light . . .1-64, 2-16
Supplemental front impact air bag system . . .1-53
Supplemental restraint system Information and warning labels .......1-63
Precautions on supplemental restraint
system ....................1-46
Supplemental restraint system
(Supplemental air bag system) .........1-46
Switch Autolightswitch...............2-40
Automatic power window switch ......2-63
11-6