2017 NISSAN QUEST sensor
[x] Cancel search: sensorPage 179 of 520
3-28Pre-driving checks and adjustments
Power open
When the liftgate is fully closed, the liftgate will
fully open automatically by:
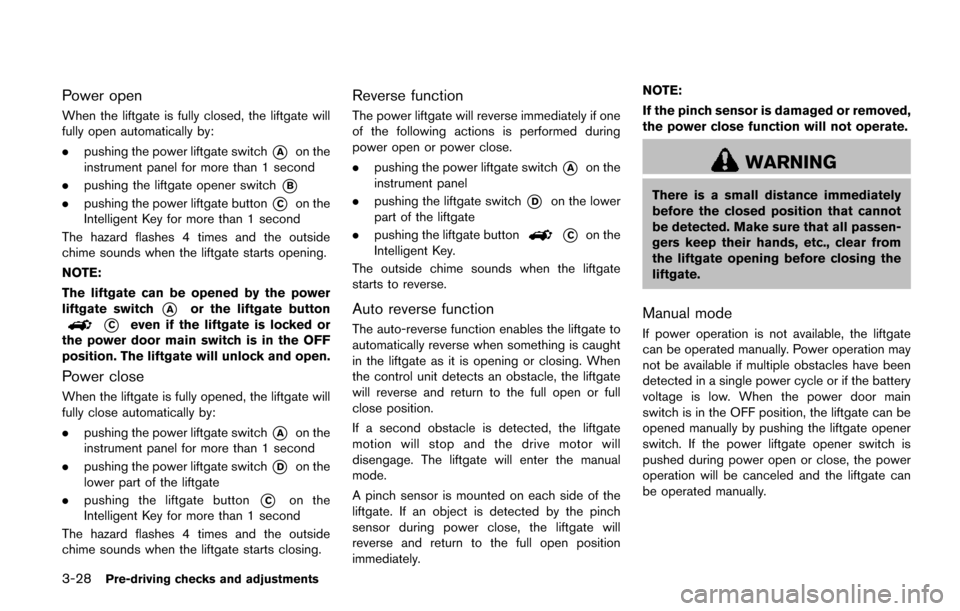
.pushing the power liftgate switch
*Aon the
instrument panel for more than 1 second
. pushing the liftgate opener switch
*B
.pushing the power liftgate button*Con the
Intelligent Key for more than 1 second
The hazard flashes 4 times and the outside
chime sounds when the liftgate starts opening.
NOTE:
The liftgate can be opened by the power
liftgate switch
*Aor the liftgate button
*Ceven if the liftgate is locked or
the power door main switch is in the OFF
position. The liftgate will unlock and open.
Power close
When the liftgate is fully opened, the liftgate will
fully close automatically by:
. pushing the power liftgate switch
*Aon the
instrument panel for more than 1 second
. pushing the power liftgate switch
*Don the
lower part of the liftgate
. pushing the liftgate button
*Con the
Intelligent Key for more than 1 second
The hazard flashes 4 times and the outside
chime sounds when the liftgate starts closing.
Reverse function
The power liftgate will reverse immediately if one
of the following actions is performed during
power open or power close.
. pushing the power liftgate switch
*Aon the
instrument panel
. pushing the liftgate switch
*Don the lower
part of the liftgate
. pushing the liftgate button
*Con the
Intelligent Key.
The outside chime sounds when the liftgate
starts to reverse.
Auto reverse function
The auto-reverse function enables the liftgate to
automatically reverse when something is caught
in the liftgate as it is opening or closing. When
the control unit detects an obstacle, the liftgate
will reverse and return to the full open or full
close position.
If a second obstacle is detected, the liftgate
motion will stop and the drive motor will
disengage. The liftgate will enter the manual
mode.
A pinch sensor is mounted on each side of the
liftgate. If an object is detected by the pinch
sensor during power close, the liftgate will
reverse and return to the full open position
immediately. NOTE:
If the pinch sensor is damaged or removed,
the power close function will not operate.
WARNING
There is a small distance immediately
before the closed position that cannot
be detected. Make sure that all passen-
gers keep their hands, etc., clear from
the liftgate opening before closing the
liftgate.
Manual mode
If power operation is not available, the liftgate
can be operated manually. Power operation may
not be available if multiple obstacles have been
detected in a single power cycle or if the battery
voltage is low. When the power door main
switch is in the OFF position, the liftgate can be
opened manually by pushing the liftgate opener
switch. If the power liftgate opener switch is
pushed during power open or close, the power
operation will be canceled and the liftgate can
be operated manually.
Page 185 of 520
3-34Pre-driving checks and adjustments
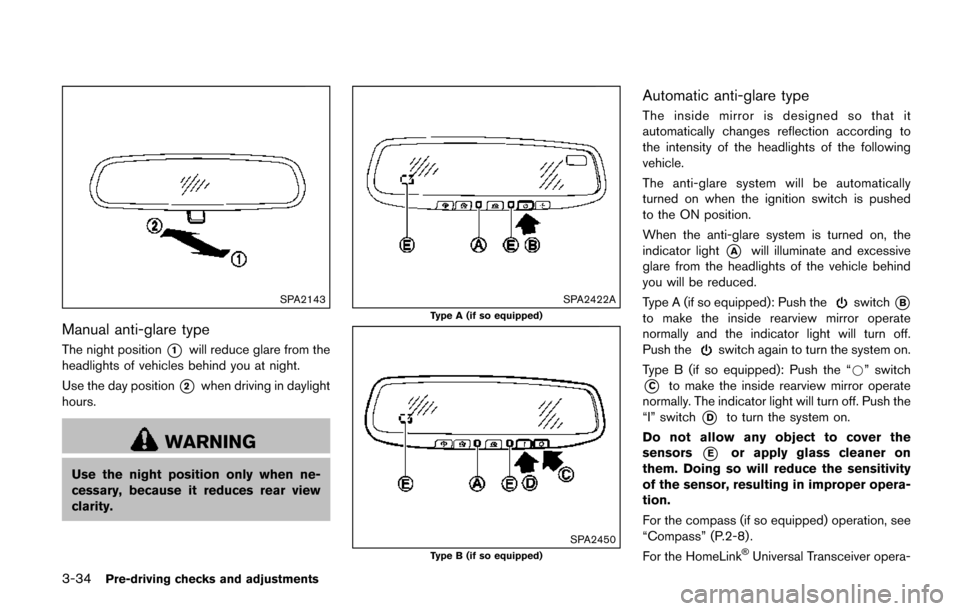
SPA2143
Manual anti-glare type
The night position*1will reduce glare from the
headlights of vehicles behind you at night.
Use the day position
*2when driving in daylight
hours.
WARNING
Use the night position only when ne-
cessary, because it reduces rear view
clarity.
SPA2422A
Type A (if so equipped)
SPA2450Type B (if so equipped)
Automatic anti-glare type
The inside mirror is designed so that it
automatically changes reflection according to
the intensity of the headlights of the following
vehicle.
The anti-glare system will be automatically
turned on when the ignition switch is pushed
to the ON position.
When the anti-glare system is turned on, the
indicator light
*Awill illuminate and excessive
glare from the headlights of the vehicle behind
you will be reduced.
Type A (if so equipped): Push the
switch*B
to make the inside rearview mirror operate
normally and the indicator light will turn off.
Push the
switch again to turn the system on.
Type B (if so equipped): Push the “*” switch
*Cto make the inside rearview mirror operate
normally. The indicator light will turn off. Push the
“I” switch
*Dto turn the system on.
Do not allow any object to cover the
sensors
*Eor apply glass cleaner on
them. Doing so will reduce the sensitivity
of the sensor, resulting in improper opera-
tion.
For the compass (if so equipped) operation, see
“Compass” (P.2-8) .
For the HomeLink
�ŠUniversal Transceiver opera-
Page 237 of 520
4-48Monitor, heater, air conditioner, audio, phone and voice recognition systems
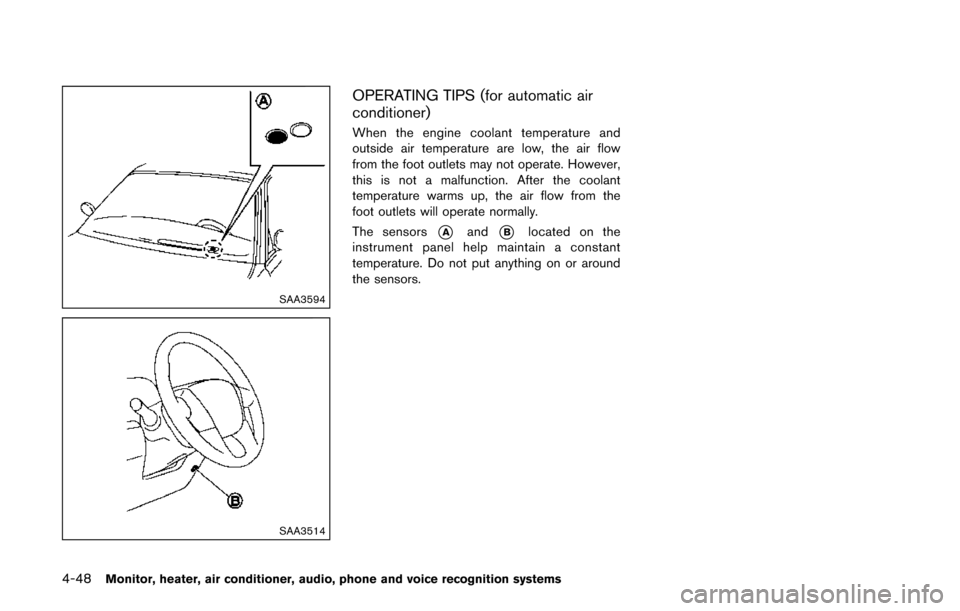
SAA3594
SAA3514
OPERATING TIPS (for automatic air
conditioner)
When the engine coolant temperature and
outside air temperature are low, the air flow
from the foot outlets may not operate. However,
this is not a malfunction. After the coolant
temperature warms up, the air flow from the
foot outlets will operate normally.
The sensors
*Aand*Blocated on the
instrument panel help maintain a constant
temperature. Do not put anything on or around
the sensors.
Page 244 of 520
— Pushing the “DUAL” button allows theuser to independently change the front
passenger’s side temperature with the
passenger side temperature control but-
tons (“
” and “”) . (“DUAL” will
appear on the display.)
To cancel the separate temperature
setting, push the “DUAL” button (“DUAL”
will disappear from the display) and the
driver’s side temperature setting will be
applied to both the driver’s and front
passenger’s sides.
4. Models with Advanced Climate Control System:
.Push the “AUTO” auto-recirculation
button. The indicator light on the “
AUTO” auto-recirculation button will illu-
minate. In this mode, the sensor detects
odors and gas to automatically switch
between the air recirculation mode and
the outside air circulation mode. (See
“Advanced climate control system” (P.4-
57) for details.)
Models without Advanced Climate Control
System:
.Push and hold the air recirculation “”
button or outside air circulation “”
button (the one with the indicator light
on) for more than 2 seconds to set the
automatic control between the air recir- culation and outside air circulation
modes. (The “
” and “” indicator
lights will blink twice.)
The following conditions need to be met for the
automatic air intake control mode to function
properly.
. The air flow control is not in the front
defroster mode (the indicator light on the
front defroster “
FRONT” button is
turned off).
. The outside temperature is approximately
328F(0 8C) or above.
A visible mist may be seen coming from the
ventilators in hot, humid conditions as the air is
cooled rapidly. This does not indicate a mal-
function.
Heating (A/C off):
1. Push the “AUTO” button.
(The AUTO indicator light will illuminate.)
2. If the A/C indicator light illuminates, push the “A/C” button.
(The A/C indicator light will turn off.)
3. Push the temperature control buttons (“
” and “”) (driver’s side) to set the
desired temperature.
When the DUAL mode is turned off (“DUAL”
does not appear on the display):
.Pushing the “AUTO” button changes both the driver’s and front passenger’s
side temperature.
.Pushing the “DUAL” button allows the user to independently change the front
passenger’s side temperature with the
passenger side temperature control but-
tons (“
”or“”) . (“DUAL” will
appear on the display.)
To cancel the separate temperature
setting, push the “DUAL” button (“DUAL”
will disappear from the display) and the
driver’s side temperature setting will be
applied to both the driver’s and front
passenger’s sides.
4. Models with Advanced Climate Control System:
.Push the “AUTO” auto-recirculation
button. The indicator light on the “
AUTO” auto-recirculation button will illu-
minate. In this mode, the sensor detects
odors and gas to automatically switch
between the air recirculation mode and
the outside air circulation mode. (See
“Advanced climate control system” (P.4-
57) for details.)
Models without Advanced Climate Control
System:
.Push and hold the air recirculation “”
button or outside air circulation “”
Monitor, heater, air conditioner, audio, phone and voice recognition systems4-55
Page 246 of 520
button will illuminate.
The air recirculation mode cannot be activated
when the air conditioner is in the front defrosting
mode.
Outside air circulation:
.Models with Advanced Climate Control
System:
Push the air recirculation “
” button twice
to draw outside air into the passenger
compartment. The indicator light on the air
recirculation “
” button will turn off.
. Models without Advanced Climate Control
System:
Push the outside air circulation “
” button
to draw outside air into the passenger
compartment. The indicator light on the
outside air circulation “
” button will turn
on.
Automatic air intake control:
. Models with Advanced Climate Control
System:
Push the “
AUTO” auto-recirculation”
button to switch to the automatic air intake
control mode. The indicator light on the
“
AUTO” auto-recirculation button will
illuminate. In this mode, the sensor detects
odors and gas to automatically switch
between the air recirculation mode and the outside air circulation mode. (See “Ad-
vanced climate control system” (P.4-57) for
details.)
. Models without Advanced Climate Control
System:
To switch to the automatic control mode,
push the air recirculation “
” button to
recirculate interior air inside the vehicle. The
indicator light on the air recirculation “
”
button for about 2 seconds. The indicator
lights (both air recirculation “
” and
outside air circulation “” buttons) will
flash twice, and then the intake air will be
controlled automatically.
The following conditions need to be met for the
automatic air intake control mode to function
properly.
. The air flow control is not in the front
defroster mode (the indicator light on the
front defroster “
FRONT” button is
turned off).
. The outside temperature is approximately
328F(0 8C) or above.
SAA3670
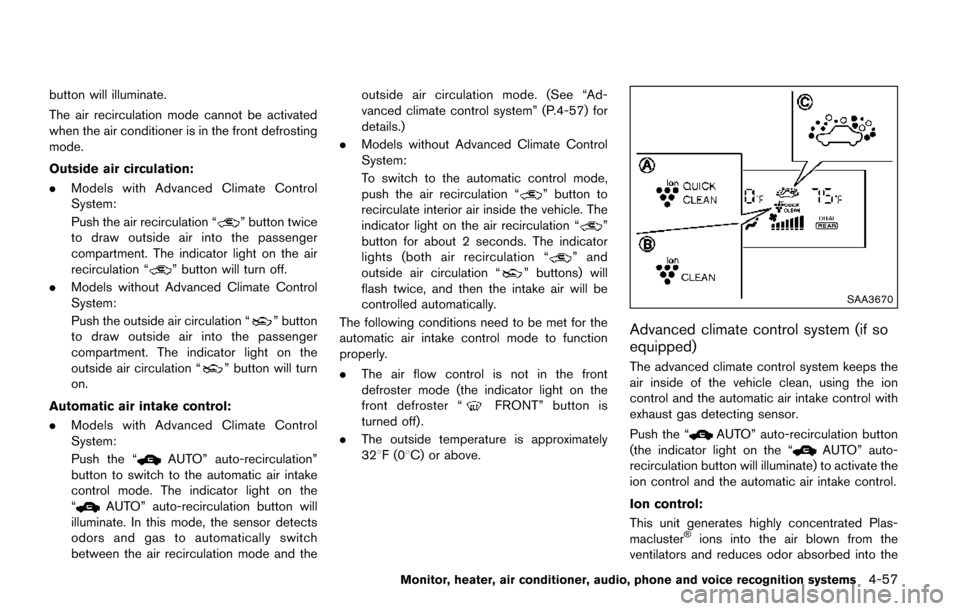
Advanced climate control system (if so
equipped)
The advanced climate control system keeps the
air inside of the vehicle clean, using the ion
control and the automatic air intake control with
exhaust gas detecting sensor.
Push the “
AUTO” auto-recirculation button
(the indicator light on the “AUTO” auto-
recirculation button will illuminate) to activate the
ion control and the automatic air intake control.
Ion control:
This unit generates highly concentrated Plas-
macluster
�Šions into the air blown from the
ventilators and reduces odor absorbed into the
Monitor, heater, air conditioner, audio, phone and voice recognition systems4-57
Page 247 of 520
4-58Monitor, heater, air conditioner, audio, phone and voice recognition systems
interior trim.
When the air conditioner is turned on, the
system generates Plasmacluster
�Šions automa-
tically.
“The high-density Plasmacluster
�Šions gener-
ated in the air conditioner’s air stream not only
suppress airborne bacteria and reduce the
adherence of odors to the interior trim, but also
have a proven skin moisture preserving effect.”
The amount of Plasmacluster
�Šions increases
according to the amount of air flow. When the air
flow is high, “
”*Ais displayed on the
screen and when the air flow is low, the
indication in the screen changes to “
”*B.
Plasmacluster�Šand Plasmacluster�Šions are
registered trademark of Sharp corporation.
Automatic air intake control with exhaust
gas/outside odor detection sensor:
This vehicle is equipped with an exhaust gas
detection sensor. When the automatic air intake
control is activated, the sensor detects industry
odors such as pulp or chemicals, and exhaust
gas such as gasoline or diesel. When such
odors or gas are detected, “
”*Cwill
appear on the display and the system auto-
matically changes from the outside air circulation
mode to the recirculation mode.
The automatic air intake control can be activated when the “
AUTO” auto-recirculation button
is pushed (the indicator light on the “AUTO”
auto-recirculation button will illuminate) under
the following conditions.
. The air flow control is not in the front
defroster mode (the indicator light on the
front defroster“
FRONT” button is
turned off).
. The outside temperature is about 328 F
(08C) or above.
When the automatic air intake control is ON, for
the first 5 minutes, the recirculation mode is
selected to prevent dust, dirt and pollen from
entering the vehicle and cleans the air inside of
the vehicle with positive and negative ions that
are emitted from the ventilator.
After 5 minutes, the sensor detects exhaust gas
and automatically alternates between the recir-
culation mode and outside air circulation mode.
Turning the system off
Push the “ON·OFF” button.
Rear air conditioning system
To control the rear air conditioning system
independently with the front air conditioner
control panel, push the “REAR” button. When
the rear air conditioning system control is on, the
indicator light on the “REAR” button will
illuminate and “
” will appear on the display.
In this state, the rear air conditioning system can
be adjusted with the front air conditioner control
panel. However, if no operation is conducted for
approximately 10 seconds after the “REAR”
button is pushed, the front air conditioner
control panel will automatically switch to the
front air conditioning mode.
To cancel the rear air conditioning mode and
switch back to the front air conditioning mode,
push “REAR” button one more time.
Automatic operation:
1. Push the “REAR” button to display “
”on
the front display when the rear air condition-
ing system is on.
2. Push the “AUTO” button. (The AUTO indicator light will illuminate.)
3. Push the temperature control buttons (“
” and “”) (driver’s side) to set the
desired temperature.
Page 374 of 520
pressure to the recommended COLD
tire pressure shown on the Tire and
Loading Information label to turn
the low tire pressure warning light
OFF. If the light still illuminates
while driving after adjusting the tire
pressure, a tire may be flat or the
TPMS may be malfunctioning. If you
have a flat tire, replace it with a
spare tire as soon as possible. If no
tire is flat and all tires are properly
inflated, it is recommended that you
consult a NISSAN dealer.
. Since the spare tire is not equipped
with the TPMS, when a spare tire is
mounted or a wheel is replaced, the
TPMS will not function and the low
tire pressure warning light will flash
for approximately 1 minute. The
light will remain on after 1 minute.
Have your tires replaced and/or
TPMS system reset as soon as
possible. It is recommended you
visit a NISSAN dealer for these
services.
. Replacing tires with those not ori-
ginally specified by NISSAN could
affect the proper operation of the
TPMS. .
Do not inject any tire liquid or
aerosol tire sealant into the tires,
as this may cause a malfunction of
the tire pressure sensors.
CAUTION
.The TPMS may not function properly
when the wheels are equipped with
tire chains or the wheels are buried
in snow.
. Do not place metalized film or any
metal parts (antenna, etc.) on the
windows. This may cause poor re-
ception of the signals from the tire
pressure sensors, and the TPMS will
not function properly.
Some devices and transmitters may temporarily
interfere with the operation of the TPMS and
cause the low tire pressure warning light to
illuminate. Some examples are:
. Facilities or electric devices using similar
radio frequencies are near the vehicle.
. If a transmitter set to similar frequencies is
being used in or near the vehicle. .
If a computer (or similar equipment) or a DC/
AC converter is being used in or near the
vehicle.
Low tire pressure warning light may illuminate in
the following cases.
. If the vehicle is equipped with a wheel and
tire without TPMS.
. If the TPMS has been replaced and the ID
has not been registered.
. If the wheel is not originally specified by
NISSAN.
FCC Notice:
For USA:
This device complies with Part 15 of the
FCC Rules. Operation is subject to the
following two conditions: (1) This device
may not cause harmful interference, and
(2) this device must accept any interfer-
ence received, including interference that
may cause undesired operation.
Note: Changes or modifications not ex-
pressly approved by the party responsible
for compliance could void the user’s
authority to operate the equipment.
For Canada:
This device complies with Industry Canada
licence-exempt RSS standard(s) . Opera-
tion is subject to the following two condi-
Starting and driving5-5
Page 375 of 520
5-6Starting and driving
tions: (1) this device may not cause inter-
ference, and (2) this device must accept
any interference, including interference
that may cause undesired operation of
the device.
TPMS with Easy Fill Tire Alert
When adding air to an under-inflated tire, the
TPMS with Easy Fill Tire Alert provides visual
and audible signals outside the vehicle to help
you inflate the tires to the recommended COLD
tire pressure.
Vehicle set-up:
1. Park the vehicle in a safe and level place.
2. Apply the parking brake and place the shiftlever in the P (Park) position.
3. Place the ignition switch in the ON position. Do not start the engine.
Operation:
1. Add air to the tire.
2. Within a few seconds, the hazard indicators will start flashing.
3. When the designated pressure is reached, the horn beeps once and the hazard
indicators stop flashing.
4. Perform the above steps for each tire.
.If the tire is over-inflated to more than approximately 4 psi (30 kPa) , the horn
beeps and the hazard indicators flash 3
times. To correct the pressure, push the
core of the valve stem on the tire briefly to
release pressure. When the pressure
reaches the designated pressure, the
horn beeps once.
.If the hazard indicator does not flash
within approximately 15 seconds after
starting to inflate the tire, it indicates that
the TPMS with Easy Fill Tire Alert is not
operating.
.The TPMS will not activate the Easy FillTire Alert under the following conditions:
— If there is interference from an external device or transmitter
— The air pressure from the inflation device is not sufficient to inflate the tire
— There is a malfunction in the TPMS system
— There is a malfunction in the horn or hazard indicators
— The identification code of the tire pres- sure sensor is not registered to the
system
— The battery of the tire pressure sensor is low
.If the TPMS with Easy Fill Tire Alert doesnot operate due to TPMS interference,
move the vehicle about 1 m (3 ft)
backward or forward and try again.
If the TPMS with Easy Fill Tire Alert is not
working, use a tire pressure gauge.
AVOIDING COLLISION AND ROLL-
OVER
WARNING
Failure to operate this vehicle in a safe
and prudent manner may result in loss
of control or an accident.
Be alert and drive defensively at all times. Obey
all traffic regulations. Avoid excessive speed,
high speed cornering, or sudden steering
maneuvers, because these driving practices
could cause you to lose control of your vehicle.
As with any vehicle, a loss of control could
result in a collision with other vehicles or
objects, or cause the vehicle to rollover,
particularly if the loss of control causes the
vehicle to slide sideways. Be attentive at all
times, and avoid driving when tired. Never drive
when under the influence of alcohol or drugs
(including prescription or over-the-counter
drugs which may cause drowsiness) . Always