Page 137 of 558
WARNING
●Never rely solely on the hill descent
control system to control vehicle speed
when driving on steep downhill grades.
Always drive carefully when using the
hill descent control system and deceler-
ate the vehicle speed by depressing the
brake pedal if necessary. Be especially
careful when driving on frozen, muddy
or extremely steep downhill roads. Fail-
ure to control vehicle speed may result
in a loss of control of the vehicle and
possible serious injury or death. ●
The hill descent control may not control
the vehicle speed on a hill under all load
or road conditions. Always be prepared
to depress the brake pedal to control
vehicle speed. Failure to do so may re-
sult in a collision or serious personal
injury.
Page 183 of 558

WARNING
●Always be sure the liftgate has been
closed securely to prevent it from open-
ing while driving.
● Do not drive with the liftgate open. This
could allow dangerous exhaust gases
to be drawn into the vehicle. For addi-
tional information, refer to “Exhaust
gas (carbon monoxide)” in the “Starting
and driving” section of this manual.
● To help avoid risk of injury or death
through unintended operation of the
vehicle and or its systems, including
entrapment in windows or inadvertent
door lock activation, do not leave chil-
dren, people who require the assistance
of others or pets unattended in your
vehicle. Additionally, the temperature
inside a closed vehicle on a warm day
can quickly become high enough to
cause a significant risk of injury or
death to people and pets.
● Always be sure that hands and feet are
clear of the door frame to avoid injury
while closing the liftgate.
OPERATING THE MANUAL
LIFTGATE (if so equipped)
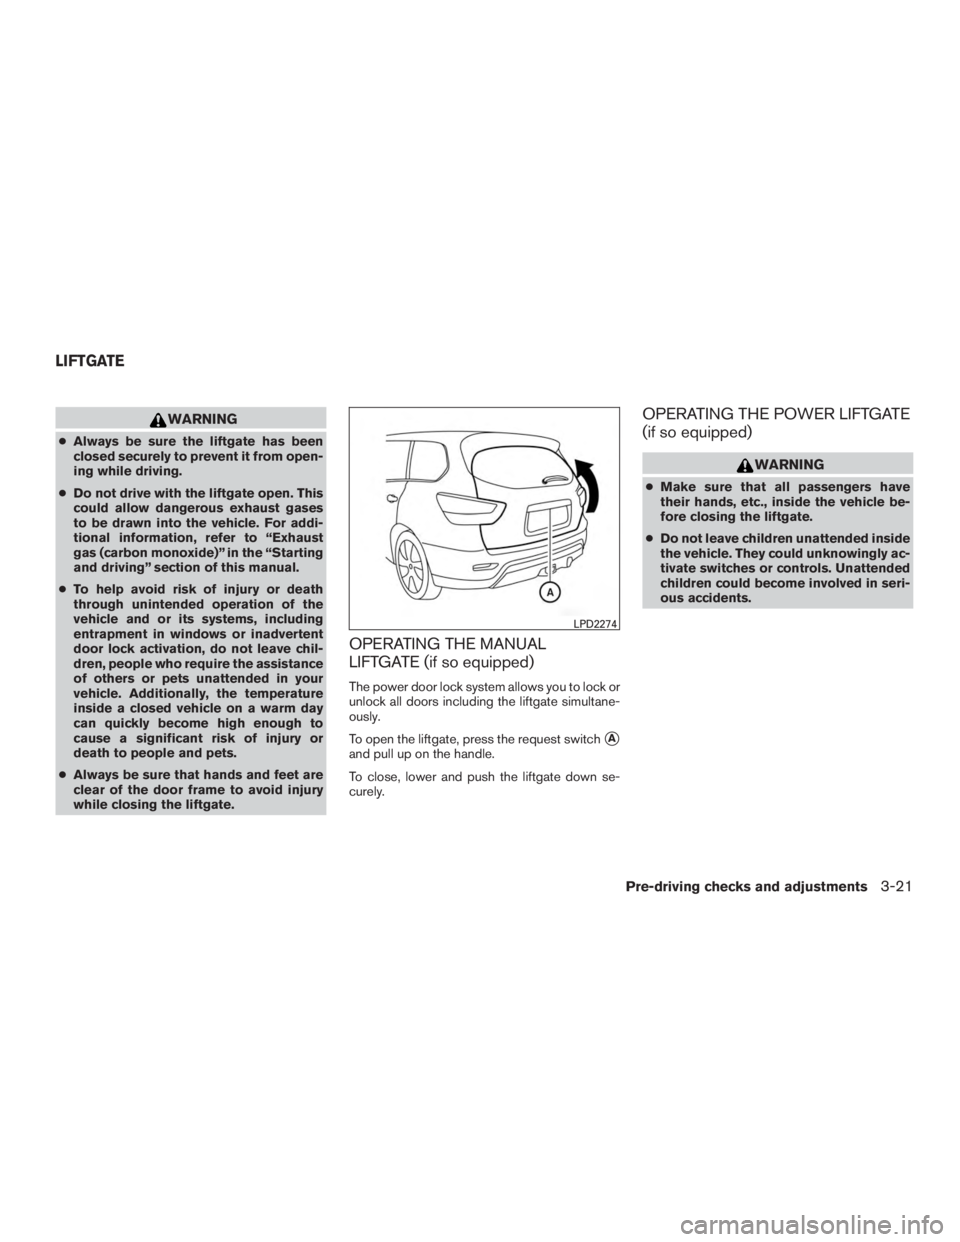
The power door lock system allows you to lock or
unlock all doors including the liftgate simultane-
ously.
To open the liftgate, press the request switch
�A
and pull up on the handle.
To close, lower and push the liftgate down se-
curely.
OPERATING THE POWER LIFTGATE
(if so equipped)
Page 185 of 558

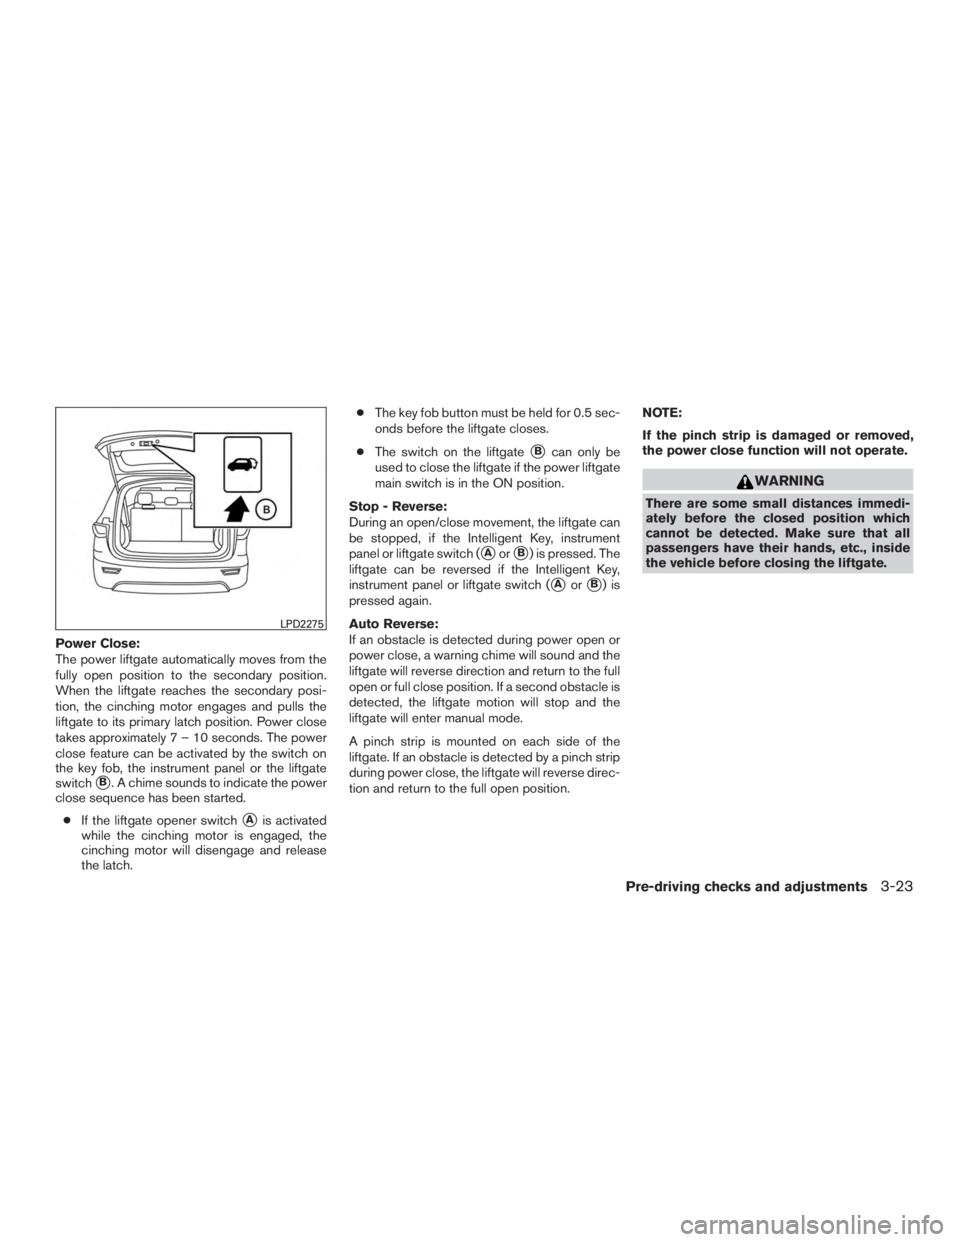
Power Close:
The power liftgate automatically moves from the
fully open position to the secondary position.
When the liftgate reaches the secondary posi-
tion, the cinching motor engages and pulls the
liftgate to its primary latch position. Power close
takes approximately7–10seconds. The power
close feature can be activated by the switch on
the key fob, the instrument panel or the liftgate
switch
�B. A chime sounds to indicate the power
close sequence has been started.
● If the liftgate opener switch
�Ais activated
while the cinching motor is engaged, the
cinching motor will disengage and release
the latch. ●
The key fob button must be held for 0.5 sec-
onds before the liftgate closes.
● The switch on the liftgate
�Bcan only be
used to close the liftgate if the power liftgate
main switch is in the ON position.
Stop - Reverse:
During an open/close movement, the liftgate can
be stopped, if the Intelligent Key, instrument
panel or liftgate switch (
�Aor�B) is pressed. The
liftgate can be reversed if the Intelligent Key,
instrument panel or liftgate switch (
�Aor�B)is
pressed again.
Auto Reverse:
If an obstacle is detected during power open or
power close, a warning chime will sound and the
liftgate will reverse direction and return to the full
open or full close position. If a second obstacle is
detected, the liftgate motion will stop and the
liftgate will enter manual mode.
A pinch strip is mounted on each side of the
liftgate. If an obstacle is detected by a pinch strip
during power close, the liftgate will reverse direc-
tion and return to the full open position. NOTE:
If the pinch strip is damaged or removed,
the power close function will not operate.
Page 188 of 558
WARNING
Prevent unintentional liftgate
opening/closing. There may be conditions
when opening/closing the liftgate is not
desired. Keep the Intelligent Key out of
the range of the liftgate (3 ft or 1 m) , when
washing or working around the back of
the vehicle.
Page 193 of 558

WARNING
●Do not adjust the steering wheel while
driving. You could lose control of your
vehicle and cause an accident.
● Do not adjust the steering wheel any
closer to you than is necessary for
proper steering operation and comfort.
The driver’s air bag inflates with great
force. If you are unrestrained, leaning
forward, sitting sideways or out of posi-
tion in any way, you are at greater risk of
injury or death in a crash. You may also
receive serious or fatal injuries from the
air bag if you are up against it when it
inflates. Always sit back against the
seatback and as far away as practical
from the steering wheel. Always use the
seat belts.
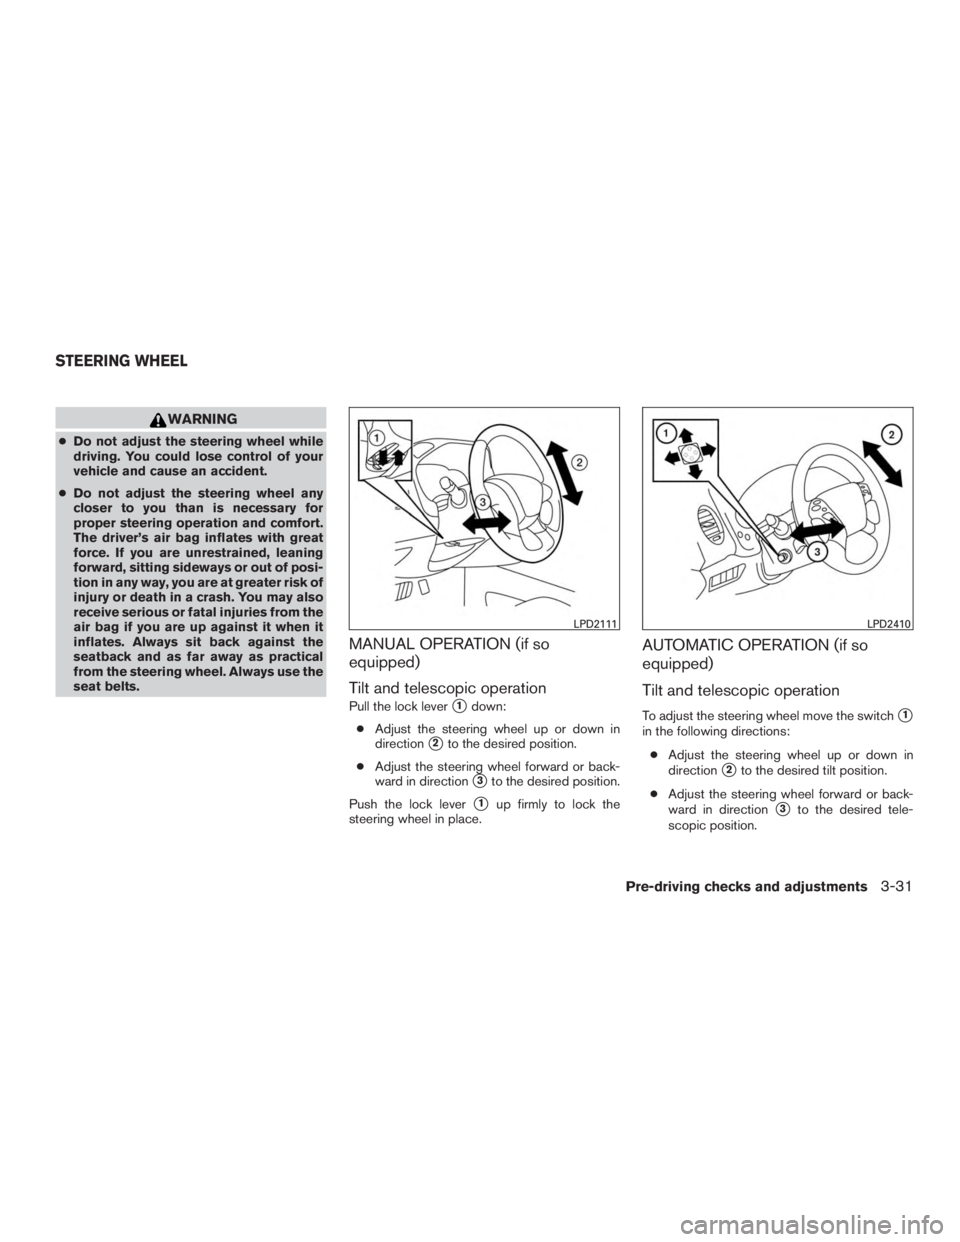
MANUAL OPERATION (if so
equipped)
Tilt and telescopic operation
Pull the lock lever�1down:
● Adjust the steering wheel up or down in
direction
�2to the desired position.
● Adjust the steering wheel forward or back-
ward in direction
�3to the desired position.
Push the lock lever
�1up firmly to lock the
steering wheel in place.
AUTOMATIC OPERATION (if so
equipped)
Tilt and telescopic operation
To adjust the steering wheel move the switch�1
in the following directions:
● Adjust the steering wheel up or down in
direction
�2to the desired tilt position.
● Adjust the steering wheel forward or back-
ward in direction
�3to the desired tele-
scopic position.
Page 206 of 558
WARNING
●Do not adjust the heater and the air
conditioner controls or audio controls
while driving so that full attention may
be given to vehicle operation.
● Do not use this system if you notice any
abnormality, such as a frozen screen or
lack of sound. Continued use of the
system may result in accident, fire or
electric shock.
● If you notice any foreign objects enter-
ing the system hardware, spilled liquid
on the system, or notice smoke or
fumes coming out from the system, or
any other unusual operation is ob-
served, stop using the system immedi-
ately. It is recommended that you visit a
NISSAN dealer for service. Ignoring
such conditions may lead to an acci-
dent, fire or electric shock.
● Do not disassemble or modify this sys-
tem. If you do, it may lead to an acci-
dent, fire, or electric shock.
● Park the vehicle in a safe location and
apply the parking brake to view the im-
ages on the front center display screen.
Page 231 of 558
WARNING
●Failure to follow the warnings and in-
structions for the proper use of the
Around View® Monitor system could
result in serious injury or death.
● The Around View® Monitor is a conve-
nience feature and is not a substitute
for proper vehicle operation because it
has areas where objects cannot be
viewed. The four corners of the vehicle
in particular, are areas where objects do
not always appear in the bird’s-eye,
front, or rear views. Always check your
surroundings to be sure that it is safe to
move before operating the vehicle. Al-
ways operate the vehicle slowly.
● The driver is always responsible for
safety during parking and other
maneuvers.
Page 239 of 558

WARNING
Listed below are the system limitations for
Around View® Monitor. Failure to operate
the vehicle in accordance with these sys-
tem limitations could result in serious in-
jury or death.
●
Do not use the Around View® Monitor
with the outside mirrors in the stored
position, and make sure that the liftgate
is securely closed when operating the
vehicle using the Around View® Monitor.
●The apparent distance between objects
viewed on the Around View® Monitor
differs from the actual distance.
● The cameras are installed on the front
grille, the outside mirrors and above the
rear license plate. Do not put anything
on the vehicle that covers the cameras.
● When washing the vehicle with high
pressure water, be sure not to spray it
around the cameras. Otherwise, water
may enter the camera unit causing wa-
ter condensation on the lens, a mal-
function, fire or an electric shock.
● Do not strike the cameras. They are
precision instruments. Doing so could
cause a malfunction or cause damage
resulting in a fire or an electric shock. There are some areas where the system will not
show objects and the system does not warn of
moving objects. When in the front or rear view
display, an object below the bumper or on the
ground may not be viewed
�1. When in the
bird’s-eye view, a tall object near the seam
�2of
the camera viewing areas will not appear in the
monitor.
The following are operating limitations and do not
represent a system malfunction:
● There may be a delay when switching be-
tween views.
● When the temperature is extremely high or
low, the screen may not display objects
clearly.
● When strong light directly shines on the
camera, objects may not be displayed
clearly.
● The screen may flicker under fluorescent
light.
● The colors of objects on the Around View®
Monitor may differ somewhat from the actual
color of objects.
● Objects on the Around View® Monitor may
not be clear and the color of the object may
differ in a dark environment. ●
There may be differences in sharpness be-
tween each camera view of the bird’s-eye
view.
● Do not use wax on the camera lens. Wipe off
any wax with a clean cloth that has been
dampened with a diluted mild cleaning
agent, then wipe with a dry cloth.
Monitor, climate, audio, phone and voice recognition systems4-37