Page 173 of 558
NOTE:● Request switches for all doors and lift-
gate can be deactivated when the I-Key
Door Lock setting is switched to OFF in
the vehicle settings of the vehicle infor-
mation display. For additional informa-
tion, refer to “Vehicle information dis-
play” in the “Instruments and controls”
section of this manual.
● Doors lock with the door handle re-
quest switch while the ignition switch
is not in the LOCK position. ●
Doors do not lock by pushing the door
handle request switch while any door is
open. However, doors lock with the
mechanical key even if any door is
open.
● Doors do not lock with the door handle
request switch with the Intelligent Key
inside the vehicle and a beep sounds to
warn you. However, when an Intelligent
Key is inside the vehicle, doors can be
locked with another Intelligent Key.
Page 175 of 558
HOW TO USE THE REMOTE
KEYLESS ENTRY FUNCTION
The remote keyless entry function can operate all
door locks using the remote keyless function of
the Intelligent Key. The remote keyless function
can operate at a distance of 33 ft (10 m) away
from the vehicle. The operating distance de-
pends upon the conditions around the vehicle.
The remote keyless entry function will not func-
tion under the following conditions:● When the Intelligent Key is not within the
operational range.
● When the doors or the rear liftgate are open
or not closed securely.
● When the Intelligent Key battery is dis-
charged.
Page 183 of 558

WARNING
●Always be sure the liftgate has been
closed securely to prevent it from open-
ing while driving.
● Do not drive with the liftgate open. This
could allow dangerous exhaust gases
to be drawn into the vehicle. For addi-
tional information, refer to “Exhaust
gas (carbon monoxide)” in the “Starting
and driving” section of this manual.
● To help avoid risk of injury or death
through unintended operation of the
vehicle and or its systems, including
entrapment in windows or inadvertent
door lock activation, do not leave chil-
dren, people who require the assistance
of others or pets unattended in your
vehicle. Additionally, the temperature
inside a closed vehicle on a warm day
can quickly become high enough to
cause a significant risk of injury or
death to people and pets.
● Always be sure that hands and feet are
clear of the door frame to avoid injury
while closing the liftgate.
OPERATING THE MANUAL
LIFTGATE (if so equipped)
The power door lock system allows you to lock or
unlock all doors including the liftgate simultane-
ously.
To open the liftgate, press the request switch
�A
and pull up on the handle.
To close, lower and push the liftgate down se-
curely.
OPERATING THE POWER LIFTGATE
(if so equipped)
Page 191 of 558
2. To open the fuel-filler door, push the rightside of the fuel-filler door to release.
To lock, close the fuel-filler door securely and
lock the doors.
FUEL-FILLER CAP
Page 193 of 558

WARNING
●Do not adjust the steering wheel while
driving. You could lose control of your
vehicle and cause an accident.
● Do not adjust the steering wheel any
closer to you than is necessary for
proper steering operation and comfort.
The driver’s air bag inflates with great
force. If you are unrestrained, leaning
forward, sitting sideways or out of posi-
tion in any way, you are at greater risk of
injury or death in a crash. You may also
receive serious or fatal injuries from the
air bag if you are up against it when it
inflates. Always sit back against the
seatback and as far away as practical
from the steering wheel. Always use the
seat belts.
MANUAL OPERATION (if so
equipped)
Tilt and telescopic operation
Pull the lock lever�1down:
● Adjust the steering wheel up or down in
direction
�2to the desired position.
● Adjust the steering wheel forward or back-
ward in direction
�3to the desired position.
Push the lock lever
�1up firmly to lock the
steering wheel in place.
AUTOMATIC OPERATION (if so
equipped)
Tilt and telescopic operation
To adjust the steering wheel move the switch�1
in the following directions:
● Adjust the steering wheel up or down in
direction
�2to the desired tilt position.
● Adjust the steering wheel forward or back-
ward in direction
�3to the desired tele-
scopic position.
Page 194 of 558

CAUTION
For vehicles with automatic drive posi-
tioner: Failure to reset the tilt and tele-
scoping functions of the steering wheel,
after the vehicle’s battery has been dis-
charged, may prevent the steering wheel
position from being adjusted.
For vehicles with automatic drive positioner: Both
the tilt and telescopic steering operation must be
reset after the vehicle’s battery has been dis-
charged in order to prevent the tilt and telescopic
operation from locking in one position. When the
battery has been recharged or replaced, perform
the following: ● For tilt operation, adjust the switch
�1so the
steering wheel moves to the highest position
�2that can be reached.
● For telescopic operation, adjust the switch
�1so the steering wheel moves to the most
forward and backward position
�3that can
be reached.
Performing these operations resets the range of
the steering wheel’s tilt and telescopic function.
Entry/Exit function (if so equipped)
The automatic drive positioner system will make
the steering wheel move up automatically when
the driver’s door is opened and the ignition
switch is in the LOCK position. This lets the driver
get into and out of the seat more easily. The
steering wheel moves back into position when
the driver’s door is closed and the ignition switch
is pushed.
For additional information, refer to “Automatic
drive positioner” in this section.
Page 195 of 558
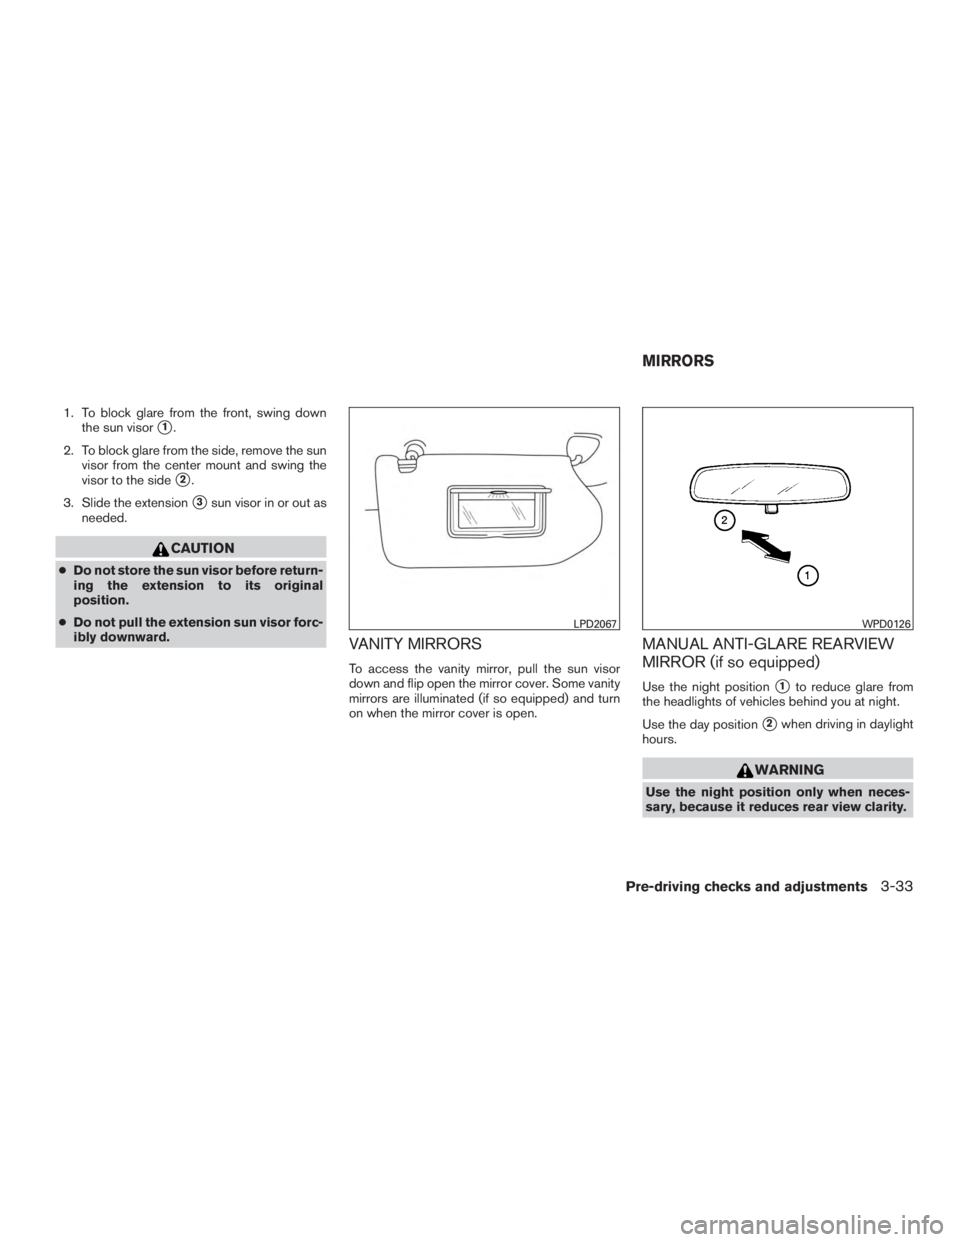
1. To block glare from the front, swing downthe sun visor
�1.
2. To block glare from the side, remove the sun visor from the center mount and swing the
visor to the side
�2.
3. Slide the extension
�3sun visor in or out as
needed.
Page 247 of 558

will interfere with the chime sound, and
it may not be heard.
● The MOD system performance will be
limited according to e")
●Excessive noise (for example, audio
system volume or open vehicle window)
will interfere with the chime sound, and
it may not be heard.
● The MOD system performance will be
limited according to environmental con-
ditions and surrounding objects such
as:
– When there is low contrast between background and the moving objects.
– When there is a blinking source of light.
– When strong light such as another vehicle’s headlight or sunlight is
present.
– When camera orientation is not in its usual position, such as when a mirror
is folded.
– When there is dirt, water drops or snow on the camera lens.
– When the position of the moving ob- jects in the display is not changed.
● The MOD system might detect flowing
water droplets on the camera lens,
white smoke from the muffler, moving
shadows, etc. ●
The MOD system may not function
properly depending on the speed, direc-
tion, distance or shape of the moving
objects.
● If your vehicle sustains damage to the
parts where the camera is installed,
leaving it misaligned or bent, the sens-
ing zone may be altered and the MOD
system may not detect objects properly.
● When the temperature is extremely
high or low, the screen may not display
objects clearly. This is not a
malfunction.
NOTE:
The blue MOD icon will change to orange if
one of the following has occurred ● When the system is malfunctioning.
● When the component temperature reaches
a high level (icon will blink) .
● When the Rear View camera has detected a
blockage (icon will blink) . :
SYSTEM MAINTENANCE