Page 100 of 466
If this indicator light comes on steady for 20 sec-
onds and then blinks for 10 seconds when the
engine is not running, it indicates that the vehicle
is not ready for an emission control system
inspection/maintenance test. For additional infor-
mation, refer to “Readiness for
inspection/maintenance (I/M) test” in the “Tech-
nical and consumer information” section of this
manual.
Operation
The MIL will come on in one of two ways:● MIL on steady — An emission control system
malfunction has been detected. Check the
fuel-filler cap if the Loose Fuel Cap warning
appears in the vehicle information display. If
the fuel-filler cap is loose or missing, tighten
or install the cap and continue to drive the
vehicle. The
Page 123 of 466
WARNING
When the LED DRL system is active, tail
lights on your vehicle are not on. It is
necessary at dusk to turn on your head-
lights. Failure to do so could cause an
accident injuring yourself and others.
INSTRUMENT BRIGHTNESS
CONTROL
Press the “-” button�Ato decrease the bright-
ness of instrument panel lights.
Press the “+” button
�Bto increase the bright-
ness of instrument panel lights.
TURN SIGNAL SWITCH
Turn signal
�1Move the lever up or down to signal the
turning direction. When the turn is com-
pleted, the turn signal cancels automatically.
Lane change signal
�2Move the lever up or down until the turn
signal begins to flash, but the lever does not
latch, to signal a lane change. Hold the lever
until the lane change is completed.
Page 126 of 466
WARNING
Do not use or allow occupants to use the
seat heater if you or the occupants can not
monitor elevated seat temperatures or
have an inability to feel pain in those body
parts in contact with the seat. Use of the
seat heater by such people could result in
serious injury.
Page 127 of 466
WARNING
Do not use or allow occupants to use the
seat heater if you or the occupants cannot
monitor elevated seat temperatures or
have an inability to feel pain in body parts
that contact the seat. Use of the seat
heater by such people could result in seri-
ous injury.
Page 143 of 466
WARNING
●To avoid personal injury, keep your
hands, fingers and head away from the
sunshade arm, the arm rail and sun-
shade inlet port.
● Do not allow children near the rear sun-
shade system. They could be injured.
● Do not place objects on or near the rear
sunshade. This could cause improper
operation or damage it.
● Do not pull or push the rear sunshade.
This could cause improper operation or
damage it.
Page 146 of 466

WARNING
●Do not use the HomeLink® Universal
Transceiver with any garage door
opener that lacks safety stop and re-
verse features as required by federal
safety standards. (These standards be-
came effective for opener models
manufactured after April 1, 1982) . A ga-
rage door opener which cannot detect
an object in the path of a closing garage
door and then automatically stop and
reverse, does not meet current federal
safety standards. Using a garage door
opener without these features in-
creases the risk of serious injury or
death.
● During the programming procedure
your garage door or security gate will
open and close (if the transmitter is
within range) . Make sure that people or
objects are clear of the garage door,
gate, etc. that you are programming.
● Your vehicle’s engine should be turned
off while programming the HomeLink®
Universal Transceiver.
PROGRAMMING HOMELINK®
If you have any questions or are having difficulty
programming your HomeLink® buttons, refer to
the HomeLink® web site at: www.homelink.com
or call 1-800-355-3515.
NOTE:
Place the ignition switch in the ACC posi-
tion (if so equipped) when programming
HomeLink®. It is also recommended that a
new battery be placed in the hand-held
transmitter of the device being pro-
grammed to HomeLink® for quicker pro-
gramming and accurate transmission of
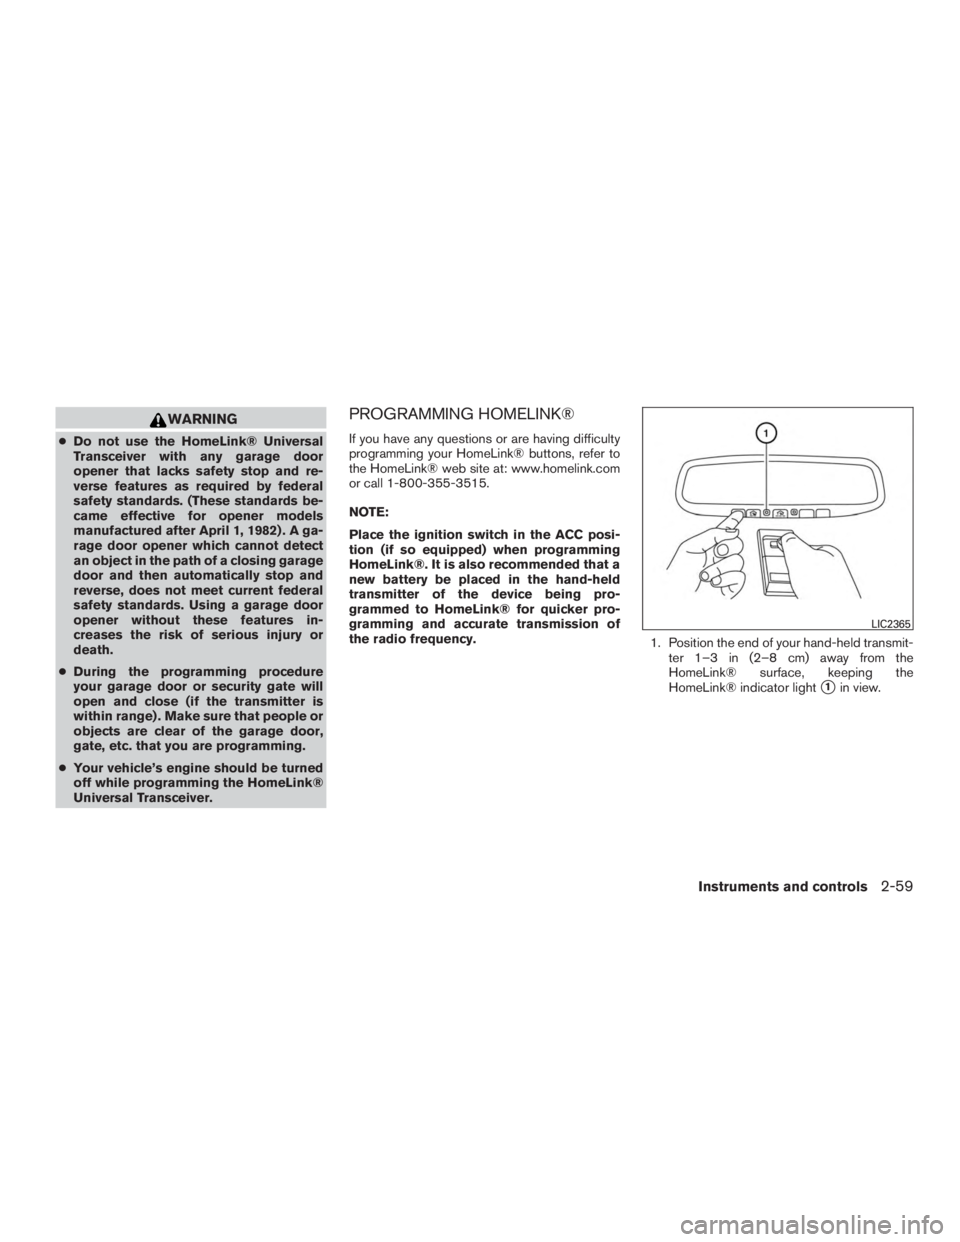
the radio frequency. 1. Position the end of your hand-held transmit-
ter 1–3 in (2–8 cm) away from the
HomeLink® surface, keeping the
HomeLink® indicator light
�1in view.
Page 175 of 466
Auto Reverse:
If an obstacle is detected during power open or
power close, a warning chime will sound and the
liftgate will reverse direction and return to the full
open or full close position. If a second obstacle is
detected, the liftgate motion will stop and the
liftgate will enter manual mode.
A pinch strip is mounted on each side of the
liftgate. If an obstacle is detected by a pinch strip
during power close, the liftgate will reverse direc-
tion and return to the full open position.
NOTE:
If the pinch strip is damaged or removed,
the power close function will not operate.
Page 181 of 466

WARNING
●Do not adjust the steering wheel while
driving. You could lose control of your
vehicle and cause an accident.
● Do not adjust the steering wheel any
closer to you than is necessary for
proper steering operation and comfort.
The driver’s air bag inflates with great
force. If you are unrestrained, leaning
forward, sitting sideways or out of posi-
tion in any way, you are at greater risk of
injury or death in a crash. You may also
receive serious or fatal injuries from the
air bag if you are up against it when it
inflates. Always sit back against the
seatback and as far away as practical
from the steering wheel. Always use the
seat belts.
MANUAL OPERATION (if so
equipped)
Tilt and telescopic operation
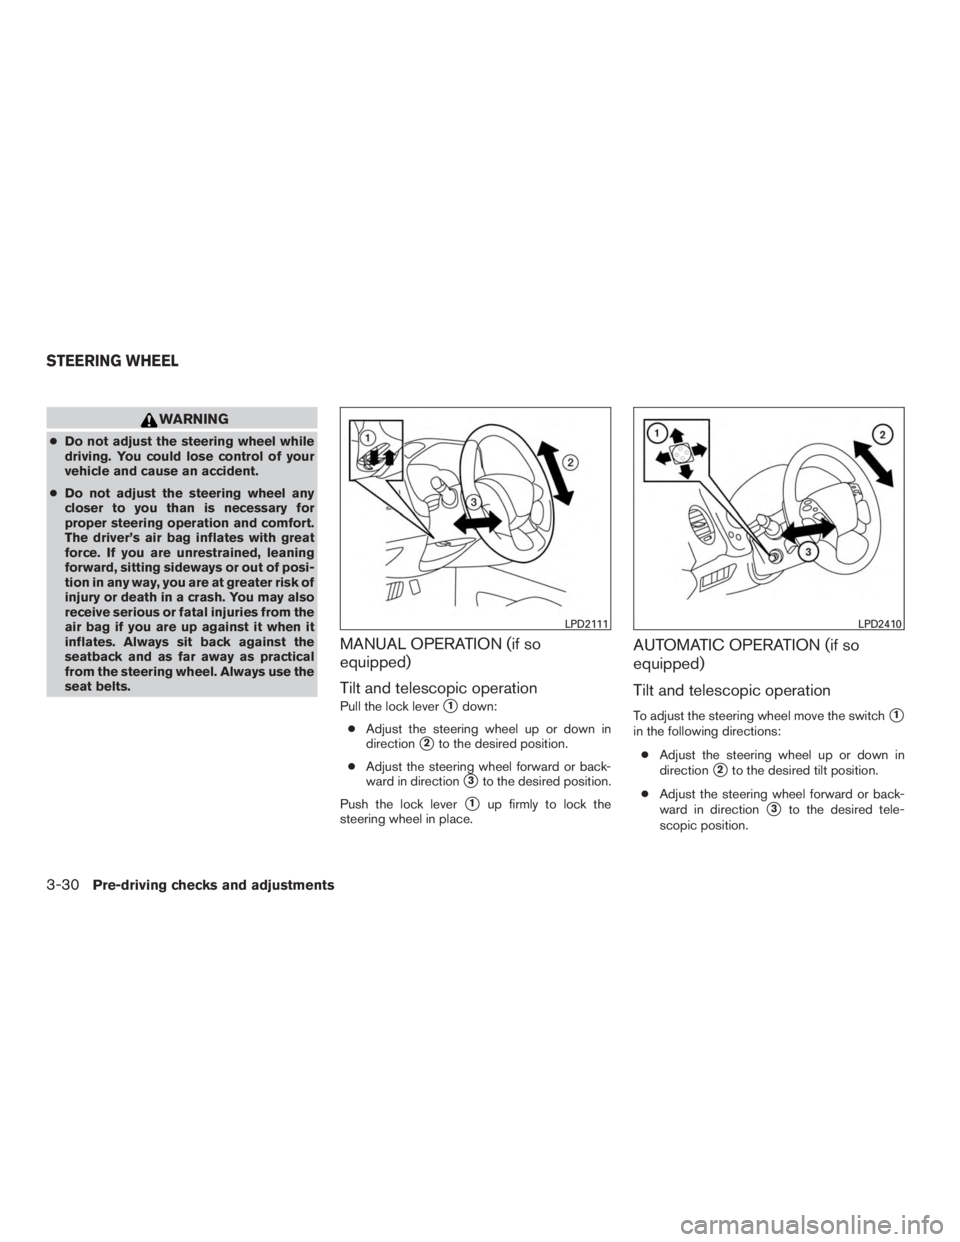
Pull the lock lever�1down:
● Adjust the steering wheel up or down in
direction
�2to the desired position.
● Adjust the steering wheel forward or back-
ward in direction
�3to the desired position.
Push the lock lever
�1up firmly to lock the
steering wheel in place.
AUTOMATIC OPERATION (if so
equipped)
Tilt and telescopic operation
To adjust the steering wheel move the switch�1
in the following directions:
● Adjust the steering wheel up or down in
direction
�2to the desired tilt position.
● Adjust the steering wheel forward or back-
ward in direction
�3to the desired tele-
scopic position.