Page 348 of 406
1. Map light
2. Personal light
3. Step light
4. Door mirror turn signal light (if soequipped)
5. Headlight assembly
6. Fog light
7. High-mounted stop light (if so
equipped)
8. License plate light
9. Backup (reversing)
10. Rear combination light
Replacement procedures
All other lights are either type A, B, C or D. When
replacing a bulb, first remove the lens, lamp
and/or cover.
Indicates bulb removal
Indicates bulb installationLDI2762
WDI0263
Do-it-yourself8-25
Page 349 of 406
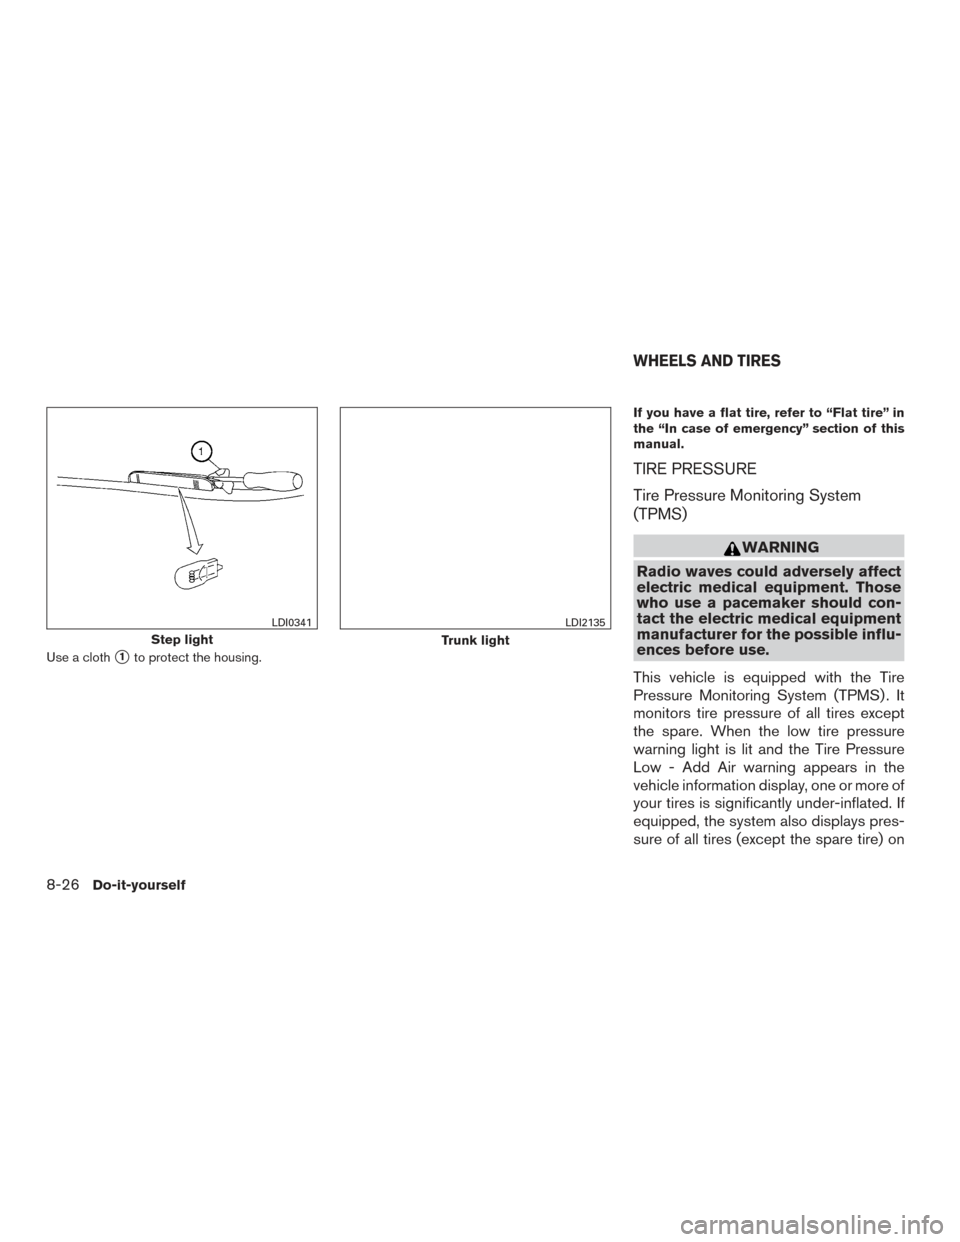
Use a cloth�1to protect the housing.If you have a flat tire, refer to “Flat tire” in
the “In case of emergency” section of this
manual.
TIRE PRESSURE
Tire Pressure Monitoring System
(TPMS)
WARNING
Radio waves could adversely affect
electric medical equipment. Those
who use a pacemaker should con-
tact the electric medical equipment
manufacturer for the possible influ-
ences before use.
This vehicle is equipped with the Tire
Pressure Monitoring System (TPMS) . It
monitors tire pressure of all tires except
the spare. When the low tire pressure
warning light is lit and the Tire Pressure
Low - Add Air warning appears in the
vehicle information display, one or more of
your tires is significantly under-inflated. If
equipped, the system also displays pres-
sure of all tires (except the spare tire) on
Step light
LDI0341
Trunk light
LDI2135
WHEELS AND TIRES
8-26Do-it-yourself
Page 350 of 406
. Also, this system may not")
the display screen by sending a signal
from a sensor that is installed in each
wheel.
The TPMS will activate only when the
vehicle is driven at speeds above 16 mph
(25 km/h). Also, this system may not de-
tect a sudden drop in tire pressure (for
example a flat tire while driving) .
For additional information, refer to “Low
tire pressure warning light” in the “Instru-
ments and controls” section, “Tire Pres-
sure Monitoring System (TPMS)” in the
“Starting and driving” section and “Flat
tire” in the “In case of emergency” section
of this manual.Tire inflation pressure
Check the tire pressures (including the
spare) often and always prior to long dis-
tance trips. The recommended tire pres-
sure specifications are shown on the
F.M.V.S.S./C.M.V.S.S. certification label
or the Tire and Loading Information label
under the�Cold Tire Pressure� heading.
The Tire and Loading Information label is
affixed to the driver side center pillar. Tire
pressures should be checked regularly
because:
● Most tires naturally lose air over time.
● Tires can lose air suddenly when
driven over potholes or other objects
or if the vehicle strikes a curb while
parking. The tire pressures should be checked
when the tires are cold. The tires are
considered COLD after the vehicle has
been parked for 3 or more hours, or driven
less than 1 mile (1.6 km) at moderate
speeds.
The TPMS with Easy Fill Tire Alert pro-
vides visual and audible signals outside
the vehicle for inflating the tires to the
recommended COLD tire pressure. For
additional information, refer to “TPMS
with Easy Fill Tire Alert” in the “Starting
and driving” section of this manual.
If the tires are used at speeds above
100 mph (162 km/h) where it is legal to
do so (on a race track for example) , the
cold tire inflation pressure must be in-
creased. For additional information, refer
to “Checking tire pressure” in this section.
Set the tire pressure to the normal cold
tire inflation pressure when the vehicle
speed or load is reduced.
Do-it-yourself8-27
Page 351 of 406

Incorrect tire pressure, including un-
der inflation, may adversely affect
tire life and vehicle handling.
WARNING
● Improperly inflated tires can fail
suddenly and cause an accident.
● The Gross Vehicle Weight Rating
(GVWR) is located on the
F.M.V.S.S./C.M.V.S.S. certifica-
tion label. The vehicle weight ca-
pacity is indicated on the Tire and
Loading Information label (if so
equipped) . Do not load your ve-
hicle beyond this capacity. Over-
loading your vehicle may result in
reduced tire life, unsafe operat-
ing conditions due to premature
tire failure, or unfavorable han-
dling characteristics and could
also lead to a serious accident.
Loading beyond the specified ca-
pacity may also result in failure of
other vehicle components. ●
Before taking a long trip, or
whenever you heavily load your
vehicle, use a tire pressure gauge
to ensure that the tire pressures
are at the specified level.
● Increase the cold tire inflation
pressure as indicated in �Check-
ing tire pressure� in this section
when using the tires specified by
NISSAN above 100 mph
(162 km/h) where it is legal to do
so (on a race track for example) .
Failure to increase the cold tire
inflation pressure may result in
tire failure, loss of control and
possible injury. After such use,
readjust tire pressure.
● For additional information re-
garding tires, refer to “Important
Tire Safety Information” (US) or
“Tire Safety Information”
(Canada) in the Warranty Infor-
mation Booklet.
8-28
Do-it-yourself
Page 352 of 406
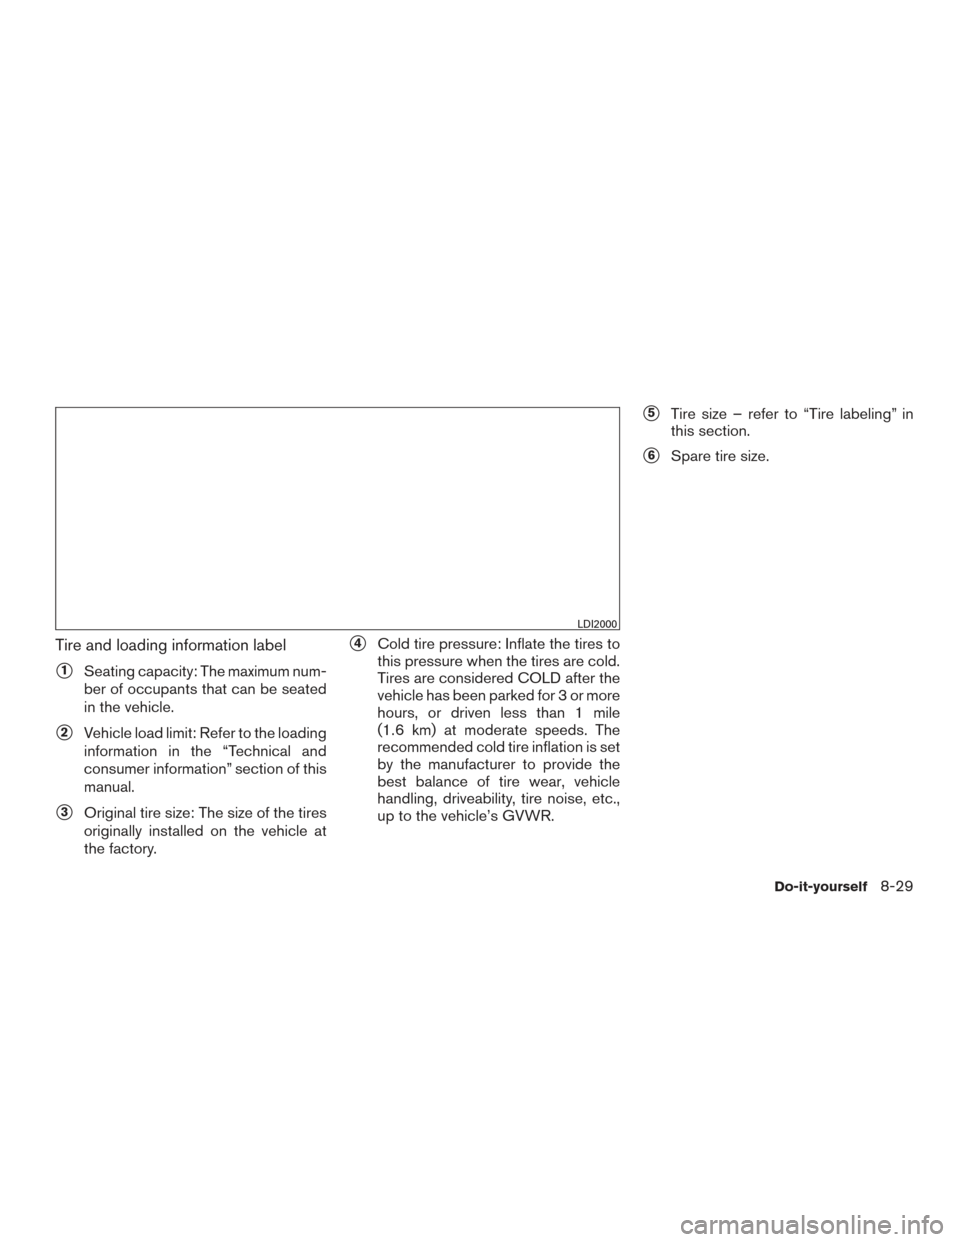
Tire and loading information label
�1Seating capacity: The maximum num-
ber of occupants that can be seated
in the vehicle.
�2Vehicle load limit: Refer to the loading
information in the “Technical and
consumer information” section of this
manual.
�3Original tire size: The size of the tires
originally installed on the vehicle at
the factory.
�4Cold tire pressure: Inflate the tires to
this pressure when the tires are cold.
Tires are considered COLD after the
vehicle has been parked for 3 or more
hours, or driven less than 1 mile
(1.6 km) at moderate speeds. The
recommended cold tire inflation is set
by the manufacturer to provide the
best balance of tire wear, vehicle
handling, driveability, tire noise, etc.,
up to the vehicle’s GVWR.
�5Tire size – refer to “Tire labeling” in
this section.
�6Spare tire size.
LDI2000
Do-it-yourself8-29
Page 353 of 406

Checking tire pressure
1. Remove the valve stem cap from thetire.
2. Press the pressure gauge squarely onto the valve stem. Do not press too
hard or force the valve stem side-
ways, or air will escape. If the hissing
sound of air escaping from the tire is
heard while checking the pressure,
reposition the gauge to eliminate this
leakage.
3. Remove the gauge. 4. Read the tire pressure on the gauge
stem and compare to the specifica-
tion shown on the Tire and Loading
Information label.
5. Add air to the tire as needed. If too much air is added, press the core of
the valve stem briefly with the tip of
the gauge stem to release pressure.
Recheck the pressure and add or
release air as needed.
6. Install the valve stem cap.
7. Check the pressure of all other tires, including the spare.
Size Cold Tire Inflation
Pressure
Front and Rear
Original Tire:
245/45R18
245/40R19
245/40WR19 33 PSI, 230 kPa
Spare Tire:
(Temporary)
T145/80D17 60 PSI, 420 kPa
Full Size Spare
Tire
245/40R19 33 PSI, 230 kPa
LDI0393
8-30Do-it-yourself
Page 354 of 406

TIRE LABELING
Federal law requires tire manufacturers to
place standardized information on the
sidewall of all tires. This information iden-
tifies and describes the fundamental
characteristics of the tire and also pro-
vides the tire identification number (TIN)
for safety standard certification. The TIN
can be used to identify the tire in case of a
recall.
�1Tire size (example: P215/65R15 95H)
1. P: The “P” indicates the tire is de- signed for passenger vehicles (not all
tires have this information) .
2. Three-digit number (215): This num- ber gives the width in millimeters of
the tire from sidewall edge to side-
wall edge.
3. Two-digit number (65): This number, known as the aspect ratio, gives the
tire’s ratio of height to width. 4. R: The “R” stands for radial.
5. Two-digit number (15): This number
is the wheel or rim diameter in inches.
6. Two- or three-digit number (95): This number is the tire’s load index. It is a
measurement of how much weight
each tire can support. You may not
find this information on all tires be-
cause it is not required by law.
7. H: Tire speed rating. You should not drive the vehicle faster than the tire
speed rating.
Example
WDI0394
Example
WDI0395
Do-it-yourself8-31
Page 355 of 406
 for a
new tire (example: DOT XX XX XXX
XXXX)
1. DOT: Abbreviation for the “Depart- ment Of Transportation”. The symbol
can be placed above, below or to the
left")
�2TIN (Tire Identification Number) for a
new tire (example: DOT XX XX XXX
XXXX)
1. DOT: Abbreviation for the “Depart- ment Of Transportation”. The symbol
can be placed above, below or to the
left or right of the Tire Identification
Number.
2. Two-digit code: Manufacturer’s identification mark.
3. Two-digit code: Tire size. 4. Three-digit code: Tire type code
(Optional) .
5. Four numbers represent the week and year the tire was built. For ex-
ample, the numbers 3103 means the
31st week of 2003. If these numbers
are missing then look on the other
sidewall of the tire.
�3Tire ply composition and material
The number of layers or plies of rubber-
coated fabric in the tire. Tire manufactur- ers also must indicate the materials in the
tire, which include steel, nylon, polyester
and others.
�4Maximum permissible inflation pressure
This number is the greatest amount of air
pressure that should be put in the tire. Do
not exceed the maximum permissible in-
flation pressure.
�5Maximum load rating
This number indicates the maximum load
in kilograms and pounds that can be car-
ried by the tire. When replacing the tires
on the vehicle, always use a tire that has
the same load rating as the factory in-
stalled tire.
�6Term of “tubeless” or “tube type”
Indicates whether the tire requires an in-
ner tube (“tube type”) or not (“tubeless”) .
�7The word “radial”
The word “radial” is shown if the tire has
radial structure.
�8Manufacturer or brand name
Manufacturer or brand name is shown.
Example
LDI2786
8-32Do-it-yourself

5. Headlight assembly
6. Fog light
7. High-mounted stop light (if so
equipped)
8. License plate light
9. B")