2017 NISSAN JUKE reset
[x] Cancel search: resetPage 2 of 28

2
3
14
5
9
16
13
1718
19
20
21
14
15
12
11
7
6
8
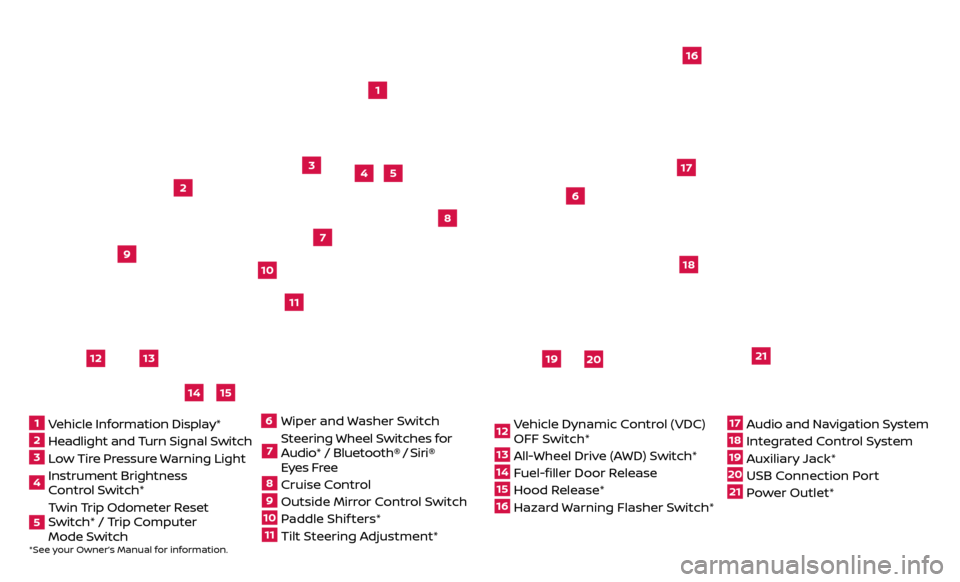
*See your Owner’s Manual for information.1 Vehicle Information Display*2 Headlight and Turn Signal Switch3 Low Tire Pressure Warning Light4 Instrument Brightness
Control Switch*5 Twin Trip Odometer Reset
Switch* / Trip Computer
Mode Switch
Wiper and
Washer Switch7 Steering Wheel Switches for
Audio* / Bluetooth®
/ Siri®
Eyes Free
8 Cruise Control9 Outside Mirr or Control Switch10 Paddle Shif ters*11 Tilt Steering Adjustment*
12 Vehicle Dynamic Control (VDC)
OFF Switch*13 All-Wheel Drive (AWD) Switch*14 Fuel-filler Door Release15 Hood Release*16 Hazard Warning Flasher Switch*
17 Audio and Navigation System18 Integrated Control System19 Auxiliary Jack*20 USB Connection Port21 Power Outlet*
610
Page 8 of 28

6
ESSENTIAL INFORMATION
TOWING YOUR VEHICLE
ALL-WHEEL DRIVE (AWD) VEHICLE
An all-wheel drive vehicle must be towed with all wheels off the ground even if the vehicle is in the 2WD mode.
For proper towing and to avoid accidental damage to your vehicle, NISSAN
recommends that a service operator tow your vehicle af ter carefully reading the
Owner’s Manual precautions.
Please see your Owner’s Manual for important safety information, system limitations, and additional
operating and feature information.
For more information, refer to the “In case of emergency (section 6)” of your Owner’s Manual.
LOOSE FUEL CAP
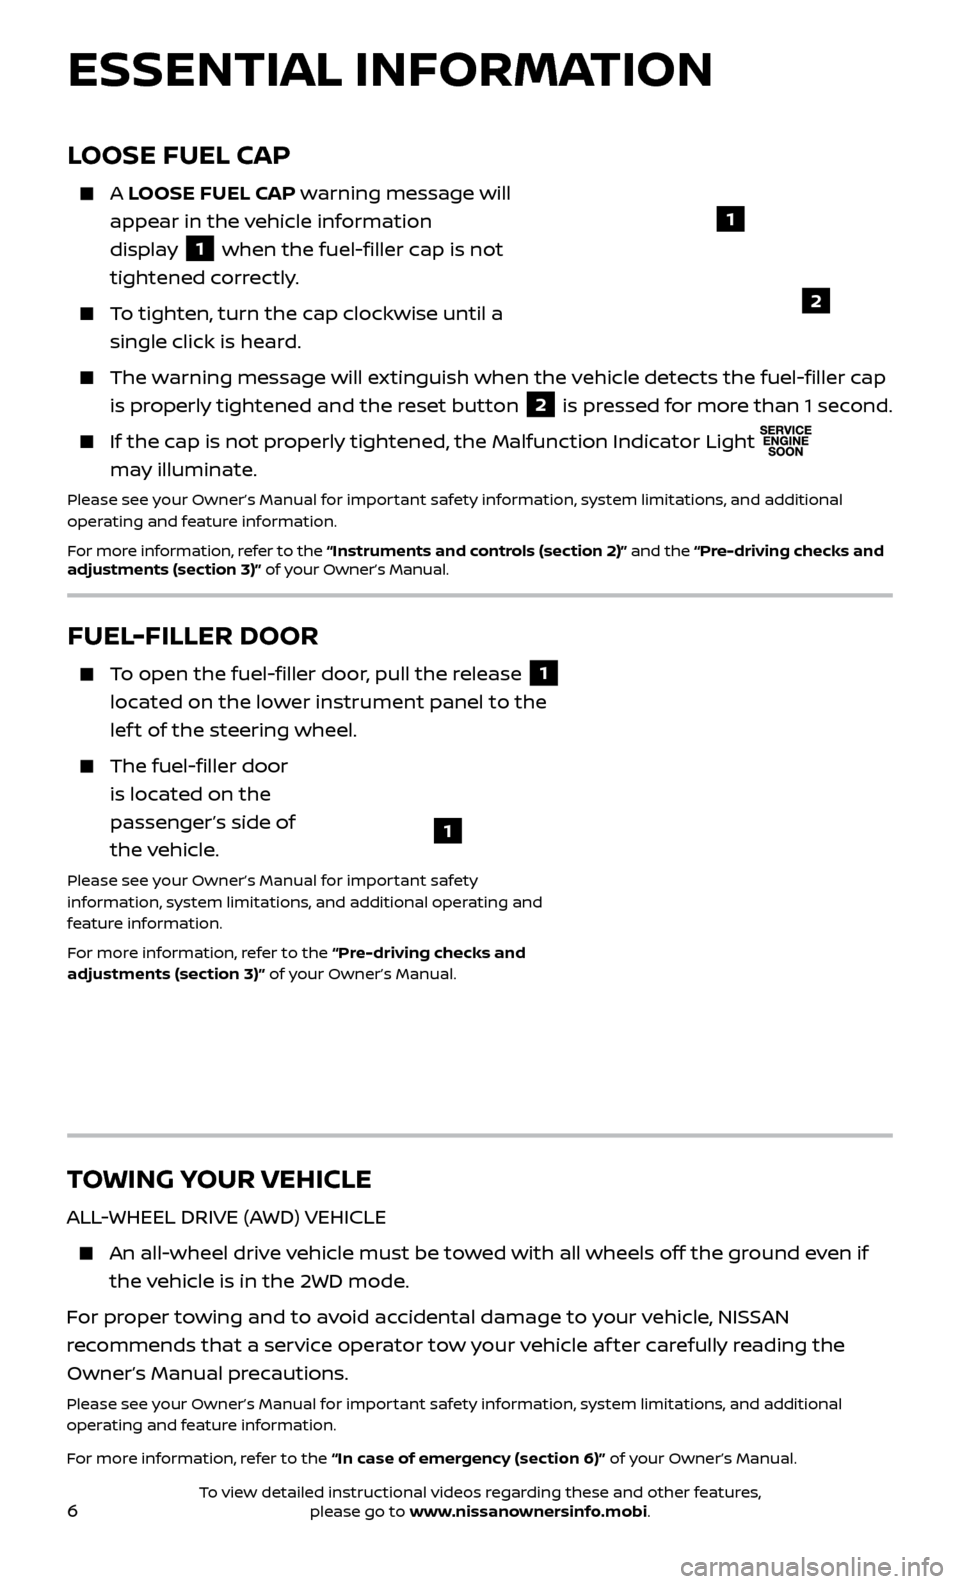
A LOOSE FUEL CAP warning message will
appear in the vehicle information
display
1 when the fuel-filler cap is not
tightened correctly.
To tighten, turn the cap clockwise until a single click is heard.
The warning message will extinguish when the vehicle detects the fuel-filler cap is properly tightened and the reset button
2 is pressed for more than 1 second.
If the cap is not properly tightened, the Malfunction Indicator Light
may illuminate.
Please see your Owner’s Manual for important safety information, system limitations, and additional
operating and feature information.
For more information, refer to the “Instruments and controls (section 2)” and the “Pre-driving checks and
adjustments (section 3)” of your Owner’s Manual.
1
2
FUEL-FILLER DOOR
To open the fuel-filler door, pull the release 1
located on the lower instrument panel to the
lef t of the steering wheel.
The fuel-filler door is located on the
passenger’s side of
the vehicle.
Please see your Owner’s Manual for important safety
information, system limitations, and additional operating and
feature information.
For more information, refer to the “Pre-driving checks and
adjustments (section 3)” of your Owner’s Manual.
1
To view detailed instructional videos regarding these and other features, please go to www.nissanownersinfo.mobi.
Page 18 of 28

16
21
56
3
FM/AM/SiriusXM® SATELLITE RADIO WITH CD PLAYER
(if so equipped)
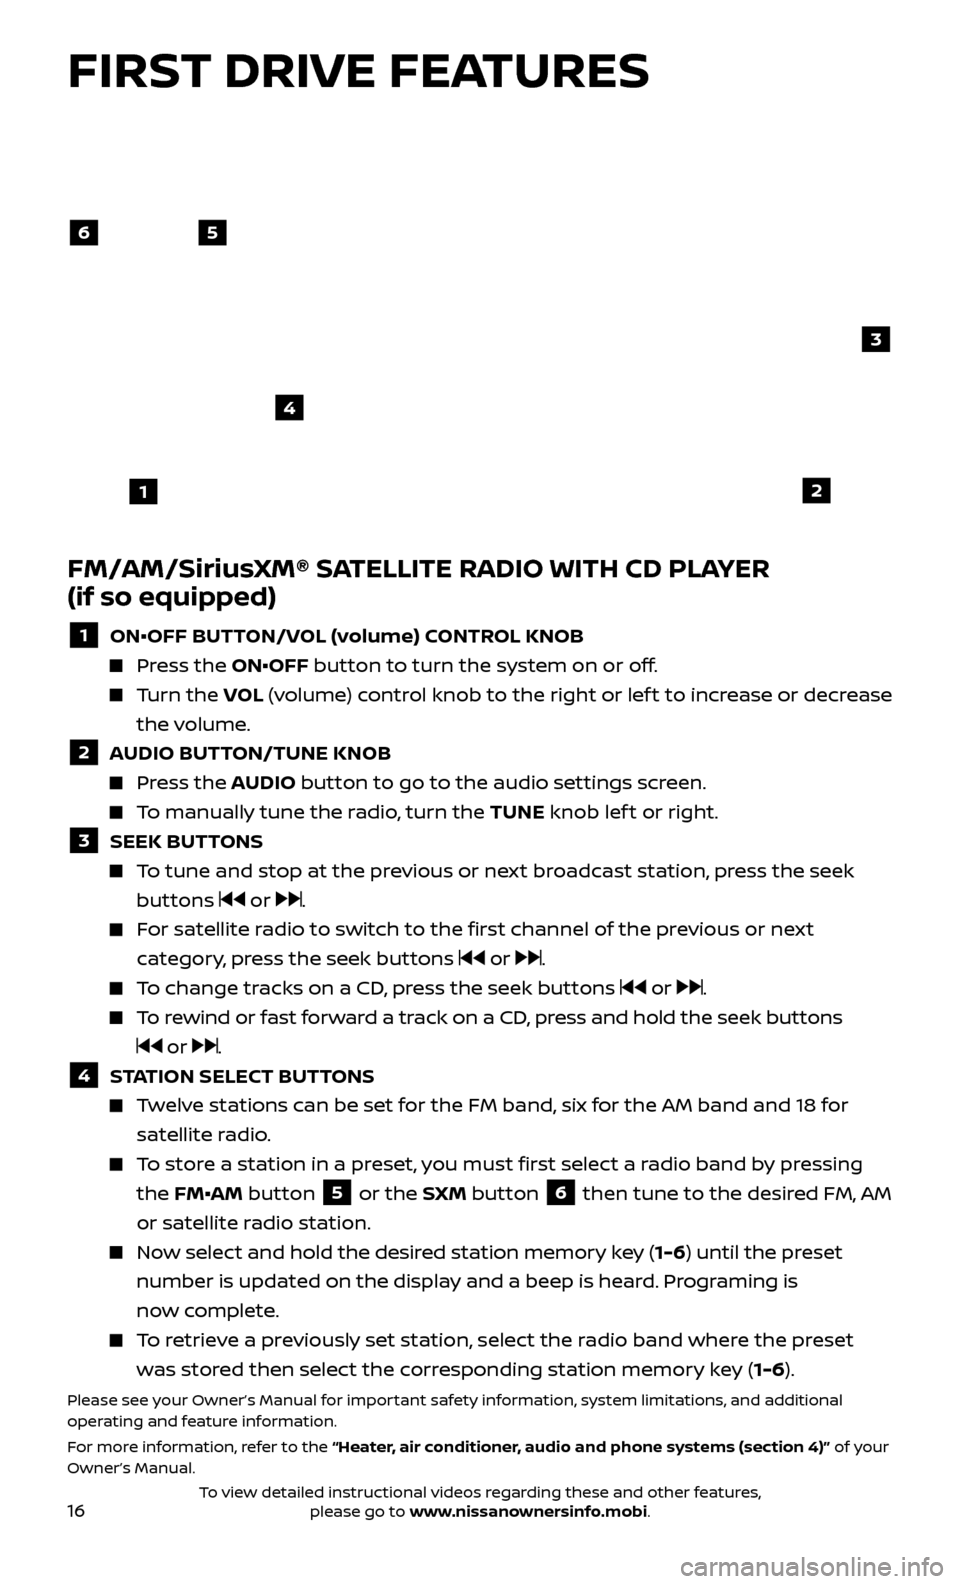
1 ON•OFF BUTTON/VOL (volume) CONTROL KNOB
Press the ON•OFF button to turn the system on or off.
Turn the V OL (volume) control knob to the right or lef t to increase or decrease
the volume.
2 AUDIO BUTTON/TUNE KNOB
Press the AUDIO button to go to the audio settings screen.
To manually tune the radio, turn the TUNE knob lef t or right.
3 SEEK BUT TONS
To tune and stop at the previous or next broadcast station, press the seek
buttons
or .
For satellite radio to switch to the first channel of the previous or next category, press the seek buttons
or .
To change tracks on a CD, press the seek buttons or .
To rewind or fast forward a track on a CD, press and hold the seek buttons
or .
4 STATION SELECT BUTTONS
Twelve stations can be set for the FM band, six for the AM band and 18 for
satellite radio.
To store a station in a preset, you must first select a radio band by pressing the FM•AM button
5 or the SXM button 6 then tune to the desired FM, AM
or satellite radio station.
Now select and hold the desired station memory key (1-6) until the preset number is updated on the display and a beep is heard. Programing is
now complete.
To retrieve a previously set station, select the radio band where the preset was stored then select the corresponding station memory key (1-6).
Please see your Owner’s Manual for important safety information, system limitations, and additional
operating and feature information.
For more information, refer to the “Heater, air conditioner, audio and phone systems (section 4)” of your
Owner’s Manual.
4
FIRST DRIVE FEATURES
To view detailed instructional videos regarding these and other features, please go to www.nissanownersinfo.mobi.
Page 19 of 28

17
CRUISE CONTROL
The cruise control system enables you to set
a constant cruising speed once the vehicle
has reached 25 mph (40 km/h).
The system wil l automatically maintain the
set speed until you tap the brake pedal,
accelerate, cancel or turn the system off.
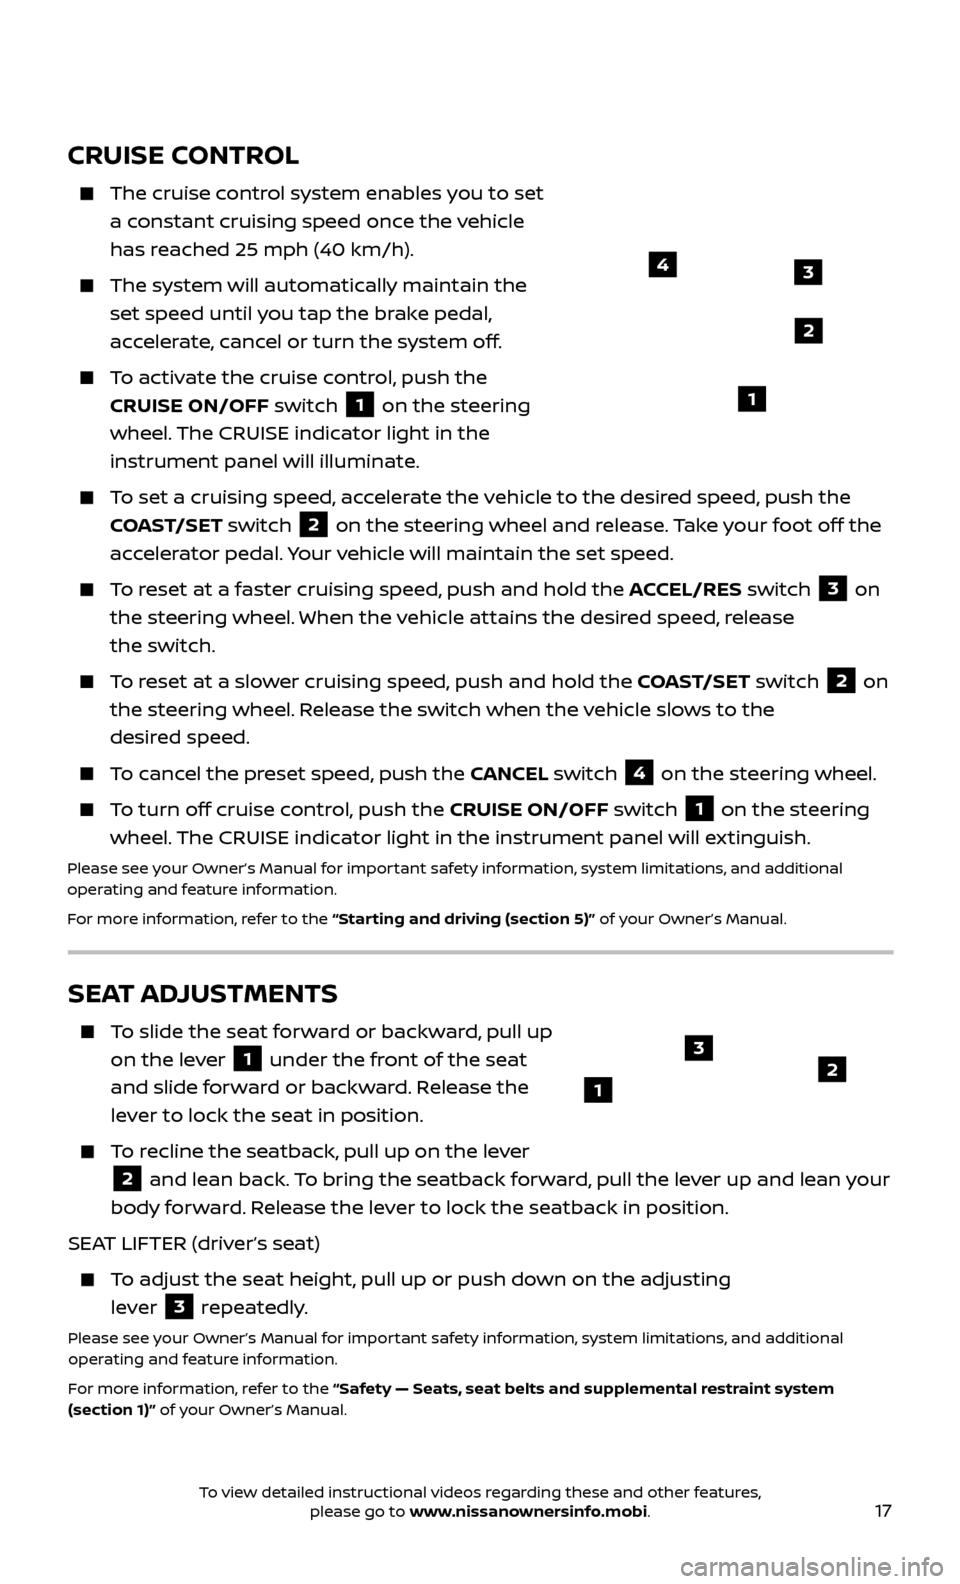
To activate the cruise control, push the CRUISE ON/OFF switch
1 on the steering
wheel. The CRUISE indicator light in the
instrument panel will illuminate.
To set a cruising speed, accelerate the vehicle to the desired speed, push the COAST/SET switch
2 on the steering wheel and release. Take your foot off the
accelerator pedal. Your vehicle will maintain the set speed.
To reset at a faster cruising speed, push and hold the ACCEL/RES switch 3 on
the steering wheel. When the vehicle attains the desired speed, release
the switch.
To reset at a slower cruising speed, push and hold the COAST/SET switch 2 on
the steering wheel. Release the switch when the vehicle slows to the
desired speed.
To cancel the preset speed, push the CANCEL switch 4 on the steering wheel.
To turn off cruise control, push the CRUISE ON/OFF switch 1 on the steering
wheel. The CRUISE indicator light in the instrument panel will extinguish.
Please see your Owner’s Manual for important safety information, system limitations, and additional
operating and feature information.
For more information, refer to the “Starting and driving (section 5)” of your Owner’s Manual.
43
2
1
SEAT ADJUSTMENTS
To slide the seat forward or backward, pull up on the lever
1 under the front of the seat
and slide forward or backward. Release the
lever to lock the seat in position.
To recline the seatback, pull up on the lever
2 and lean back. To bring the seatback forward, pull the lever up and lean your
body forward. Release the lever to lock the seatback in position.
SEAT LIFTER (driver’s seat)
To adjust the seat height, pull up or push down on the adjusting lever
3 repeatedly.Please see your Owner’s Manual for important safety information, system limitations, and additional
operating and feature information.
For more information, refer to the “Safety — Seats, seat belts and supplemental restraint system
(section 1)” of your Owner’s Manual.
123
To view detailed instructional videos regarding these and other features, please go to www.nissanownersinfo.mobi.
Page 20 of 28

18
TRIP COMPUTER
With the ignition switch in the ON position, trip
computer
1 modes can be selected by pushing
the trip computer mode switch
2 on the
instrument panel. The following modes can be
selected in the display:
Trip A – measures the distance of one specific trip.
Trip B – measures the distance of a second specific trip.
Current Fuel Consumption – displays the current fuel consumption.
Distance to Empty (dte ) – displays the estimated distance to empty the vehicle
can be driven before refueling.
Average Fuel Consumption – displays the average fuel consumption since the
last reset.
Torque Vectoring AWD (AWD model) – displays the current amount of torque distributed to each wheel.
Push the trip computer mode switch
2 for approximately 1 second to reset the
currently displayed trip odometer to zero.
Please see your Owner’s Manual for important safety information, system limitations, and additional
operating and feature information.
For more information, refer to the “Instruments and controls (section 2)” of your Owner’s Manual.
SYSTEM GUIDE
TEXT MESSAGING*
This system al lows for sending and receiving
text messages through the vehicle’s interface.
Using predefined or custom messages, send a text to an entry stored in your Bluetooth®
Hands-free Phone System.
Once enabled, the text message, sender and delivery time are shown on the control panel
display when the vehicle speed is less than 5 mph (8 km/h).
Text messages have the option of being read aloud at all vehicle speeds.
Many cellular phones may require special permission to enable text messaging. Check the cellular phone’s screen during Bluetooth® pairing. For some cellular
phones, you need to enable “Notifications” in the cellular phone’s Bluetooth®
menu for text messages to appear on the touch-screen display. For more
information and instructions, refer to your cellular phone’s Owner’s Manual.
Text message integration requires that the celllular phone support Message Access Profile (MAP) for both receiving and sending text messages. Some cellular
phones may not support all text messaging features. Please see
www.NissanUSA.com/bluetooth for compatibility information as well as your
device’s Owner’s Manual.
* Laws in some jurisdictions may restrict the use of “Text-to-Speech”. Some of the applications and features, such as social networking and texting, may also be restricted. Check local regulations for any
requirements before using these features.
Please see your Owner’s Manual for important safety information, system limitations, and additional
operating and feature information.
For more information, refer to the “Heater, air conditioner, audio and phone systems (section 4)” of your
Owner’s Manual.
2
1
To view detailed instructional videos regarding these and other features, please go to www.nissanownersinfo.mobi.