2017 NISSAN FRONTIER warning
[x] Cancel search: warningPage 406 of 478
Replacing wheels and tires
When replacing a tire, use the same size, tread
design, speed rating and load carrying capacity
as originally equipped. For additional information,
refer to “Wheels and tires” in the “Technical and
consumer information” section of this manual.
WARNING
●The use of tires other than those recom-
mended or the mixed use of tires of
different brands, construction (bias,
bias-belted or radial) , or tread patterns
can adversely affect the ride, braking,
handling, Vehicle Dynamic Control
(VDC) system, ground clearance, body-
to-tire clearance, tire chain clearance,
speedometer calibration, headlight aim
and bumper height. Some of these ef-
fects may lead to accidents and could
result in serious personal injury.
● If your vehicle was originally equipped
with 4 tires that were the same size and
you are only replacing 2 of the 4 tires,
install the new tires on the rear axle.
Placing new tires on the front axle may
cause loss of vehicle control in some
driving conditions and cause an acci-
dent and personal injury. ●
If the wheels are changed for any rea-
son, always replace with wheels which
have the same off-set dimension.
Wheels of a different off-set could
cause premature tire wear, degrade ve-
hicle handling characteristics, affect the
VDC system and/or interference with
the brake discs. Such interference can
lead to decreased braking efficiency
and/or early brake pad wear. For addi-
tional information on wheel off-set di-
mensions, refer to “Wheels and tires” in
the “Technical and consumer informa-
tion” section of this manual.
● Since the spare tire is not equipped with
the TPMS, when a spare tire is mounted
or a wheel is replaced, tire pressure will
not be indicated, the TPMS will not
function and the low tire pressure warn-
ing light will flash for approximately
1 minute. The light will remain on after
1 minute. Have your tires replaced
and/or TPMS system reset as soon as
possible. It is recommended that you
visit a NISSAN dealer for this service.
● Replacing tires with those not originally
specified by NISSAN could affect the
proper operation of the TPMS. ●
The TPMS sensor may be damaged if it
is not handled correctly. Be careful
when handling the TPMS sensor.
● When replacing the TPMS sensor, the
ID registration may be required. It is
recommended that you visit a NISSAN
dealer for ID registration.
● Do not use a valve stem cap that is not
specified by NISSAN. The valve stem
cap may become stuck.
● Be sure that the valve stem caps are
correctly fitted. Otherwise the valve may
be clogged up with dirt and cause a
malfunction or loss of pressure.
● Do not install a damaged or deformed
wheel or tire even if it has been re-
paired. Such wheels or tires could have
structural damage and could fail with-
out warning.
● The use of retread tires is not
recommended.
● For additional information regarding
tires, refer to “Important Tire Safety In-
formation” (US) or “Tire Safety Informa-
tion” (Canada) in the Warranty Informa-
tion Booklet.
Do-it-yourself8-39
Page 411 of 478
Seat belts:Check that all parts of the seat belt
system (for example, buckles, anchors, adjusters
and retractors) operate properly and smoothly,
and are installed securely. Check the belt web-
bing for cuts, fraying, wear or damage.
Steering wheel: Check for changes in the
steering system, such as excessive free play,
hard steering or strange noises.
Warning lights and chimes: Make sure all
warning lights and chimes are operating properly.
Windshield defroster: Check that the air
comes out of the defroster outlets properly and in
sufficient quantity when operating the heater or
air conditioner.
Windshield wiper and washer*: Check that
the wipers and washer operate properly and that
the wipers do not streak.
Under the hood and vehicle
The maintenance items listed here should be
checked periodically (for example, each time you
check the engine oil or refuel) .
Battery*: Check the fluid level in each cell. The
fluid should be at the bottom of the filler opening.
Vehicles operated in high temperatures or under
severe conditions require frequent checks of the
battery fluid level. NOTE:
Care should be taken to avoid situations
that can lead to potential battery discharge
and potential no-start conditions such as:
1. Installation or extended use of elec-
tronic accessories that consume bat-
tery power when the engine is not run-
ning (Phone chargers, GPS, DVD
players, etc.) .
2. Vehicle is not driven regularly and/or
only driven short distances.
In these cases, the battery may need to be
charged to maintain battery health.
Brake fluid level*: Make sure that the brake
fluid level is between the MAX and MIN lines on
the reservoir.
Engine coolant level*: Check the coolant level
when the engine is cold.
Engine drive belts*: Make sure the drive belts
are not frayed, worn, cracked or oily.
Engine oil level*: Check the level after parking
the vehicle on a level spot and turning off the
engine. Wait more than 15 minutes for the oil to
drain back into the oil pan. Exhaust system:
Make sure there are no loose
supports, cracks or holes. If the sound of the
exhaust seems unusual or there is a smell of
exhaust fumes, immediately have the exhaust
system inspected. It is recommended that you
visit a NISSAN dealer for this service. For addi-
tional information, refer to “Exhaust gas (carbon
monoxide)” in the “Starting and driving” section of
this manual.
Fluid leaks: Check under the vehicle for fuel, oil,
water or other fluid leaks after the vehicle has
been parked for a while. Water dripping from the
air conditioner after use is normal. If you should
notice any leaks or if fuel fumes are evident,
check for the cause and have it corrected imme-
diately.
Power steering fluid level* and lines: Check
the level when the fluid is cold, with the engine
off. Check the lines for proper attachment, leaks,
cracks, etc.
Radiator and hoses: Check the front of the
radiator and clean off any dirt, insects, leaves,
etc., that may have accumulated. Make sure the
hoses have no cracks, deformation, rot or loose
connections.
9-4Maintenance and schedules
Page 430 of 478
Aftermarket fuel additives
NISSAN does not recommend the use of any
aftermarket fuel additives (for example, fuel injec-
tor cleaner, octane booster, intake valve deposit
removers, etc.) which are sold commercially.
Many of these additives intended for gum, varnish
or deposit removal may contain active solvents or
similar ingredients that can be harmful to the fuel
system and engine.
Octane rating tips
Using unleaded gasoline with an octane
rating lower than recommended can cause
persistent, heavy “spark knock.” (“Spark
knock” is a metallic rapping noise.) If se-
vere, this can lead to engine damage. If you
detect a persistent heavy spark knock even
when using gasoline of the stated octane
rating, or if you hear steady spark knock
while holding a steady speed on level
roads, have a NISSAN dealer correct the
condition. Failure to correct the condition
is misuse of the vehicle, for which NISSAN
is not responsible.
Incorrect ignition timing may result in spark
knock, after-run and/or overheating, which may
cause excessive fuel consumption or engine
damage. If any of the above symptoms are en-countered, have your vehicle checked. It is rec-
ommended that you visit a NISSAN dealer for
servicing.
However, now and then you may notice
light spark knock for a short time while
accelerating or driving up hills. This is not a
cause for concern, because you get the
greatest fuel benefit when there is light
spark knock for a short time under heavy
engine load.FLEXIBLE FUEL VEHICLE (FFV) FUEL
RECOMMENDATION (if so equipped)
Your vehicle is designed to use (E-85) Fuel Etha-
nol, “Regular” unleaded regular gasoline or any
percentage of the two fuels combined.
U.S. government regulations require Fuel
Ethanol dispensing pumps to have a small,
square, orange and black label with the
common abbreviation or the appropriate
percentage for that region.
CAUTION
Use of other fuels such as Fuel Methanol
may cause powertrain damage or a loss of
vehicle performance.
Under no circumstances should a leaded
gasoline be used, because this will cause
damage to the three-way catalyst.
General information
This information is for Flexible Fuel vehicles (FFV)
only. FFV vehicles can be identified by the fuel
filler door label that states Ethanol (E-85) or
Unleaded Gasoline Only. This section only cov-
ers those subjects that are unique to Flexible Fuel
vehicles.
CAUTION
Only vehicles with the E-85 filler door la-
bel can operate on E-85. Fuel system or
other damage can occur if E-85 is used in
vehicles that are not designed to run on
E-85.
Ethanol Fuel (E-85)
E-85 is a mixture of approximately 85% fuel etha-
nol and 15% unleaded gasoline.
WARNING
●
Ethanol vapors are extremely flam-
mable and could cause serious per-
sonal injury.
Technical and consumer information10-7
Page 440 of 478
WARNING
● It is extremely dangerous to ride
in a cargo area inside a vehicle. In
a collision, people riding in these
areas are more likely to be seri-
ously injured or killed.
● Do not allow people to ride in any
area of your vehicle that is not
equipped with seats and seat
belts.
● Be sure everyone in your vehicle
is in a seat and using a seat belt
properly.
TERMS
It is important to familiarize yourself with
the following terms before loading your
vehicle:
● Curb Weight (actual weight of your
vehicle) - vehicle weight including:
standard and optional equipment, flu-
ids, emergency tools, and spare tire
assembly. This weight does notin-
clude passengers and cargo. ●
GVW (Gross Vehicle Weight) - curb
weight plus the combined weight of
passengers and cargo.
● GVWR (Gross Vehicle Weight Rat-
ing) - maximum total combined
weight of the unloaded vehicle, pas-
sengers, luggage, hitch, trailer
tongue load and any other optional
equipment. This information is lo-
cated on the F.M.V.S.S./C.M.V.S.S.
certification label.
● GAWR (Gross Axle Weight Rating) -
maximum weight (load) limit specified
for the front or rear axle. This informa-
tion is located on the
F.M.V.S.S./C.M.V.S.S. certification
label.
● GCWR (Gross Combined Weight
rating) - The maximum total weight
rating of the vehicle, passengers,
cargo, and trailer. ●
Vehicle Capacity Weight, Load limit,
Total load capacity - maximum total
weight limit specified of the load
(passengers and cargo) for the ve-
hicle. This is the maximum combined
weight of occupants and cargo that
can be loaded into the vehicle. If the
vehicle is used to tow a trailer, the
trailer tongue weight must be in-
cluded as part of the cargo load. This
information is located on the Tire and
Loading Information label.
● Cargo capacity - permissible weight
of cargo, the subtracted weight of
occupants from the load limit.VEHICLE LOAD CAPACITY
Before driving a loaded vehicle, confirm
that you do not exceed the Gross Vehicle
Weight Rating (GVWR) or the Gross Axle
Weight Rating (GAWR) for your vehicle.
Both the GVWR and GAWR are located
on the F.M.V.S.S./C.M.V.S.S. certification
label. For additional information, refer to
“Measurement of weights” in this section.
VEHICLE LOADING INFORMATION
Technical and consumer information10-17
Page 442 of 478
Steps for determining correct load
limit
1. Locate the statement “The combinedweight of occupants and cargo
should never exceed XXX lbs or XXX
kg” on your vehicle’s placard.
2. Determine the combined weight of the driver and passengers that will be
riding in your vehicle.
3. Subtract the combined weight of the driver and passengers from XXX lbs
or XXX kg.
4. The resulting figure equals the avail- able amount of cargo and luggage
load capacity. For example, if the
XXX amount equals 1,400 lbs. and
there will be five 150 lb. passengers
in your vehicle, the amount of avail-
able cargo and luggage load capac-
ity is 650 lbs. (1,400-750 (5 X 150)
= 650 lbs) or (640-340 (5 X 70) =
300 kg.) 5. Determine the combined weight of
luggage and cargo being loaded on
the vehicle. That weight may not
safely exceed the available cargo and
luggage load capacity calculated in
step 4.
6. If your vehicle will be towing a trailer, load from your trailer will be trans-
ferred to your vehicle. Consult this
manual to determine how this re-
duces the available cargo and lug-
gage load capacity of your vehicle.
Before driving a loaded vehicle, confirm
that you do not exceed the GVWR or the
GAWR for your vehicle. For additional
information, refer to “Measurement of
weights” in this section.
Also check tires for proper inflation pres-
sures. For additional information, refer to
the “Tire and Loading Information label” in
the “Do-it-yourself” section of this
manual.
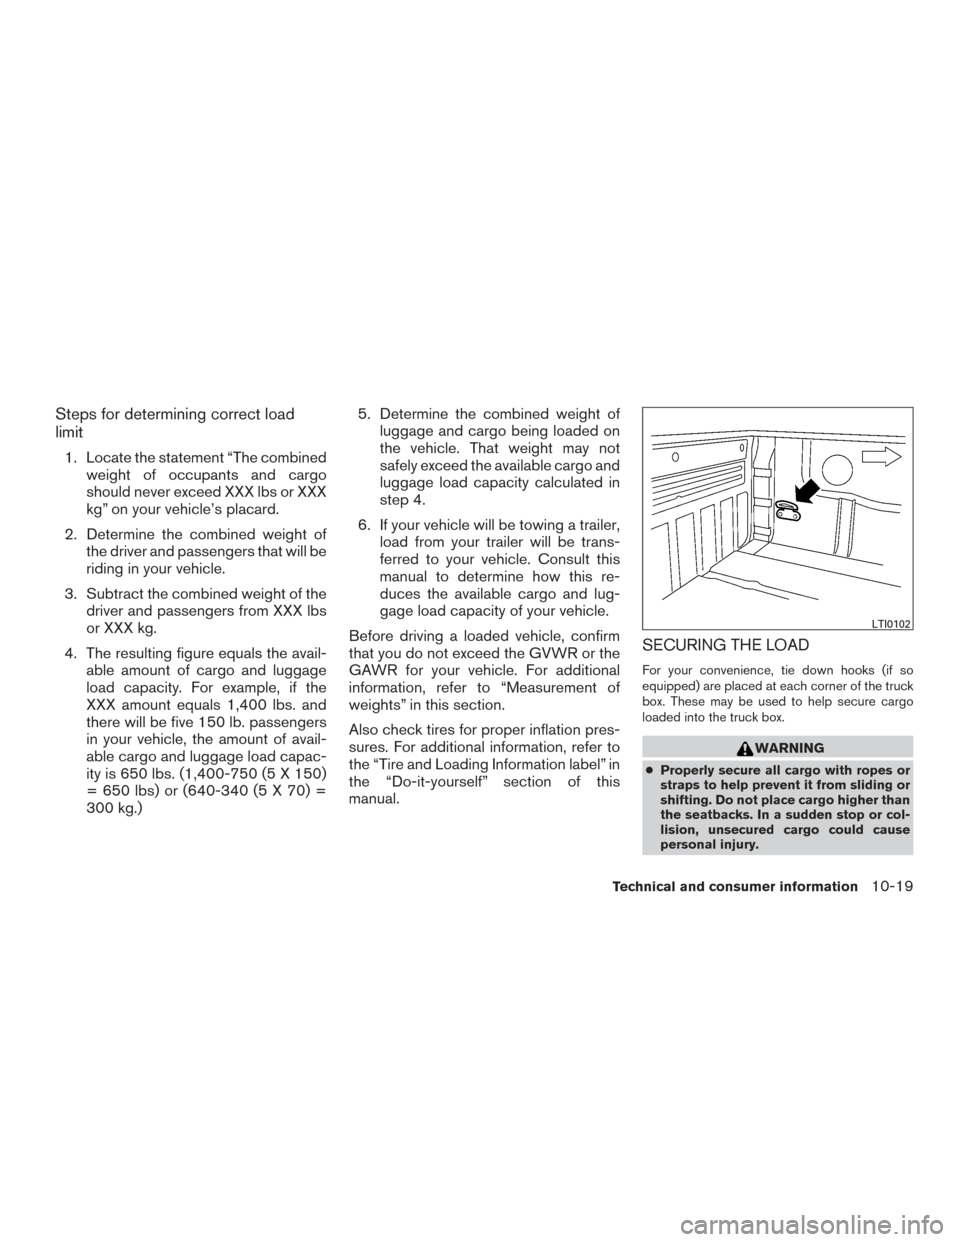
SECURING THE LOAD
For your convenience, tie down hooks (if so
equipped) are placed at each corner of the truck
box. These may be used to help secure cargo
loaded into the truck box.
WARNING
● Properly secure all cargo with ropes or
straps to help prevent it from sliding or
shifting. Do not place cargo higher than
the seatbacks. In a sudden stop or col-
lision, unsecured cargo could cause
personal injury.
LTI0102
Technical and consumer information10-19
Page 443 of 478
●Do not load your vehicle any heavier
than the GVWR or the maximum front
and rear GAWRs. If you do, parts of your
vehicle can break, tire damage could
occur, or it can change the way your
vehicle handles. This could result in loss
of control and cause personal injury.
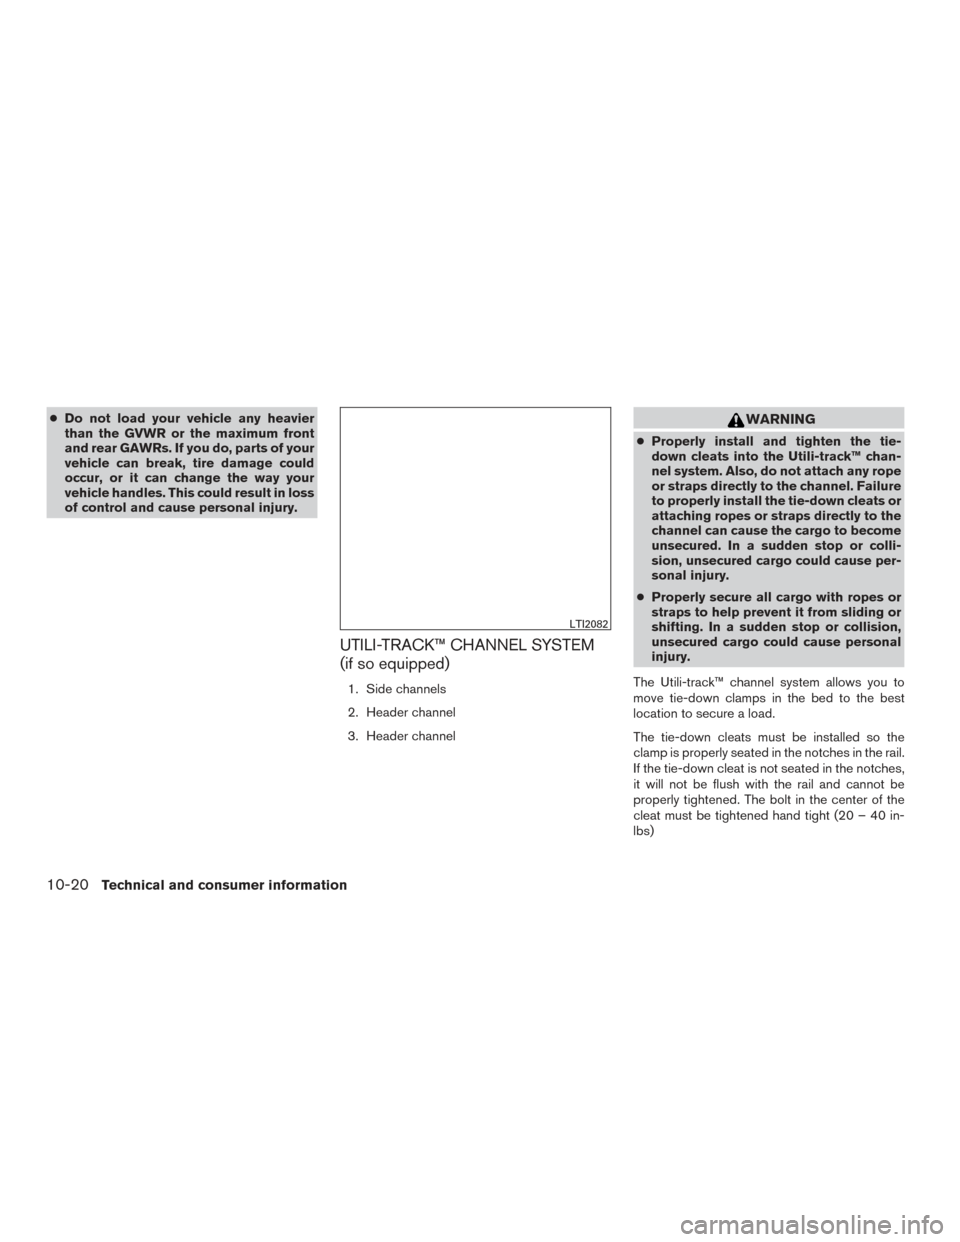
UTILI-TRACK™ CHANNEL SYSTEM
(if so equipped)
1. Side channels
2. Header channel
3. Header channel
WARNING
●Properly install and tighten the tie-
down cleats into the Utili-track™ chan-
nel system. Also, do not attach any rope
or straps directly to the channel. Failure
to properly install the tie-down cleats or
attaching ropes or straps directly to the
channel can cause the cargo to become
unsecured. In a sudden stop or colli-
sion, unsecured cargo could cause per-
sonal injury.
● Properly secure all cargo with ropes or
straps to help prevent it from sliding or
shifting. In a sudden stop or collision,
unsecured cargo could cause personal
injury.
The Utili-track™ channel system allows you to
move tie-down clamps in the bed to the best
location to secure a load.
The tie-down cleats must be installed so the
clamp is properly seated in the notches in the rail.
If the tie-down cleat is not seated in the notches,
it will not be flush with the rail and cannot be
properly tightened. The bolt in the center of the
cleat must be tightened hand tight (20 – 40 in-
lbs)
LTI2082
10-20Technical and consumer information
Page 447 of 478
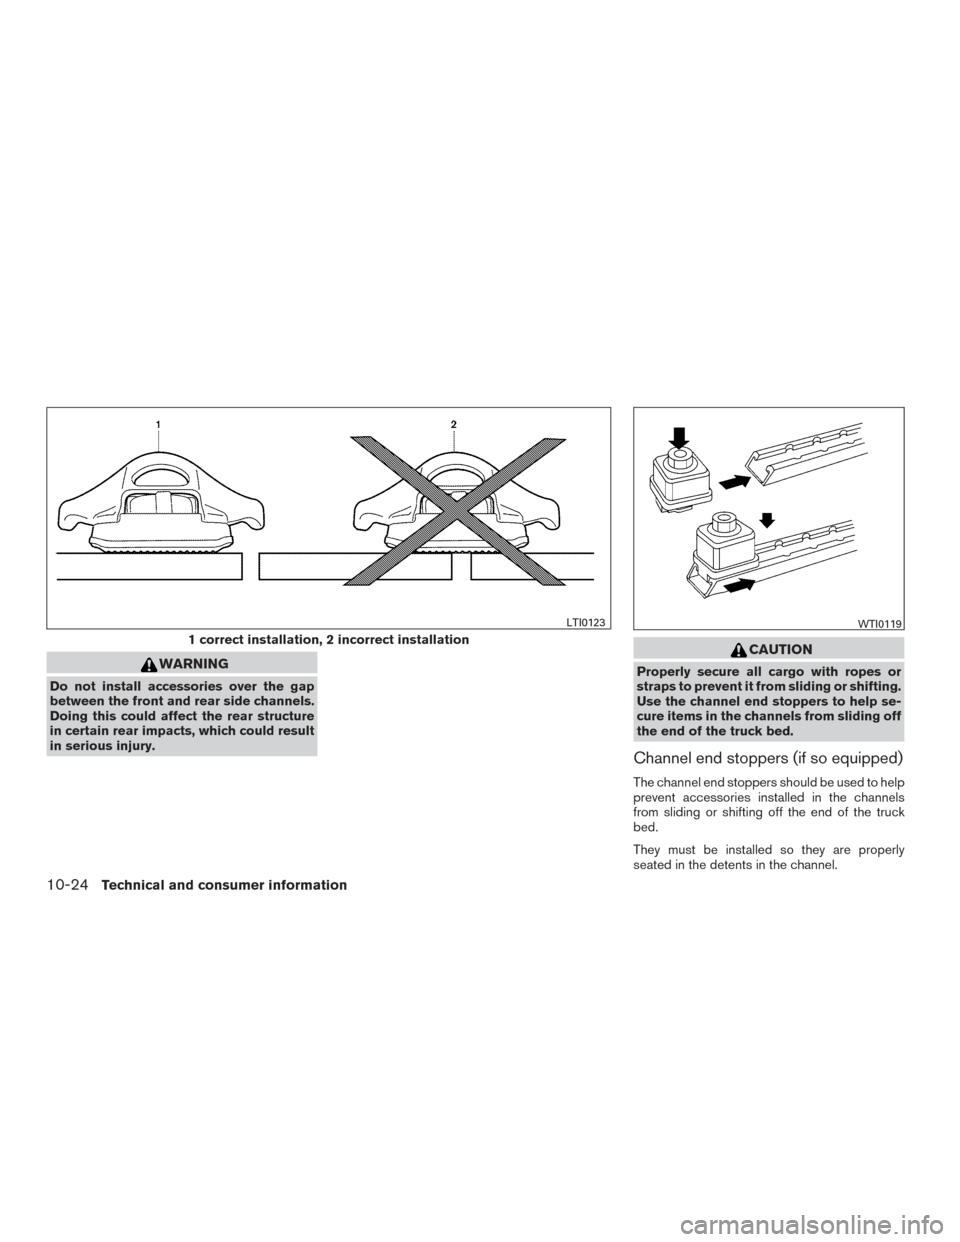
WARNING
Do not install accessories over the gap
between the front and rear side channels.
Doing this could affect the rear structure
in certain rear impacts, which could result
in serious injury.
CAUTION
Properly secure all cargo with ropes or
straps to prevent it from sliding or shifting.
Use the channel end stoppers to help se-
cure items in the channels from sliding off
the end of the truck bed.
Channel end stoppers (if so equipped)
The channel end stoppers should be used to help
prevent accessories installed in the channels
from sliding or shifting off the end of the truck
bed.
They must be installed so they are properly
seated in the detents in the channel.
1 correct installation, 2 incorrect installation
LTI0123WTI0119
10-24Technical and consumer information
Page 448 of 478
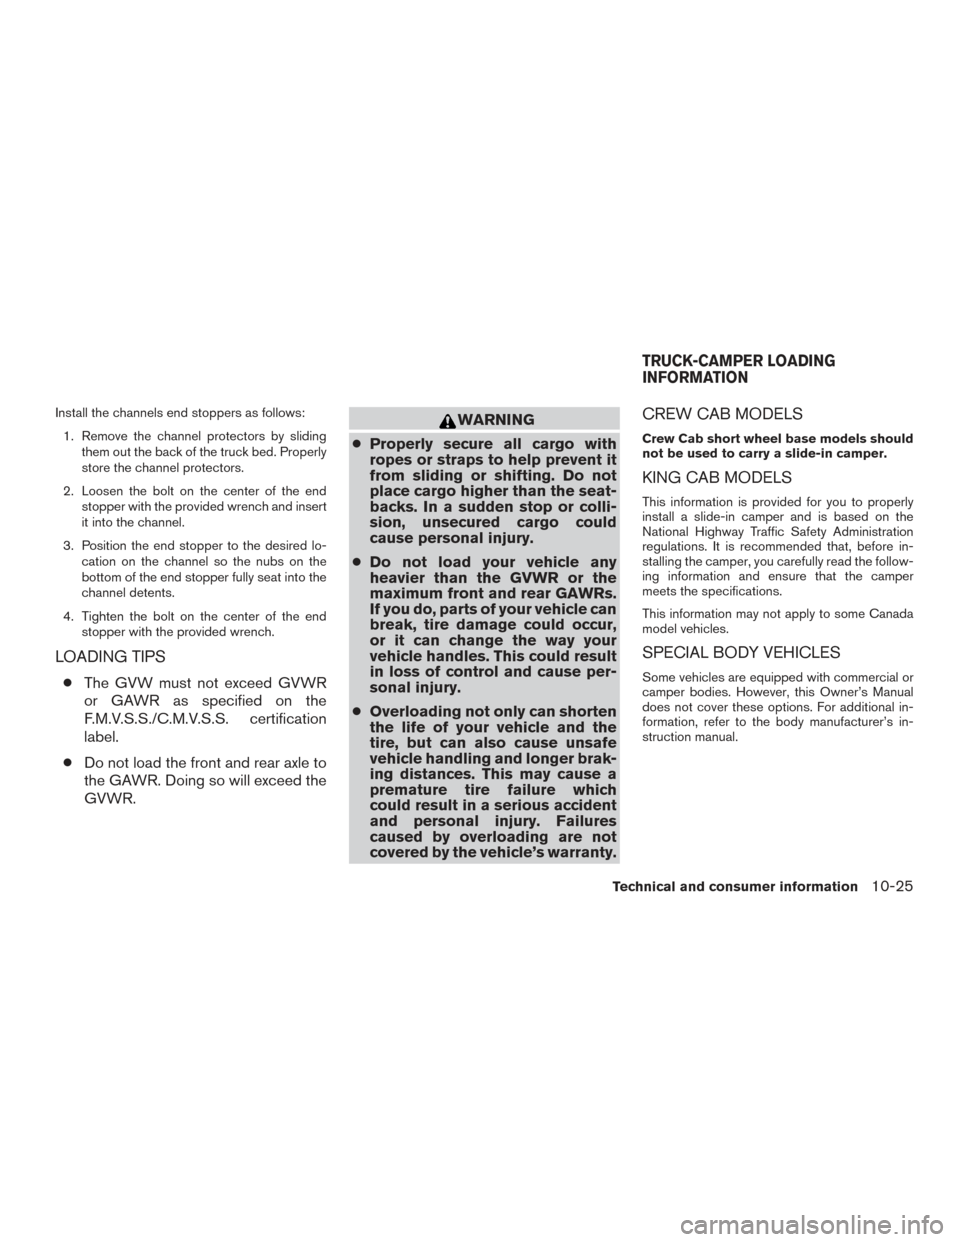
Install the channels end stoppers as follows:1. Remove the channel protectors by sliding them out the back of the truck bed. Properly
store the channel protectors.
2. Loosen the bolt on the center of the end stopper with the provided wrench and insert
it into the channel.
3. Position the end stopper to the desired lo- cation on the channel so the nubs on the
bottom of the end stopper fully seat into the
channel detents.
4. Tighten the bolt on the center of the end stopper with the provided wrench.
LOADING TIPS
●The GVW must not exceed GVWR
or GAWR as specified on the
F.M.V.S.S./C.M.V.S.S. certification
label.
● Do not load the front and rear axle to
the GAWR. Doing so will exceed the
GVWR.
WARNING
● Properly secure all cargo with
ropes or straps to help prevent it
from sliding or shifting. Do not
place cargo higher than the seat-
backs. In a sudden stop or colli-
sion, unsecured cargo could
cause personal injury.
● Do not load your vehicle any
heavier than the GVWR or the
maximum front and rear GAWRs.
If you do, parts of your vehicle can
break, tire damage could occur,
or it can change the way your
vehicle handles. This could result
in loss of control and cause per-
sonal injury.
● Overloading not only can shorten
the life of your vehicle and the
tire, but can also cause unsafe
vehicle handling and longer brak-
ing distances. This may cause a
premature tire failure which
could result in a serious accident
and personal injury. Failures
caused by overloading are not
covered by the vehicle’s warranty.CREW CAB MODELS
Crew Cab short wheel base models should
not be used to carry a slide-in camper.
KING CAB MODELS
This information is provided for you to properly
install a slide-in camper and is based on the
National Highway Traffic Safety Administration
regulations. It is recommended that, before in-
stalling the camper, you carefully read the follow-
ing information and ensure that the camper
meets the specifications.
This information may not apply to some Canada
model vehicles.
SPECIAL BODY VEHICLES
Some vehicles are equipped with commercial or
camper bodies. However, this Owner’s Manual
does not cover these options. For additional in-
formation, refer to the body manufacturer’s in-
struction manual.
TRUCK-CAMPER LOADING
INFORMATION
Technical and consumer information10-25