2017 NISSAN ARMADA sensor
[x] Cancel search: sensorPage 81 of 614
1-62Safety — seats, seat belts and supplemental restraint system
not illuminated (indicating that the air bag might
inflate in a crash) , it could be that the child
restraint or seat belt is not being used properly.
Make sure that the child restraint is installed
properly, the seat belt is used properly and the
occupant is positioned properly. If the front
passenger air bag status light is still not
illuminated, reposition the occupant or child
restraint in a rear seat.
If the front passenger air bag status light will not
illuminate even though you believe that the child
restraint, the seat belts and the occupant are
properly positioned, the system may be sensing
an unoccupied seat (in which case the air bag is
OFF) . Your NISSAN dealer can check that the
system is OFF by using a special tool. However,
until you have confirmed with your dealer that
your air bag is working properly, reposition the
occupant or child restraint in a rear seat.
The NISSAN Advanced Air Bag System and
front passenger air bag status light will take a
few seconds to register a change in the front
passenger seat status. However, if the seat
becomes unoccupied, the air bag status light
will remain off.
If a malfunction occurs in the front passenger air
bag system, the supplemental air bag warning
light
, located in the meter and gauges area
will blink. Have the system checked. It is recommended you visit a NISSAN dealer for
this service.
Normal operation:
In order for the occupant classification sensor
system to classify the front passenger based on
weight, please follow the precautions and steps
outlined below:
Precautions:
.
Make sure that there are no objects weigh-
ing over 9.1 lbs (4 kg) hanging on the seat
or placed in the seatback pocket.
. Make sure that a child restraint or other
object is not pressing against the rear of the
seatback.
. Make sure that a rear passenger is not
pushing or pulling on the back of the front
passenger seat.
. Make sure that the front passenger seat or
seatback is not forced back against an
object on the seat or floor behind it.
. Make sure that there is no object placed
under the front passenger seat. Steps:
1. Adjust the seat as outlined. (See “Seats”
(P.1-2) .) Sit upright, leaning against the
seatback, and centered on the seat cushion
with your feet comfortably extended to the
floor.
2. Make sure there are no objects on your lap.
3. Fasten the seat belt as outlined. (See “Seat belts” (P.1-18) .)
4. Remain in this position for 30 seconds allowing the system to classify the front
passenger before the vehicle is put into
motion.
5. Ensure proper classification by checking the front passenger air bag status light.
NOTE:
This vehicle’s occupant classification sen-
sor system locks the classification during
driving so it is important that you confirm
that the front passenger is properly classi-
fied prior to driving. Also, the occupant
classification sensor system may recalcu-
late the weight of the occupant when the
vehicle comes to a stop (i.e. stop light, stop
sign, etc.) , so the front passenger seat
occupant should continue to remain
seated as outlined above.
Page 82 of 614
Troubleshooting:
If you think the front passenger air bag status
light is incorrect:
1. If the light is ON with no front passenger and noobjects on the front passenger seat:
This may be due to the following conditions that
may be interfering with the weight sensors:
.An object weighing over 9.1 lbs (4 kg)
hanging on the seat or placed in the
seatback pocket.
. A child restraint or other object pressing
against the rear of the seatback.
. A rear passenger pushing or pulling on the
back of the front passenger seat.
. Forcing the front seat or seatback against an
object on the seat or floor behind it.
. An object placed under the front passenger
seat.
. An object placed between the seat cushion
and center console or between the seat
cushion and the door.
If the vehicle is moving, please come to a stop
when it is safe to do so. Check and correct any
of the above conditions. Restart the vehicle and
wait 1 minute.
NOTE:
A system check will be performed during
which the front passenger air bag status light will remain lit for about 7 seconds
initially.
If the light is still ON after this, it is recom-
mended that the vehicle be checked by a
NISSAN dealer as soon as possible.2. If the light is ON with an adult occupying the
front passenger seat:
.Occupant is a small adult — the air bag
status light is functioning as intended. The
front passenger air bag is suppressed.
However, if the occupant is not a small adult,
then this may be due to the following conditions
that may be interfering with the weight sensors:
. Occupant is not sitting upright, leaning
against the seatback, and centered on the
seat cushion with his/her feet comfortably
extended to the floor.
. A child restraint or other object pressing
against the rear of the seatback.
. A rear passenger pushing or pulling on the
back of the front passenger seat.
. Forcing the front seat or seatback against an
object on the seat or floor behind it.
. An object placed under the front passenger
seat.
. An object placed between the seat cushion
and center console or between the seat
cushion and the door. If the vehicle is moving, please come to a stop
when it is safe to do so. Check and correct any
of the above conditions. Restart the vehicle and
wait 1 minute.
NOTE:
A system check will be performed during
which the front passenger air bag status
light will remain lit for about 7 seconds
initially.
If the light is still ON after this, the person should
be advised not to ride in the front passenger
seat and it is recommended that the vehicle be
checked by a NISSAN dealer as soon as
possible.
3. If the light is OFF with a small adult, child or child
restraint occupying the front passenger seat.
This may be due to the following conditions that
may be interfering with the weight sensors:
.Small adult or child is not sitting upright,
leaning against the seatback, and centered
on the seat cushion with his/her feet
comfortably extended to the floor.
. The child restraint is not properly installed,
as outlined. (See “Child restraints” (P.1-
31) .)
. An object weighing over 9.1 lbs (4 kg)
hanging on the seat or placed in the
seatback pocket.
Safety — seats, seat belts and supplemental restraint system1-63
Page 83 of 614
1-64Safety — seats, seat belts and supplemental restraint system
.A child restraint or other object pressing
against the rear of the seatback.
. A rear passenger pushing or pulling on the
back of the front passenger seat.
. Forcing the front seat or seatback against an
object on the seat or floor behind it.
. An object placed under the front passenger
seat.
. An object placed between the seat cushion
and center console.
If the vehicle is moving, please come to a stop
when it is safe to do so. Check and correct any
of the above conditions. Restart the vehicle and
wait 1 minute.
NOTE:
A system check will be performed during
which the front passenger air bag status
light will remain lit for about 7 seconds
initially.
If the light is still OFF after this, the small adult,
child or child restraint should be repositioned in
the rear seat and it is recommended that the
vehicle be checked by a NISSAN dealer as soon
as possible.Other supplemental front-impact air bag
precautions
WARNING
. Do not place any objects on the
steering wheel pad or on the instru-
ment panel. Also, do not place any
objects between any occupant and
the steering wheel or instrument
panel. Such objects may become
dangerous projectiles and cause
injury if the front air bags inflate.
. Do not place objects with sharp
edges on the seat. Also, do not
place heavy objects on the seat that
will leave permanent impressions in
the seat. Such objects can damage
the seat or occupant classification
sensors (weight sensors) . This can
affect the operation of the air bag
system and result in serious perso-
nal injury.
. Do not use water or acidic cleaners
(hot steam cleaners) on the seat.
This can damage the seat or occu-
pant classification sensors. This can
also affect the operation of the air
bag system and result in serious personal injury.
. Immediately after inflation, several
front air bag system components
will be hot. Do not touch them; you
may severely burn yourself.
. No unauthorized changes should be
made to any components or wiring
of the supplemental air bag system.
This is to prevent accidental infla-
tion of the supplemental air bag or
damage to the supplemental air bag
system.
. Do not make unauthorized changes
to your vehicle’s electrical system,
suspension system or front end
structure. This could affect proper
operation of the front air bag sys-
tem.
. Tampering with the air bag system
may result in serious personal in-
jury. Tampering includes changes to
the steering wheel and the instru-
ment panel assembly by placing
material over the steering wheel
pad and above the instrument panel
or by installing additional trim ma-
terial around the air bag system.
Page 84 of 614
.Removing or modifying the front
passenger seat may affect the func-
tion of the air bag system and result
in serious personal injury.
. Modifying or tampering with the
front passenger seat may result in
serious personal injury. For exam-
ple, do not change the front seats by
placing material on the seat cushion
or by installing additional trim ma-
terial, such as seat covers, on the
seat that is not specifically designed
to assure proper air bag operation.
Additionally, do not stow any ob-
jects under the front passenger seat
or the seat cushion and seatback.
Such objects may interfere with the
proper operation of the occupant
classification sensors.
. No unauthorized changes should be
made to any components or wiring
of the seat belt system. This may
affect the front air bag system.
Tampering with the seat belt system
may result in serious personal in-
jury.
. It is recommended you visit a
NISSAN dealer for work on and
around the front air bag. It is also recommended you visit a NISSAN
dealer for installation of electrical
equipment. The Supplemental Re-
straint System (SRS) wiring har-
nesses* should not be modified or
disconnected. Unauthorized electri-
cal test equipment and probing
devices should not be used on the
air bag system.
. A cracked windshield should be
replaced immediately by a qualified
repair facility. A cracked windshield
could affect the function of the
supplemental air bag system.
* The SRS wiring harness connectors are
yellow and orange for easy identification.
When selling your vehicle, we request that you
inform the buyer about the front air bag system
and guide the buyer to the appropriate sections
in this Owner’s Manual.
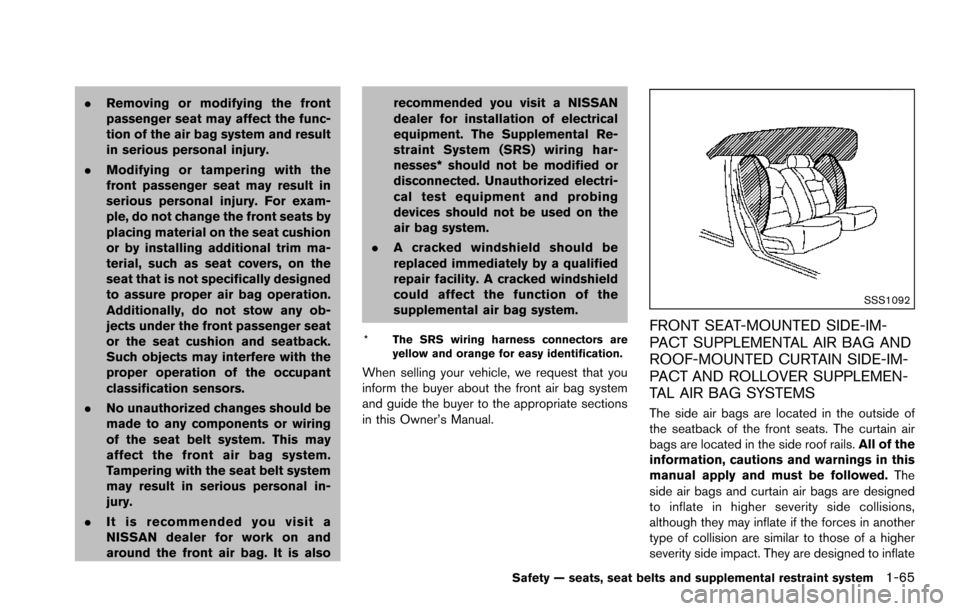
SSS1092
FRONT SEAT-MOUNTED SIDE-IM-
PACT SUPPLEMENTAL AIR BAG AND
ROOF-MOUNTED CURTAIN SIDE-IM-
PACT AND ROLLOVER SUPPLEMEN-
TAL AIR BAG SYSTEMS
The side air bags are located in the outside of
the seatback of the front seats. The curtain air
bags are located in the side roof rails. All of the
information, cautions and warnings in this
manual apply and must be followed. The
side air bags and curtain air bags are designed
to inflate in higher severity side collisions,
although they may inflate if the forces in another
type of collision are similar to those of a higher
severity side impact. They are designed to inflate
Safety — seats, seat belts and supplemental restraint system1-65
Page 88 of 614
.The supplemental air bag warning light
remains on after approximately 7 seconds.
. The supplemental air bag warning light
flashes intermittently.
. The supplemental air bag warning light does
not come on at all.
Under these conditions, the air bag and/or
pretensioner systems may not operate properly.
They must be checked and repaired. It is
recommended you visit a NISSAN dealer for
this service.
WARNING
If the supplemental air bag warning
light is on, it could mean that the front
air bag, side air bag, curtain air bag
and/or pretensioner systems will not
operate in an accident. To help avoid
injury to yourself or others, have your
vehicle checked as soon as possible. It
is recommended you visit a NISSAN
dealer for this service.
REPAIR AND REPLACEMENT PRO-
CEDURE
The front air bags, side air bags, curtain air bags
and pretensioners are designed to activate on a
one-time-only basis. As a reminder, unless it is
damaged, the supplemental air bag warning light
will remain illuminated after inflation has oc-
curred. These systems should be repaired and/
or replaced as soon as possible. It is recom-
mended you visit a NISSAN dealer for this
service.
When maintenance work is required on the
vehicle, the front air bags, side air bags, curtain
air bags, pretensioners and related parts should
be pointed out to the person conducting the
maintenance. The ignition switch should always
be in the LOCK position when working under
the hood or inside the vehicle.
WARNING
. Once a front air bag, side air bag or
curtain air bag has inflated, the air
bag module will not function again
and must be replaced. Additionally,
the activated pretensioner must
also be replaced. The air bag mod-
ule and pretensioner should be
replaced. It is recommended you visit a NISSAN dealer for this ser-
vice. However, the air bag module
and pretensioner system cannot be
repaired.
. The front air bag, side air bag,
curtain air bag and the pretensioner
should be inspected if there is any
damage to the front end or side
portion of the vehicle. It is recom-
mended you visit a NISSAN dealer
for this service.
. If you need to dispose of a supple-
mental air bag or pretensioner or
scrap the vehicle, it is recommended
you visit a NISSAN dealer. Correct
supplemental air bag and preten-
sioner system disposal procedures
are set forth in the appropriate
NISSAN Service Manual. Incorrect
disposal procedures could cause
personal injury.
. If there is an impact to your vehicle
from any direction, your Occupant
Classification Sensor (OCS) should
be checked to verify it is still
functioning correctly. It is recom-
mended that you visit a NISSAN
dealer for this service. The OCS
should be checked even if no air
Safety — seats, seat belts and supplemental restraint system1-69
Page 113 of 614
2-24Instruments and controls
8. Parking brake release warning
This warning appears when the vehicle speed is
above 4 MPH (7 km/h) and the parking brake is
applied.
9. Low fuel warning
This warning appears when the fuel level in the
tank is getting low. Refuel as soon as it is
convenient, preferably before the fuel gauge
reaches the 0 (Empty) position.
There is a small reserve of fuel remaining
in the tank when the fuel gauge reaches
the 0 (Empty) position.
10. Low washer fluid warning
This warning appears when the washer tank fluid
is at a low level. Add washer fluid as necessary.
(See “Window washer fluid” (P.8-10).)
11. Door/liftgate open warning (ignition
switch is in the ON position)
This warning appears if any of the doors and/or
the liftgate are open or not closed securely. The
vehicle icon indicates which door or the liftgate
is open on the display.
12. Loose fuel cap warning
This warning appears when the fuel-filler cap is
not tightened correctly after the vehicle has
been refueled. (See “Fuel-filler cap” (P.3-27) .)
13. Check tire pressure warning
This warning appears when the low tire pressure
warning light in the meter illuminates and low tire
pressure is detected. The warning appears each
time the ignition switch is placed in the ON
position as long as the low tire pressure warning
light remains illuminated. If this warning appears,
stop the vehicle and adjust the tire pressure to
the recommended COLD tire pressure shown
on the Tire and Loading Information label. (See
“Low tire pressure warning light” (P.2-15) and
“Tire Pressure Monitoring System (TPMS)” (P.5-
5) .)
14. Extended storage fuse warning (if so
equipped)
This warning may appear if the extended storage
fuse switch is not pushed in (switched on) .
When this warning appears, push in (switch on)
the extended storage fuse switch to turn off the
warning. For more information, see “Extended
storage fuse switch” (P.8-21) .
15. Back-up Collision Intervention (BCI)
not available warning (if so equipped)
This warning appears when the Back-up Colli-
sion Intervention (BCI) system is temporarily not
available.
For more details, see “Back-up Collision Inter-
vention (BCI)” (P.5-56) .
16. Back-up Collision Intervention (BCI)
malfunction warning (if so equipped)
This warning appears when the Back-up Colli-
sion Intervention (BCI) system is not functioning
properly.
For more details, see “Back-up Collision Inter-
vention (BCI)” (P.5-56) .
17. Headlight warning
This warning appears if the LED headlights are
malfunctioning. It is recommended you have the
system checked by a NISSAN dealer.
18. Front radar obstruction warning (if so
equipped)
This warning appears when the sensor area of
the front bumper is covered with dirt or is
obstructed, making it impossible to detect a
vehicle ahead.
The following systems will be automatically
canceled.
Page 117 of 614
2-28Instruments and controls
trip odometer?Distance to empty (dte) ?
Outside air temperature (ICY) ?Setting ?
Warning check
1. Current and average fuel consumption
The current and average fuel consumption mode
shows the current and average fuel consump-
tion.
2. Average fuel consumption (MPG or l
(liter)/100 km) and speed (MPH or km/h)
Fuel consumption:
The average fuel consumption mode shows the
average fuel consumption since the last reset.
Resetting is done by pushing the
switch*Bfor longer than 1 second. (The average speed is
also reset at the same time.)
The display is updated every 30 seconds. At
about the first 1/3 mile (500 m) after a reset, the
display shows “——”.
Speed:
The average speed mode shows the average
vehicle speed since the last reset. Resetting is
done by pushing the
switch*Bfor longer
than 1 second. (The average fuel consumption is
also reset at the same time.)
The display is updated every 30 seconds. The
first 30 seconds after a reset, the display shows
“——”.
3. Elapsed time and trip odometer
(MILES or km)
Elapsed time:
The elapsed time mode shows the time since
the last reset. The displayed time can be reset
by pushing the
switch*Bfor longer than 1
second. (The trip odometer is also reset at the
same time.)
Trip odometer:
The trip odometer mode shows the total
distance the vehicle has been driven since the
last reset. Resetting is done by pushing the
switch*Bfor longer than 1 second. (The
elapsed time is also reset at the same time.)
4. Distance to empty (dte — MILES or
km)
The distance to empty (dte) mode provides you
with an estimation of the distance that can be
driven before refueling. The dte is constantly
being calculated, based on the amount of fuel in
the fuel tank and the actual fuel consumption.
The display is updated every 30 seconds.
The dte mode includes a low range warning
feature. If the fuel level is low, the warning is
displayed on the screen.
When the fuel level drops even lower, the dte
display will change to “——”. .
If the amount of fuel added is small, the
display just before the ignition switch is
pushed to the OFF position may continue to
be displayed.
. When driving uphill or rounding curves, the
fuel in the tank shifts, which may momenta-
rily change the display.
5. Outside air temperature (ICY — 8For
8C)
The outside air temperature is displayed in 8For
8C in the range of �í22 to 1318F(�í30 to 558C) .
The outside air temperature mode includes a low
temperature warning feature. If the outside air
temperature is below 378F(3 8C) , the warning is
displayed on the screen.
The outside temperature sensor is located in
front of the radiator. The sensor may be affected
by road or engine heat, wind directions and
other driving conditions. The display may differ
from the actual outside temperature or the
temperature displayed on various signs or bill-
boards.
Page 123 of 614
2-34Instruments and controls
Wiper drip wipe system:
The wiper will also operate once about 3
seconds after the washer and wiper are
operated. This operation is to wipe washer fluid
that has dripped on the windshield.
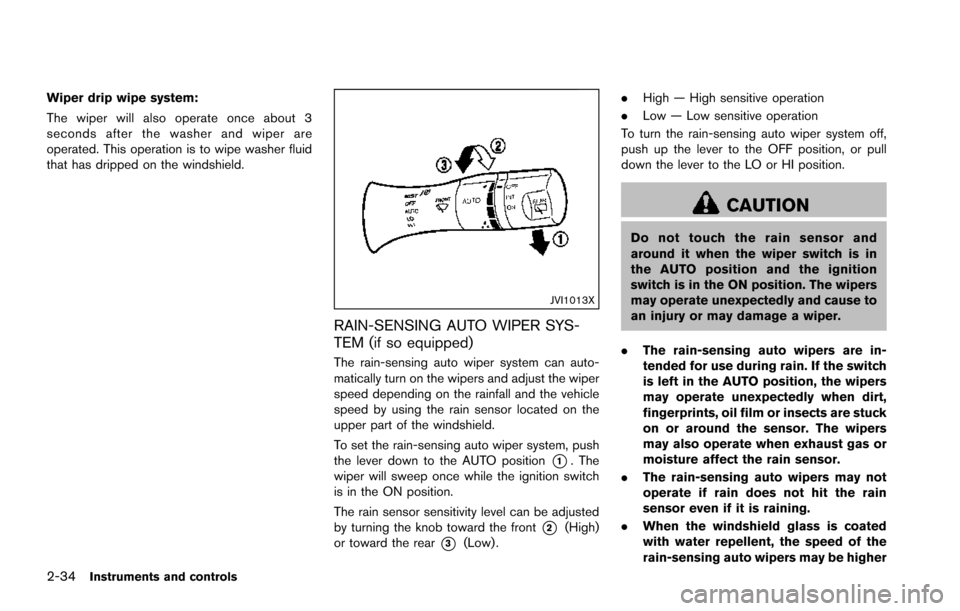
JVI1013X
RAIN-SENSING AUTO WIPER SYS-
TEM (if so equipped)
The rain-sensing auto wiper system can auto-
matically turn on the wipers and adjust the wiper
speed depending on the rainfall and the vehicle
speed by using the rain sensor located on the
upper part of the windshield.
To set the rain-sensing auto wiper system, push
the lever down to the AUTO position
*1. The
wiper will sweep once while the ignition switch
is in the ON position.
The rain sensor sensitivity level can be adjusted
by turning the knob toward the front
*2(High)
or toward the rear
*3(Low) . .
High — High sensitive operation
. Low — Low sensitive operation
To turn the rain-sensing auto wiper system off,
push up the lever to the OFF position, or pull
down the lever to the LO or HI position.
CAUTION
Do not touch the rain sensor and
around it when the wiper switch is in
the AUTO position and the ignition
switch is in the ON position. The wipers
may operate unexpectedly and cause to
an injury or may damage a wiper.
. The rain-sensing auto wipers are in-
tended for use during rain. If the switch
is left in the AUTO position, the wipers
may operate unexpectedly when dirt,
fingerprints, oil film or insects are stuck
on or around the sensor. The wipers
may also operate when exhaust gas or
moisture affect the rain sensor.
. The rain-sensing auto wipers may not
operate if rain does not hit the rain
sensor even if it is raining.
. When the windshield glass is coated
with water repellent, the speed of the
rain-sensing auto wipers may be higher