2017 NISSAN ALTIMA SEDAN ECO mode
[x] Cancel search: ECO modePage 166 of 497
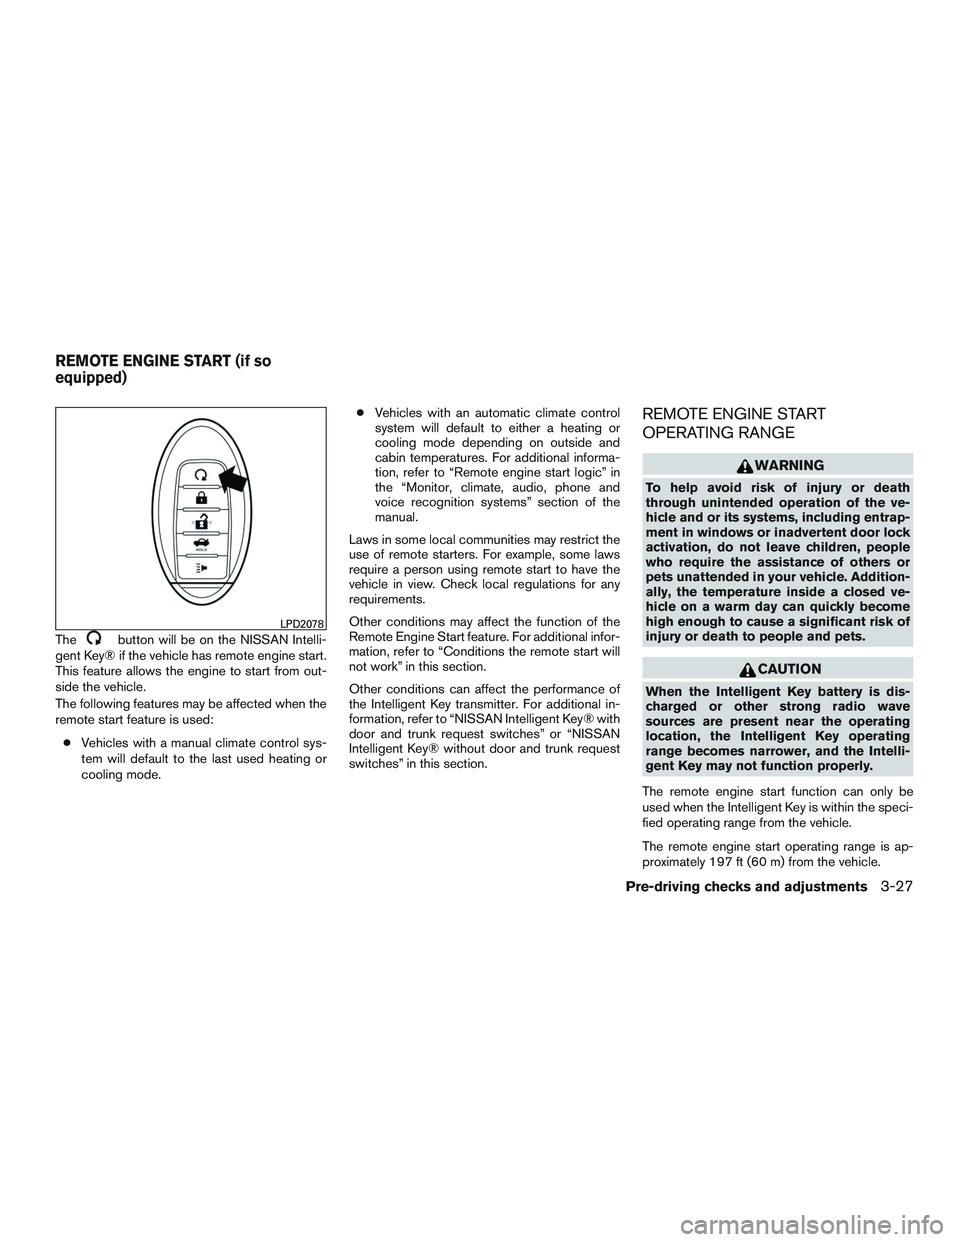
Thebutton will be on the NISSAN Intelli-
gent Key® if the vehicle has remote engine start.
This feature allows the engine to start from out-
side the vehicle.
The following features may be affected when the
remote start feature is used:
● Vehicles with a manual climate control sys-
tem will default to the last used heating or
cooling mode. ●
Vehicles with an automatic climate control
system will default to either a heating or
cooling mode depending on outside and
cabin temperatures. For additional informa-
tion, refer to “Remote engine start logic” in
the “Monitor, climate, audio, phone and
voice recognition systems” section of the
manual.
Laws in some local communities may restrict the
use of remote starters. For example, some laws
require a person using remote start to have the
vehicle in view. Check local regulations for any
requirements.
Other conditions may affect the function of the
Remote Engine Start feature. For additional infor-
mation, refer to “Conditions the remote start will
not work” in this section.
Other conditions can affect the performance of
the Intelligent Key transmitter. For additional in-
formation, refer to “NISSAN Intelligent Key® with
door and trunk request switches” or “NISSAN
Intelligent Key® without door and trunk request
switches” in this section.
REMOTE ENGINE START
OPERATING RANGE
WARNING
To help avoid risk of injury or death
through unintended operation of the ve-
hicle and or its systems, including entrap-
ment in windows or inadvertent door lock
activation, do not leave children, people
who require the assistance of others or
pets unattended in your vehicle. Addition-
ally, the temperature inside a closed ve-
hicle on a warm day can quickly become
high enough to cause a significant risk of
injury or death to people and pets.
CAUTION
When the Intelligent Key battery is dis-
charged or other strong radio wave
sources are present near the operating
location, the Intelligent Key operating
range becomes narrower, and the Intelli-
gent Key may not function properly.
The remote engine start function can only be
used when the Intelligent Key is within the speci-
fied operating range from the vehicle.
The remote engine start operating range is ap-
proximately 197 ft (60 m) from the vehicle.
LPD2078
REMOTE ENGINE START (if so
equipped)
Pre-driving checks and adjustments3-27
Page 180 of 497
4 Monitor, climate, audio, phone and voice
recognition systems
Control panel buttons — color screen with
Navigation System (if so equipped)..................4-4
How to use the touch-screen . . ..................4-5
How to use the
BACK button ..............4-7
How to use the [
] button ..................4-7
button...................................4-9
RearView Monitor (if so equipped) ..................4-10
RearView Monitor system operation .............4-11
How to read the displayed lines .................4-11
Difference between predicted and actual
distances ..................................... 4-12
Adjusting the screen ........................... 4-14
RearView Monitor system limitations .............4-14
System maintenance ........................... 4-16
Vents ........................................... 4-16
Heater and Air Conditioner (manual)
(if so equipped) .................................. 4-17
Controls ...................................... 4-18
Heater operation .............................. 4-19
Air conditioner operation .......................4-20
Air flow charts ................................. 4-21
Heater and Air Conditioner (automatic)
(if so equipped) .................................. 4-24Automatic operation
........................... 4-25
Manual operation .............................. 4-26
Operating tips ................................. 4-26
Servicing air conditioner ........................... 4-27
Audio system .................................... 4-27
Radio ........................................ 4-27
FM radio reception ............................ 4-27
AM radio reception ............................ 4-28
Satellite radio reception (if so equipped) .........4-28
Audio operation precautions ....................4-28
FM/AM radio with compact disc (CD) player
(Type A) (if so equipped) .......................4-35
FM/AM radio with compact disc (CD) player
(Type B) (if so equipped) .......................4-39
FM/AM/SAT radio with compact disc (CD)
player (Type A) (if so equipped) .................4-43
FM/AM/SAT radio with compact disc (CD)
player (Type B) (if so equipped) .................4-49
USB (Universal Serial Bus) connection port
(models without Navigation System)
(if so equipped) ............................... 4-55
USB (Universal Serial Bus) connection port
(models with Navigation System)
(if so equipped) ............................... 4-57
Page 186 of 497
Touch-screen maintenance
If you clean the display screen, use a dry, soft
cloth. If additional cleaning is necessary, use a
small amount of neutral detergent with a soft
cloth. Never spray the screen with water or de-
tergent. Dampen the cloth first and then wipe the
screen.
HOW TO USE THEBACK
BUTTON
Press theBACK button to return to the
previous screen.
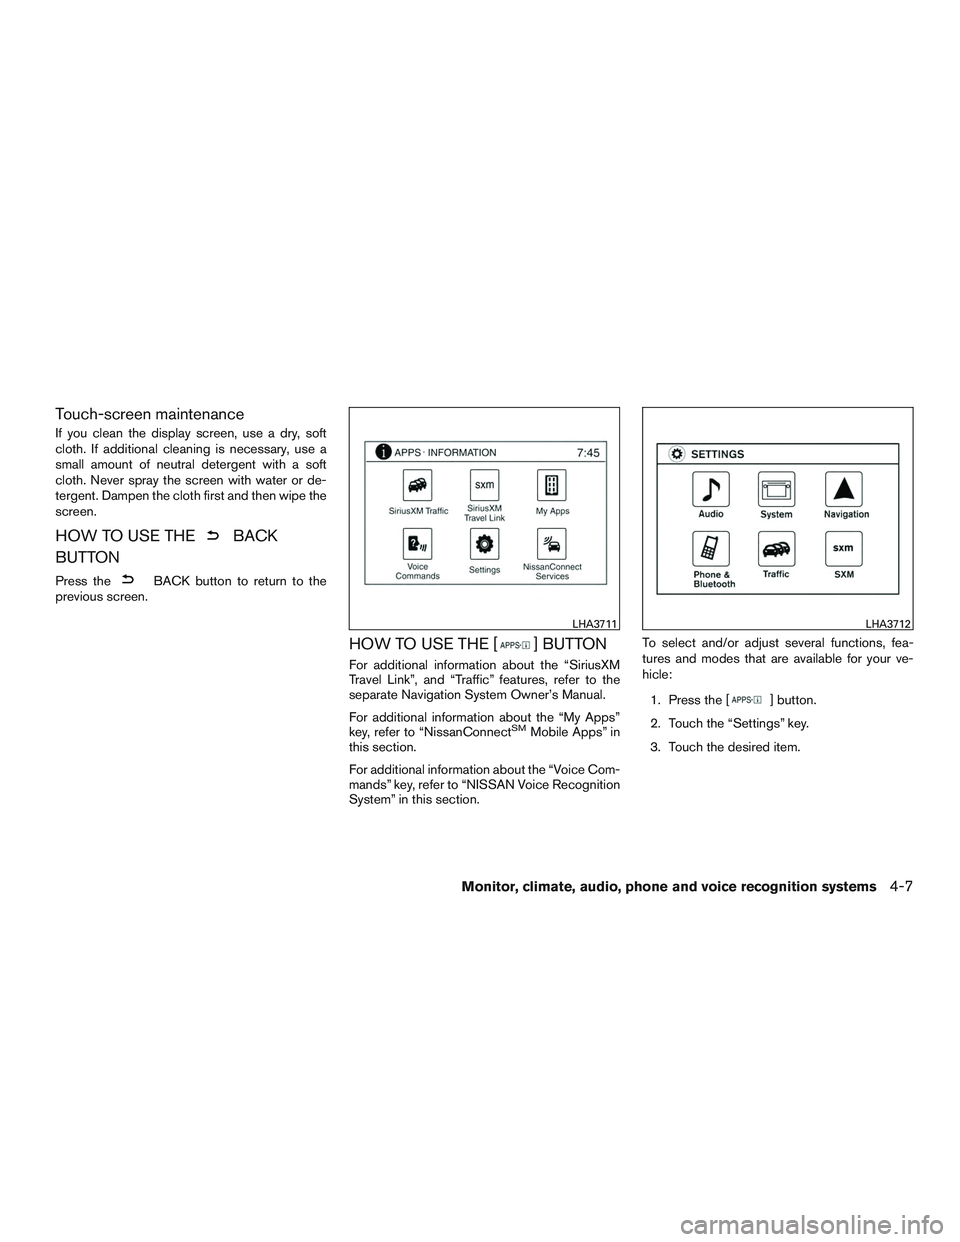
HOW TO USE THE [] BUTTON
For additional information about the “SiriusXM
Travel Link”, and “Traffic” features, refer to the
separate Navigation System Owner’s Manual.
For additional information about the “My Apps”
key, refer to “NissanConnect
SMMobile Apps” in
this section.
For additional information about the “Voice Com-
mands” key, refer to “NISSAN Voice Recognition
System” in this section. To select and/or adjust several functions, fea-
tures and modes that are available for your ve-
hicle:
1. Press the [
] button.
2. Touch the “Settings” key.
3. Touch the desired item.
LHA3711LHA3712
Monitor, climate, audio, phone and voice recognition systems4-7
Page 187 of 497
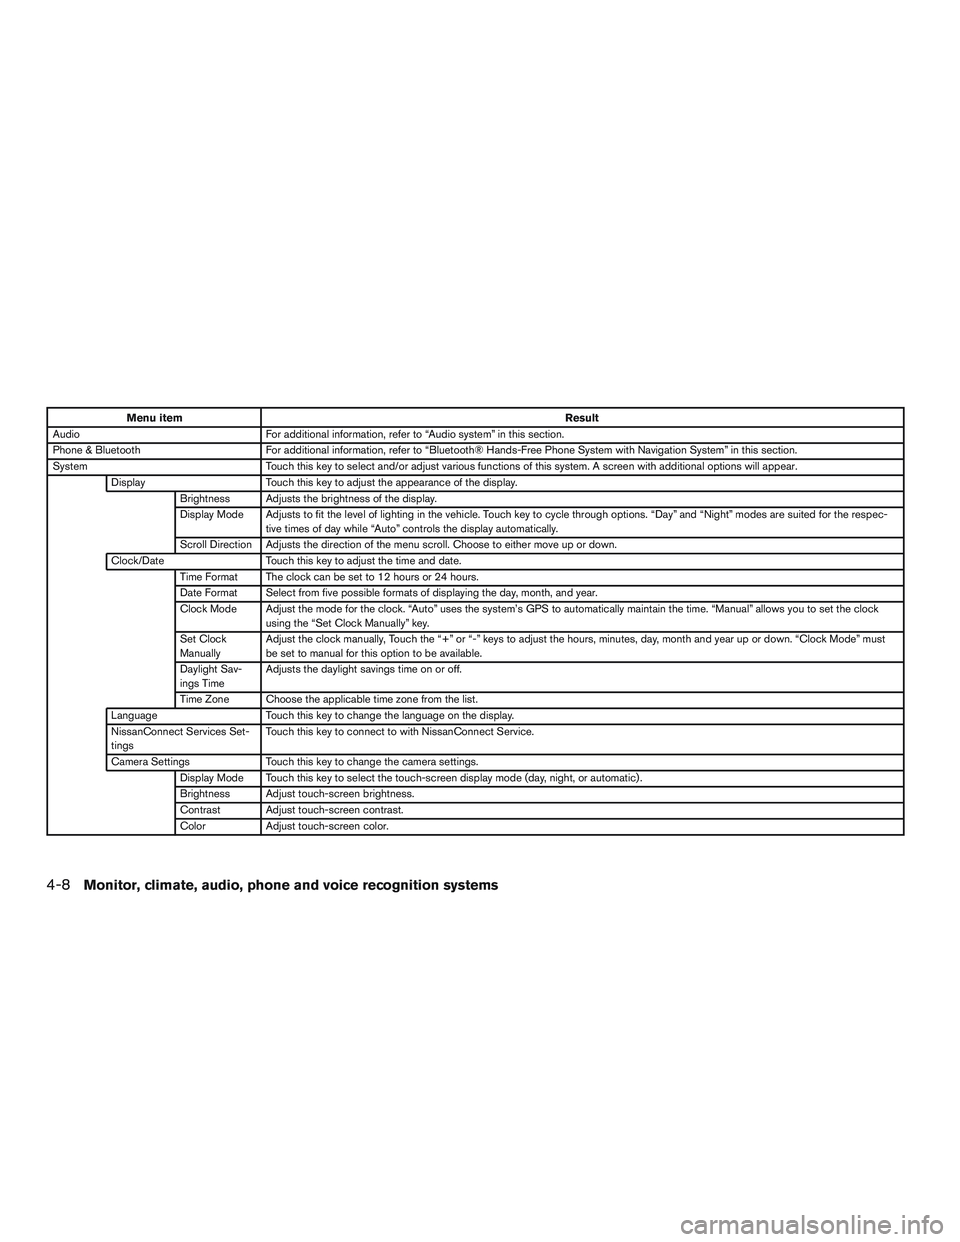
Menu itemResult
Audio For additional information, refer to “Audio system” in this section.
Phone & Bluetooth For additional information, refer to “Bluetooth® Hands-Free Phone System with Navigation System” in this section.
System Touch this key to select and/or adjust various functions of this system. A screen with additional options will appear.
Display Touch this key to adjust the appearance of the display.
Brightness Adjusts the brightness of the display.
Display Mode Adjusts to fit the level of lighting in the vehicle. Touch key to cycle through options. “Day” and “Night” modes are suited for the respec- tive times of day while “Auto” controls the display automatically.
Scroll Direction Adjusts the direction of the menu scroll. Choose to either move up or down.
Clock/Date Touch this key to adjust the time and date.
Time Format The clock can be set to 12 hours or 24 hours.
Date Format Select from five possible formats of displaying the day, month, and year.
Clock Mode Adjust the mode for the clock. “Auto” uses the system’s GPS to automatically maintain the time. “Manual” allows you to set the clock using the “Set Clock Manually” key.
Set Clock
Manually Adjust the clock manually, Touch the “+” or “-” keys to adjust the hours, minutes, day, month and year up or down. “Clock Mode” must
be set to manual for this option to be available.
Daylight Sav-
ings Time Adjusts the daylight savings time on or off.
Time Zone Choose the applicable time zone from the list.
Language Touch this key to change the language on the display.
NissanConnect Services Set-
tings Touch this key to connect to with NissanConnect Service.
Camera Settings Touch this key to change the camera settings.
Display Mode Touch this key to select the touch-screen display mode (day, night, or automatic) .
Brightness Adjust touch-screen brightness.
Contrast Adjust touch-screen contrast.
Color Adjust touch-screen color.
4-8Monitor, climate, audio, phone and voice recognition systems
Page 193 of 497
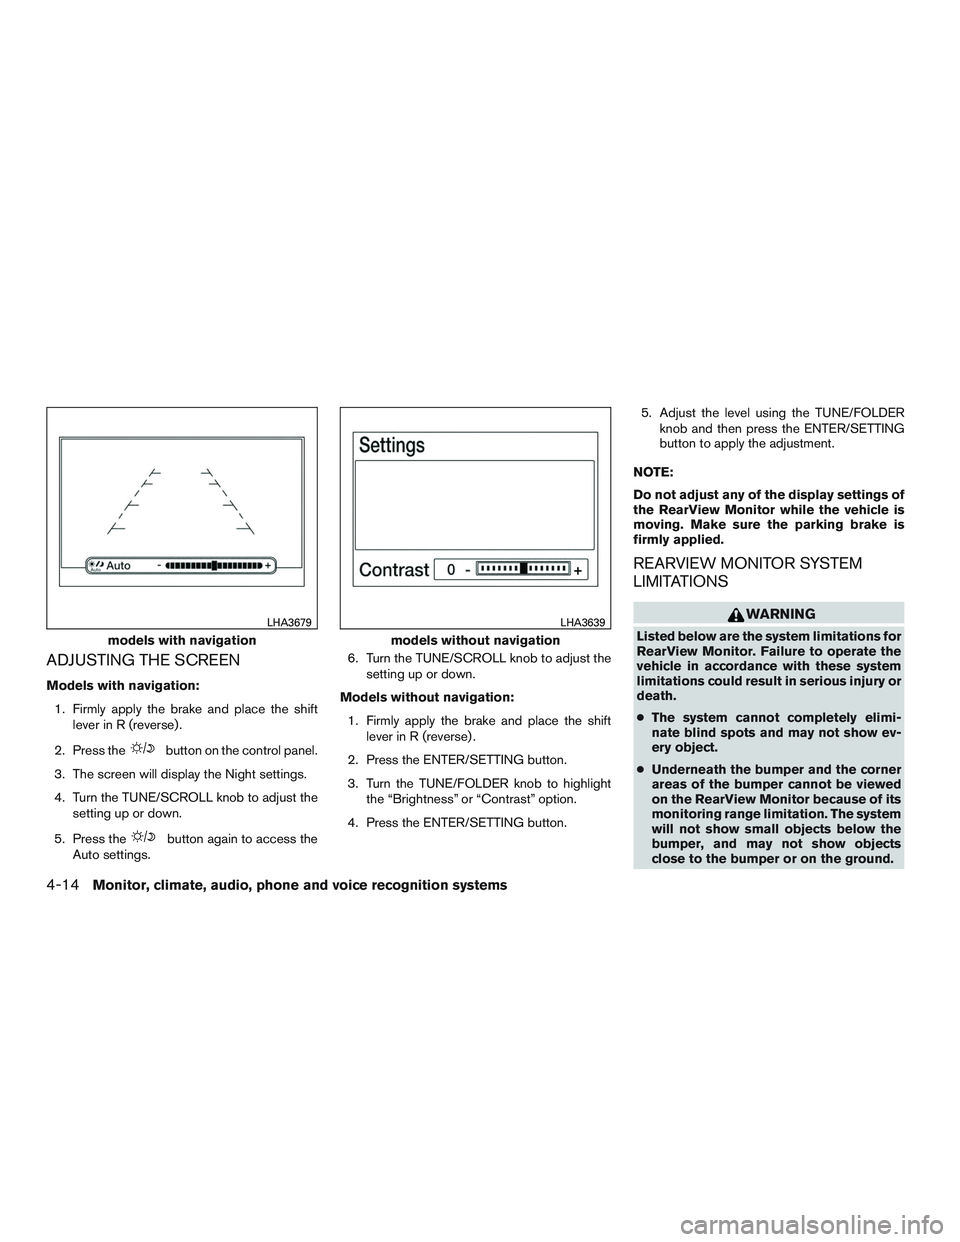
ADJUSTING THE SCREEN
Models with navigation:1. Firmly apply the brake and place the shift lever in R (reverse) .
2. Press the
button on the control panel.
3. The screen will display the Night settings.
4. Turn the TUNE/SCROLL knob to adjust the setting up or down.
5. Press the
button again to access the
Auto settings. 6. Turn the TUNE/SCROLL knob to adjust the
setting up or down.
Models without navigation: 1. Firmly apply the brake and place the shift lever in R (reverse) .
2. Press the ENTER/SETTING button.
3. Turn the TUNE/FOLDER knob to highlight the “Brightness” or “Contrast” option.
4. Press the ENTER/SETTING button. 5. Adjust the level using the TUNE/FOLDER
knob and then press the ENTER/SETTING
button to apply the adjustment.
NOTE:
Do not adjust any of the display settings of
the RearView Monitor while the vehicle is
moving. Make sure the parking brake is
firmly applied.
REARVIEW MONITOR SYSTEM
LIMITATIONS
WARNING
Listed below are the system limitations for
RearView Monitor. Failure to operate the
vehicle in accordance with these system
limitations could result in serious injury or
death.
● The system cannot completely elimi-
nate blind spots and may not show ev-
ery object.
● Underneath the bumper and the corner
areas of the bumper cannot be viewed
on the RearView Monitor because of its
monitoring range limitation. The system
will not show small objects below the
bumper, and may not show objects
close to the bumper or on the ground.models with navigation
LHA3679
models without navigation
LHA3639
4-14Monitor, climate, audio, phone and voice recognition systems
Page 197 of 497
WARNING
●The air conditioner cooling function op-
erates only when the engine is running.
● Do not leave children or adults who
would normally require the assistance
of others alone in your vehicle. Pets
should also not be left alone. They
could accidentally injure themselves or
others through inadvertent operation of
the vehicle. Also, on hot, sunny days,
temperatures in a closed vehicle could
quickly become high enough to cause
severe or possibly fatal injuries to
people or animals.
● Do not use the recirculation mode for
long periods as it may cause the interior
air to become stale and the windows to
fog up.
NOTE: ● Odors from inside and outside the vehicle
can build up in the air conditioner unit. Odor
can enter the passenger compartment
through the vents. ●
When parking, set the heater and air condi-
tioner controls to turn off air recirculation to
allow fresh air into the passenger compart-
ment. This should help reduce odors inside
the vehicle.
CONTROLS
Fan control dial
Thefan control dial turns the fan on and off,
and controls fan speed.
Air flow control buttons
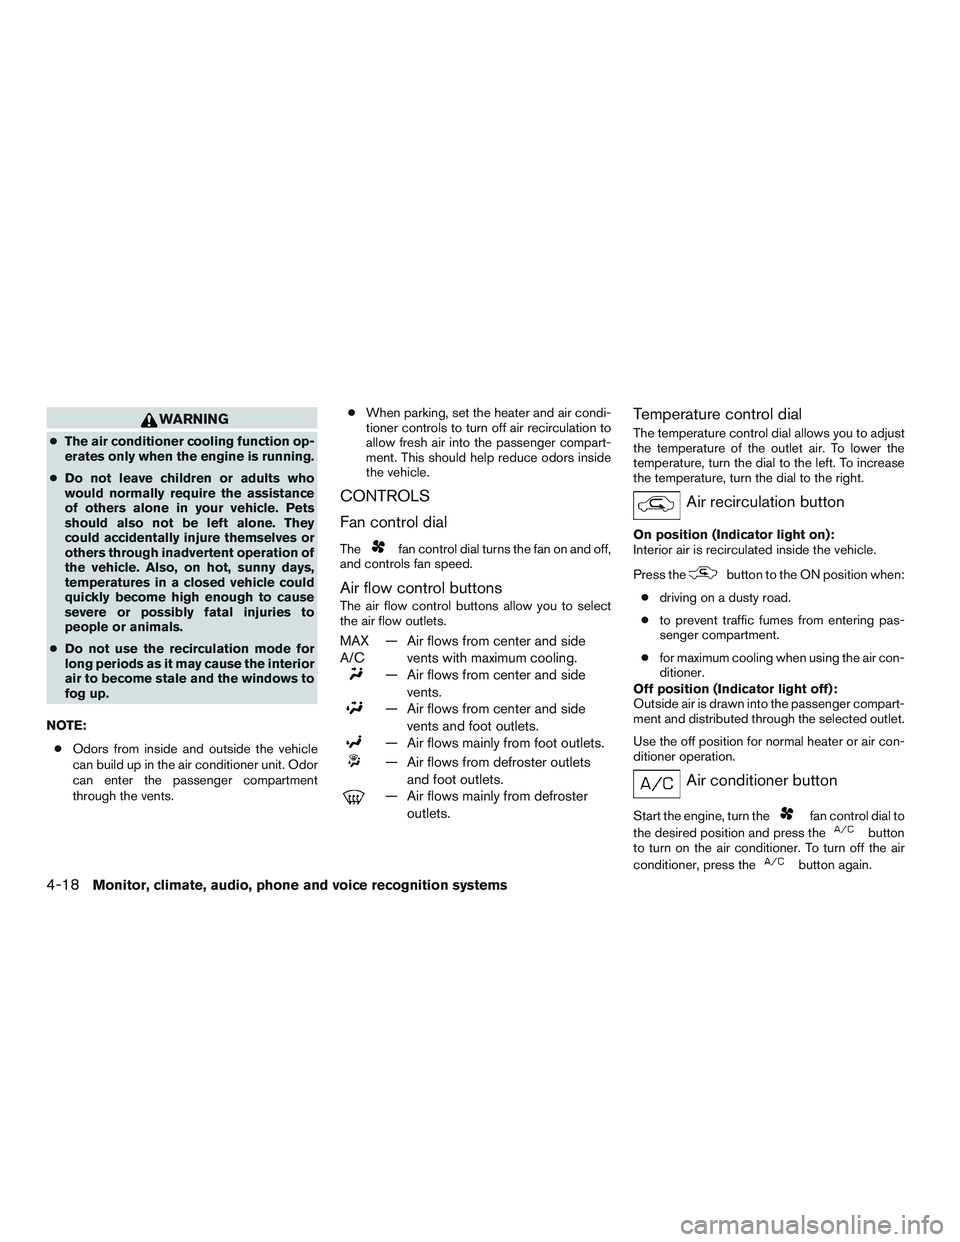
The air flow control buttons allow you to select
the air flow outlets.
MAX
A/C — Air flows from center and side
vents with maximum cooling.
— Air flows from center and sidevents.
— Air flows from center and sidevents and foot outlets.
— Air flows mainly from foot outlets.
— Air flows from defroster outletsand foot outlets.
— Air flows mainly from defrosteroutlets.
Temperature control dial
The temperature control dial allows you to adjust
the temperature of the outlet air. To lower the
temperature, turn the dial to the left. To increase
the temperature, turn the dial to the right.
Air recirculation button
On position (Indicator light on):
Interior air is recirculated inside the vehicle.
Press the
button to the ON position when:
● driving on a dusty road.
● to prevent traffic fumes from entering pas-
senger compartment.
● for maximum cooling when using the air con-
ditioner.
Off position (Indicator light off):
Outside air is drawn into the passenger compart-
ment and distributed through the selected outlet.
Use the off position for normal heater or air con-
ditioner operation.
Air conditioner button
Start the engine, turn thefan control dial to
the desired position and press the
button
to turn on the air conditioner. To turn off the air
conditioner, press the
button again.
4-18Monitor, climate, audio, phone and voice recognition systems
Page 198 of 497
The air conditioner cooling function oper-
ates only when the engine is running.
Rear window and outside mirror (if so
equipped) defroster switch
For additional information, refer to “Rear window
and outside mirror (if so equipped) defroster
switch” in the “Instruments and controls” section
of this manual.
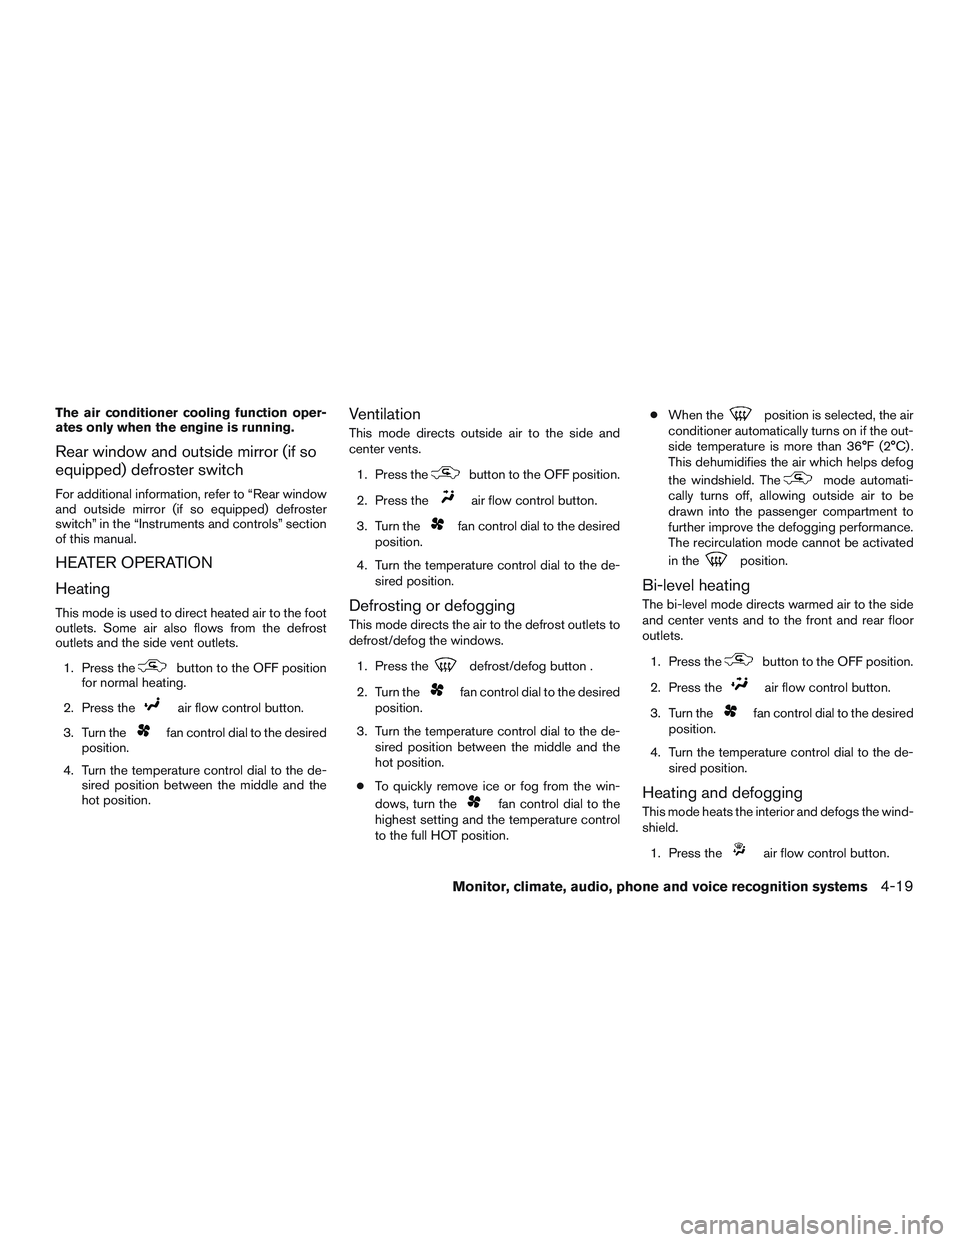
HEATER OPERATION
Heating
This mode is used to direct heated air to the foot
outlets. Some air also flows from the defrost
outlets and the side vent outlets.1. Press the
button to the OFF position
for normal heating.
2. Press the
air flow control button.
3. Turn the
fan control dial to the desired
position.
4. Turn the temperature control dial to the de- sired position between the middle and the
hot position.
Ventilation
This mode directs outside air to the side and
center vents.
1. Press the
button to the OFF position.
2. Press the
air flow control button.
3. Turn the
fan control dial to the desired
position.
4. Turn the temperature control dial to the de- sired position.
Defrosting or defogging
This mode directs the air to the defrost outlets to
defrost/defog the windows.
1. Press the
defrost/defog button .
2. Turn the
fan control dial to the desired
position.
3. Turn the temperature control dial to the de- sired position between the middle and the
hot position.
● To quickly remove ice or fog from the win-
dows, turn the
fan control dial to the
highest setting and the temperature control
to the full HOT position. ●
When the
position is selected, the air
conditioner automatically turns on if the out-
side temperature is more than 36°F (2°C) .
This dehumidifies the air which helps defog
the windshield. The
mode automati-
cally turns off, allowing outside air to be
drawn into the passenger compartment to
further improve the defogging performance.
The recirculation mode cannot be activated
in the
position.
Bi-level heating
The bi-level mode directs warmed air to the side
and center vents and to the front and rear floor
outlets.
1. Press the
button to the OFF position.
2. Press the
air flow control button.
3. Turn the
fan control dial to the desired
position.
4. Turn the temperature control dial to the de- sired position.
Heating and defogging
This mode heats the interior and defogs the wind-
shield.
1. Press the
air flow control button.
Monitor, climate, audio, phone and voice recognition systems4-19
Page 199 of 497
2. Turn thefan control dial to the desired
position.
3. Turn the temperature control dial to the de- sired position between the middle and the
hot position.
● When the
position is selected, the air
conditioner automatically turns on if the out-
side temperature is more than 36°F (2°C) .
This dehumidifies the air which helps defog
the windshield. The
mode automati-
cally turns off, allowing outside air to be
drawn into the passenger compartment to
further improve the defogging performance.
Operating tips
Clear snow and ice from the wiper blades
and air inlet in front of the windshield. This
improves heater operation.
AIR CONDITIONER OPERATION
Start the engine, turn thefan control dial to
the desired position, and press the
button
to activate the air conditioner. When the air con-
ditioner is on, cooling and dehumidifying func-
tions are added to the heater operation.
The air conditioner cooling function oper-
ates only when the engine is running.
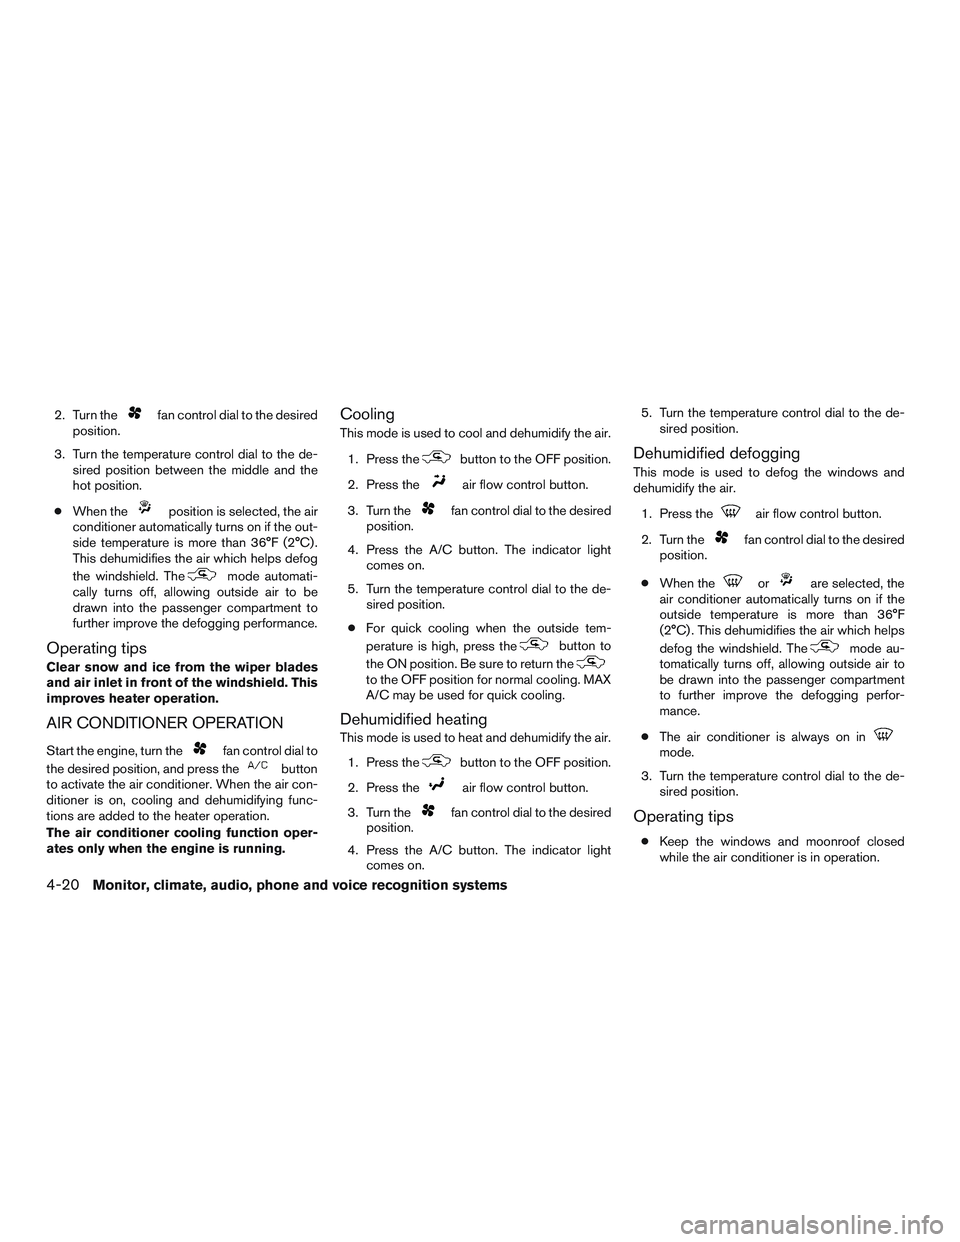
Cooling
This mode is used to cool and dehumidify the air.
1. Press the
button to the OFF position.
2. Press the
air flow control button.
3. Turn the
fan control dial to the desired
position.
4. Press the A/C button. The indicator light comes on.
5. Turn the temperature control dial to the de- sired position.
● For quick cooling when the outside tem-
perature is high, press the
button to
the ON position. Be sure to return the
to the OFF position for normal cooling. MAX
A/C may be used for quick cooling.
Dehumidified heating
This mode is used to heat and dehumidify the air.
1. Press the
button to the OFF position.
2. Press the
air flow control button.
3. Turn the
fan control dial to the desired
position.
4. Press the A/C button. The indicator light comes on. 5. Turn the temperature control dial to the de-
sired position.
Dehumidified defogging
This mode is used to defog the windows and
dehumidify the air.
1. Press the
air flow control button.
2. Turn the
fan control dial to the desired
position.
● When the
orare selected, the
air conditioner automatically turns on if the
outside temperature is more than 36°F
(2°C) . This dehumidifies the air which helps
defog the windshield. The
mode au-
tomatically turns off, allowing outside air to
be drawn into the passenger compartment
to further improve the defogging perfor-
mance.
● The air conditioner is always on in
mode.
3. Turn the temperature control dial to the de- sired position.
Operating tips
●Keep the windows and moonroof closed
while the air conditioner is in operation.
4-20Monitor, climate, audio, phone and voice recognition systems