2017 MITSUBISHI OUTLANDER SPORT radio controls
[x] Cancel search: radio controlsPage 213 of 399

Bluetooth® 2.0 interface (if so equipped) 5-150 Features and controls
5
1. Press the SPEECH button (except for vehicles with Mitsubishi Multi-Commu- nication System) or PICK-UP button (for vehicles with Mitsubishi Multi-Commu-nication System). 2. Say “Setup.” 3. Say “Pairing Options.”4. The voice guide will say “Select one of the following: pair, edit, delete, or list.” Say “Edit.”5. The voice guide will say “Please say,” and read out the numbers of the Bluetooth
®
devices and device tags of corresponding devices in order, starting with the Blue- tooth
® that has been most recently con-
nected. After all paired device tags have beenread, the voice guide will say “Which device, please?” Say the number of the device tag you want to change. 6. The voice guide will say “New name, please.” Say the name you want to regis-ter as a new device tag.
When the confirmation function is on, the voice guide will say “
N00565401126
For the operation of a music player connected via Bluetooth
®, refer to the following sec-
tions. Refer to “Listen to Bluetooth Audio (if so equipped)” on page 7-52. Refer to the separate owner’s manual.
Refer to the separate owner’s manual.
N00565500087
You can make or receive hands-free calls using a Bluetooth
® compatible cellular phone
connected to the Bluetooth
® 2.0 interface.
You can also use the phonebooks in the Blue- tooth
® 2.0 interface to make calls without
dialing telephone numbers. To make a call P.5-151 Send function P.5-152Receiving calls P.5-152 Mute function P.5-153 Switching between hands-free mode and pri-vate mode P.5-153
NOTE
You can press and release the SPEECH but- ton while the list is being read, and immedi-ately say the number of the device tag you want to change.
Operating a music player con- nected via Bluetooth
®
For vehicles equipped with the AM/FM radio/CD player For vehicles equipped with the Mitsubishi Multi-Communication Sys-tem (MMCS)
For vehicles equipped with the DISPLAY AUDIOHow to make or receive hands- free calls
NOTE
Hands-free calls may not operate correctly when you place or receive the call directly from your cellular phone, instead of using the Bluetooth
® 2.0 interface.
BK0239500US.book
150 ページ 2016年5月13日 金曜日 午前8時53分
Page 215 of 399

Bluetooth® 2.0 interface (if so equipped) 5-152 Features and controls
5
5. If only 1 telephone number is registered under the name you just said, the voice guide will proceed to Step 6. If 2 or more telephone numbers are regis-tered that match the name you just said, the voice guide will say “Would you like to call
6. The voice guide will say “Calling
You can redial the last number called, based on the history of dialed calls in the paired cel- lular phone.Use the following procedure to redial. 1. Press the SPEECH button (except for vehicles with Mitsubishi Multi-Commu- nication System) or PICK-UP button (forvehicles with Mitsubishi Multi-Commu- nication System). 2. Say “Redial.”
N00565700018
During a call, press the SPEECH button toenter voice recognition mode, then say
“
N00565801058
If an incoming phone call is received whilethe ignition switch is in the “ACC” or “ON”position, the audio system will be automati- cally turned on and switched to the incoming call, even when the audio system was origi-nally off. The voice guide announcement for the incoming call will be emitted from the frontpassenger’s seat speaker. If the CD player or radio was playing when the incoming call was received, the audio sys-tem will mute the sound from the CD player or radio and emit only the incoming call. To receive the call, press the PICK-UP buttonon the steering wheel control switch. When the call is over,
the audio system will
return to its previous state.
NOTE
If the name you selected has matching data in the vehicle phonebook but no telephone number is registered under the selected loca-tion, the voice guide will say “{home/work/mobile/other} not found for
NOTE
When the confirmation function is on, the system will check if the name and location of the receiver are correct. If the name is cor-rect, answer “Yes.” To change the name or location to call, answer “No.” The system will return to Step3.
RedialingSend function
Receiving calls
BK0239500US.book
152 ページ 2016年5月13日 金曜日 午前8時53分
Page 222 of 399

Bluetooth® 2.0 interface (if so equipped)
Features and controls 5-159
5
1. Press the SPEECH button (except for vehicles with Mitsubishi Multi-Commu-nication System) or PICK-UP button (for vehicles with Mitsubishi Multi-Commu- nication System).2. Say “Phonebook.”3. The voice guide will say “Select one of the following: new entry, edit number, edit name, list names, delete, erase all, orimport contact.” Say “Import contact.”
4. The voice guide will say “Would you like to import a single entry or all contacts?” Say “All contacts.” 5. The voice guide will say “Importing thecontact list from the mobile phonebook. This may take several minutes to com- plete. Would you like to continue?”Answer “Yes,” transferring to the mobile phonebook the phonebook stored in the cellular phone will start.Answer “No,” the system will return tothe main menu.
6. When the transfer is complete, the voice guide will say “Import complete” and then the system will return to the main menu.
N00566301135
Model name: MMC or MDGMY10FCC ID: CB2MDGMY10 orNT8MDGMY10IC: 279B-MDGMY10 or 3043A-MDGMY10 Your Bluetooth
® 2.0 interface operates on a
radio frequency subject to Federal Communi-cations Commission (FCC) Rules (For vehi- cles sold in U.S.A.) and Industry Canada Rules (For vehicles sold in Canada). Thisdevice complies with Part 15 of the FCC Rules and RSS-210 of the Industry Canada Rules. Operation is subject to the followingtwo conditions: This device may not cause harmful inter- ference. This device must accept any interference received, including interference that may cause undesired operation.
The already stored phonebook in the mobile phonebook is overwritten by the stored phonebook in the cellular phone. All or part of data may not be transferred, even when the cellular phone supports Blue- tooth
®, depending on the compatibility of
the device. Only a home, a work, and a mobile number can be imported. The maximum supported telephone number length is 19 digits. Any telephone number of20 digits or more will be truncated to the first 19 digits. If telephone numbers contain characters other than 0 to 9,
*, # or +, these characters
are deleted before the transfer. For the connection settings on the cellular phone side, refer to the instructions for the cellular phone.NOTE
NOTE
The transfer may take some time to complete depending on the number of contacts. If the Bluetooth
® 2.0 interface could not be
connected to the Bluetooth
® compatible cel-
lular phone, the voice guide will say “Unable to transfer contact list from phone” and then the system will return to the main menu. If you press the HANG-UP button or press and hold the SPEECH button during the datatransfer, the transfer will be cancelled and the system will return to the main menu. If an error occurs during the data transfer, all transfers will be cancelled and the voice guide will say “Unable to complete thephonebook import” and then the system will return to the main menu. If there are no contacts in the phonebook, the voice guide will say “There are no contacts on the connected phone.”
General information
BK0239500US.book
159 ページ 2016年5月13日 金曜日 午前8時53分
Page 223 of 399
USB input terminal (if so equipped) 5-160 Features and controls
5
The term “IC:” before the radio certification number only signifies that Industry Canada technical specifications were met.The antenna used for this transmitter must notbe co-located or operating in conjunction with any other antenna or transmitter. End- users and installers must be provided withinstallation instructio
ns and transmitter oper-
ating conditions for satisfying RF exposure compliance.FCC Notice: This equipment has been tested and found to comply with the limits for a Class B digital device, pursuant to part 15 ofthe FCC Rules. These limits are designed to provide reasonable protection against harmful interference in a residential installation.This equipment generates, uses and can radi- ate radio frequency energy and, if not installed and used in accordance with theinstructions, may cause harmful interference to radio communications. However, there is no guarantee that interfer-ence will not occur in a particular installation. If this equipment does cause harmful interfer- ence to radio or television reception, whichcan be determined by turning the equipment
off and on, the user is encouraged to try to correct the interference by one or more of the following measures: Reorient or relocate the receiving antenna. Increase the separation between the equipment and receiver. Connect the equipment into an outlet on a circuit different from that to which thereceiver is connected. Consult the dealer or an experienced radio/TV technician for help.
ICES Notice: This Class B digital apparatus complies with Canadian ICES-003.
N00566401123
N00566701139
You can connect your USB memory device or iPod
* to play music files stored in the USB
memory device or iPod. This section explains how to connect andremove a USB memory device or iPod. See the following section for details on how to play music files. Refer to “Listen to an iPod” on page 7-44. Refer to “Listen to Audio Files on a USBDevice” on page 7-46. Refer to “To play iPod/USB memory device tracks via voice operation” on page 7-49. * : “iPod” is a registered trademark of Apple Inc. in the United States and other countries.
N00566800090
1. Park your vehicle in a safe place and turnthe ignition switch to the “OFF” positionor put the operation mode in OFF. 2. Open the USB input terminal cover (A) in the floor console box.
CAUTION Changes or modifications made to this equipment not expressly approved by the manufacturer may void the FCC authoriza- tion to operate this equipment.
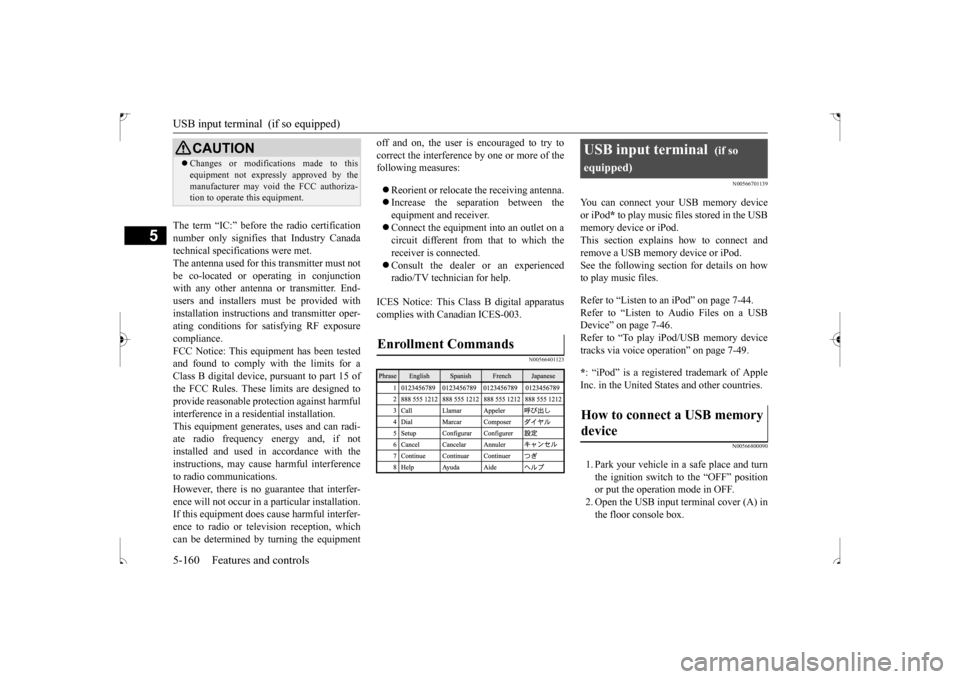
Enrollment Commands
USB input terminal
(if so
equipped)How to connect a USB memory device
BK0239500US.book
160 ページ 2016年5月13日 金曜日 午前8時53分
Page 225 of 399
USB input terminal (if so equipped) 5-162 Features and controls
5
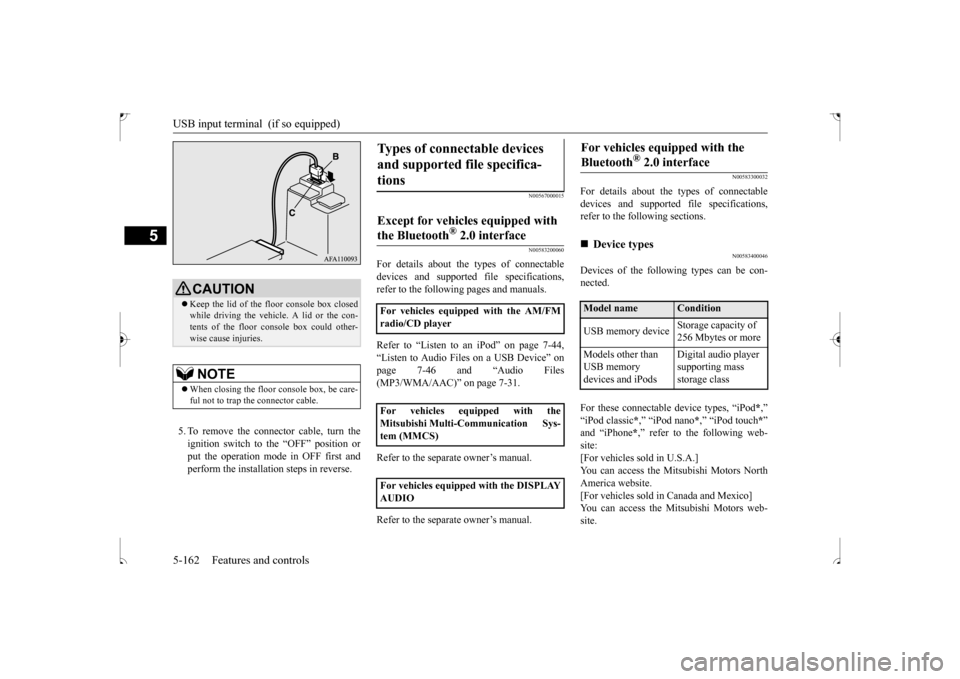
5. To remove the connector cable, turn the ignition switch to the “OFF” position orput the operation mode in OFF first and perform the installation steps in reverse.
N00567000015 N00583200060
For details about the types of connectable devices and supported file specifications,refer to the following pages and manuals. Refer to “Listen to an iPod” on page 7-44, “Listen to Audio Files on a USB Device” on page 7-46 and “Audio Files (MP3/WMA/AAC)” on page 7-31. Refer to the separate owner’s manual. Refer to the separate owner’s manual.
N00583300032
For details about the types of connectable devices and supported file specifications, refer to the following sections.
N00583400046
Devices of the following types can be con-nected. For these connectable device types, “iPod
*,”
“iPod classic
*,” “iPod nano
*,” “iPod touch
*”
and “iPhone
*,” refer to the following web-
site:[For vehicles sold in U.S.A.] You can access the Mitsubishi Motors North America website.[For vehicles sold in Canada and Mexico] You can access the Mitsubishi Motors web- site.
CAUTION Keep the lid of the floor console box closed while driving the vehicle. A lid or the con- tents of the floor console box could other- wise cause injuries.NOTE
When closing the floor console box, be care- ful not to trap the connector cable.
Types of connectable devices and supported file specifica- tions
Except for vehicles equipped with the Bluetooth
® 2.0 interface
For vehicles equipped with the AM/FM radio/CD player For vehicles equipped with the Mitsubishi Multi-Communication Sys- tem (MMCS) For vehicles equipped with the DISPLAY AUDIO
For vehicles equipped with the Bluetooth
® 2.0 interface
Device types Model name
Condition
USB memory device
Storage capacity of 256 Mbytes or more
Models other than USB memory devices and iPods
Digital audio player supporting mass storage class
BK0239500US.book
162 ページ 2016年5月13日 金曜日 午前8時53分
Page 228 of 399
HomeLink® Wireless Control System (if so equipped)
Features and controls 5-165
5
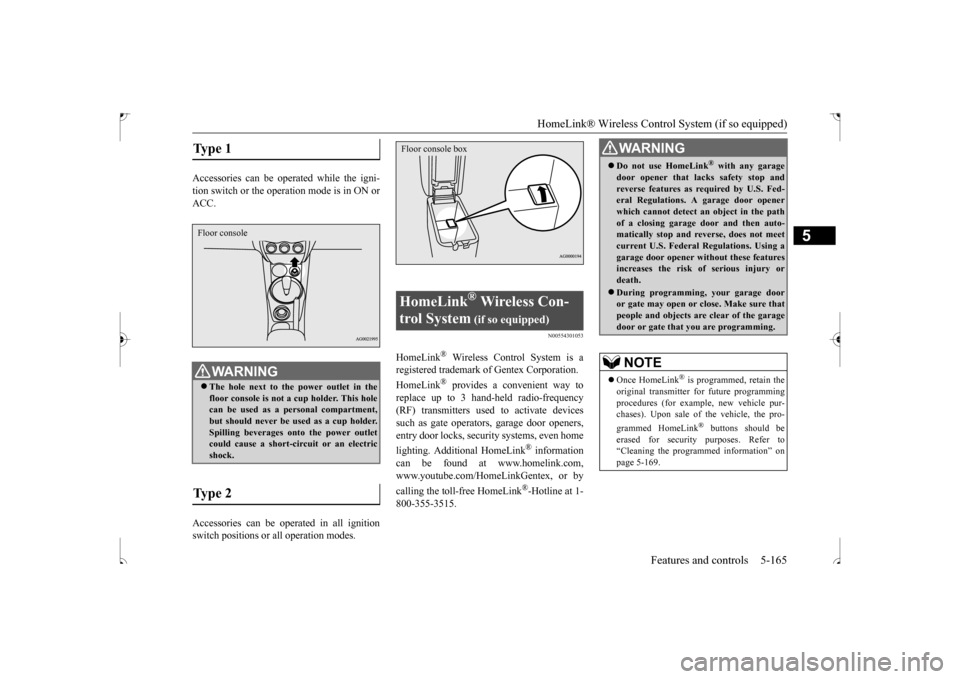
Accessories can be operated while the igni- tion switch or the operat
ion mode is in ON or
ACC. Accessories can be operated in all ignition switch positions or all operation modes.
N00554301053
HomeLink
® Wireless Control System is a
registered trademark of Gentex Corporation. HomeLink
® provides a convenient way to
replace up to 3 hand-held radio-frequency(RF) transmitters used to activate devicessuch as gate operators, garage door openers, entry door locks, security systems, even home lighting. Additional HomeLink
® information
can be found at www.homelink.com, www.youtube.com/HomeLinkGentex, or by calling the toll-free HomeLink
®-Hotline at 1-
800-355-3515.
Type 1
WA R N I N G The hole next to the power outlet in the floor console is not a cup holder. This hole can be used as a personal compartment, but should never be used as a cup holder.Spilling beverages onto the power outlet could cause a short-circuit or an electric shock.
Type 2 Floor console
HomeLink
® Wireless Con-
trol System
(if so equipped)
Floor console box
WA R N I N G Do not use HomeLink
® with any garage
door opener that lacks safety stop andreverse features as required by U.S. Fed- eral Regulations. A garage door opener which cannot detect an object in the pathof a closing garage door and then auto- matically stop and reverse, does not meet current U.S. Federal Regulations. Using agarage door opener without these features increases the risk of serious injury or death. During programming, your garage door or gate may open or close. Make sure thatpeople and objects are clear of the garage door or gate that you are programming.NOTE
Once HomeLink
® is programmed, retain the
original transmitter for future programming procedures (for example, new vehicle pur-chases). Upon sale of the vehicle, the pro- grammed HomeLink
® buttons should be
erased for security purposes. Refer to“Cleaning the programmed information” on page 5-169.
BK0239500US.book
165 ページ 2016年5月13日 金曜日 午前8時53分
Page 229 of 399
HomeLink® Wireless Control System (if so equipped) 5-166 Features and controls
5
N00584600032
Some garage door openers manufactured after 1995 have “rolling code protection”. To program a garage door opener equipped with “rolling code protection”;you will need to access the garage door opener motor to press the motor’s “Learn” or “Smart” buttons. For conve-nience, use a ladder and another person toassist you. It is recommended that a new battery be placed in the hand-held transmitter of the device being programmed to HomeLink
®
for quicker training and accurate trans- mission of the radio-frequency signal.
N00584700033
To program HomeLink
® to operate a garage
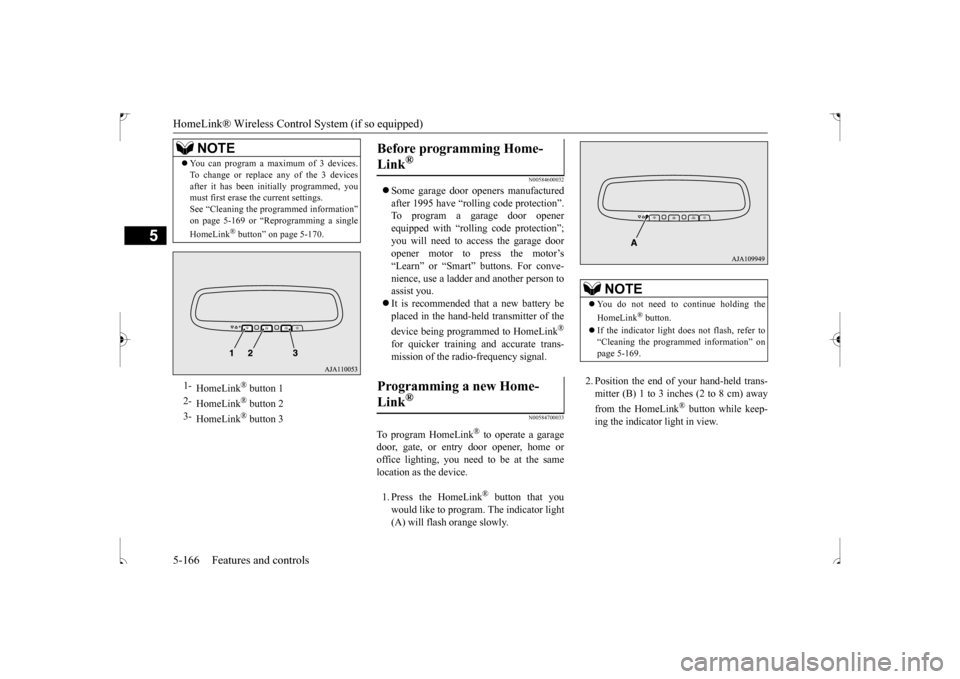
door, gate, or entry door opener, home or office lighting, you need to be at the same location as the device. 1. Press the HomeLink
® button that you
would like to program. The indicator light (A) will flash orange slowly.
2. Position the end of your hand-held trans- mitter (B) 1 to 3 inches (2 to 8 cm) away from the HomeLink
® button while keep-
ing the indicator light in view.
You can program a maximum of 3 devices. To change or replace any of the 3 devices after it has been initially programmed, you must first erase the current settings. See “Cleaning the programmed information”on page 5-169 or “Reprogramming a single HomeLink
® button” on page 5-170.
1-
HomeLink
® button 1
2-
HomeLink
® button 2
3-
HomeLink
® button 3
NOTE
Before programming Home- Link
®
Programming a new Home-Link
®
NOTE
You do not need to continue holding the HomeLink
® button.
If the indicator light does not flash, refer to “Cleaning the programmed information” on page 5-169.
BK0239500US.book
166 ページ 2016年5月13日 金曜日 午前8時53分
Page 231 of 399
HomeLink® Wireless Control System (if so equipped) 5-168 Features and controls
5
N00584800034
Canadian radio-frequency laws require trans- mitter signals to “time-out” (or quit) after several seconds of transmission - which may not be long enough for HomeLink
® to pick
up the signal during programming. Similar tothis Canadian law, some U.S. gate operators are designed to “time-out” in the same man- ner.The indicator LED on the hand-held transmit- ter will go off when the device times out indi- cating that it has finished transmitting.If you live in Canada or
you are having diffi-
culties programming a gate operator or garage door opener by using the “Program-ming” procedures, replace “Programming a new HomeLink
®” step 3 with the following:
3. Press and release - every 2 seconds (“cycle”) your hand-held transmitter until the HomeLink
® indicator light changes from
slowly flashing orange to either rapidly flash-ing green (rolling code) or continuously lit green (fixed code). Now you may release the hand-held transmitter button.Proceed with “Programming a new Home- Link
®” step 4 to complete.
N00584900035
The HomeLink
® has the capability of receiv-
ing garage door status from compatible garage door opener systems. Check your garage door opener manual for the available feature and HomeLink
® compatibility. Also
for a listing of compatible systems contact HomeLink
® at: www.homelink.com
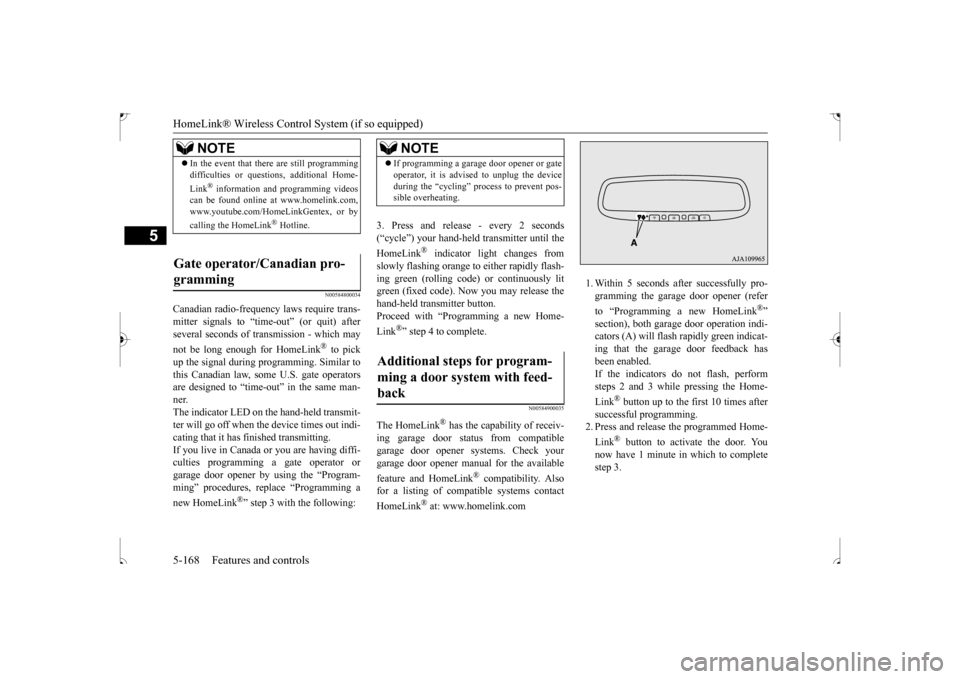
1. Within 5 seconds after successfully pro- gramming the garage door opener (refer to “Programming a new HomeLink
®”
section), both garage door operation indi- cators (A) will flash rapidly green indicat- ing that the garage door feedback hasbeen enabled. If the indicators do not flash, perform steps 2 and 3 while pressing the Home- Link
® button up to the first 10 times after
successful programming. 2. Press and release the programmed Home- Link
® button to activate the door. You
now have 1 minute in which to complete step 3.
NOTE
In the event that there are still programming difficulties or questions, additional Home- Link
® information and programming videos
can be found online at www.homelink.com, www.youtube.com/HomeLinkGentex, or by calling the HomeLink
® Hotline.
Gate operator/Canadian pro- gramming
NOTE
If programming a garage door opener or gate operator, it is advised to unplug the device during the “cycling” process to prevent pos- sible overheating.
Additional steps for program- ming a door system with feed-back
BK0239500US.book
168 ページ 2016年5月13日 金曜日 午前8時53分