2017 MITSUBISHI OUTLANDER battery
[x] Cancel search: batteryPage 271 of 521
Multi Information display - Type 2 5-190 Features and controls
5
N00557101179
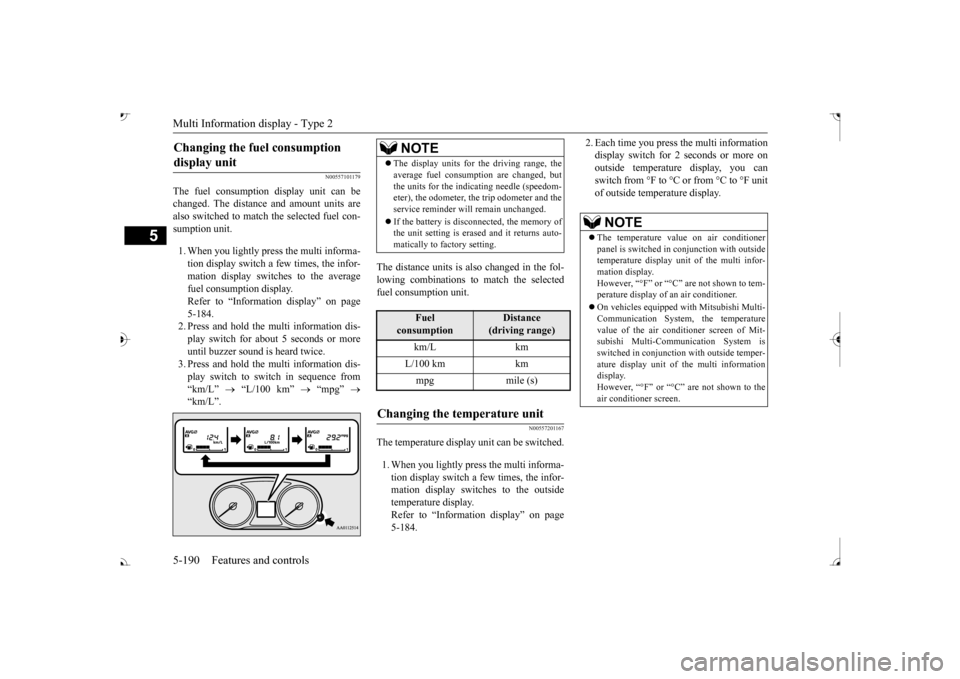
The fuel consumption display unit can be changed. The distance and amount units are also switched to match the selected fuel con- sumption unit. 1. When you lightly press the multi informa- tion display switch a few times, the infor- mation display switches to the average fuel consumption display. Refer to “Information display” on page 5-184.2. Press and hold the multi information dis- play switch for about 5 seconds or more until buzzer sound is
heard twice.
3. Press and hold the multi information dis- play switch to swit
ch in sequence from
“km/L”
“L/100 km”
“mpg”
The distance units is also changed in the fol- lowing combinations to match the selected fuel consumption unit.
N00557201167
The temperature display unit can be switched. 1. When you lightly press the multi informa- tion display switch a few times, the infor- mation display switches to the outsidetemperature display. Refer to “Information display” on page 5-184.
2. Each time you press the multi information display switch for 2 seconds or more onoutside temperatur
e display, you can
switch from °F to °C or from °C to °F unit of outside temperature display.
Changing the fuel consumption display unit
NOTE
The display units for the driving range, the average fuel consumption are changed, butthe units for the indica
ting needle (speedom-
eter), the odometer, the trip odometer and the service reminder will
remain unchanged.
If the battery is disconnected, the memory of the unit setting is erased and it returns auto- matically to factory setting.
Fuel
consumption
Distance
(driving range)
L/100 km km mpg mile (s)
Changing the temperature unit
NOTE
The temperature value on air conditioner panel is switched in
conjunction with outside
temperature display unit of the multi infor- mation display.However, “°F” or “°C” are not shown to tem- perature display of
an air conditioner.
On vehicles e
quipped with Mitsubishi Multi-
Communication System, the temperature value of the air condi
tioner screen of Mit-
subishi Multi-Communication System is switched in conjunction
with outside temper-
ature display unit of
the multi information
display. However, “°F” or “°C” air conditioner screen.
BK0239700US.book 190 ページ 2016年6月16日 木曜日 午前10時58分
Page 301 of 521

Combination headlights and dimmer switch 5-220 Features and controls
5
N00558601113
If there is a fault in the charging system, the warning display is displayed on the informa- tion screen in the multi information display.The warning light in the instrument cluster also illuminates.
N00558701101
If the engine oil pressure drops while the engine is running, the warning display is dis-played on the information screen in the multi information display.
N00522501892
• Confirm that the vehicle slows down when you press down on the brake pedal harderthan usual. In some cases, the brake pedalmay go all the way to the floor.• Should the brakes fail, use engine brakingto reduce your speed and observe the fol- lowings. [Vehicles with the parking brake of thelever type] Carefully pull the parking brake lever. [Vehicles with the Electric parking brake]Keep pulling the Electric parking brake switch. (Refer to “Electric parking brake” Depress the brake peda
l to illuminate the
stop lights to alert th
e vehicles behind you.
Charging system warning dis- play
CAUTION
CAUTION If warnings are displa
yed while the engine is
running, park your vehicl
e in a safe place as
soon as possible and c
ontact an authorized
Mitsubishi Motors dealer
or a repair facility
of your choice to have the system checked.
Oil pressure warning display
CAUTION If the vehicle is driven while the engine oil is low, or the oil level is normal but the warn-ing is displayed, th
e engine may overheat
and damage may result. If the warning is displayed while the engine is running, park your ve
hicle in a safe place
as soon as possible and
check the engine oil
level.
If this warning display comes on when the engine oil level is pr
oper, have your vehicle
checked at an authorized Mitsubishi Motorsdealer or a repair fa
cility of your choice.
NOTE
The oil pressure wa
rning display does not
show the amount of oil. The oil level must be checked using the dipstick.
Combination headlights and dimmer switch Headlights
NOTE
Do not leave the headli
ghts and other lights
on for a long period of time when the engine is not running. The battery will run down.CAUTION
BK0239700US.book 220 ページ 2016年6月16日 木曜日 午前10時58分
Page 312 of 521
Hazard warning flasher switch Features and controls 5-231
5
N00522701328
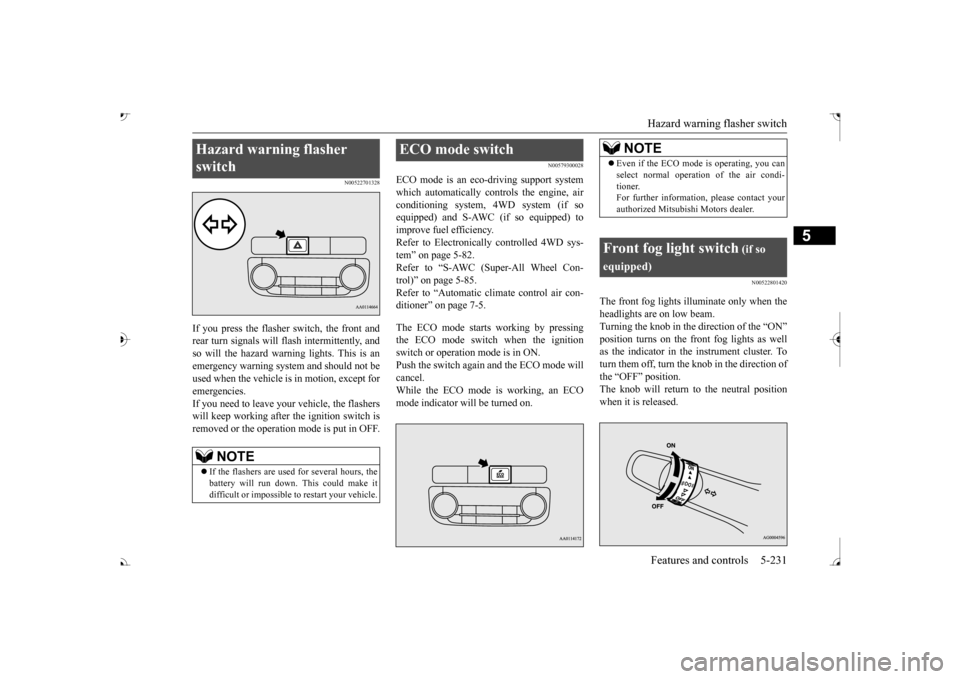
If you press the flasher switch, the front and rear turn signals will flash intermittently, and so will the hazard warning lights. This is an emergency warning system and should not beused when the vehicle is in motion, except for emergencies. If you need to leave your
vehicle, the flashers
will keep working after the ignition switch is removed or the operation mode is put in OFF.
N00579300028
ECO mode is an eco-driving support systemwhich automatically controls the engine, air conditioning system,
4WD system (if so
equipped) and S-AWC (if so equipped) to improve fuel efficiency. Refer to Electronically controlled 4WD sys-tem” on page 5-82. Refer to “S-AWC (Super-All Wheel Con- trol)” on page 5-85. Refer to “Automatic climate control air con- ditioner” on page 7-5. The ECO mode starts working by pressing the ECO mode switch when the ignition switch or operation mode is in ON. Push the switch again
and the ECO mode will
cancel. While the ECO mode is working, an ECO mode indicator will be turned on.
N00522801420
The front fog lights illuminate only when theheadlights are on low beam. Turning the knob in the direction of the “ON”as the indicator in the instrument cluster. To turn them off, turn the knob in the direction of the “OFF” position.The knob will return to the neutral position when it is released.
Hazard warning flasher switch
NOTE
If the flashers are used for several hours, the battery will run down.
This could make it
difficult or impossible
to restart your vehicle.
ECO mode switch
NOTE
Even if the ECO mode is operating, you can select normal operati
on of the air condi-
tioner.For further informati
on, please contact your
authorized Mitsubish
i Motors dealer.
Front fog light switch
(if so
equipped)
BK0239700US.book 231 ページ 2016年6月16日 木曜日 午前10時58分
Page 319 of 521
Electric rear window defogger switch 5-238 Features and controls
5
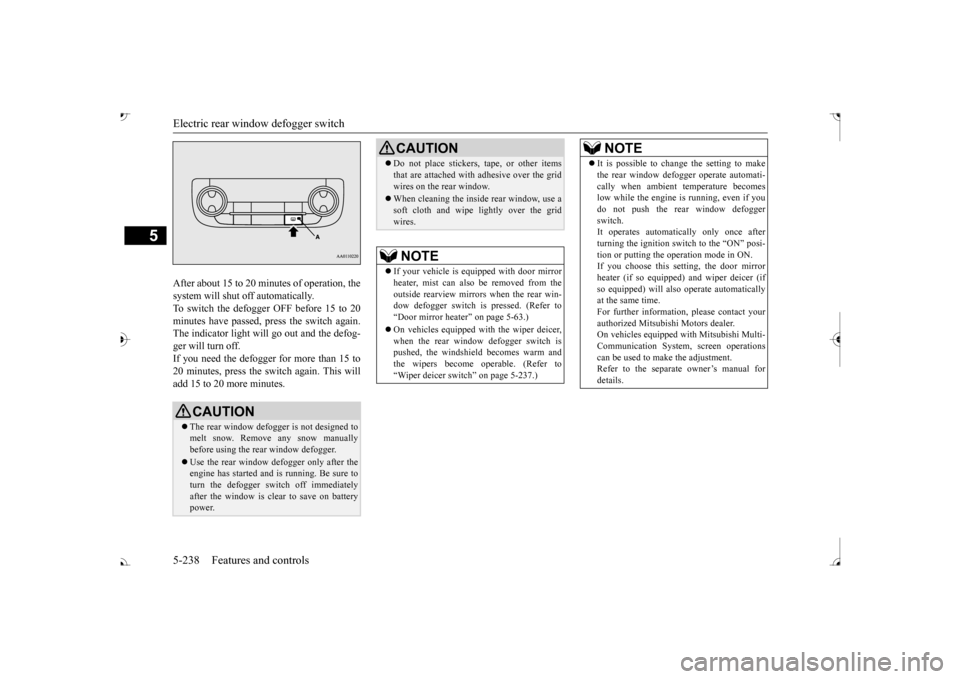
After about 15 to 20 minutes of operation, the system will shut off automatically.To switch the defogger OFF before 15 to 20 minutes have passed,
press the switch again.
The indicator light will
go out and the defog-
ger will turn off. If you need the defogger for more than 15 to 20 minutes, press the switch again. This willadd 15 to 20 more minutes.
CAUTION The rear window defogge
r is not designed to
melt snow. Remove any snow manually before using the rear window defogger. Use the rear window defogger only after the engine has started and
is running. Be sure to
turn the defogger switch off immediatelyafter the window is clea
r to save on battery
power.
Do not place stickers,
tape, or other items
that are attached with adhesive over the gridwires on the rear window. When cleaning the inside
rear window, use a
soft cloth and wipe lightly over the gridwires.NOTE
If your vehicle is e
quipped with door mirror
heater, mist can also be removed from the outside rearview mirror
s when the rear win-
dow defogger switch is
pressed. (Refer to
Page 321 of 521

Bluetooth® 2.0 interface 5-240 Features and controls
5
Refer to “USB input terminal” on page 5-263. Refer to “Listen to an iPod” on page 7-32.Refer to “Listen to Audio Files on a USB Device” on page 7-34. Refer to “To play iPod/USB memory devicetracks via voice opera
tion” on page 7-37.
Refer to “Listen to Bl
uetooth Audio” on page
7-40. Bluetooth
® is a registered trademark of
BLUETOOTH SIG, INC.
N00563801070
You have acquired a device
that includes soft-
ware licensed to Mits
ubishi Motors Corpora-
tion from Visteon Corporation, and their subsequent 3rd party
suppliers. For a com-
plete list of these 3rd party products and theirend user license agreem
ents, please go to the
following website. http://www.jciblueconnect.com/faq/fulldis-closure.pdf
N00563901345
The Bluetooth
® 2.0 interface allows for mak-
ing/receiving hands-free
calls in the vehicle
using a Bluetooth
® compatible cellular
phone. It also allows the user to play music, saved in a Bluetooth
® music player, from the
vehicle’s speakers. The system is equipped with a voice recogni- tion function, which allows you to makehands-free calls by simple switch operations and voice command
operations using a
defined voice tree. The Bluetooth
® 2.0 interface can be used
when the ignition switch or the operation mode is in ON or ACC. Before you can use the Bluetooth
® 2.0 inter-
face, you must pair the Bluetooth
® device
and Bluetooth
® 2.0 interface. Refer to “Con-
necting the Bluetooth
® 2.0 interface and
Bluetooth
® device” on page 5-247.
Bluetooth
® is a registered trademark of
BLUETOOTH SIG, INC.
Link System End User License Agreement Bluetooth
® 2.0 interface
WA R N I N G Although the Bluetooth
® 2.0 interface
allows you to make ha
nds-free calls, if you
choose to use the cellular phone while driving, you must not allow yourself to bedistracted from the sa
fe operation of your
vehicle. Anything, including cellular phone usage, that distracts you from thesafe operation of your vehicle increases your risk of an accident. Refer to and comply with all state and local laws in your area regarding cellular phone usage wh
ile driving.
NOTE
If the ignition switch
or the operation mode
is left in ACC, the accessory power willautomatically turn off after a certain period of time and you will no
longer be able to use
the Bluetooth
® 2.0 interface. The accessory
power comes on again if
the ignition switch
or the engine switch is operated. Refer to“ACC power auto-cutout function” on page 5-20 and 5-64. The Bluetooth
® 2.0 interface cannot be used
if the Bluetooth
® device has a dead battery
or the device power is turned off. Hands-free calls
will not be possible if your
phone does not have
service available.
BK0239700US.book 240 ページ 2016年6月16日 木曜日 午前10時58分
Page 347 of 521
Sun visors 5-266 Features and controls
5
N00524601363
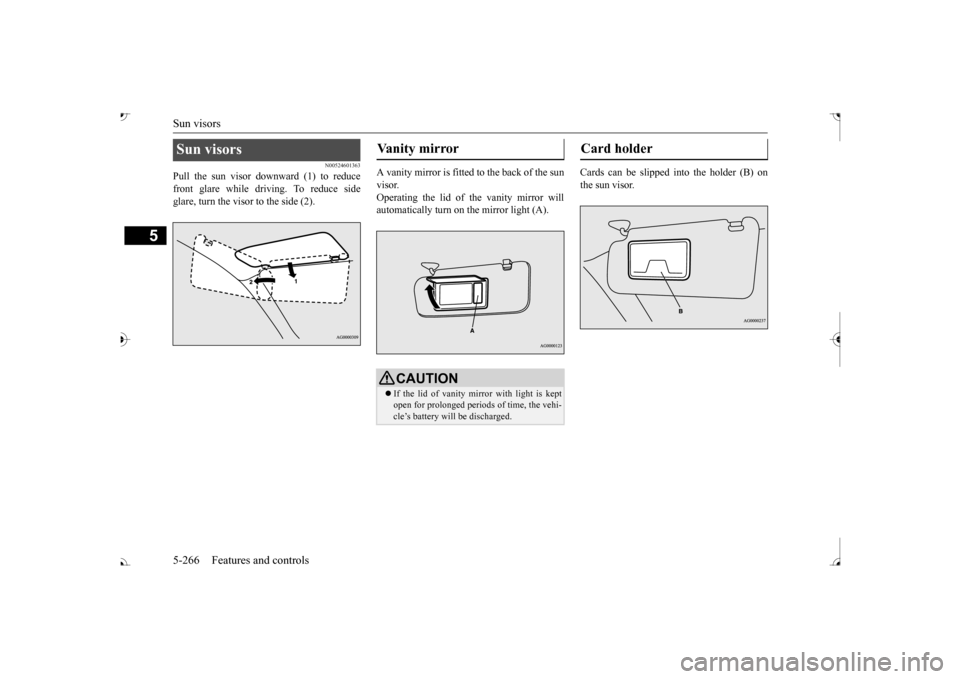
Pull the sun visor downward (1) to reduce front glare while driving. To reduce side glare, turn the visor to the side (2).
A vanity mirror is fitted to the back of the sun visor. Operating the lid of the vanity mirror will automatically turn on the mirror light (A).
Cards can be slipped into the holder (B) on the sun visor.
Sun visors
Vanity mirror
CAUTION If the lid of vanity mirror with light is kept open for prolonged periods of time, the vehi- cle’s battery will be discharged.
Card holder
BK0239700US.book 266 ページ 2016年6月16日 木曜日 午前10時58分
Page 348 of 521
12 V power outlets
Features and controls 5-267
5
N00525001683
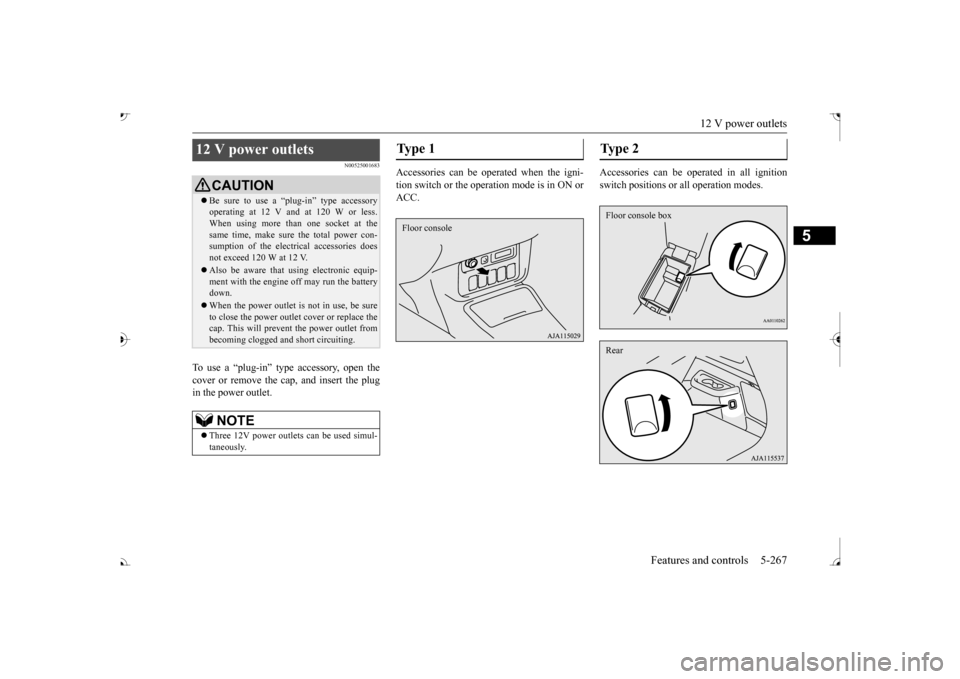
To use a “plug-in” type accessory, open the cover or remove the ca
p, and insert the plug
in the power outlet.
Accessories can be operated when the igni- tion switch or the operation mode is in ON or ACC.
Accessories can be ope
rated in all ignition
switch positions or
all operation modes.
12 V power outlets
CAUTIONBe sure to use a “plug-in” type accessory operating at 12 V and at 120 W or less.When using more than one socket at the same time, make sure the total power con- sumption of the electrical accessories doesnot exceed 120 W at 12 V. Also be aware that
using electronic equip-
ment with the engine
off may run the battery
down. When the power outlet is not in use, be sure to close the power outle
t cover or replace the
cap. This will prevent the power outlet frombecoming clogged and
short circuiting.
NOTE
Three 12V power outlet
s can be used simul-
taneously.
Ty p e 1 Floor console
Type 2 Floor console boxRear
BK0239700US.book 267 ページ 2016年6月16日 木曜日 午前10時58分
Page 349 of 521
HomeLink® Wireless Control System (if so equipped) 5-268 Features and controls
5
N00554301040
HomeLink
® Wireless Contro
l System is a
registered trademark of Gentex Corporation. HomeLink
® provides a convenient way to
replace up to 3 hand-held radio-frequency (RF) transmitters used to activate devicessuch as gate operators
, garage door openers,
entry door locks, security systems, even home lighting. Additional HomeLink
® information
can be found at www.homelink.com, www.youtube.com/HomeLinkGentex, or by calling the toll-free HomeLink
®-Hotline at 1-
800-355-3515.
N00584600029
Some garage door openers manufactured after 1995 have “rolli
ng code protection”.
To program a garage door openerequipped with “rolli
ng code protection”; cess the garage door
opener motor to press the motor’s “Learn”
For convenience, use
a ladder and another pe
rson to assist you.
It is recommended that a new battery be placed in the hand-held
transmitter of the
device being progr
ammed to HomeLink
®
for quicker training and accurate trans- mission of the radio-frequency signal.
HomeLink
® Wireless Con-
trol System
(if so equipped)
WA R N I N G Do not use HomeLink
® with any garage
door opener that la
cks safety stop and
reverse features as required by U.S. Fed- eral Regulations.
A garage door opener
which cannot detect an object in the path of a closing garage d
oor and then auto-
matically stop and reverse, does not meetcurrent U.S. Federal
Regulations. Using a
garage door opener wi
thout these features
increases the risk of serious injury ordeath.
During programming, your garage door or gate may open or close. Make sure thatpeople and objects are clear of the garagedoor or gate that
you are programming.
NOTE
Once HomeLink
® is programmed, retain the
original transmitter for future programming procedures (for example, new vehicle pur-chases). Upon sale of the vehicle, the pro- grammed HomeLink
® buttons should be
erased for security purposes. Refer to “Cleaning the progra
mmed information” on
page 5-272. You can program a ma
ximum of 3 devices.
To change or replace any of the 3 devicesafter it has been in
itially programmed, you
must first erase the current settings. See “Cleaning the programmed information”on page 5-272 or “Reprogramming a single HomeLink
® button” on page 5-272.
WA R N I N G
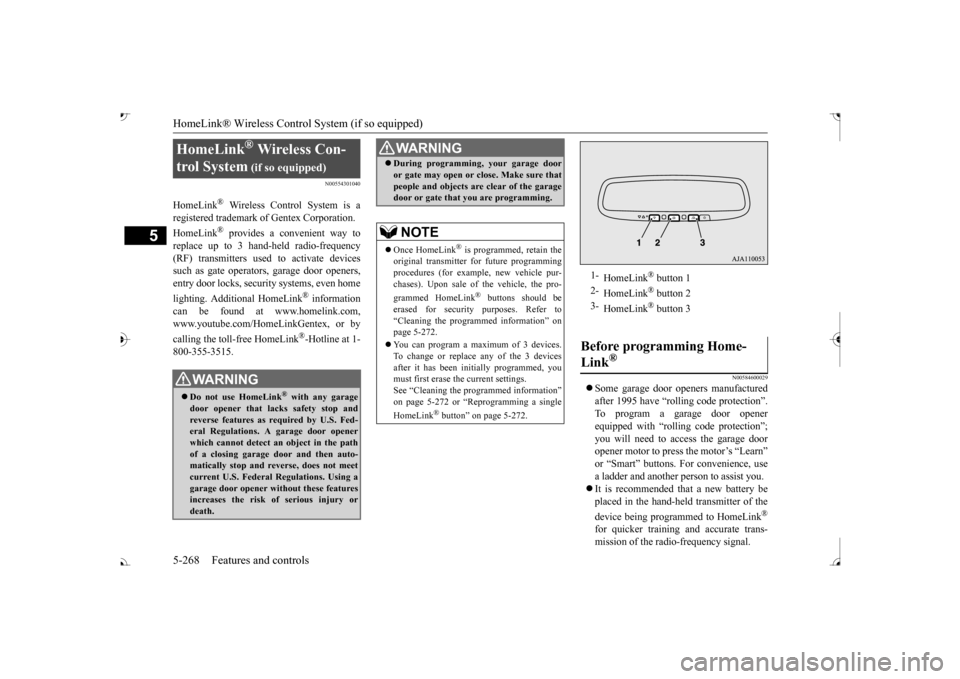
1-
HomeLink
® button 1
2-
HomeLink
® button 2
3-
HomeLink
® button 3
Before programming Home- Link
®
BK0239700US.book 268 ページ 2016年6月16日 木曜日 午前10時58分