2017 MITSUBISHI OUTLANDER ECO mode
[x] Cancel search: ECO modePage 144 of 521
Ignition switch
Features and controls 5-63
5
N00549301260
When the rear window defogger switch is pressed with the engine running, the outside rearview mirrors are defogged or defrosted. Current will flow thr
ough the heater element
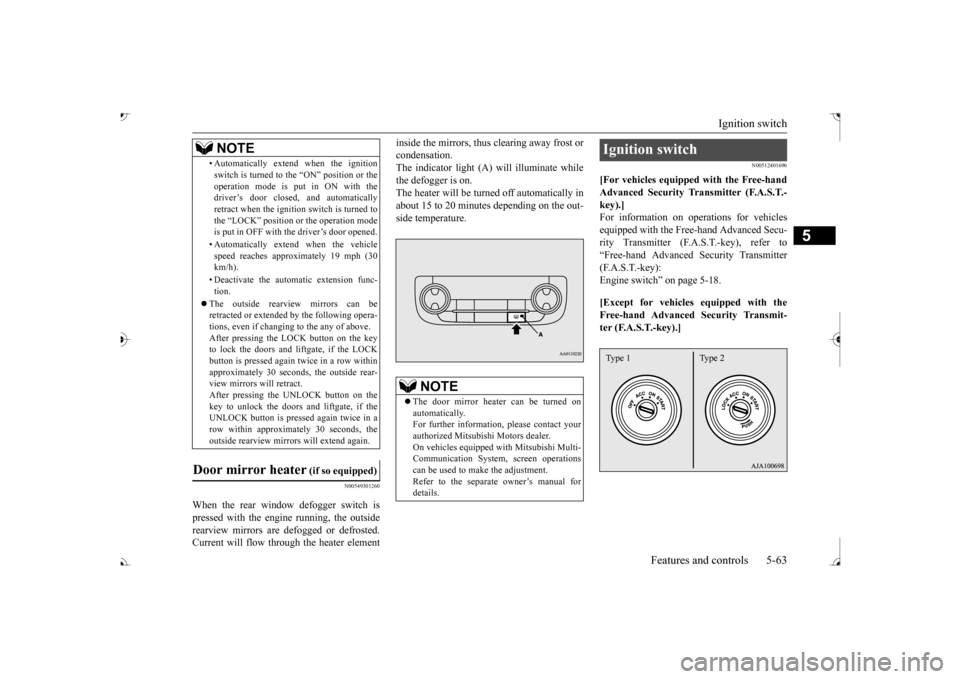
inside the mirrors, thus clearing away frost or condensation.The indicator light (A) will illuminate while the defogger is on. The heater will be turned off automatically inabout 15 to 20 minutes depending on the out- side temperature.
N00512401696
[For vehicles equipped with the Free-handAdvanced Security Tr
ansmitter (F.A.S.T.-
key).]For information on operations for vehicles equipped with the Free-hand Advanced Secu- rity Transmitter (F.A
.S.T.-key), refer to
“Free-hand Advanced
Security Transmitter
(F.A.S.T.-key): Engine switch” on page 5-18. [Except for vehicles equipped with the Free-hand Advanced Security Transmit- ter (F.A.S.T.-key).]
• Automatically extend when the ignition switch is turned to the “ON” position or theoperation mode is put in ON with thedriver’s door closed, and automatically retract when the ignition switch is turned to the “LOCK” position or the operation modeis put in OFF with the driver’s door opened. • Automatically extend when the vehicle speed reaches approximately 19 mph (30 km/h). • Deactivate the automatic extension func- tion.
The outside rearvi
ew mirrors can be
retracted or extended
by the following opera-
tions, even if changing to the any of above.After pressing the LOCK
button on the key
to lock the doors and liftgate, if the LOCK button is pressed again twice in a row withinapproximately 30 seconds
, the outside rear-
view mirrors will retract. After pressing the
UNLOCK button on the
key to unlock the doors and liftgate, if the UNLOCK button is pressed again twice in a row within approximately 30 seconds, theoutside rearview mirro
rs will extend again.
Door mirror heater
(if so equipped)
NOTE
The door mirror heater can be turned on automatically.For further informati
on, please contact your
authorized Mitsubishi Motors dealer. On vehicles equipped
with Mitsubishi Multi-
Communication System, screen operations can be used to ma
ke the adjustment.
Refer to the separate
owner’s manual for
details.
Ignition switch Type 1 Type 2
BK0239700US.book 63 ページ 2016年6月16日 木曜日 午前10時58分
Page 147 of 521
![MITSUBISHI OUTLANDER 2017 3.G Owners Manual Starting the engine 5-66 Features and controls
5
N00512601845
[For vehicles equipped with the Free-hand Advanced Security Transmitter (F.A.S.T.-key).] For information on operation for vehicles equippe MITSUBISHI OUTLANDER 2017 3.G Owners Manual Starting the engine 5-66 Features and controls
5
N00512601845
[For vehicles equipped with the Free-hand Advanced Security Transmitter (F.A.S.T.-key).] For information on operation for vehicles equippe](/manual-img/19/7536/w960_7536-146.png)
Starting the engine 5-66 Features and controls
5
N00512601845
[For vehicles equipped with the Free-hand Advanced Security Transmitter (F.A.S.T.-key).] For information on operation for vehicles equipped with the Free-hand Advanced Secu-rity Transmitter (F.A.S.T.-key), refer to “Free-hand Advanced Se
curity Transmitter
(F.A.S.T.-key): Starting” on page 5-13. [Except for vehicles equipped with the Free-hand Advanced Security Transmit- ter (F.A.S.T.-key).]
Do not operate the starter motor continu- ously for longer than 15 seconds as this could run the battery
down or damage the
starter motor. If the engine does not start,turn the ignition switch back to the “OFF” or “LOCK” position, wait a few seconds, and then try again. Trying repeatedly withthe engine or starter motor still turning will damage the starter mechanism. If the engine will not
start because the bat-
tery is weak or discharged, refer to “Jump-starting the engine” (on page 8-2)for instructions. A longer warm up period will only con- sume extra fuel. The engine is warmed upenough for driving when the bar graph of engine coolant temper
ature display starts
to move or the low coolant temperatureindicator goes out. Refer to “Engine cool- ant temperature display” on page 5-171 or “Low coolant temper
ature indicator” on
page 5-215.
This model is equipped with an electronically controlled fuel injection system. This is a sys- tem that automatically controls fuel injection.There is usually no need to depress the accel- erator pedal when starting the engine. The starter should not be run for more than 15seconds at a time. To prevent battery drain, wait a few seconds between attempts to restart the engine. 1. Make sure all occupants are properly seated with seat belts fastened. 2. Insert the ignition key. 3. Press and hold the brake pedal down withyour right foot. 4. Make sure the selector
lever is in the “P”
NOTE
If the front wheels are turned, the anti-theft lock may sometimes make it difficult to turnthe key from “LOCK” to “ACC”. Firmlyturn the steering wheel to the left or to the right as you turn the key.
Starting the engine
Tips for starting
WA R N I N G Never run the engine in
a closed or poorly
ventilated area any longer than is needed to move your vehicle out of the area. Car- bon monoxide gas, which is odorless andextremely poisonous, could build up and cause serious injury or death.
CAUTION Do not push-start the vehicle.Do not run the engine at high rpms or drive at high speeds until
the engine has had a
chance to warm up. Release the ignition sw
itch as soon as the
engine starts. Otherwis
e, the starter motor
will be damaged
Starting the engine
BK0239700US.book 66 ページ 2016年6月16日 木曜日 午前10時58分
Page 149 of 521

Automatic transaxle (if so equipped) 5-68 Features and controls
5
Also you can manually shift up and shift down the transaxle. Refer to “Sports mode” The transaxle prevents
unnecessary upshifts
even when the accelerator pedal is released and ensures smooth driving. According to the condi
tions, the transaxle
will automatically shift to a lower gear toachieve stronger engine braking. This may help reduce your need to use the service brake.
N00513801424
As an additional safe
ty precaution, models
equipped with an automatic transaxle have a shift-lock device that holds the selector leverin the “P” (PARK) position. To move the selector lever from the “P” (PARK) position to another position, follow the steps below. 1. Press and hold the brake pedal down. 2. Move the selector lever to the desired position.
The transaxle has 6 forward gears and 1 reverse gear.The individual gears are selected automati- cally, depending on the position of the gear selector lever, the speed of the vehicle and theposition of the accelerator pedal.
DRIVING UPHILL
DRIVING DOWNHILL
NOTE
During the break-in pe
riod or immediately
after reconnecting the
battery, your vehicle
may not shift smoothly. This does not indi-cate a problem in the transaxle. Shifting will become smoother once the transaxle has been shifted several
times by the electronic
control system.
Selector lever operation
NOTE
The selector lever cannot
be moved from “P”
mode is put in OFF or ACC, or if the brakepedal is not pressed and held down.
Set the selector lever in the gate to operate while the brake pedal is depressed. Set the selector lever in the gate to operate.
BK0239700US.book 68 ページ 2016年6月16日 木曜日 午前10時58分
Page 150 of 521
Automatic transaxle (if so equipped)
Features and controls 5-69
5
N00563101086
When the selector lever cannot be shifted from the “P” (PARK) position to anotherposition while the brake pedal is pressed and held down with the operation mode in ON, the battery may be flat or the shift-lock mech-anism may be malfunctioning. Immediately have your
vehicle checked by an
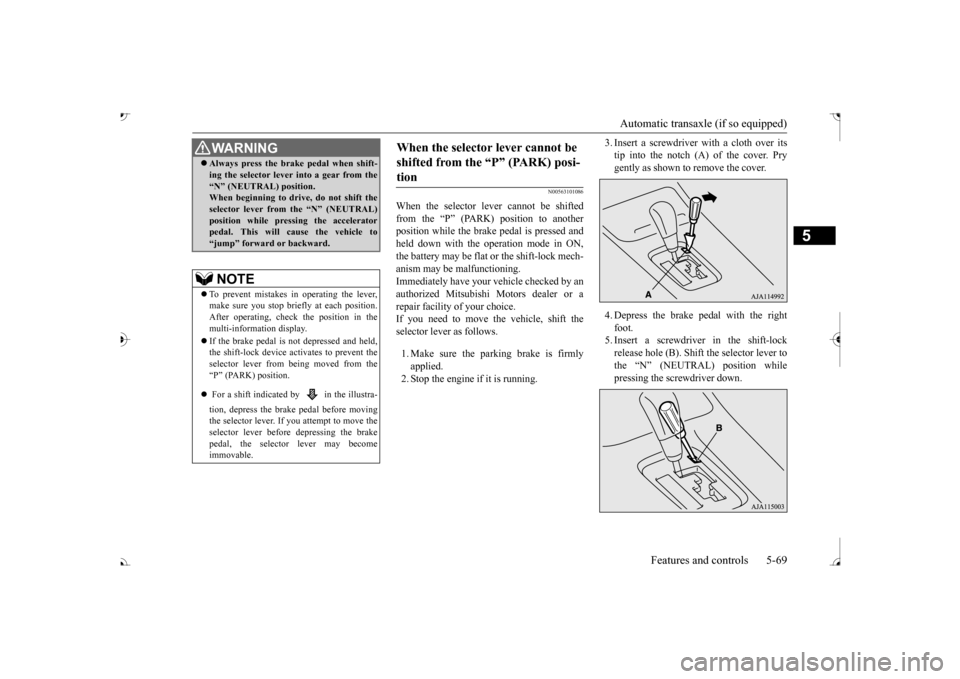
authorized Mitsubishi Motors dealer or a repair facility of your choice. If you need to move the vehicle, shift theselector lever as follows. 1. Make sure the parking brake is firmly applied. 2. Stop the engine if it is running.
3. Insert a screwdrive
r with a cloth over its
tip into the notch (A) of the cover. Prygently as shown to remove the cover. 4. Depress the brake
pedal with the right
foot. 5. Insert a screwdriver in the shift-lockrelease hole (B). Shift the selector lever to the “N” (NEUTRAL) position while pressing the screwdriver down.
WA R N I N G Always press the brake pedal when shift- ing the selector
lever into a gear from the
“N” (NEUTRAL) position. When beginning to drive, do not shift the selector lever from
the “N” (NEUTRAL)
position while pressing the acceleratorpedal. This will cause the vehicle to “jump” forward or backward.NOTE
To prevent mistakes in operating the lever, make sure you stop brie
fly at each position.
After operating, chec
k the position in the
multi-information display. If the brake pedal is not depressed and held, the shift-lock device ac
tivates to prevent the
selector lever from being moved from the“P” (PARK) position. For a shift indicated by in the illustra- tion, depress the brake pedal before moving the selector lever. If you attempt to move the selector lever before depressing the brake pedal, the selector lever may becomeimmovable.
When the selector lever cannot be shifted from the “P” (PARK) posi-tion
BK0239700US.book 69 ページ 2016年6月16日 木曜日 午前10時58分
Page 151 of 521
Automatic transaxle (if so equipped) 5-70 Features and controls
5
N00513901441
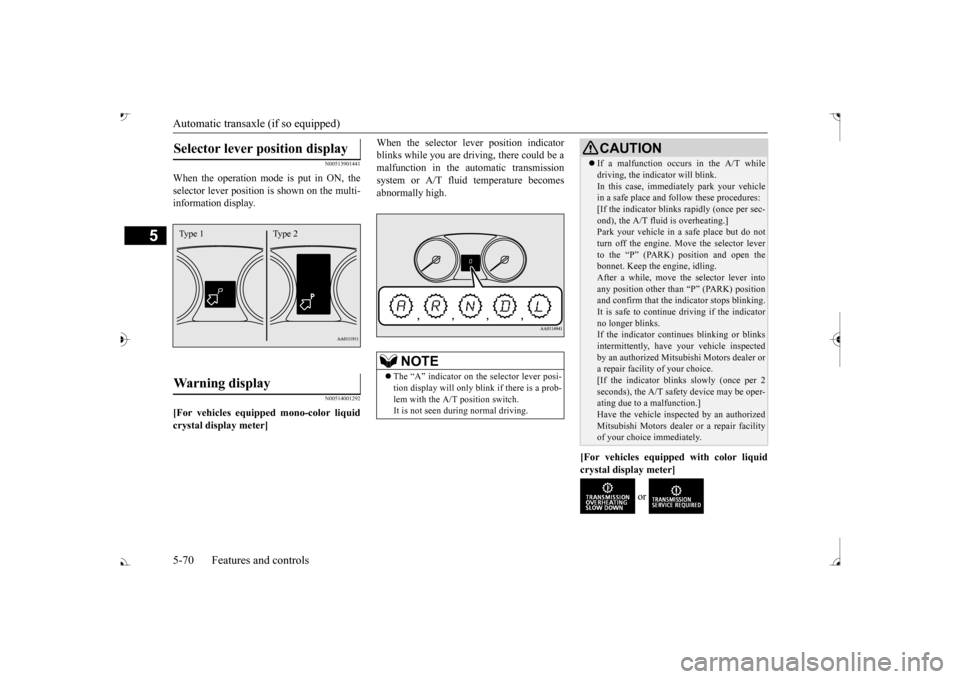
When the operation mode is put in ON, the selector lever position
is shown on the multi-
information display.
N00514001292
[For vehicles equipped mono-color liquid crystal display meter]
When the selector le
ver position indicator
blinks while you are driv
ing, there could be a
malfunction in the automatic transmission system or A/T fluid temperature becomes abnormally high.
[For vehicles equipped with color liquid crystal display meter]
or
Selector lever position display
Warning display
Type 1 Type 2
NOTE
The “A” indicator on the selector lever posi- tion display will only blink if there is a prob- lem with the A/T position switch.It is not seen during normal driving.
CAUTION If a malfunction occurs in the A/T while driving, the indicator will blink.In this case, immediat
ely park your vehicle
in a safe place and fo
llow these procedures:
[If the indicator blinks
rapidly (once per sec-
ond), the A/T fluid is overheating.]Park your vehicle in a safe place but do not turn off the engine. M
ove the selector lever
to the “P” (PARK) position and open thebonnet. Keep the engine, idling. After a while, move the selector lever into any position other than “P” (PARK) positionand confirm that the i
ndicator stops blinking.
It is safe to continue driving if the indicator no longer blinks.If the indicator conti
nues blinking or blinks
intermittently, have
your vehicle inspected
by an authorized Mitsubishi Motors dealer ora repair facility of your choice. [If the indicator blinks slowly (once per 2 seconds), the A/T safety
device may be oper-
ating due to a malfunction.] Have the vehicle inspected by an authorized Mitsubishi Motors dealer
or a repair facility
of your choice immediately.
BK0239700US.book 70 ページ 2016年6月16日 木曜日 午前10時58分
Page 158 of 521
Continuously variable transmission (CVT) (if so equipped)
Features and controls 5-77
5
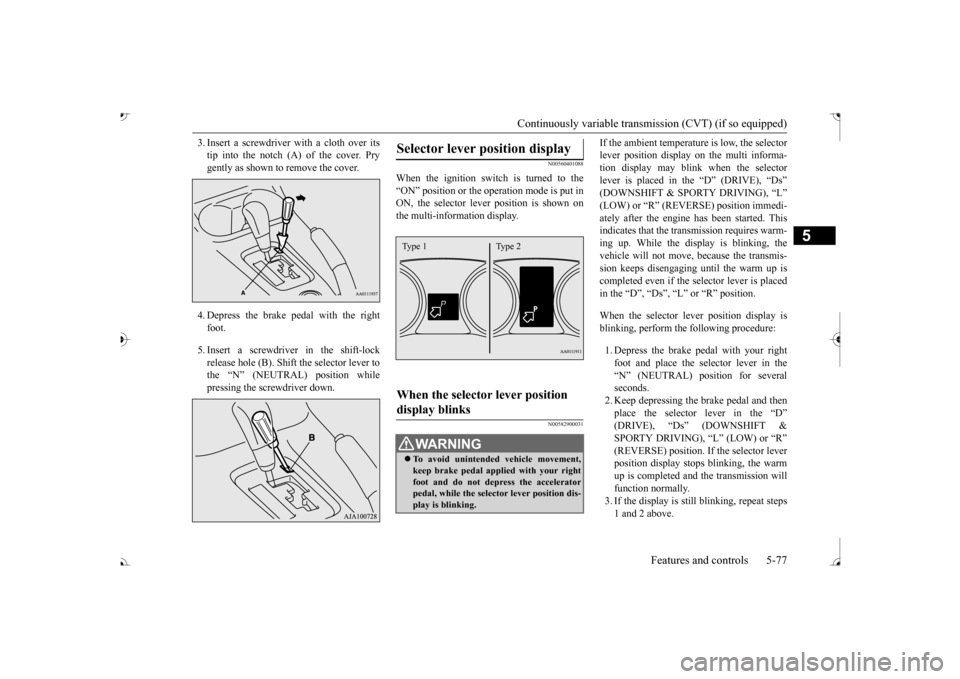
3. Insert a screwdrive
r with a cloth over its
tip into the notch (A) of the cover. Prygently as shown to remove the cover. 4. Depress the brake pe
dal with the right
foot. 5. Insert a screwdriver in the shift-lock release hole (B). Shift the selector lever tothe “N” (NEUTRAL) position while pressing the screwdriver down.
N00560401088
When the ignition switch is turned to the“ON” position or the ope
ration mode is put in
ON, the selector leve
r position is shown on
the multi-information display.
N00582900031
If the ambient temperature is low, the selectorlever position display on the multi informa-tion display may blink when the selector lever is placed in the “D” (DRIVE), “Ds” ately after the engine has been started. This indicates that the tran
smission requires warm-
ing up. While the display is blinking, the vehicle will not move,
because the transmis-
sion keeps disengaging until the warm up is completed even if the selector lever is placed in the “D”, “Ds”, “L” or “R” position. When the selector le
ver position display is
blinking, perform th
e following procedure:
1. Depress the brake pedal with your right foot and place the se
lector lever in the
“N” (NEUTRAL) position for severalseconds. 2. Keep depressing the brake pedal and then place the selector lever in the “D” SPORTY DRIVING), “L” (LOW) or “R” (REVERSE) position. If the selector leverposition display stops
blinking, the warm
up is completed and the transmission will function normally.3. If the display is still
blinking, repeat steps
1 and 2 above.
Selector lever position display
When the selector lever position display blinks
WA R N I N G To avoid unintended
vehicle movement,
keep brake pedal applied with your right foot and do not depress the accelerator pedal, while the selector lever position dis-play is blinking.Type 1 Type 2
BK0239700US.book 77 ページ 2016年6月16日 木曜日 午前10時58分
Page 164 of 521
Electronically controlled 4WD system (if so equipped)
Features and controls 5-83
5
Select the drive mode from the following 3 types to suit the driving conditions.
4-wheel drive operation requires special driv- ing skills.Carefully read the “4-wheel drive operation” section on page 5-88 and take care to drive safely.
N00548401046
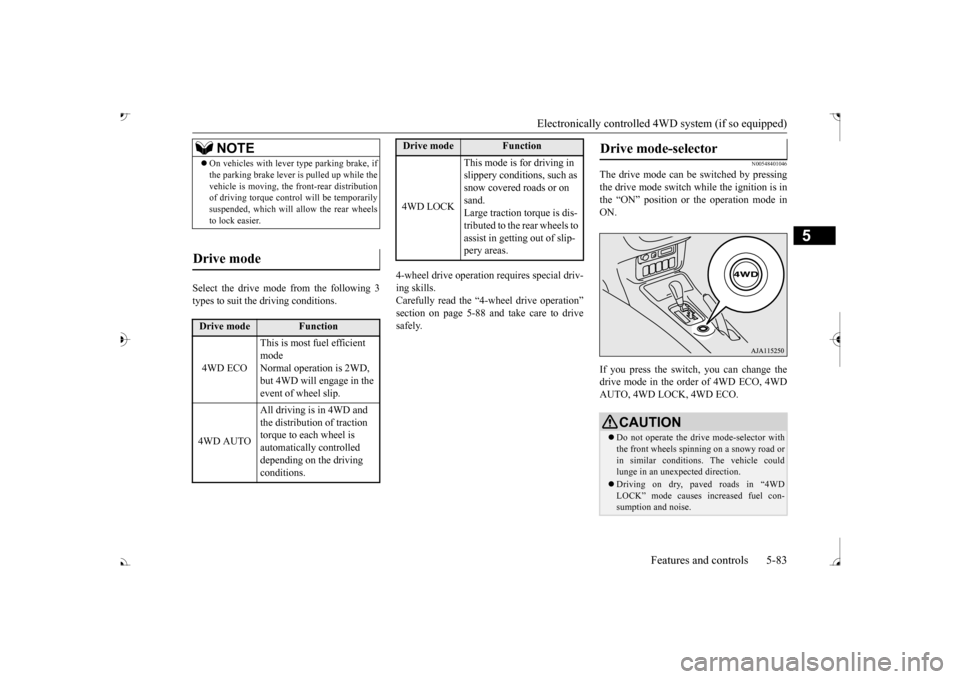
The drive mode can be switched by pressing the drive mode switch while the ignition is in the “ON” position or the operation mode inON. If you press the switch, you can change the drive mode in the order of 4WD ECO, 4WD AUTO, 4WD LOCK, 4WD ECO.
NOTE
On vehicles with lever
type parking brake, if
the parking brake lever is pulled up while thevehicle is moving, the
front-rear distribution
of driving torque contro
l will be temporarily
suspended, which will allow the rear wheels to lock easier.
Drive mode
Drive mode
Function
4WD ECO
This is most fuel efficient mode Normal operation is 2WD, but 4WD will engage in the event of wheel slip.
4WD AUTO
All driving is in 4WD and the distribution of traction torque to each wheel is automatically controlled depending on the driving conditions.
4WD LOCK
This mode is for driving in slippery conditions, such as snow covered roads or on sand. Large traction torque is dis-tributed to the rear wheels to assist in getting out of slip- pery areas.
Drive mode
Function
Drive mode-selector
CAUTION Do not operate the drive mode-selector with the front wheels spinning on a snowy road orin similar conditions
. The vehicle could
lunge in an unexpe
cted direction.
Driving on dry, paved roads in “4WD LOCK” mode causes increased fuel con- sumption and noise.
BK0239700US.book 83 ページ 2016年6月16日 木曜日 午前10時58分
Page 165 of 521
Electronically controlled 4W
D system (if so equipped)
5-84 Features and controls
5
N00549401030
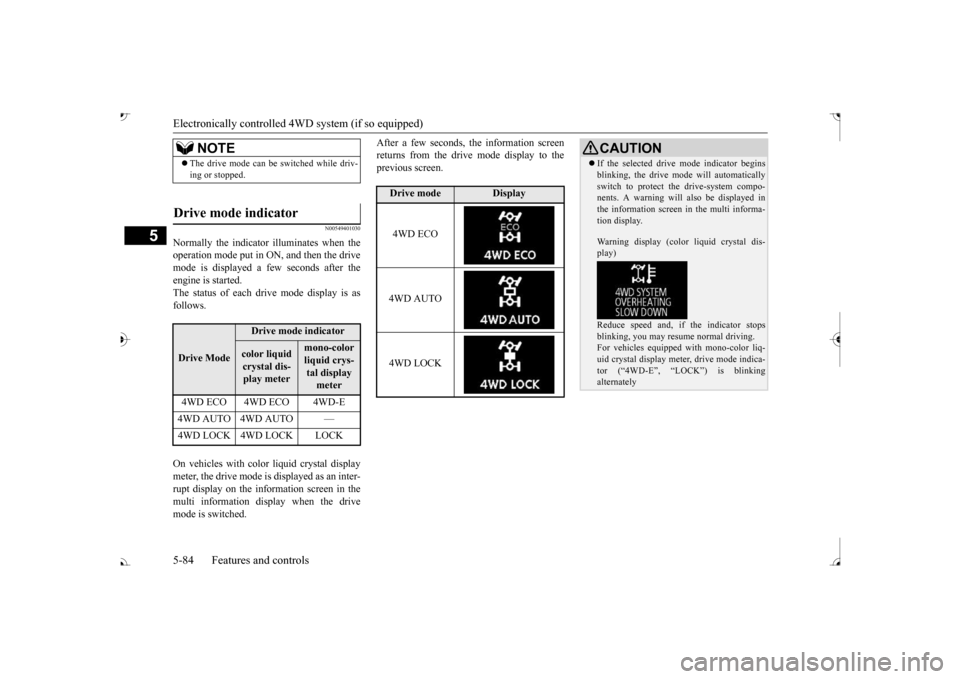
Normally the indicator illuminates when the operation mode put in ON, and then the drivemode is displayed a few seconds after the engine is started. The status of each drive mode display is asfollows. On vehicles with color liquid crystal display meter, the drive mode is displayed as an inter-rupt display on the information screen in the multi information display when the drive mode is switched.
After a few seconds, the information screen returns from the drive mode display to theprevious screen.
NOTE
The drive mode can be
switched while driv-
ing or stopped.
Drive mode indicator
Drive Mode
Drive mode indicatorcolor liquid crystal dis-play meter
mono-color liquid crys- tal display meter
4WD ECO 4WD ECO 4WD-E 4WD AUTO 4WD AUTO —
Drive mode
Display
4WD ECO 4WD AUTO 4WD LOCK
CAUTION If the selected drive mode indicator begins blinking, the drive m
ode will automatically
switch to protect the drive-system compo-nents. A warning will
also be displayed in
the information screen in the multi informa- tion display. Warning display (color liquid crystal dis- play) Reduce speed and, if the indicator stops blinking, you may resume normal driving. For vehicles equipped
with mono-color liq-
uid crystal display mete
r, drive mode indica-
tor (“4WD-E”, “LOC
K”) is blinking
alternately
BK0239700US.book 84 ページ 2016年6月16日 木曜日 午前10時58分