2017 MITSUBISHI OUTLANDER mirror
[x] Cancel search: mirrorPage 234 of 521
Rear-view camera (if so equipped)
Features and controls 5-153
5
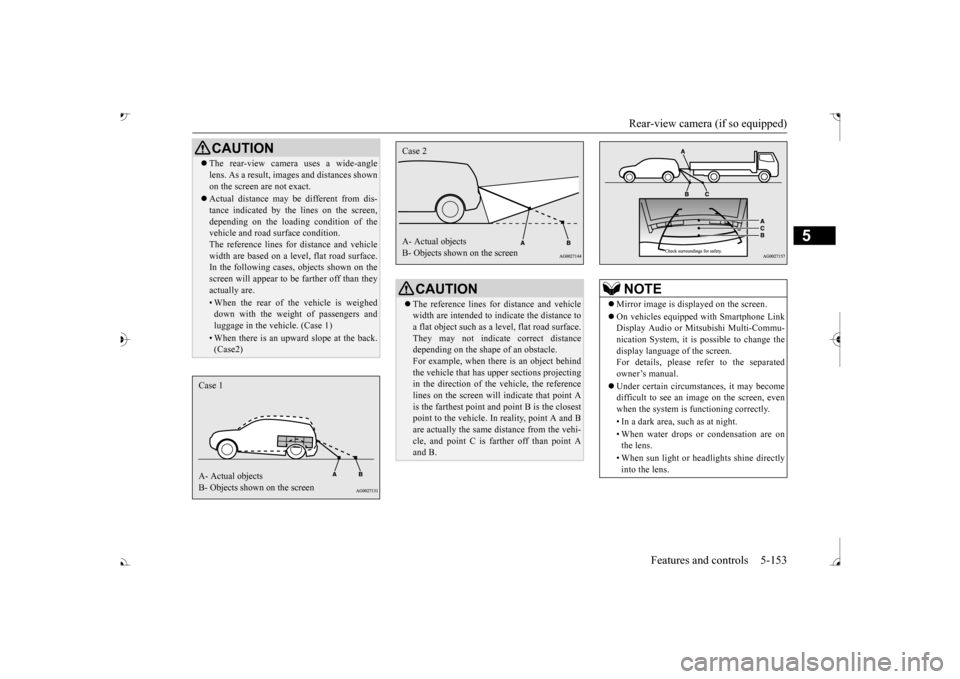
CAUTION The rear-view camera uses a wide-angle lens. As a result, imag
es and distances shown
on the screen are not exact. Actual distance may be different from dis- tance indicated by the
lines on the screen,
depending on the loadi
ng condition of the
vehicle and road surface condition. The reference lines for
distance and vehicle
width are based on a level, flat road surface. In the following cases, objects shown on the screen will appear to
be farther off than they
actually are.• When the rear of th
e vehicle is weighed
down with the weight of passengers and luggage in the vehicle. (Case 1)• When there is an upward slope at the back.(Case2)
Case 1 A- Actual objects B- Objects shown on the screen
CAUTION The reference lines for
distance and vehicle
width are intended to i
ndicate the distance to
a flat object such as a level, flat road surface. They may not indicate correct distance depending on the shape of an obstacle.For example, when there is an object behind the vehicle that has u
pper sections projecting
in the direction of the
vehicle, the reference
lines on the screen will indicate that point A is the farthest point a
nd point B is the closest
point to the vehicle. In
reality, point A and B
are actually the same distance from the vehi- cle, and point C is fa
rther off than point A
and B.Case 2 A- Actual objects B- Objects shown on the screen
NOTE
Mirror image is displayed on the screen. On vehicles equipped with Smartphone Link Display Audio or Mitsubishi Multi-Commu- nication System, it is
possible to change the
display language of the screen. For details, please refer to the separated owner’s manual. Under certain circumst
ances, it may become
difficult to see an image on the screen, evenwhen the system is functioning correctly. • In a dark area, such as at night. • When water drops or condensation are on the lens. • When sun light or he
adlights shine directly
into the lens.
BK0239700US.book 153 ページ 2016年6月16日 木曜日 午前10時58分
Page 235 of 521
Multi Around Monitor (if so equipped)
5
N00587200042
The Multi Around Monitor system uses 4 cameras, “Front-view camera”, “Side-viewcameras (right and le
ft)” and “Rear-view
camera”, and displays
composite views from
those cameras on a screen in the inside rear-view mirror, the DISPLAY AUDIO, the Smartphone Link Display Audio or the Mit- subishi Multi-Comm
unication System.
The Multi Around Monitor
system wi
ll assist
the driver to park the vehicle in a narrow orparallel parking space. Multi Around Monitor
(if so
equipped) Before using the Multi Around Monitor system, read this entire section to fully understand the limitations of this system. Failure to follow instructions could resultin an accident. The Multi Around Monitor system is an aid system to help observe around the vehicle. It is not a substitute for your visual confirmation. Never rely solely on the Multi Around Monitor system. The view on the screen islimited, and objects
outside the view can-
not be seen on the screen.
CAUTION Before using the Multi Around Monitor, make sure that all doors and the liftgate areclosed and the outside mirrors are unfolded.If an outside mirror is folded and/or if a front door and/or the liftgate
is open, the areas dis-
played on the Multi Around Monitor will notbe appropriate.
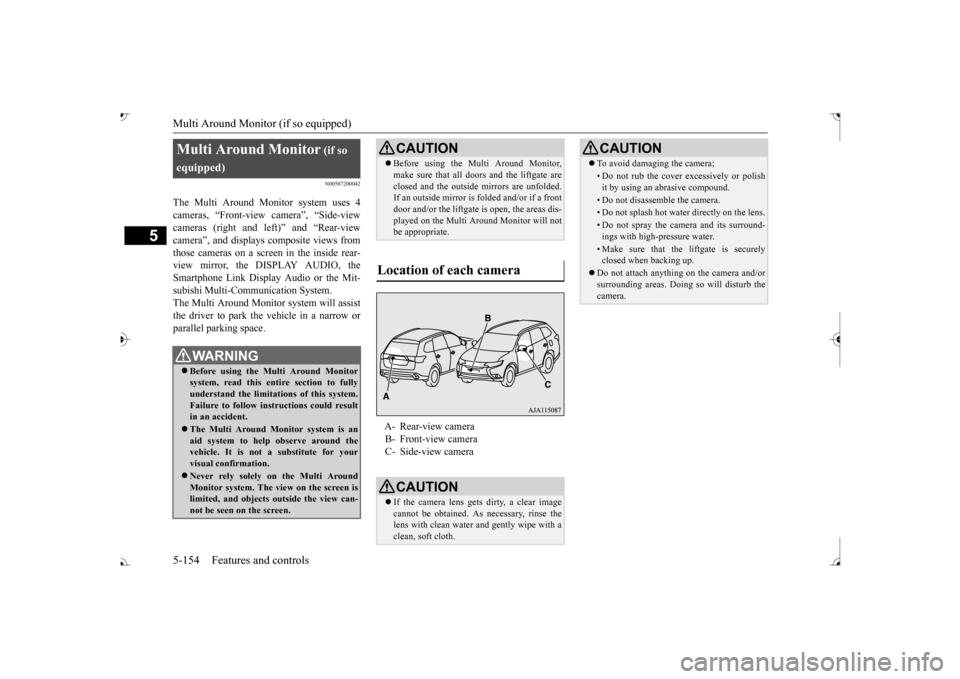
Location of each camera
A- Rear-view camera B- Front-view camera C- Side-view cameraCAUTION If the camera lens gets
dirty, a clear image
cannot be obtained. As necessary, rinse the lens with clean water and gently wipe with aclean, soft cloth.
To avoid damaging the camera;• Do not rub the cover excessively or polish it by using an abrasive compound.• Do not disassemble the camera.• Do not splash hot wate
r directly on the lens.
• Do not spray the camera and its surround- ings with high-pressure water.• Make sure that the liftgate is securelyclosed when backing up.
Do not attach anythi
ng on the camera and/or
surrounding areas. Doing
so will disturb the
camera.CAUTION
BK0239700US.book 154 ページ 2016年6月16日 木曜日 午前10時58分
Page 238 of 521
Multi Around Monitor (if so equipped)
Features and controls 5-157
5
N00587500032
The Multi Around Monitor can only be used when the operation mode is put in ON. When you move the selector lever to the “R” view/rear-view is disp
layed on the screen of
the inside rearview mirror, the DISPLAY AUDIO, the Smartphone Link Display Audio or the Mitsubishi Multi-communication Sys-
tem. When you move the selector lever to any other position, the
display disappears.
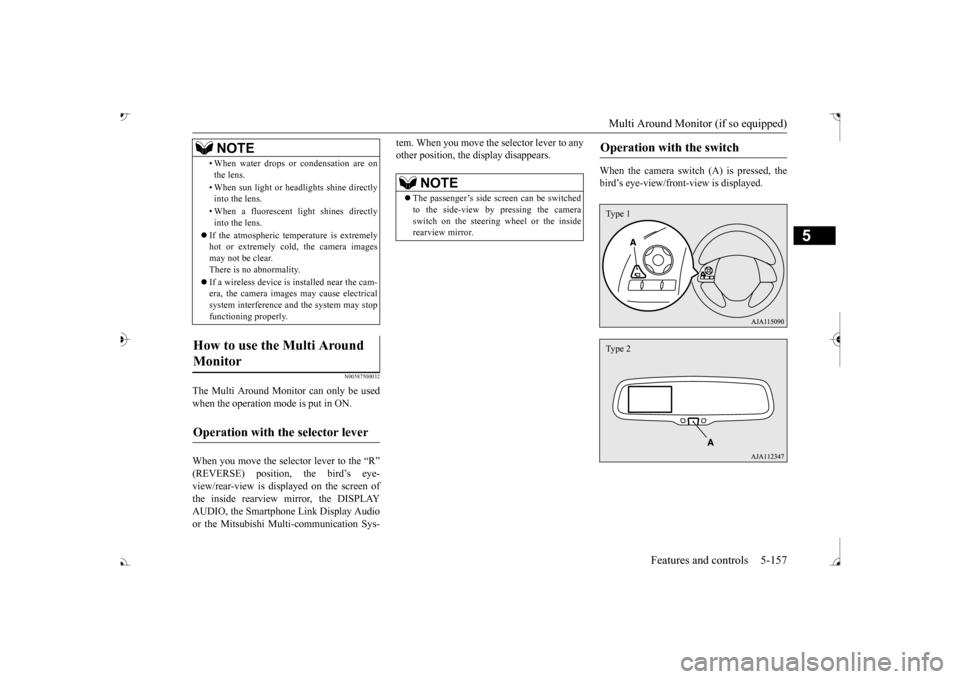
When the camera switch (A) is pressed, the bird’s eye-view/front
-view is displayed.
• When water drops or
condensation are on
the lens. • When sun light or he
adlights shine directly
into the lens. • When a fluorescent li
ght shines directly
into the lens.
If the atmospheric temperature is extremely hot or extremely cold, the camera images may not be clear.There is no abnormality. If a wireless device is installed near the cam- era, the camera images may cause electrical system interference and the system may stop functioning properly.
How to use the Multi Around Monitor
Operation with the selector lever
NOTE
NOTE
The passenger’s side sc
reen can be switched
to the side-view by pressing the camera switch on the steering wheel or the inside rearview mirror.
Operation with the switch
Type 1Type 2
BK0239700US.book 157 ページ 2016年6月16日 木曜日 午前10時58分
Page 242 of 521
Multi Around Monitor (if so equipped)
Features and controls 5-161
5
N00587900023
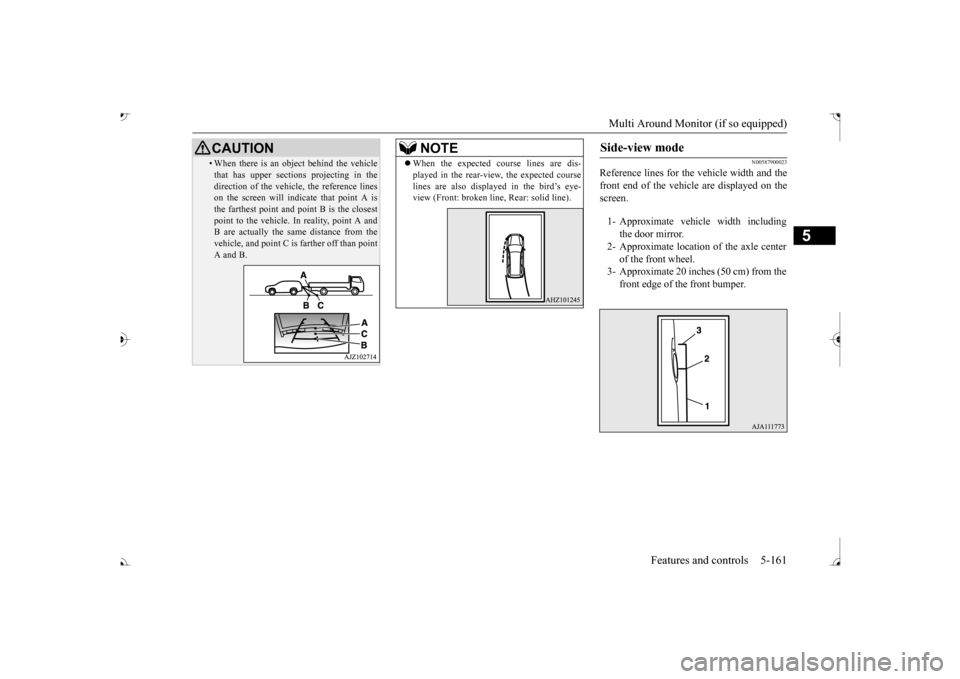
Reference lines for the
vehicle width and the
front end of the vehicle are displayed on the screen.
• When there is an object behind the vehicle that has upper sections projecting in thedirection of the vehicl
e, the reference lines
on the screen will indicate that point A is the farthest point and
point B is the closest
point to the vehicle.
In reality, point A and
B are actually the same distance from the vehicle, and point C is
farther off than point
A and B.CAUTION
NOTE
When the expected course lines are dis- played in the rear-view, the expected courselines are also displayed in the bird’s eye-view (Front: broken li
ne, Rear: solid line).
Side-view mode
1- Approximate vehi
cle width including
the door mirror.
2- Approximate location
of the axle center
of the front wheel.
3- Approximate 20 inches (50 cm) from the
front edge of the front bumper.
BK0239700US.book 161 ページ 2016年6月16日 木曜日 午前10時58分
Page 307 of 521

Combination headlights and dimmer switch 5-226 Features and controls
5
The sensitivity of the se
nsor can be temporar-
ily lowering in the following ways. 1. Park your vehicle in a safe place and the ignition switch is turned to the “OFF” or “LOCK” position or the operation mode is put in OFF.2. Press the automatic high beam system switch more than 15 times within 5 sec- onds after operation mode is turned on.
• A vehicle in front
or oncoming vehicle is
hindered by any object
such as continuous
bends, elevated median/i
sland, traffic signs,
roadside trees. • Your vehicle passes
an oncoming vehicle
suddenly on a bend with poor visibility. • Another vehicle crosse
s ahead of your vehi-
cle.
The headlights may remain at low beam (or be switched from high beam to low beam) when a reflective object (e.g. street light, traffic signal, noticeboard and signboard) Any of the following factors may influence the headlight beam switching timing: • How brightly the exteri
or lights of a vehicle
in front or oncoming
vehicle il
luminate.
• Movement or direction
of a vehicle in front
or oncoming vehicle. • Only right or left exte
rior light of a vehicle
in front or oncoming
vehicle is illuminat-
ing. • A vehicle in front or
oncoming vehicle is a
motorcycle. • Road conditions (gradient, bends and road surface). • The number of occupa
nts and luggage load.
The automatic high beam
system recognises
environmental conditi
ons by sensing a light
source ahead of your ve
hicle. Therefore, you
may feel like someth
ing is not quite right
when the headlight beams are switched auto- matically.NOTE
The system may not de
tect a light vehicle
such as a bicycle. The system may not detect an ambient brightness precisely. Th
is causes the traffic
to be dazzled by high beam or the low beamto be maintained. In such cases, you should switch the headli
ght beams manually.
• In bad weather (heavy
rain, fog, snow or
sandstorm). • The windshield is dirty or fogged up. • The windshield is cracked or broken.• The sensor is deformed or dirty. • A light, which is simila
r to the headlights or
tail lights, is shining around your vehicle. • A vehicle in front
or oncoming vehicle is
driven without lights, the exterior lights are dirty or discoloured, or the direction of theheadlight beams is adjusted improperly. • It becomes dark and bright suddenly and continuously around your vehicle. • Your vehicle is driven on uneven surfaces.• Your vehicle is driven on a winding road. • A reflective object such as a noticeboard or a mirror reflects a li
ght ahead of your vehi-
cle. • When lights of the vehicle in front or head- lights of an oncoming ve
hicle blend into the
other lights. • The rear end of a vehicle in front (such as a container truck) re
flect a strong light.
• Your vehicle's headlight
is broken or dirty.
NOTE
• Your vehicle is inclined due to a flat tire or towing. • The warning display appears. (Refer to “System
problem warning” on
page 5-227.)
Observe the precautions below to maintain good usage conditions: • Do not attempt to di
sassemble the sensor.
• Do not affix a sticker or label on the wind- shield near the sensor. • Avoid overload. • Do not modify your vehicle.• When the windshield is replaced, use the Mitsubishi Motors
genuine parts.
To adjust the sensitivity of the sensor
NOTE
BK0239700US.book 226 ページ 2016年6月16日 木曜日 午前10時58分
Page 319 of 521
Electric rear window defogger switch 5-238 Features and controls
5
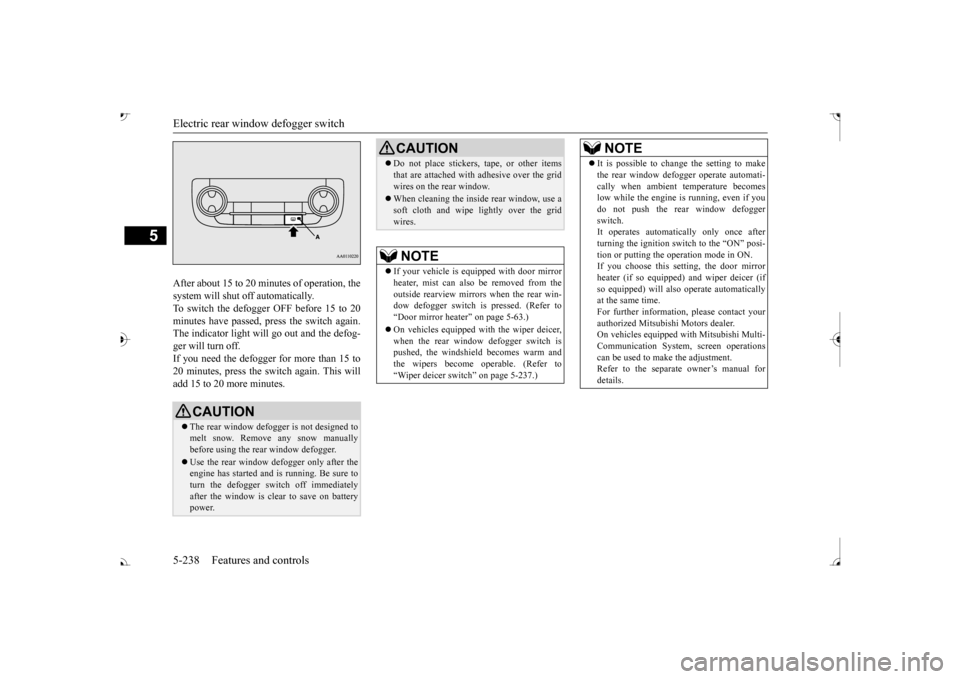
After about 15 to 20 minutes of operation, the system will shut off automatically.To switch the defogger OFF before 15 to 20 minutes have passed,
press the switch again.
The indicator light will
go out and the defog-
ger will turn off. If you need the defogger for more than 15 to 20 minutes, press the switch again. This willadd 15 to 20 more minutes.
CAUTION The rear window defogge
r is not designed to
melt snow. Remove any snow manually before using the rear window defogger. Use the rear window defogger only after the engine has started and
is running. Be sure to
turn the defogger switch off immediatelyafter the window is clea
r to save on battery
power.
Do not place stickers,
tape, or other items
that are attached with adhesive over the gridwires on the rear window. When cleaning the inside
rear window, use a
soft cloth and wipe lightly over the gridwires.NOTE
If your vehicle is e
quipped with door mirror
heater, mist can also be removed from the outside rearview mirror
s when the rear win-
dow defogger switch is
pressed. (Refer to
Page 347 of 521
Sun visors 5-266 Features and controls
5
N00524601363
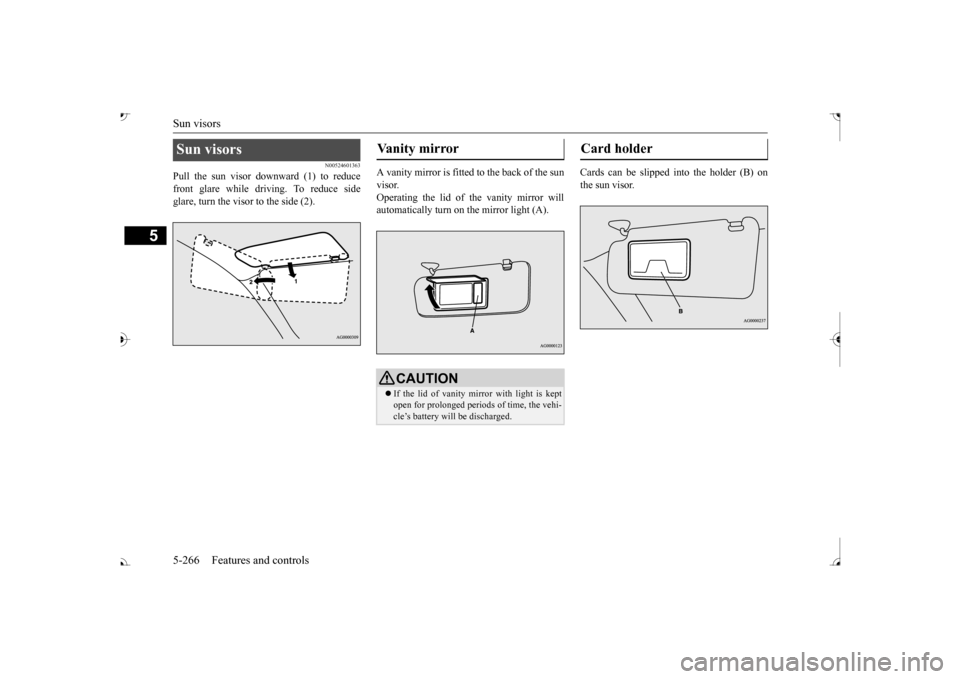
Pull the sun visor downward (1) to reduce front glare while driving. To reduce side glare, turn the visor to the side (2).
A vanity mirror is fitted to the back of the sun visor. Operating the lid of the vanity mirror will automatically turn on the mirror light (A).
Cards can be slipped into the holder (B) on the sun visor.
Sun visors
Vanity mirror
CAUTION If the lid of vanity mirror with light is kept open for prolonged periods of time, the vehi- cle’s battery will be discharged.
Card holder
BK0239700US.book 266 ページ 2016年6月16日 木曜日 午前10時58分
Page 379 of 521
Trailer towing 6-14 Driving safety
6
Trailer lights and equipment must comply with federal, state,
and local regulations.
Check with your loca
l recreational vehicle
dealer for the requirements in your area, and use only equipment designed for your vehi- cle. Since lighting and wiring
vary by trailer type
and brand, you should have a qualified tech- nician install a suitable connector between thevehicle and the trailer.
Improper equipment or
installation can cause da
mage to your vehi-
cle’s electrical system
and affect your vehicle
warranty. Many states and Canadi
an provinces require
special outside mirrors when towing a trailer. Even if not required,
you should install spe-
cial mirrors if you ca
nnot clearly see behind
you, or if the trailer
creates a blind spot.
Ask your trailer sales or
rental agency if any
other items are recomm
ended or required for
your towing situation.
Towing a trailer requires a certain amount of experience. Before setting out for the open road, you’ll want to get to know your trailer. Acquaint
yourself with the feel of handling and braking with the added weight of the trailer. Alwayskeep in mind that the vehicle you are driving is now a good deal longer and not nearly as responsive as your vehicl
e is without a trailer.
Before you start, check the trailer hitch, safety chains, tires
and mirror adjustment.
Be sure your vehicle’s ti
res are inflated to the
cold inflation pressure listed in the manual. You’ll find these numbe
rs on the tire and
loading information placard at the sill of thedriver’s door. Refer to “Tire inflati
on pressures” on page
9-18. Stay at least twice as far behind the vehicle ahead as you would when driving your vehi- cle without a trailer.
This can help you avoid
situations that require
heavy braking and sud-
den turns.
Trailer lights Additional trailer equipment
Operating hints
WA R N I N G If you have a rear window open and you tow a trailer with
your vehicle, carbon
monoxide gas which
you cannot see or
smell could come into your vehicle. It can cause unconsciousness or death. Refer to“Exhaust system” on page 9-24. To maximize your safe
ty when towing a
trailer: Have your exhaust system inspected for leaks, and make necessary repairs beforestarting on your trip. Keep the rear windows closed.If exhaust does come into your vehicle through a window or
another opening,
drive with your front, main heating or cooling system on an
d with the blower on
any speed. This will
bring fresh, outside
air into your vehicle. Do not use recircula- tion because it only recirculates the air inside your vehicle. Refer to “Air selectionswitch” on page 7-9.
Driver preparation
Vehicle preparation Tire Following distance
BK0239700US.book 14 ページ 2016年6月16日 木曜日 午前10時58分