2017 MITSUBISHI OUTLANDER mirror
[x] Cancel search: mirrorPage 112 of 521
Free-hand Advanced Securi
ty Transmitter (F.A.S.T.-key) (if so equipped)
Features and controls 5-31
5
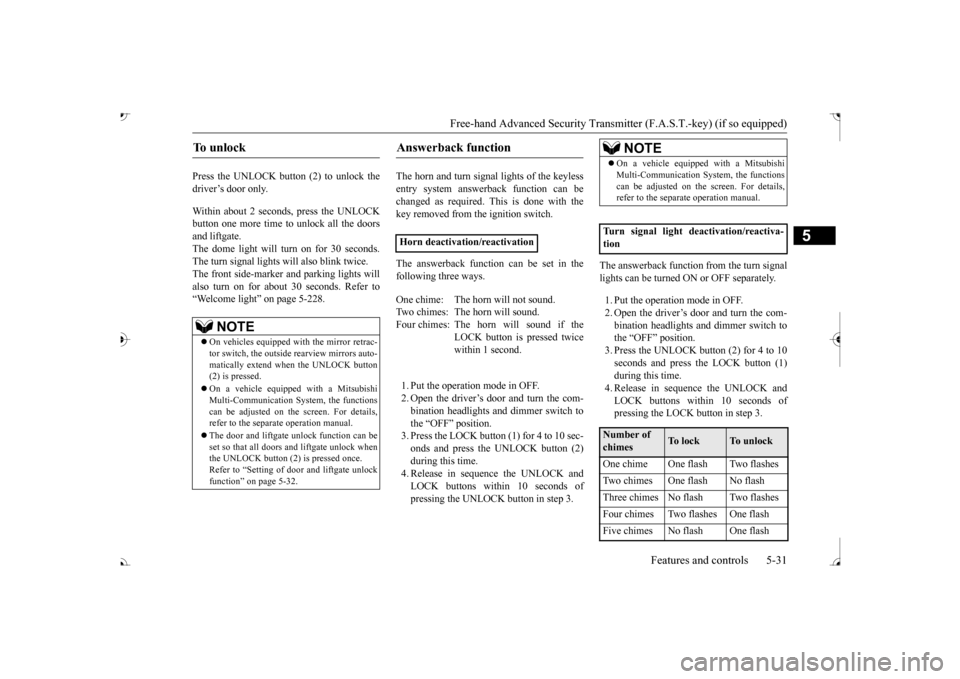
Press the UNLOCK button (2) to unlock the driver’s door only. Within about 2 seconds, press the UNLOCK button one more time to unlock all the doorsand liftgate. The dome light will turn on for 30 seconds. The turn signal lights will also blink twice. The front side-marker
and parking lights will
also turn on for about 30 seconds. Refer to“Welcome light” on page 5-228.
The horn and turn signal lights of the keyless entry system answerback function can be changed as required. This is done with thekey removed from the ignition switch. The answerback function can be set in the following three ways. 1. Put the operation mode in OFF. 2. Open the driver’s door and turn the com- bination headlights a
nd dimmer switch to
the “OFF” position.3. Press the LOCK button (1) for 4 to 10 sec- onds and press the UNLOCK button (2) during this time.4. Release in sequence the UNLOCK and LOCK buttons within 10 seconds of pressing the UNLOCK button in step 3.
The answerback function from the turn signal lights can be turned ON or OFF separately. 1. Put the operation mode in OFF. 2. Open the driver’s door and turn the com- bination headlights and dimmer switch tothe “OFF” position. 3. Press the UNLOCK button (2) for 4 to 10 seconds and press the LOCK button (1)during this time. 4. Release in sequence the UNLOCK and LOCK buttons within 10 seconds ofpressing the LOCK button in step 3.
To u n l o c k
NOTE
On vehicles equipped wi
th the mirror retrac-
tor switch, the outside rearview mirrors auto- matically extend when
the UNLOCK button
(2) is pressed. On a vehicle equippe
d with a Mitsubishi
Multi-Communication System, the functionscan be adjusted on the screen. For details, refer to the separa
te operation manual.
The door and liftgate unlock function can be set so that all doors and liftgate unlock when the UNLOCK button (2) is pressed once.Refer to “Setting of door
and liftgate unlock
function” on page 5-32.
Answerback function
Horn deactivation/reactivation One chime: The horn will not sound. Two chimes: The horn will sound.Four chimes: The horn will sound if the
LOCK button is pressed twice within 1 second.
NOTE
On a vehicle equipped with a Mitsubishi Multi-Communication System, the functionscan be adjusted on the screen. For details,refer to the separa
te operation manual.
Turn signal light deactivation/reactiva- tionNumber of chimes
To l o c k
To u n l o c k
One chime One flash Two flashes Two chimes One flash No flash Three chimes No flash Two flashes Four chimes Two flashes One flash Five chimes No flash One flash
BK0239700US.book 31 ページ 2016年6月16日 木曜日 午前10時58分
Page 120 of 521
Power liftgate (if so equipped) Features and controls 5-39
5
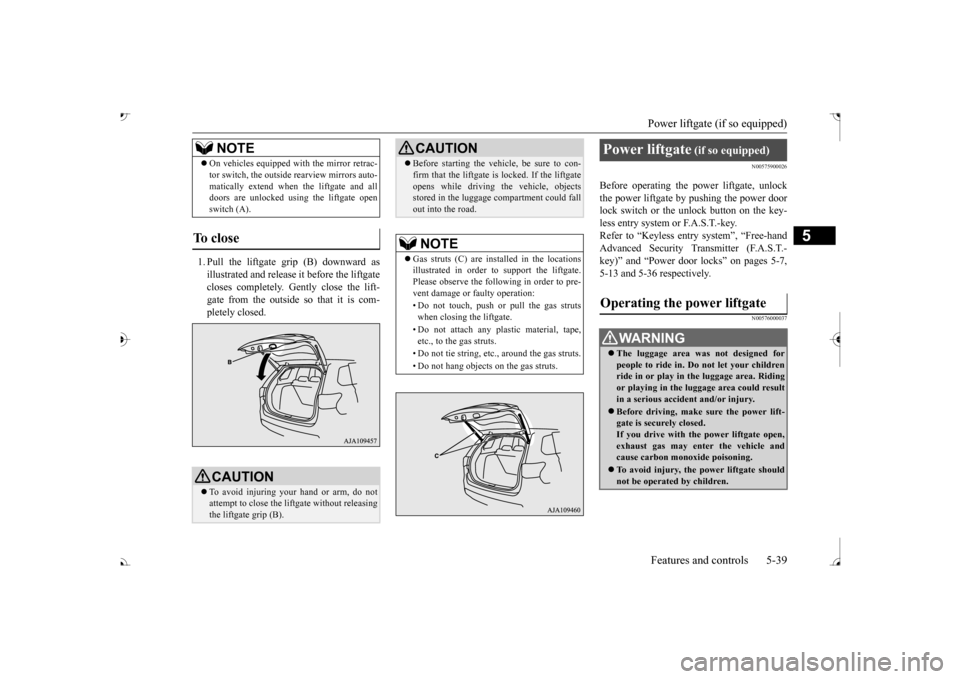
1. Pull the liftgate grip (B) downward as illustrated and release it before the liftgate closes completely. Gently close the lift- gate from the outside so that it is com-pletely closed.
N00575900026
Before operating the pow
er liftgate, unlock
the power liftgate by pushing the power doorlock switch or the unlock button on the key- less entry system or F.A.S.T.-key. Refer to “Keyless entry system”, “Free-handAdvanced Security Transmitter (F.A.S.T.- key)” and “Power door locks” on pages 5-7, 5-13 and 5-36 respectively.
N00576000037
On vehicles equipped wi
th the mirror retrac-
tor switch, the outside rearview mirrors auto-matically extend when
the liftgate and all
doors are unlocked using the liftgate open switch (A).
To close
CAUTION To avoid injuring your hand or arm, do not attempt to close the lift
gate without releasing
the liftgate grip (B).NOTE
Before starting the vehi
cle, be sure to con-
firm that the liftgate is locked. If the liftgateopens while driving the vehicle, objectsstored in the luggage compartment could fall out into the road.NOTE
Gas struts (C) are installed in the locations illustrated in order to
support the liftgate.
Please observe the foll
owing in order to pre-
vent damage or faulty operation: • Do not touch, push or pull the gas struts when closing the liftgate. • Do not attach any pl
astic material, tape,
etc., to the gas struts. • Do not tie string, etc., around the gas struts.• Do not hang objects on the gas struts.CAUTION
Power liftgate
(if so equipped)
WA R N I N G The luggage area was not designed for people to ride in. Do not let your children ride in or play in
the luggage area. Riding
or playing in the lu
ggage area could result
in a serious accide
nt and/or injury.
Before driving, make sure the power lift- gate is securely closed. If you drive with th
e power liftgate open,
exhaust gas may enter the vehicle and cause carbon monoxide poisoning. To avoid injury, the power liftgate should not be operated by children.
BK0239700US.book 39 ページ 2016年6月16日 木曜日 午前10時58分
Page 124 of 521

Power liftgate (if so equipped) Features and controls 5-43
5
If the driver’s side po
wer liftgate switch is
pressed once while the
power liftgate is oper-
ating, the warning buz
zer will sound and the
power liftgate will move in the direction opposite to the one in which it was operating. The power liftgate can
be opened by pressing
the open switch (C). If the open switch is pressed while the power liftgate and all doors are unlocked, the power
liftgate will open after the warning buzzer sounds and the hazard wa
rning flasher blinks.
The power liftgate can
be closed by pressing
the close switch (D) on the power liftgate.
If the close switch on the power liftgate is pressed, the power liftgate will close after thewarning buzzer sounds 3 times and the hazard warning flasher
blinks 2 times.
If the close switch is pressed once while thepower liftgate is clos
ing, the warning buzzer
sounds once and the power liftgate opens.
N00576200026
If the auto reverse sensors (A) on either side of the power liftgate de
tect that something is
being trapped by the cl
osing power liftgate,
the warning buzzer will sound once and theliftgate will automatically reverse direction and return to the full open position.
WA R N I N G When operating the
power liftgate, make
sure that there are no people near the power liftgate and that there is sufficient space behind and ab
ove the vehicle.
Opening the power liftgate using the open switch
NOTE
When you are carrying the F.A.S.T.-key with the power liftgate is locked, the power lift- gate can be opened by pressing the open switch even if the power liftgate is locked. For vehicles equipped w
ith the mirror retrac-
tor switch, the outside rearview mirrors auto-matically extend when the power liftgate and all doors are unlocked using the liftgate open switch (C).
Closing the power liftgate using the close switch
NOTE
If the close switch is again pressed once while the power liftgate is operating in the opening direction, th
e warning buzzer will
sound once and the power
liftgate will close.
Auto reverse
BK0239700US.book 43 ページ 2016年6月16日 木曜日 午前10時58分
Page 138 of 521
Steering wheel height
and reach adjustment
Features and controls 5-57
5
Warning light (yellow) Warning display If there is a malfunction in the system, the warning light will come on. In addition, the warning display appears on the information screen in the multi information display.
Under normal conditions, the warning light only comes on when the operation mode isput in ON and goes off a few seconds later.
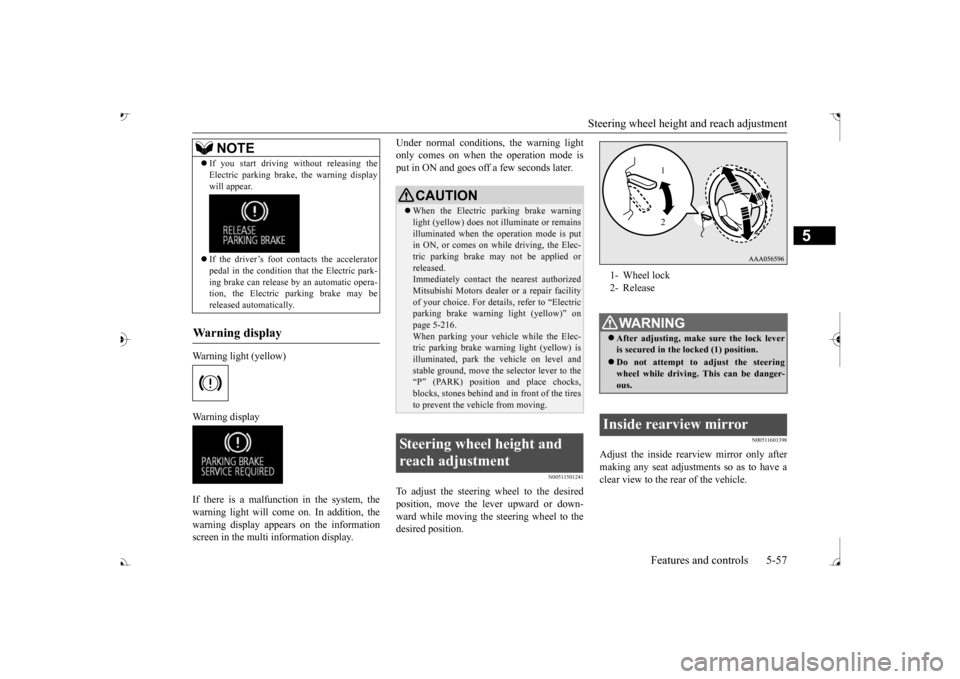
N00511501241
To adjust the steering wheel to the desiredposition, move the lever upward or down- ward while moving the steering wheel to the desired position.
N00511601398
Adjust the inside rearview mirror only after making any seat adjustme
nts so as to have a
clear view to the rear of the vehicle.
If you start driving wi
thout releasing the
Electric parking brake, the warning displaywill appear. If the driver’s foot contacts the accelerator pedal in the condition th
at the Electric park-
ing brake can release by an automatic opera-tion, the Electric parking brake may be released automatically.
Wa r n i n g d is p la y
NOTE
CAUTION When the Electric parking brake warning light (yellow) does not
illuminate or remains
illuminated when the operation mode is put in ON, or comes on while driving, the Elec- tric parking brake may not be applied orreleased. Immediately contact the nearest authorized Mitsubishi Motors dealer
or a repair facility
of your choice. For detail
s, refer to “Electric
parking brake warni
ng light (yellow)” on
page 5-216.When parking your vehi
cle while the Elec-
tric parking brake warning light (yellow) is illuminated, park th
e vehicle on level and
stable ground, move the
selector lever to the
“P” (PARK) position and place chocks, blocks, stones behind and
in front of the tires
to prevent the vehicle from moving.
Steering wheel height and reach adjustment
1- Wheel lock 2- ReleaseWA R N I N G After adjusting, make sure the lock lever is secured in the locked (1) position. Do not attempt to adjust the steering wheel while driving. This can be danger-ous.
Inside rearview mirror
1 2
BK0239700US.book 57 ページ 2016年7月1日 金曜日 午後3時15分
Page 139 of 521
Inside rearview mirror 5-58 Features and controls
5
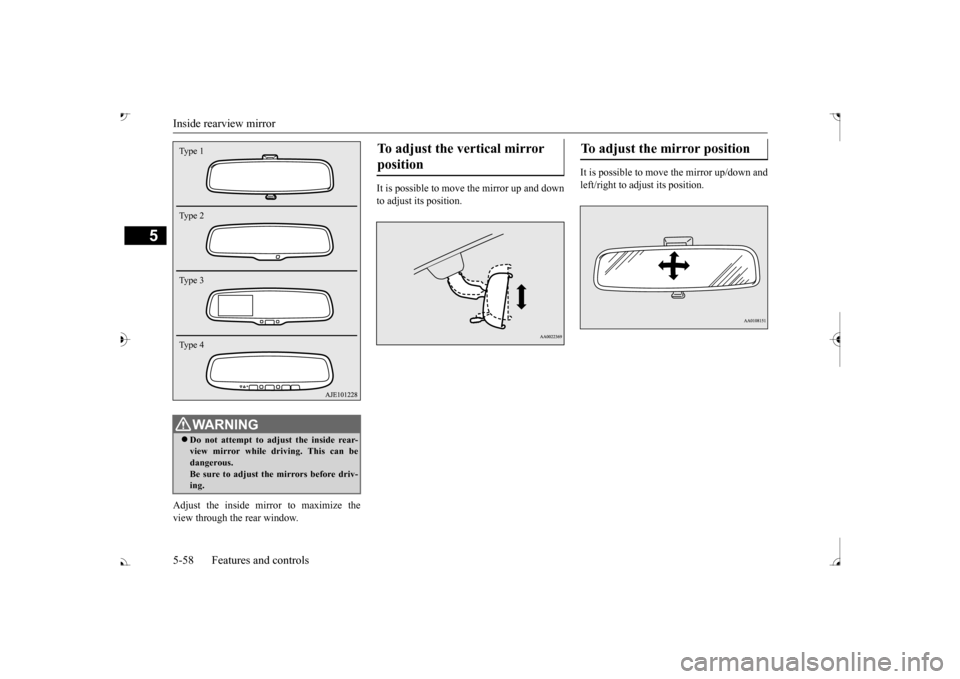
Adjust the inside mirror to maximize the view through the rear window.
It is possible to move
the mirror up and down
to adjust its position.
It is possible to move the mirror up/down and left/right to adjust its position.
WA R N I N G Do not attempt to adjust the inside rear- view mirror while driving. This can be dangerous.Be sure to adjust the mirrors before driv- ing.Type 1 Type 2Type 3Type 4
To adjust the vertical mirror position
To adjust the mirror position
BK0239700US.book 58 ページ 2016年6月16日 木曜日 午前10時58分
Page 140 of 521

Inside rearview mirror
Features and controls 5-59
5
The day/night knob (A) at
the bottom of the
mirror can be used to adjust the mirror to reduce the glare from the headlights of vehi- cles behind you during night driving.
When the headlights of the vehicles behind you are very bright, the reflection factor of the rearview mirror is automatically changed to reduce the glare. Normally, use the automatic mode. When the ignition switch is turned to the “ON” positionor the operation mode is put in ON, the reflection factor of the mirror is automatically changed.
When the headlights of the vehicles behind you are very bright, th
e reflection factor of
the rearview mirror is automatically changed to reduce the glare. Normally, use the automatic mode. When the ignition switch is turned to the “ON” positionor the operation mode is put in ON, the green indicator (1) illuminates and the reflection factor of the mirror is
automatically changed.
To reduce the glare Ty p e 1 1- Daytime position 2- Night position
Ty p e 2
NOTE
Do not hang items on, or spray glass cleaner on the sensor (1), as reduced sensitivity could result.
Ty p e 3
NOTE
Do not hang items on,
or spray glass cleaner
on the sensor (2), as reduced sensitivity could result.
BK0239700US.book 59 ページ 2016年6月16日 木曜日 午前10時58分
Page 141 of 521

Outside rearview mirrors 5-60 Features and controls
5
When the headlights of the vehicles behind you are very bright, the reflection factor of the rearview mirror is automatically changed to reduce the glare. Normally, use the automatic mode. When the ignition switch is turned to the “ON” positionor the operation mode is put in ON, the green indicator (1) illuminat
es and the reflection
factor of the mirror is automatically changed.
N00512201232
Adjust the outside rearview mirrors only aftermaking any seat adjustme
nts so as to have a
clear view to the rear of the vehicle.
If you want to stop automatic mode, press the switch (3) for approximately 2 secondsand the indicator (1) will go off.To return to automatic mode, press the switch again or perform the following opera- tion.[Except for vehicles e
quipped with the Free-
hand Advanced Security Transmitter (F.A.S.T.-key)]Turn the ignition switch to the “ON” position after turning to “OFF” or “ACC” position. [For vehicles equippe
d with the Free-hand
Advanced Security Transmitter (F.A.S.T.- key)] Put the operation mode
in ON after putting
the operation mode in OFF.NOTE
Ty p e 4
NOTE
Do not hang items on,
or spray glass cleaner
on the sensors (2), as
reduced sensitivity
could result.
If you want to stop automatic mode, press the switch (3) and the
indicator will go off.
To return to automatic mode, press theswitch again or perform the following opera- tion. [Except for vehicles e
quipped with the Free-
hand Advanced Security Transmitter (F.A.S.T.-key)] Turn the ignition switch to the “ON” positionafter turning to “OFF” or “ACC” position. [For vehicles equippe
d with the Free-hand
Advanced Security Transmitter (F.A.S.T.-key)] Put the operation mode in ON after putting the operation mode in OFF.
Outside rearview mirrors
WA R N I N G Do not attempt to adjust the outside rear- view mirrors while driving. This can be dangerous.Be sure to adjust the mirrors before driv- ing.NOTE
BK0239700US.book 60 ページ 2016年6月16日 木曜日 午前10時58分
Page 142 of 521
Outside rearview mirrors
Features and controls 5-61
5
N00549101167
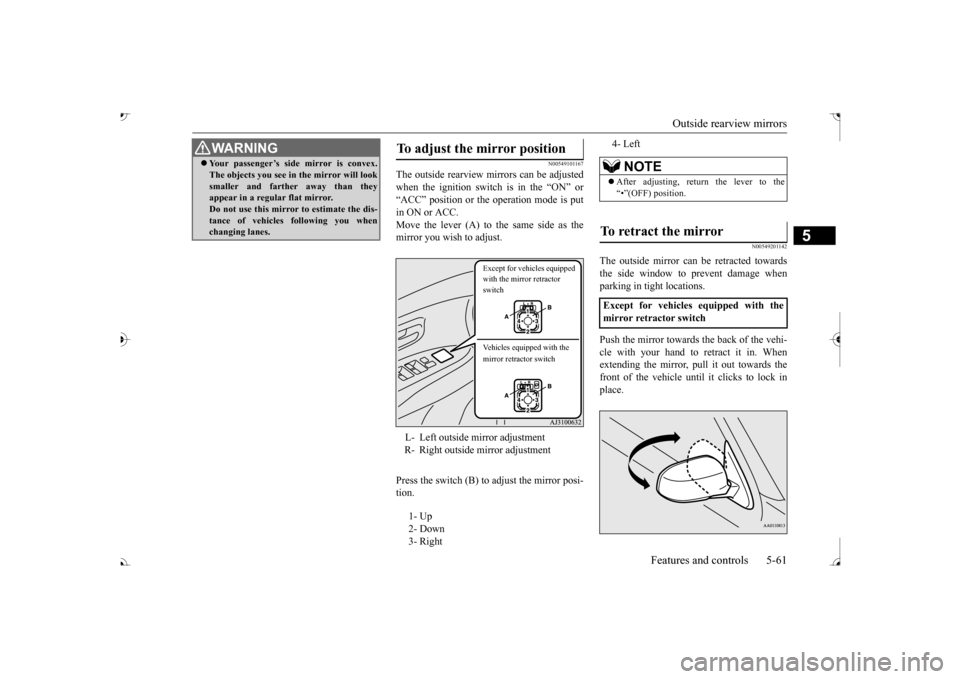
The outside rearview mirrors can be adjusted when the ignition switch is in the “ON” or “ACC” position or the operation mode is putin ON or ACC. Move the lever (A) to the same side as the mirror you wish to adjust. Press the switch (B) to adjust the mirror posi- tion.
N00549201142
The outside mirror can
be retracted towards
the side window to prevent damage when parking in tight locations. Push the mirror towards the back of the vehi- cle with your hand to retract it in. When extending the mirror, pull it out towards thefront of the vehicle until it clicks to lock in place.
Your passenger’s side mirror is convex. The objects you see in the mirror will looksmaller and farthe
r away than they
appear in a regular flat mirror. Do not use this mirror to estimate the dis- tance of vehicles following you whenchanging lanes.WA R N I N G
To adjust the mirror position L- Left outside mirror adjustment R- Right outside mirror adjustment 1- Up 2- Down 3- Right
Except for vehicles equipped with the mirror retractor switch Vehicles equipped with the mirror retractor switch
4- Left
NOTE
After adjusting, return the lever to the “•”(OFF) position.
To retract the mirror Except for vehicles equipped with the mirror retractor switch
BK0239700US.book 61 ページ 2016年6月16日 木曜日 午前10時58分