2017 MITSUBISHI OUTLANDER indicator
[x] Cancel search: indicatorPage 128 of 521

Theft-alarm system
Features and controls 5-47
5
N00510301226
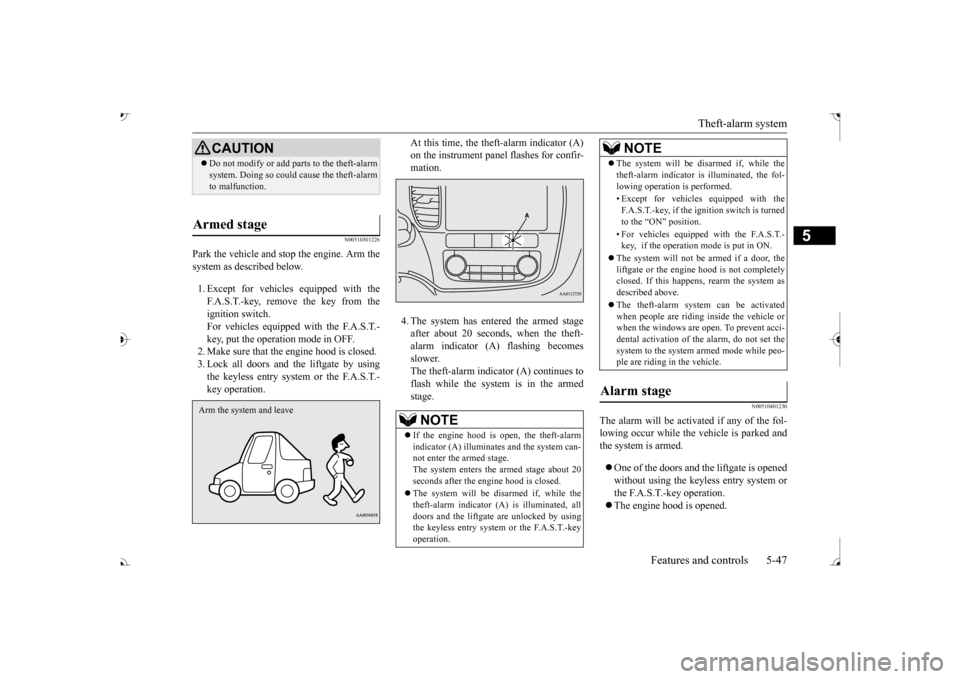
Park the vehicle and st
op the engine. Arm the
system as described below. 1. Except for vehicles equipped with the F.A.S.T.-key, remove the key from theignition switch. For vehicles equipped with the F.A.S.T.- key, put the operation mode in OFF.2. Make sure that the engine hood is closed. 3. Lock all doors and the liftgate by using the keyless entry system or the F.A.S.T.-key operation.
At this time, the theft-alarm indicator (A)mation. 4. The system has entered the armed stage after about 20 seconds, when the theft-alarm indicator (A) flashing becomes slower. The theft-alarm indicator (A) continues toflash while the system is in the armed stage.
N00510401230
The alarm will be activated if any of the fol- lowing occur while the ve
hicle is parked and
the system is armed. One of the doors and the liftgate is opened without using the keyless entry system or the F.A.S.T.-key operation. The engine hood is opened.
CAUTIONDo not modify or add parts to the theft-alarm system. Doing so could cause the theft-alarmto malfunction.
Armed stage Arm the system and leave
NOTE
If the engine hood is open, the theft-alarm indicator (A) illuminates and the system can- not enter the armed stage. The system enters the armed stage about 20seconds after the e
ngine hood is closed.
The system will be disarmed if, while the theft-alarm indicator (A) is illuminated, all doors and the liftgate are unlocked by using the keyless entry system or the F.A.S.T.-keyoperation.
The system will be disarmed if, while the theft-alarm indicator is illuminated, the fol-lowing operation is performed. • Except for vehicles equipped with the F.A.S.T.-key, if the ignition switch is turnedto the “ON” position. • For vehicles equippe
d with the F.A.S.T.-
key, if the operation mode is put in ON.
The system will not be armed if a door, the liftgate or the engine
hood is not completely
closed. If this happens, rearm the system as described above. The theft-alarm system can be activated when people are riding inside the vehicle orwhen the windows are open. To prevent acci- dental activati
on of the alarm, do not set the
system to the system armed mode while peo-ple are riding in the vehicle.
Alarm stage
NOTE
BK0239700US.book 47 ページ 2016年6月16日 木曜日 午前10時58分
Page 136 of 521

Parking brake
Features and controls 5-55
5
When the parking brake is applied, the brake warning light (red) in
the instrument cluster
and the indicator light (A) on the Electric parking brake switch will come on. When parking on a hill, set the parking brake, and turn the front wheels toward the curb on adownhill, or away from
the curb on an uphill.
NOTE
You may hear an operation noise from the vehicle body when operating the Electricparking brake. This do
es not indicate a mal-
function and the Elec
tric parking brake is
operating normally. When the battery is weak or dead, the Elec- tric parking brake cannot be applied or released. Refer to “Jum
p-starting the engine”
on page 8-2. You may feel the brake pedal moving when operating the Electr
ic parking brake.
This does not indi
cate a malfunction.
To apply
1. Stop the vehicle completely. 2. Pull up the Electric parking brake switch
while depressing the brake pedal.
CAUTION While the vehicle is in motion, do not apply the Electric parking
brake. Doing so may
cause overheating and/or
premature wear of
brake parts, reducing brake performance. NOTE
If the Electric parking
brake must be applied
in an emergency situa
tion, pull and hold the
Electric parking brake
switch to apply the
Electric parking brake. At that time, the fol- lowing warning display
will appear in the
multi-information disp
lay and a buzzer will
sound, however you should continue to pull and hold the Electric
parking brake switch.
When parking on stee
p grades, pull up the
Electric parking brak
e switch twice (once
more after the operati
on is completed once).
The maximum effect of the parking brake will be obtained. If the parking brake does not hold the vehicle stationary after the f
oot brake is released,
contact an authorized Mitsubishi Motorsdealer or a repair fa
cility of your choice.
When the operation mode is other than ON, if the parking brake is applied, the Electric parking brake indicator light comes on for a while. If the Electric parking brake switch is repeat- edly operated in a short time, the followingwarning display will appear in the multi- information display and
the Electrical park-
ing brake will temporarily stop working. Insuch case, wait for
approximately 1 minute
until the warning display disappears, and operate the Electric
parking brake switch
again. The brake warning light (red) and the indica- tor light on the Electric
parking brake switch
may blink. This does no
t indicate a malfunc-
tion, the lights go off when/if the Electric parking brake is released.NOTE
BK0239700US.book 55 ページ 2016年6月16日 木曜日 午前10時58分
Page 140 of 521

Inside rearview mirror
Features and controls 5-59
5
The day/night knob (A) at
the bottom of the
mirror can be used to adjust the mirror to reduce the glare from the headlights of vehi- cles behind you during night driving.
When the headlights of the vehicles behind you are very bright, the reflection factor of the rearview mirror is automatically changed to reduce the glare. Normally, use the automatic mode. When the ignition switch is turned to the “ON” positionor the operation mode is put in ON, the reflection factor of the mirror is automatically changed.
When the headlights of the vehicles behind you are very bright, th
e reflection factor of
the rearview mirror is automatically changed to reduce the glare. Normally, use the automatic mode. When the ignition switch is turned to the “ON” positionor the operation mode is put in ON, the green indicator (1) illuminates and the reflection factor of the mirror is
automatically changed.
To reduce the glare Ty p e 1 1- Daytime position 2- Night position
Ty p e 2
NOTE
Do not hang items on, or spray glass cleaner on the sensor (1), as reduced sensitivity could result.
Ty p e 3
NOTE
Do not hang items on,
or spray glass cleaner
on the sensor (2), as reduced sensitivity could result.
BK0239700US.book 59 ページ 2016年6月16日 木曜日 午前10時58分
Page 141 of 521

Outside rearview mirrors 5-60 Features and controls
5
When the headlights of the vehicles behind you are very bright, the reflection factor of the rearview mirror is automatically changed to reduce the glare. Normally, use the automatic mode. When the ignition switch is turned to the “ON” positionor the operation mode is put in ON, the green indicator (1) illuminat
es and the reflection
factor of the mirror is automatically changed.
N00512201232
Adjust the outside rearview mirrors only aftermaking any seat adjustme
nts so as to have a
clear view to the rear of the vehicle.
If you want to stop automatic mode, press the switch (3) for approximately 2 secondsand the indicator (1) will go off.To return to automatic mode, press the switch again or perform the following opera- tion.[Except for vehicles e
quipped with the Free-
hand Advanced Security Transmitter (F.A.S.T.-key)]Turn the ignition switch to the “ON” position after turning to “OFF” or “ACC” position. [For vehicles equippe
d with the Free-hand
Advanced Security Transmitter (F.A.S.T.- key)] Put the operation mode
in ON after putting
the operation mode in OFF.NOTE
Ty p e 4
NOTE
Do not hang items on,
or spray glass cleaner
on the sensors (2), as
reduced sensitivity
could result.
If you want to stop automatic mode, press the switch (3) and the
indicator will go off.
To return to automatic mode, press theswitch again or perform the following opera- tion. [Except for vehicles e
quipped with the Free-
hand Advanced Security Transmitter (F.A.S.T.-key)] Turn the ignition switch to the “ON” positionafter turning to “OFF” or “ACC” position. [For vehicles equippe
d with the Free-hand
Advanced Security Transmitter (F.A.S.T.-key)] Put the operation mode in ON after putting the operation mode in OFF.
Outside rearview mirrors
WA R N I N G Do not attempt to adjust the outside rear- view mirrors while driving. This can be dangerous.Be sure to adjust the mirrors before driv- ing.NOTE
BK0239700US.book 60 ページ 2016年6月16日 木曜日 午前10時58分
Page 144 of 521

Ignition switch
Features and controls 5-63
5
N00549301260
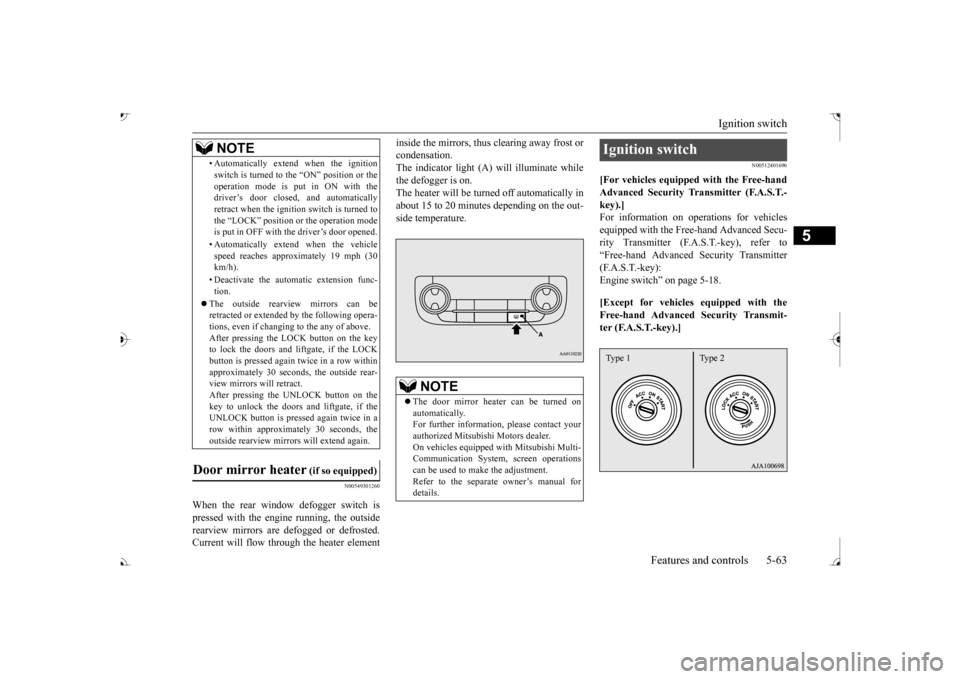
When the rear window defogger switch is pressed with the engine running, the outside rearview mirrors are defogged or defrosted. Current will flow thr
ough the heater element
inside the mirrors, thus clearing away frost or condensation.The indicator light (A) will illuminate while the defogger is on. The heater will be turned off automatically inabout 15 to 20 minutes depending on the out- side temperature.
N00512401696
[For vehicles equipped with the Free-handAdvanced Security Tr
ansmitter (F.A.S.T.-
key).]For information on operations for vehicles equipped with the Free-hand Advanced Secu- rity Transmitter (F.A
.S.T.-key), refer to
“Free-hand Advanced
Security Transmitter
(F.A.S.T.-key): Engine switch” on page 5-18. [Except for vehicles equipped with the Free-hand Advanced Security Transmit- ter (F.A.S.T.-key).]
• Automatically extend when the ignition switch is turned to the “ON” position or theoperation mode is put in ON with thedriver’s door closed, and automatically retract when the ignition switch is turned to the “LOCK” position or the operation modeis put in OFF with the driver’s door opened. • Automatically extend when the vehicle speed reaches approximately 19 mph (30 km/h). • Deactivate the automatic extension func- tion.
The outside rearvi
ew mirrors can be
retracted or extended
by the following opera-
tions, even if changing to the any of above.After pressing the LOCK
button on the key
to lock the doors and liftgate, if the LOCK button is pressed again twice in a row withinapproximately 30 seconds
, the outside rear-
view mirrors will retract. After pressing the
UNLOCK button on the
key to unlock the doors and liftgate, if the UNLOCK button is pressed again twice in a row within approximately 30 seconds, theoutside rearview mirro
rs will extend again.
Door mirror heater
(if so equipped)
NOTE
The door mirror heater can be turned on automatically.For further informati
on, please contact your
authorized Mitsubishi Motors dealer. On vehicles equipped
with Mitsubishi Multi-
Communication System, screen operations can be used to ma
ke the adjustment.
Refer to the separate
owner’s manual for
details.
Ignition switch Type 1 Type 2
BK0239700US.book 63 ページ 2016年6月16日 木曜日 午前10時58分
Page 147 of 521
![MITSUBISHI OUTLANDER 2017 3.G Owners Manual Starting the engine 5-66 Features and controls
5
N00512601845
[For vehicles equipped with the Free-hand Advanced Security Transmitter (F.A.S.T.-key).] For information on operation for vehicles equippe MITSUBISHI OUTLANDER 2017 3.G Owners Manual Starting the engine 5-66 Features and controls
5
N00512601845
[For vehicles equipped with the Free-hand Advanced Security Transmitter (F.A.S.T.-key).] For information on operation for vehicles equippe](/manual-img/19/7536/w960_7536-146.png)
Starting the engine 5-66 Features and controls
5
N00512601845
[For vehicles equipped with the Free-hand Advanced Security Transmitter (F.A.S.T.-key).] For information on operation for vehicles equipped with the Free-hand Advanced Secu-rity Transmitter (F.A.S.T.-key), refer to “Free-hand Advanced Se
curity Transmitter
(F.A.S.T.-key): Starting” on page 5-13. [Except for vehicles equipped with the Free-hand Advanced Security Transmit- ter (F.A.S.T.-key).]
Do not operate the starter motor continu- ously for longer than 15 seconds as this could run the battery
down or damage the
starter motor. If the engine does not start,turn the ignition switch back to the “OFF” or “LOCK” position, wait a few seconds, and then try again. Trying repeatedly withthe engine or starter motor still turning will damage the starter mechanism. If the engine will not
start because the bat-
tery is weak or discharged, refer to “Jump-starting the engine” (on page 8-2)for instructions. A longer warm up period will only con- sume extra fuel. The engine is warmed upenough for driving when the bar graph of engine coolant temper
ature display starts
to move or the low coolant temperatureindicator goes out. Refer to “Engine cool- ant temperature display” on page 5-171 or “Low coolant temper
ature indicator” on
page 5-215.
This model is equipped with an electronically controlled fuel injection system. This is a sys- tem that automatically controls fuel injection.There is usually no need to depress the accel- erator pedal when starting the engine. The starter should not be run for more than 15seconds at a time. To prevent battery drain, wait a few seconds between attempts to restart the engine. 1. Make sure all occupants are properly seated with seat belts fastened. 2. Insert the ignition key. 3. Press and hold the brake pedal down withyour right foot. 4. Make sure the selector
lever is in the “P”
NOTE
If the front wheels are turned, the anti-theft lock may sometimes make it difficult to turnthe key from “LOCK” to “ACC”. Firmlyturn the steering wheel to the left or to the right as you turn the key.
Starting the engine
Tips for starting
WA R N I N G Never run the engine in
a closed or poorly
ventilated area any longer than is needed to move your vehicle out of the area. Car- bon monoxide gas, which is odorless andextremely poisonous, could build up and cause serious injury or death.
CAUTION Do not push-start the vehicle.Do not run the engine at high rpms or drive at high speeds until
the engine has had a
chance to warm up. Release the ignition sw
itch as soon as the
engine starts. Otherwis
e, the starter motor
will be damaged
Starting the engine
BK0239700US.book 66 ページ 2016年6月16日 木曜日 午前10時58分
Page 151 of 521

Automatic transaxle (if so equipped) 5-70 Features and controls
5
N00513901441
When the operation mode is put in ON, the selector lever position
is shown on the multi-
information display.
N00514001292
[For vehicles equipped mono-color liquid crystal display meter]
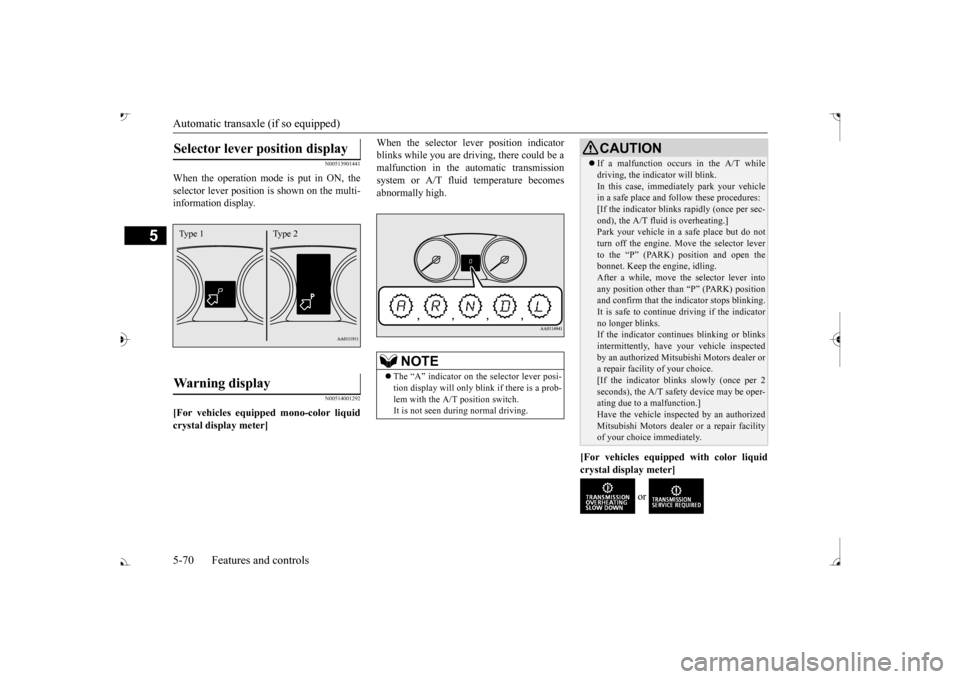
When the selector le
ver position indicator
blinks while you are driv
ing, there could be a
malfunction in the automatic transmission system or A/T fluid temperature becomes abnormally high.
[For vehicles equipped with color liquid crystal display meter]
or
Selector lever position display
Warning display
Type 1 Type 2
NOTE
The “A” indicator on the selector lever posi- tion display will only blink if there is a prob- lem with the A/T position switch.It is not seen during normal driving.
CAUTION If a malfunction occurs in the A/T while driving, the indicator will blink.In this case, immediat
ely park your vehicle
in a safe place and fo
llow these procedures:
[If the indicator blinks
rapidly (once per sec-
ond), the A/T fluid is overheating.]Park your vehicle in a safe place but do not turn off the engine. M
ove the selector lever
to the “P” (PARK) position and open thebonnet. Keep the engine, idling. After a while, move the selector lever into any position other than “P” (PARK) positionand confirm that the i
ndicator stops blinking.
It is safe to continue driving if the indicator no longer blinks.If the indicator conti
nues blinking or blinks
intermittently, have
your vehicle inspected
by an authorized Mitsubishi Motors dealer ora repair facility of your choice. [If the indicator blinks slowly (once per 2 seconds), the A/T safety
device may be oper-
ating due to a malfunction.] Have the vehicle inspected by an authorized Mitsubishi Motors dealer
or a repair facility
of your choice immediately.
BK0239700US.book 70 ページ 2016年6月16日 木曜日 午前10時58分
Page 159 of 521
![MITSUBISHI OUTLANDER 2017 3.G Owners Manual Continuously variable transmission (CVT) (if so equipped) 5-78 Features and controls
5
N00560501089
[For vehicles equipped mono-color liquid crystal display meter]When the selector le
ver position in MITSUBISHI OUTLANDER 2017 3.G Owners Manual Continuously variable transmission (CVT) (if so equipped) 5-78 Features and controls
5
N00560501089
[For vehicles equipped mono-color liquid crystal display meter]When the selector le
ver position in](/manual-img/19/7536/w960_7536-158.png)
Continuously variable transmission (CVT) (if so equipped) 5-78 Features and controls
5
N00560501089
[For vehicles equipped mono-color liquid crystal display meter]When the selector le
ver position indicator
blinks while you are driving, there could be a malfunction in the automatic transmissionsystem or CVT fluid temperature becomes abnormally high.
[For vehicles equipped with color liquid crystal display meter]
or
When the warning display or the warn- ing display appears on the information screen in the multi-information display while you are driving, there could be a malfunction in the CVT.
NOTE
While the selector le
ver position display is
blinking, a buzzer will
sound intermittently.
Warning display
NOTE
The “A” indicator on th
e selector lever posi-
tion display will only blink if there is a prob-lem with the CVT position switch. It is not seen during normal driving.
CAUTION If a malfunction occurs in the CVT while driving, the indicator will blink.In this case, immediat
ely park your vehicle
in a safe place and follow these procedures: [If the indicator blinks
rapidly (once per sec-
ond), the CVT fluid is overheating.]Park your vehicle in
a safe place but do not
turn off the engine. M
ove the selector lever
to the