2017 MITSUBISHI OUTLANDER III ECU
[x] Cancel search: ECUPage 235 of 521
Multi Around Monitor (if so equipped)
5
N00587200042
The Multi Around Monitor system uses 4 cameras, “Front-view camera”, “Side-viewcameras (right and le
ft)” and “Rear-view
camera”, and displays
composite views from
those cameras on a screen in the inside rear-view mirror, the DISPLAY AUDIO, the Smartphone Link Display Audio or the Mit- subishi Multi-Comm
unication System.
The Multi Around Monitor
system wi
ll assist
the driver to park the vehicle in a narrow orparallel parking space. Multi Around Monitor
(if so
equipped) Before using the Multi Around Monitor system, read this entire section to fully understand the limitations of this system. Failure to follow instructions could resultin an accident. The Multi Around Monitor system is an aid system to help observe around the vehicle. It is not a substitute for your visual confirmation. Never rely solely on the Multi Around Monitor system. The view on the screen islimited, and objects
outside the view can-
not be seen on the screen.
CAUTION Before using the Multi Around Monitor, make sure that all doors and the liftgate areclosed and the outside mirrors are unfolded.If an outside mirror is folded and/or if a front door and/or the liftgate
is open, the areas dis-
played on the Multi Around Monitor will notbe appropriate.
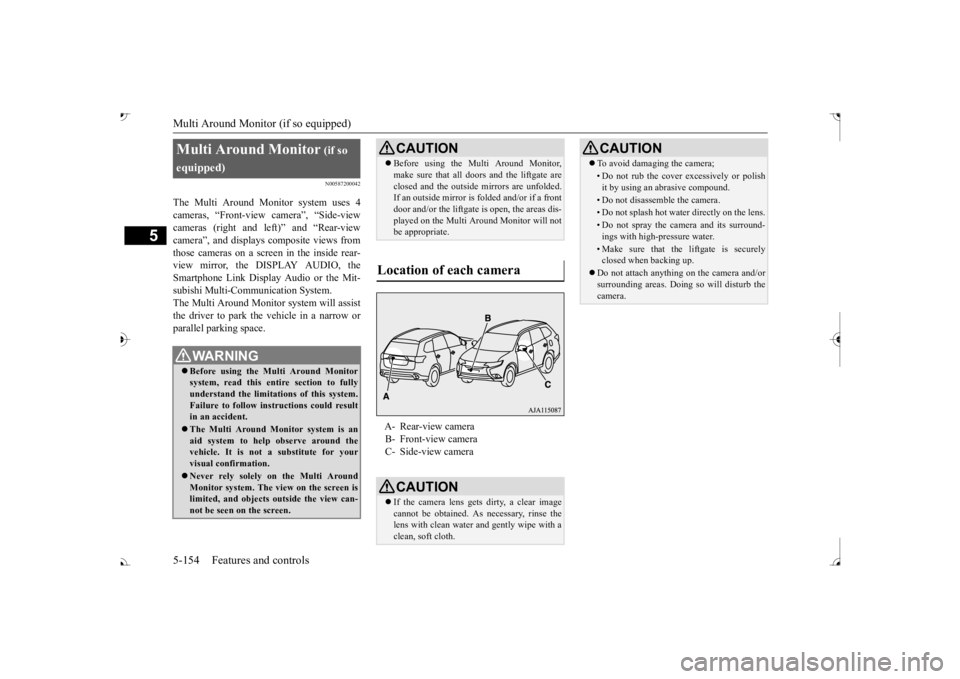
Location of each camera
A- Rear-view camera B- Front-view camera C- Side-view cameraCAUTION If the camera lens gets
dirty, a clear image
cannot be obtained. As necessary, rinse the lens with clean water and gently wipe with aclean, soft cloth.
To avoid damaging the camera;• Do not rub the cover excessively or polish it by using an abrasive compound.• Do not disassemble the camera.• Do not splash hot wate
r directly on the lens.
• Do not spray the camera and its surround- ings with high-pressure water.• Make sure that the liftgate is securelyclosed when backing up.
Do not attach anythi
ng on the camera and/or
surrounding areas. Doing
so will disturb the
camera.CAUTION
BK0239700US.book 154 ページ 2016年6月16日 木曜日 午前10時58分
Page 275 of 521
Indicator light, warning light, and information screen display list (multi information display - Type 1)
5
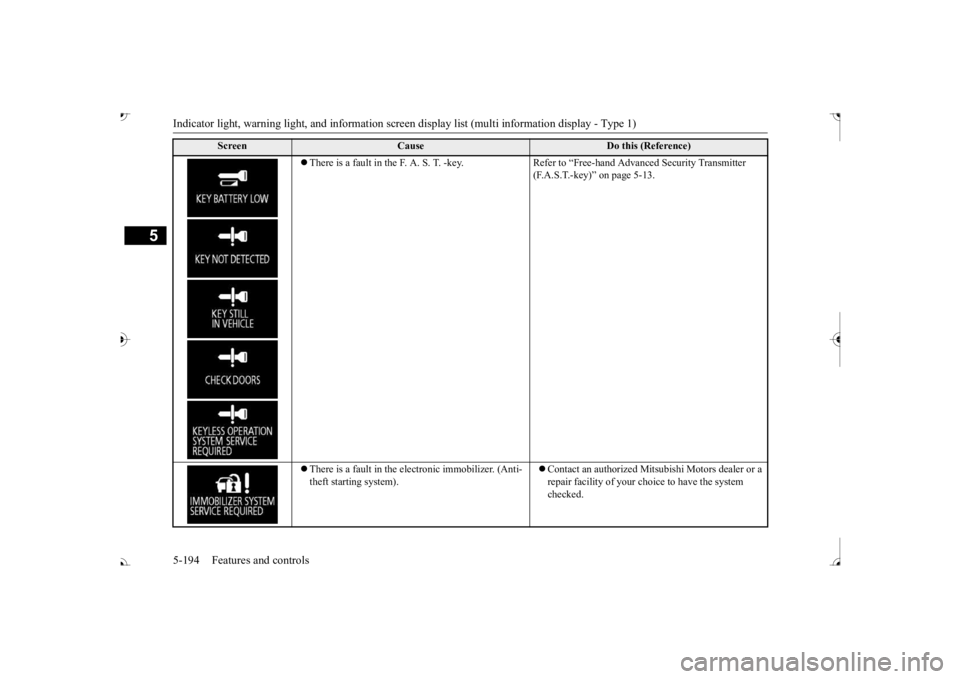
There is a fault in the F. A. S. T. -key. Refer to “Free-hand Advanced Security Transmitter
(F.A.S.T.-key)” on page 5-13.
There is a fault in the electronic immobilizer. (Anti- theft starting system).
Contact an authorized Mits
ubishi Motors dealer or a
repair facility of your c
hoice to have the system
checked.
Screen
Cause
Do this (Reference)
BK0239700US.book 194 ページ 2016年6月16日 木曜日 午前10時58分
Page 325 of 521

Bluetooth® 2.0 interface 5-244 Features and controls
5
N00564200016 N00564301027
The Bluetooth
® 2.0 interface is equipped
with a help function. If you say “Help” when th
e system is waiting
for a voice command i
nput, the system will
tell you a list of the
commands that can be
used under the ci
rcumstances.
N00564401028
There are 2 cancel functions. If you are at the main menu, say “Cancel” to exit from the Bluetooth
® 2.0 interface.
If you are anywhere else within the system,say “Cancel” to return to the main menu.
N00564501032
The Bluetooth
® 2.0 interface is equipped
with a confirmation function.
With the confirmation function activated, you are given more opportunities than normal toconfirm a command when making various settings to the Bluetooth
® 2.0 interface. This
allows you to decrease the possibility that asetting is accident
ally changed.
The confirmation function can be turned on or off by following the steps below. 1. Press the SPEECH button (except for vehicles with Mitsubishi Multi-Commu- nication System) or PICK-UP button (for vehicles with Mitsubishi Multi-Commu- nication System). 2. Say “Setup.”3. Say “Confirmation prompts.” 4. The voice guide will say “Confirmation prompts are
N00564601105
It is possible to use
a passcode as a security
function by setting a pa
sscode of your choice
for the Bluetooth
® 2.0 interface.
When the security function is turned on, it is necessary to make a voice input of a 4-digit
passcode in order to use all functions of the Bluetooth
® 2.0 interface, except for recep-
tion. Use the following procedure to turn on the security function by setting a passcode. 1. Press the SPEECH button (except for vehicles with Mitsubishi Multi-Commu- nication System) or
PICK-UP button (for
vehicles with Mitsubishi Multi-Commu- nication System). 2. Say “Setup.”3. Say “Passcode.” 4. The voice guide will
say “Passcode is dis-
abled. Would you like to enable it?”Answer “Yes.” passcode and return to the main menu. 5. The voice guide will say “Please say a 4- digit passcode. Remember this passcode. It will be required to use this system.” Say a 4-digit number which you want to set as a passcode. 6. For confirmation purposes, the voiceguide will say “Passc
ode <4-digit pass-
code>. Is this correct?” Answer “Yes.”input in Step 5.
Useful voice commands Help function Canceling
NOTE
You can return to the previous menu by say- ing “Go Back.” (if so equipped)
Confirmation function setting
Security function
Setting the passcode
BK0239700US.book 244 ページ 2016年6月16日 木曜日 午前10時58分
Page 326 of 521

Bluetooth® 2.0 interface
Features and controls 5-245
5
7. When the registration of the passcode is completed, the voice
guide will say “Pass-
code is enabled” and the system will return to the main menu.
If a passcode has been
set and the security
function is enabled, the voice guide will say “Hands-free system is
locked. State the pass-
code to continue” when the SPEECH button (except for vehicles with Mitsubishi Multi- Communication System) or PICK-UP button(for vehicles with Mitsubishi Multi-Commu- nication System) is pres
sed to enter voice rec-
ognition mode. Say th
e 4-digit passcode
number to enter the passcode. If the entered passcode is wrong, the voice guide will say “<4-digit passcode>, Incorrect
passcode. Please try again.” Enter the correct passcode. Use the following procedure to turn off the security function by di
sabling the passcode.
1. Press the SPEECH button (except for vehicles with Mitsubishi Multi-Commu- nication System) or
PICK-UP button (for
vehicles with Mitsubishi Multi-Commu-nication System). 2. Say “Setup.” 3. Say “Passcode.”4. The voice guide will say “Passcode is enabled. Would you like to disable it?” Answer “Yes.” the passcode and return to the main menu.
5. When the disabling of the passcode is completed, the voice
guide will say “Pass-
code is disabled”
and the system will
return to the main menu.
N00564700011
The Bluetooth
® 2.0 interface can use the
speaker enrollment function to create a voice model for one person per language. This makes it easier for the Bluetooth
® 2.0
interface to recognise
voice commands said
by you. You can turn a voice model registered with the speaker enrollment function on and offwhenever you want.
N00564801181
It takes about 2 to 3 mi
nutes to complete the
speaker enrollment process. To ensure the best results, run through the process while in the driver’s seat, in an envi-ronment that is as quiet as possible (when there is no rain or strong winds and the vehi- cle windows are closed).
Please turn off your
phone while in speaker enrollment to prevent interruption of the process. Use the following procedure for speakerenrollment.
NOTE
Passcode will be requi
red to access the sys-
tem after the next ignition cycle. It is required for a little time after engine stop that the entered
passcode is actually
recorded in the system.If the ignition switch
or the operation mode
is made to ACC or
ON or the engine is
started immediately afte
r engine stop, there
is a case when the entered passcode is not recorded in the system. At this time, please try to enter the passcode again.
Entering the passcode
NOTE
You can reenter the passcode as many times as you want. If you have forgotten your passcode, say “Cancel” to quit the voice input mode and then check with an authorized Mitsubishi Motors dealer.
Disabling the passcode
NOTE
System must be unlocked to disable the pass- code.
Speaker enrollment function Speaker enrollment
BK0239700US.book 245 ページ 2016年6月16日 木曜日 午前10時58分
Page 341 of 521

Bluetooth® 2.0 interface 5-260 Features and controls
5
N00580300057
1. Press the SPEECH button (except for vehicles with Mitsubishi Multi-Commu-nication System) or
PICK-UP button (for
vehicles with Mitsubishi Multi-Commu- nication System).2. Say “Phonebook.” 3. The voice guide will say “Select one of the following: new entry, edit number,edit name, list names, delete, erase all, or import contact.” Say “Delete.”
say “Please say the
name of the entry you would like todelete, or say list names.” Say the name of the phonebook entry in which the tele- phone number you want to delete is regis-tered. 5. If only one telephone
number is registered
in the selected phonebook entry, the voiceguide will say “Deleting
ed phonebook entry, the
voice guide will say “Would you like to delete [home], [work], [mobile], [other],or all?” Select the location to delete, and the voice guide will say “Deleting
if you really want to
delete the selected
telephone number(s) to
go ahead with the deletion, answer “Yes.” deleting the telephone number(s) and thenreturn to Step 4. 7. When the telephone number deletion is complete, the voice guide will say“
deleted” and then
the system will return to the main menu. If all locations are deleted, the system will say “
removed from the
phonebook. If numbers still remain under the entry, the name will retain the other associated numbers.
N00580400045
You can delete all registered information from the vehicle phonebook. 1. Press the SPEECH button (except for vehicles with Mitsubishi Multi-Commu-nication System) or
PICK-UP button (for
vehicles with Mitsubishi Multi-Commu- nication System).2. Say “Phonebook.” 3. The voice guide will say “Select one of the following: new entry, edit number,edit name, list names, delete, erase all, or import contact.” Say “Erase all.”
You can call, edit or delete a name that is being read out.Press the SPEECH butt
on and say “Call” to
call the name, “Edit name” to edit it, or “Delete” to delete it. The system will beep and then execute yourcommand. If you press the SPEECH button and say “Continue” or “Previous” while the list is being read, the system will advance or rewind the list. Say “C
ontinue” to proceed to
the next entry or “Previous” to return to the previous entry.
Deleting a telephone number
NOTE
Say “List names,” and
the names registered
in the phonebook are read out in order. Refer to “Vehicle phonebook: Listening to the list of registered names” on page 5-259.NOTE
To delete the telephone
numbers from all
locations, say “All.”
BK0239700US.book 260 ページ 2016年6月16日 木曜日 午前10時58分
Page 349 of 521
HomeLink® Wireless Control System (if so equipped) 5-268 Features and controls
5
N00554301040
HomeLink
® Wireless Contro
l System is a
registered trademark of Gentex Corporation. HomeLink
® provides a convenient way to
replace up to 3 hand-held radio-frequency (RF) transmitters used to activate devicessuch as gate operators
, garage door openers,
entry door locks, security systems, even home lighting. Additional HomeLink
® information
can be found at www.homelink.com, www.youtube.com/HomeLinkGentex, or by calling the toll-free HomeLink
®-Hotline at 1-
800-355-3515.
N00584600029
Some garage door openers manufactured after 1995 have “rolli
ng code protection”.
To program a garage door openerequipped with “rolli
ng code protection”; cess the garage door
opener motor to press the motor’s “Learn”
For convenience, use
a ladder and another pe
rson to assist you.
It is recommended that a new battery be placed in the hand-held
transmitter of the
device being progr
ammed to HomeLink
®
for quicker training and accurate trans- mission of the radio-frequency signal.
HomeLink
® Wireless Con-
trol System
(if so equipped)
WA R N I N G Do not use HomeLink
® with any garage
door opener that la
cks safety stop and
reverse features as required by U.S. Fed- eral Regulations.
A garage door opener
which cannot detect an object in the path of a closing garage d
oor and then auto-
matically stop and reverse, does not meetcurrent U.S. Federal
Regulations. Using a
garage door opener wi
thout these features
increases the risk of serious injury ordeath.
During programming, your garage door or gate may open or close. Make sure thatpeople and objects are clear of the garagedoor or gate that
you are programming.
NOTE
Once HomeLink
® is programmed, retain the
original transmitter for future programming procedures (for example, new vehicle pur-chases). Upon sale of the vehicle, the pro- grammed HomeLink
® buttons should be
erased for security purposes. Refer to “Cleaning the progra
mmed information” on
page 5-272. You can program a ma
ximum of 3 devices.
To change or replace any of the 3 devicesafter it has been in
itially programmed, you
must first erase the current settings. See “Cleaning the programmed information”on page 5-272 or “Reprogramming a single HomeLink
® button” on page 5-272.
WA R N I N G
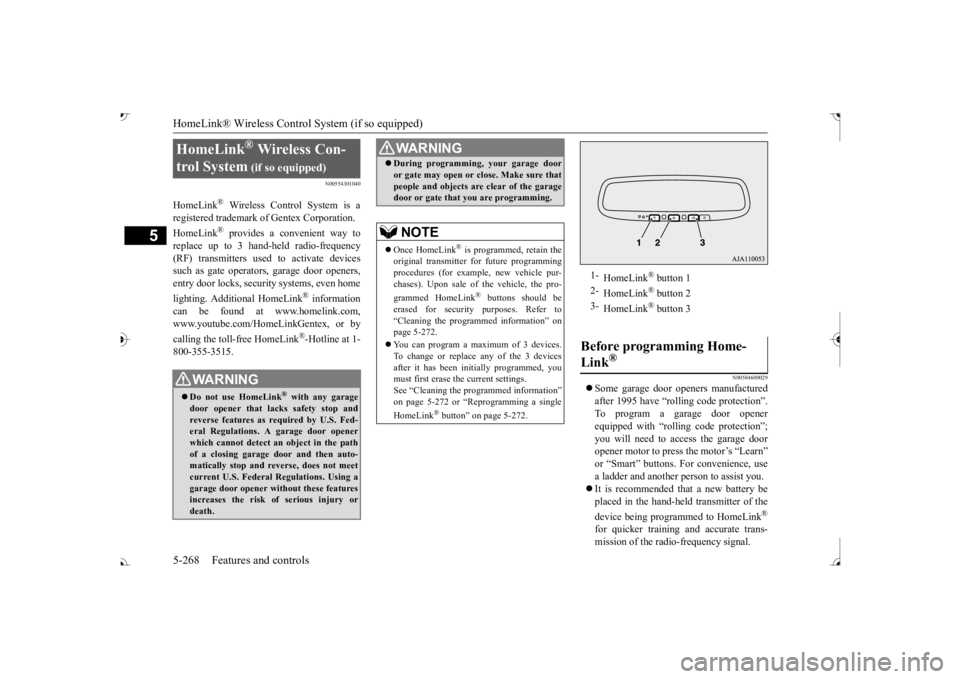
1-
HomeLink
® button 1
2-
HomeLink
® button 2
3-
HomeLink
® button 3
Before programming Home- Link
®
BK0239700US.book 268 ページ 2016年6月16日 木曜日 午前10時58分
Page 352 of 521
HomeLink® Wireless Control System (if so equipped)
Features and controls 5-271
5
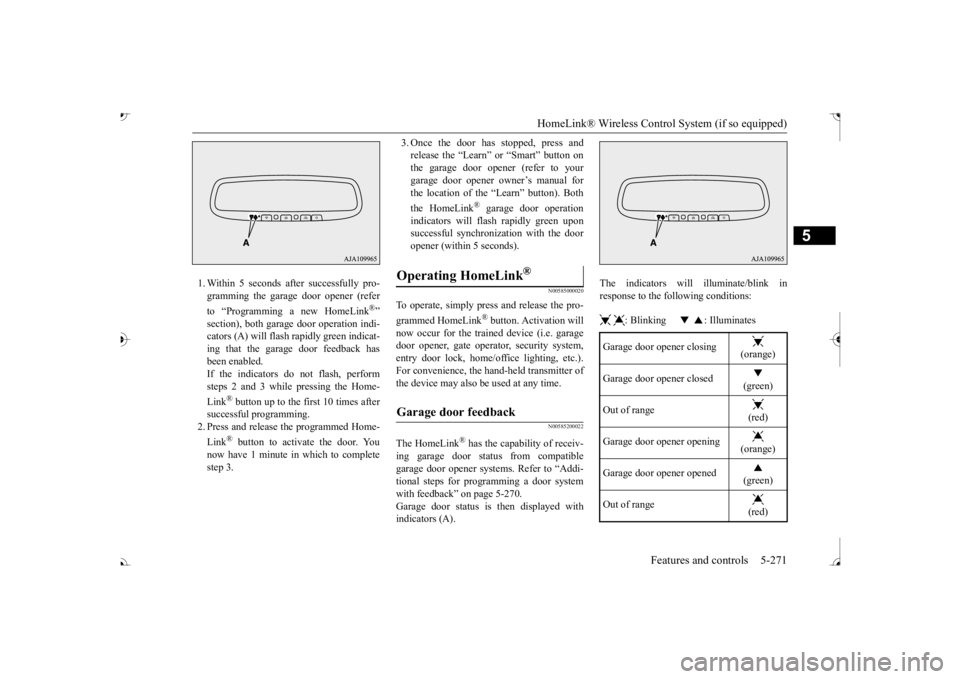
1. Within 5 seconds after successfully pro- gramming the garage door opener (refer to “Programming a new HomeLink
®”
section), both garage door operation indi- cators (A) will flash
rapidly green indicat-
ing that the garage
door feedback has
been enabled. If the indicators do not flash, performsteps 2 and 3 while pressing the Home- Link
® button up to the first 10 times after
successful programming.2. Press and release the programmed Home- Link
® button to activate the door. You
now have 1 minute in which to completestep 3.
3. Once the door has stopped, press and release the “Learn”
or “Smart” button on
the garage door opener (refer to your garage door opener owner’s manual for the location of the “Learn” button). Both the HomeLink
® garage door operation
indicators will fl
ash rapidly green upon
successful synchron
ization with the door
opener (within 5 seconds).
N00585000020
To operate, simply press and release the pro- grammed HomeLink
® button. Activation will
now occur for the traine
d device (i.e. garage
door opener, gate operat
or, security system,
entry door lock, home/of
fice lighting, etc.).
For convenience, the ha
nd-held transmitter of
the device may also be
used at any time.
N00585200022
The HomeLink
® has the capability of receiv-
ing garage door status from compatible garage door opener systems. Refer to “Addi- tional steps for programming a door systemwith feedback” on page 5-270. Garage door status is then displayed with indicators (A).
The indicators will illuminate/blink in response to the following conditions: : Blinking : Illuminates
Operating HomeLink
®
Garage door feedback
Garage door opener closing
(orange)
Garage door opener closed
(green)
Out of range
(red)
Garage door opener opening
(orange)
Garage door opener opened
(green)
Out of range
(red)
BK0239700US.book 271 ページ 2016年6月16日 木曜日 午前10時58分
Page 360 of 521
Cup holders
Features and controls 5-279
5
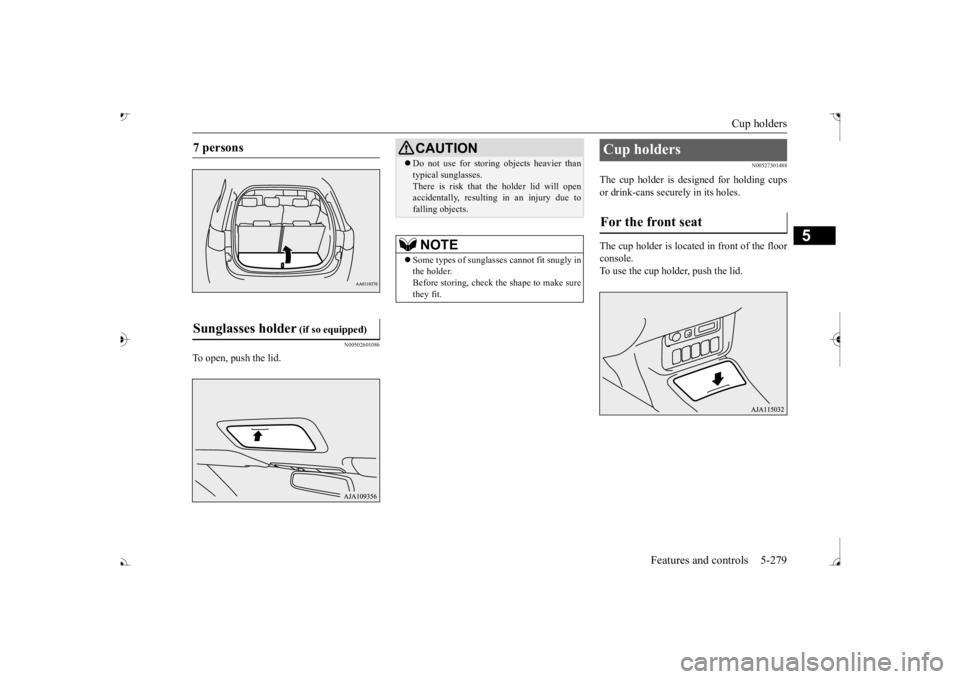
N00502601086
To open, push the lid.
N00527301488
The cup holder is designed for holding cups or drink-cans secu
rely in its holes.
The cup holder is located in front of the floor console. To use the cup holder, push the lid.
7 persons Sunglasses holder
(if so equipped)
CAUTION Do not use for stori
ng objects heavier than
typical sunglasses.There is risk that th
e holder lid will open
accidentally, resulting in an injury due to falling objects.NOTE
Some types of sunglas
ses cannot fit snugly in
the holder.Before storing, check the shape to make sure they fit.
Cup holders For the front seat
BK0239700US.book 279 ページ 2016年6月16日 木曜日 午前10時58分