Page 125 of 382
Vehicles with a rear reclining seat
The power supply or the ignition must be
switched on so that the front-passenger seat
can be selected (
Ypage 146).
XTo call up the stored rear seat setting:
press thevbutton repeatedly until the
indicator lamp in the button is not lit.
XTo call up the stored front-passenger seat
and rear seat settings: press thevbut-
ton repeatedly until the indicator lamp in the
button lights up.
XPress and hold the relevant storage position
button 1or 2until the rear seat or the front-
passenger seat is in the stored position.
iSeat adjustment is interrupted as soon as
you release the storage position button. The
adjustment of the active multicontour seat is
still carried out.
Memory function in the rear compartment123
Seats, steering wheel and mirrors
Z
Page 226 of 382

Head-up display submenu
Selecting other displays
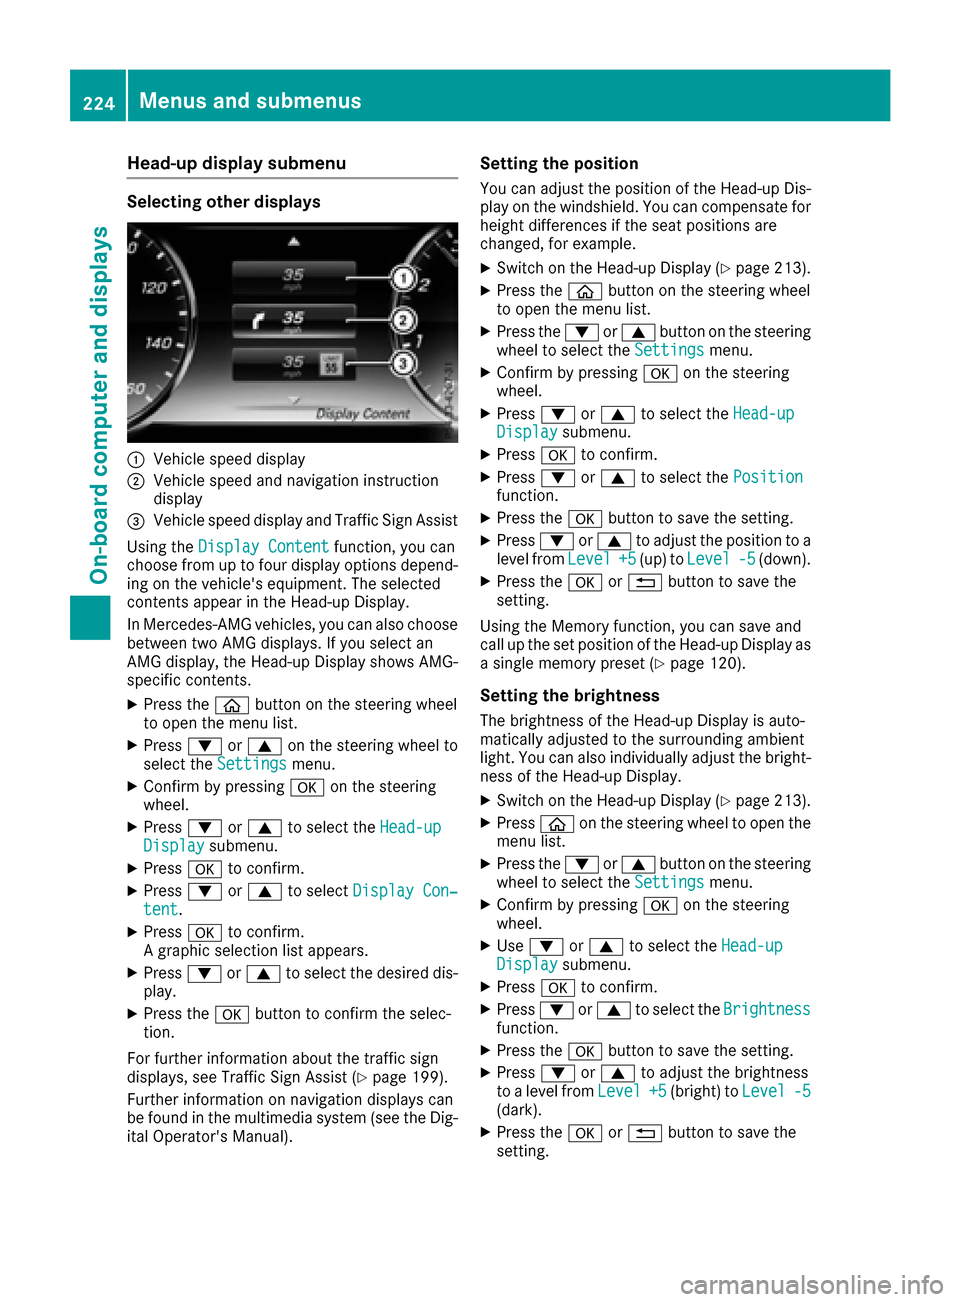
:Vehicle speed display
;Vehicle speed and navigation instruction
display
=Vehicle speed display and Traffic Sign Assist
Using the Display Content
function, you can
choose from up to four display options depend-
ing on the vehicle's equipment. The selected
contents appear in the Head-up Display.
In Mercedes-AMG vehicles, you can also choose
between two AMG displays. If you select an
AMG display, the Head-up Display shows AMG-
specific contents.
XPress the òbutton on the steering wheel
to open the menu list.
XPress :or9 on the steering wheel to
select the Settingsmenu.
XConfirm by pressing aon the steering
wheel.
XPress :or9 to select the Head-upDisplaysubmenu.
XPressato confirm.
XPress :or9 to select Display Con‐tent.
XPressato confirm.
A graphic selection list appears.
XPress :or9 to select the desired dis-
play.
XPress the abutton to confirm the selec-
tion.
For further information about the traffic sign
displays, see Traffic Sign Assist (
Ypage 199).
Further information on navigation displays can
be found in the multimedia system (see the Dig-
ital Operator's Manual).
Setting the position
You can adjust the position of the Head-up Dis-
play on the windshield. You can compensate for
height differences if the seat positions are
changed, for example.
XSwitch on the Head-up Display (Ypage 213).
XPress the òbutton on the steering wheel
to open the menu list.
XPress the :or9 button on the steering
wheel to select the Settingsmenu.
XConfirm by pressing aon the steering
wheel.
XPress :or9 to select the Head-upDisplaysubmenu.
XPressato confirm.
XPress :or9 to select the Positionfunction.
XPress theabutton to save the setting.
XPress :or9 to adjust the position to a
level from Level+5(up) toLevel-5(down).
XPress the aor% button to save the
setting.
Using the Memory function, you can save and
call up the set position of the Head-up Display as
a single memory preset (
Ypage 120).
Setting the brightness
The brightness of the Head-up Display is auto-
matically adjusted to the surrounding ambient
light. You can also individually adjust the bright-
ness of the Head-up Display.
XSwitch on the Head-up Display (Ypage 213).
XPress òon the steering wheel to open the
menu list.
XPress the :or9 button on the steering
wheel to select the Settingsmenu.
XConfirm by pressing aon the steering
wheel.
XUse : or9 to select the Head-upDisplaysubmenu.
XPressato confirm.
XPress :or9 to select the Brightnessfunction.
XPress theabutton to save the setting.
XPress :or9 to adjust the brightness
to a level from Level+5(bright) toLevel-5(dark).
XPress theaor% button to save the
setting.
224Menus and submenus
On-board computer and displays
Page 281 of 382

Keep the SD card out of the reach of children.If a SD card is swallowed, seek medical atten-
tion immediately.
!If you are no longer using the SD card, you
should remove it and store it outside the vehi-
cle. High temperatures can damage the card.
Inserting an SD card
The SD card slot is located in the stowage com-
partment under the armrest.
XInsert the SD card into the SD card slot until
the SD card engages. The side with the con-
tacts must face downwards.
XSelect the media source (Ypage 278).
Removing an SD card
XPress the memory card.
The memory card is ejected.
XRemove the memory card.
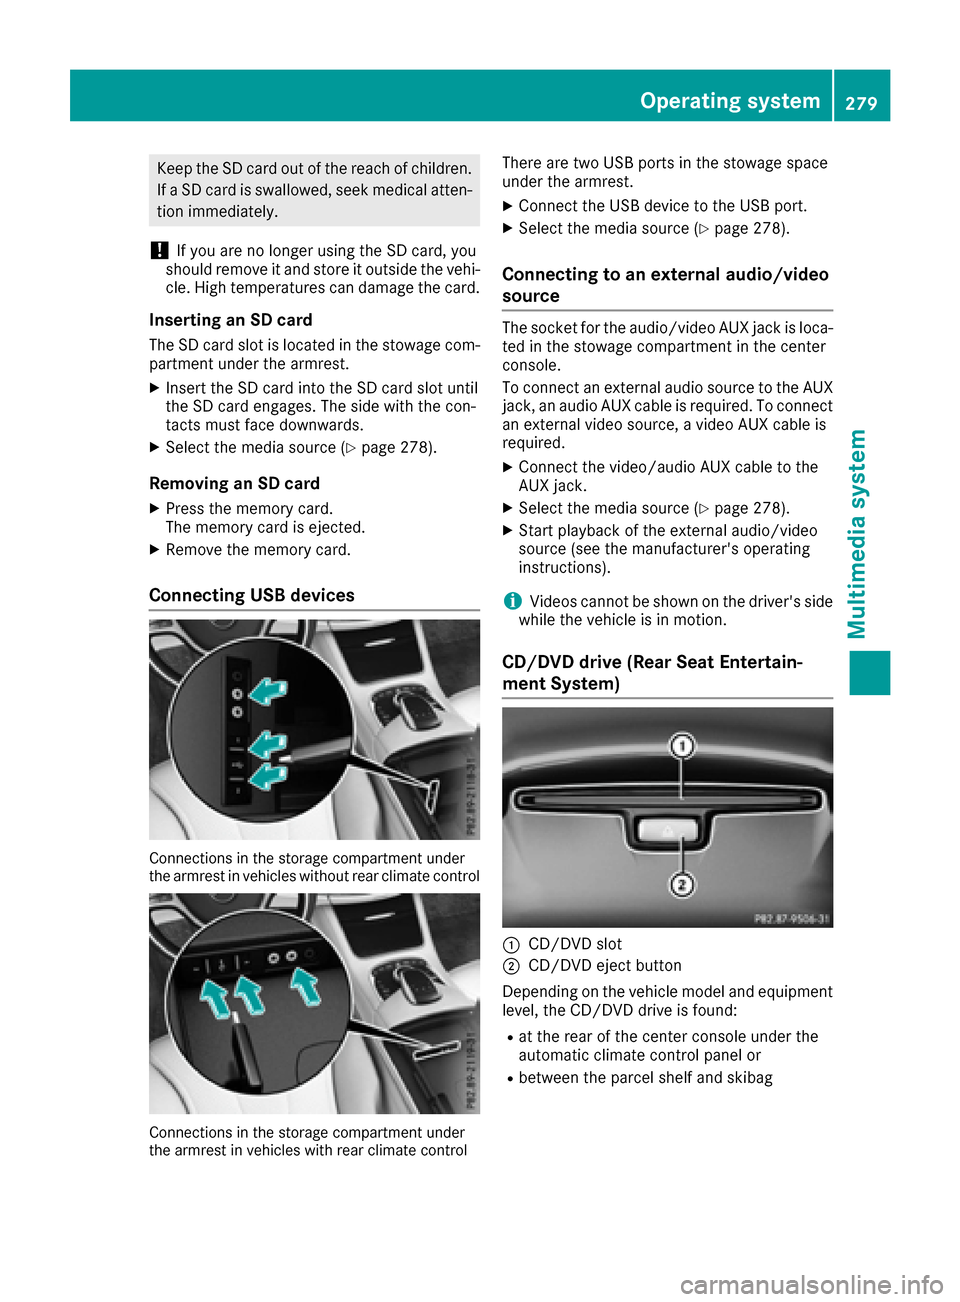
Connecting USB devices
Connections in the storage compartment under
the armrest in vehicles without rear climate control
Connections in the storage compartment under
the armrest in vehicles with rear climate control
There are two USB ports in the stowage space
under the armrest.
XConnect the USB device to the USB port.
XSelect the media source (Ypage 278).
Connecting to an external audio/video
source
The socket for the audio/video AUX jack is loca-
ted in the stowage compartment in the center
console.
To connect an external audio source to the AUX
jack, an audio AUX cable is required. To connect
an external video source, a video AUX cable is
required.
XConnect the video/audio AUX cable to the
AUX jack.
XSelect the media source (Ypage 278).
XStart playback of the external audio/video
source (see the manufacturer's operating
instructions).
iVideos cannot be shown on the driver's side
while the vehicle is in motion.
CD/DVD drive (Rear Seat Entertain-
ment System)
:CD/DVD slot
;CD/DVD eject button
Depending on the vehicle model and equipment
level, the CD/DVD drive is found:
Rat the rear of the center console under the
automatic climate control panel or
Rbetween the parcel shelf and skibag
Operating system279
Multimedia system
Z
Page 312 of 382

The garage door opener is compatible with
devices which operate in the frequency range
of 280 to 433 MHz.
RReplace the batteries in garage door remote
controlA. This increases the likelihood that
garage door remote control Awill transmit a
strong and precise signal to the integrated
garage door opener.
RWhen programming, hold remote control A
at varying distances and angles from but-
tons ;to? which you are programming. Try
various angles at a distance between 2and
8 inches (5to 20 cm) or at the same angle but
at varying distances.
RIf another remote control Ais available for
the same garage door drive, repeat the same
programming steps with this remote control
A. Before performing these steps, make sure
that new batteries have been installed in
garage door drive remote control A.
RNote that some remote controls only transmit
for a limited amount of time (the indicator
lamp on the remote control goes out). Press
buttonBon remote control Aagain before
transmission ends.
RAlign the antenna cable of the garage door
opener unit. This can improve signal recep-
tion/transmission.
Opening/closing the garage door
After it has been programmed, the integrated
garage door opener performs the function of the
garage door system remote control. Please also
read the operating instructions for the garage
door system.
XTurn the SmartKey to position 2in the ignition
lock (Ypage 145).
XPress button ;,=or? which you have
programmed to operate the garage door.
Garage door system with a fixed code: indi-
cator lamp :lights up green.
Garage door system with a rolling code: indi-
cator lamp :flashes green.
The transmitter will transmit a signal as long
as the button is pressed. The transmission is
halted after a maximum of ten seconds and
indicator lamp :lights up yellow.
XPress button ;,=or? again if necessary.
Clearing the memory
Make sure that you clear the memory of the
integrated garage door opener before selling the
vehicle.
XTurn the SmartKey to position 2in the ignition
lock (Ypage 145).
XPress and hold buttons ;and ?.
The indicator lamp initially lights up yellow
and then green.
XRelease buttons ;and ?.
The memory of the integrated garage door
opener in the rear-view mirror is cleared.
Floormats
GWARNING
Objects in the driver's footwell can restrict the pedal travel or obstruct a depressed pedal.
The operating and road safety of the vehicle is
jeopardized. There is a risk of an accident.
Make sure that all objects in the vehicle are
stowed correctly, and that they cannot enter
the driver's footwell. Install the floormats
securely and as specified in order to ensure
sufficient clearance for the pedals. Do not use
loose floormats and do not place floormats on
top of one another.
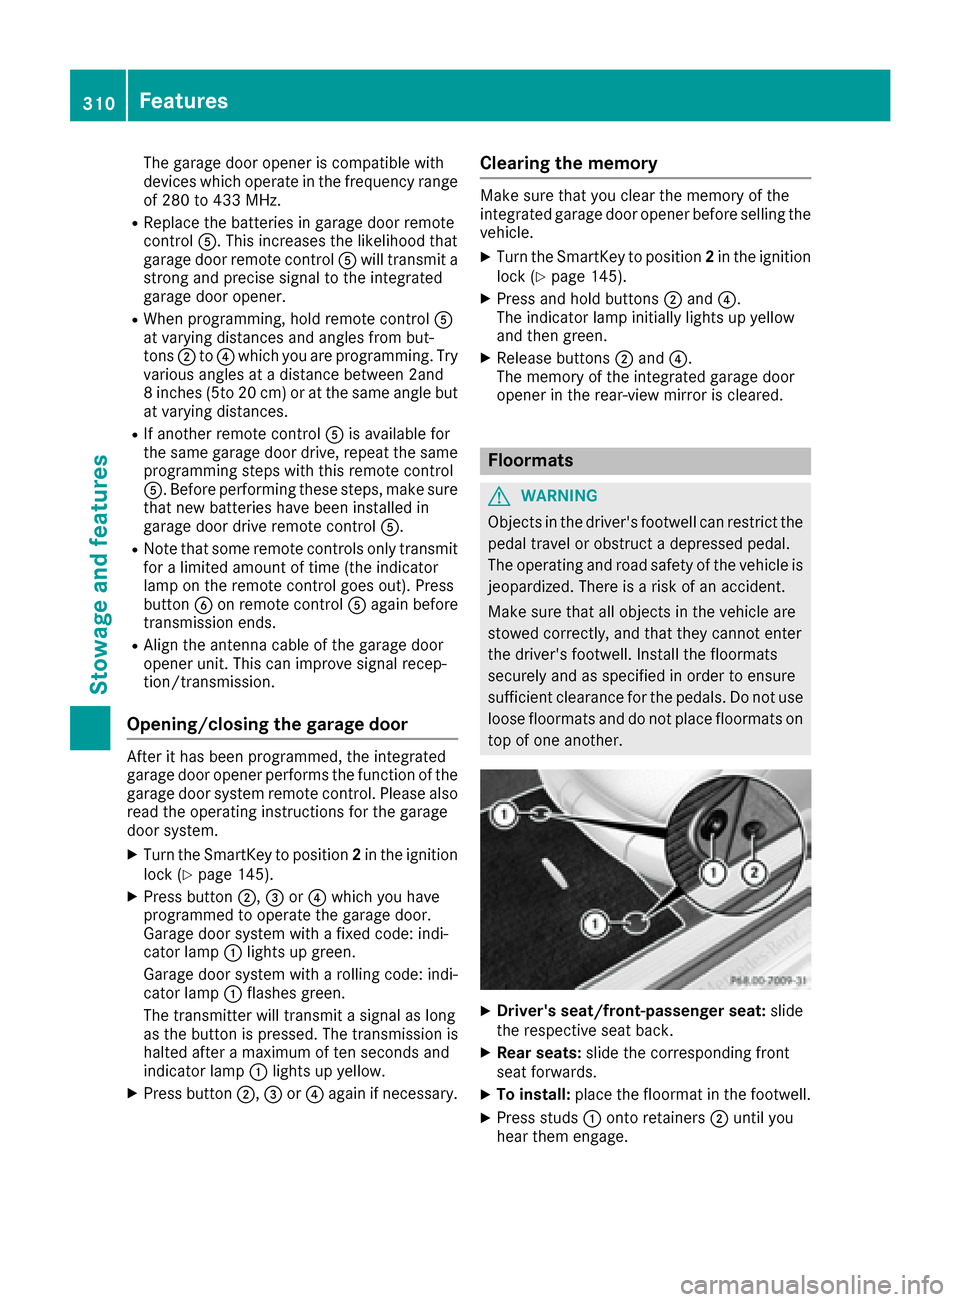
XDriver's seat/front-passenger seat: slide
the respective seat back.
XRear seats: slide the corresponding front
seat forwards.
XTo install: place the floormat in the footwell.
XPress studs :onto retainers ;until you
hear them engage.
310Features
Stowage and features
Page:
< prev 1-8 9-16 17-24