2017 MERCEDES-BENZ S-Class COUPE fuel consumption
[x] Cancel search: fuel consumptionPage 192 of 338
Depending on the vehicle equipment, you can
select the following menu:
RTripmenu (Ypage 190)
RNavimenu (navigation instructions)
(Ypage 191)
RRadiomenu (Ypage 193)
RMediamenu (Ypage 194)
RTelephonemenu (Ypage 195)
RAssistance Graphicmenu (Ypage 197)
RServicemenu (Ypage 197)
RSettingsmenu (Ypage 197)
RAMGmenu (Mercedes-AMG vehicles)
(Ypage 202)
Trip menu
Standard display
XPress and hold the 0038button on the steer-
ing wheel until the Tripmenu with trip odom-
eter 0043and odometer 0044appears.
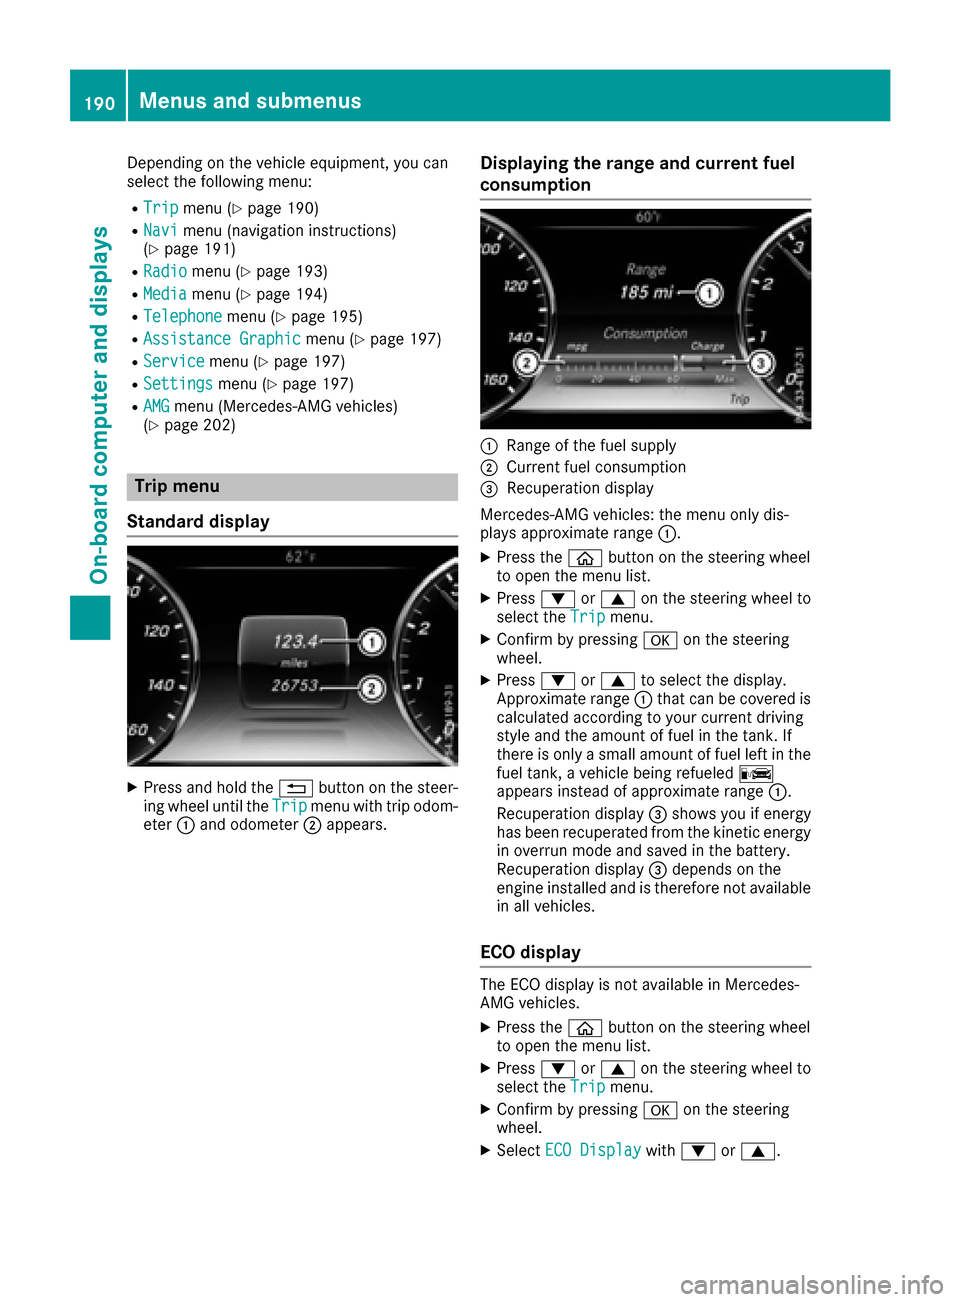
Displaying the range and current fuel
consumption
0043Range of the fuel supply
0044Current fuel consumption
0087Recuperation display
Mercedes-AMG vehicles: the menu only dis-
plays approximate range 0043.
XPress the00E2button on the steering wheel
to open the menu list.
XPress 0064or0063 on the steering wheel to
select the Tripmenu.
XConfirm by pressing 0076on the steering
wheel.
XPress 0064or0063 to select the display.
Approximate range 0043that can be covered is
calculated according to your current driving
style and the amount of fuel in the tank. If
there is only a small amount of fuel left in the
fuel tank, a vehicle being refueled 00A8
appears instead of approximate range 0043.
Recuperation display 0087shows you if energy
has been recuperated from the kinetic energy in overrun mode and saved in the battery.
Recuperation display 0087depends on the
engine installed and is therefore not available
in all vehicles.
ECO display
The ECO display is not available in Mercedes-
AMG vehicles.
XPress the 00E2button on the steering wheel
to open the menu list.
XPress 0064or0063 on the steering wheel to
select the Tripmenu.
XConfirm by pressing 0076on the steering
wheel.
XSelect ECO Displaywith0064 or0063.
190Menus and submenus
On-board computer and displays
Page 193 of 338
If the ignition remains switched off for longer
than four hours, the ECO display will be auto-
matically reset.
For more information on the ECO display, see
(
Ypage 141).
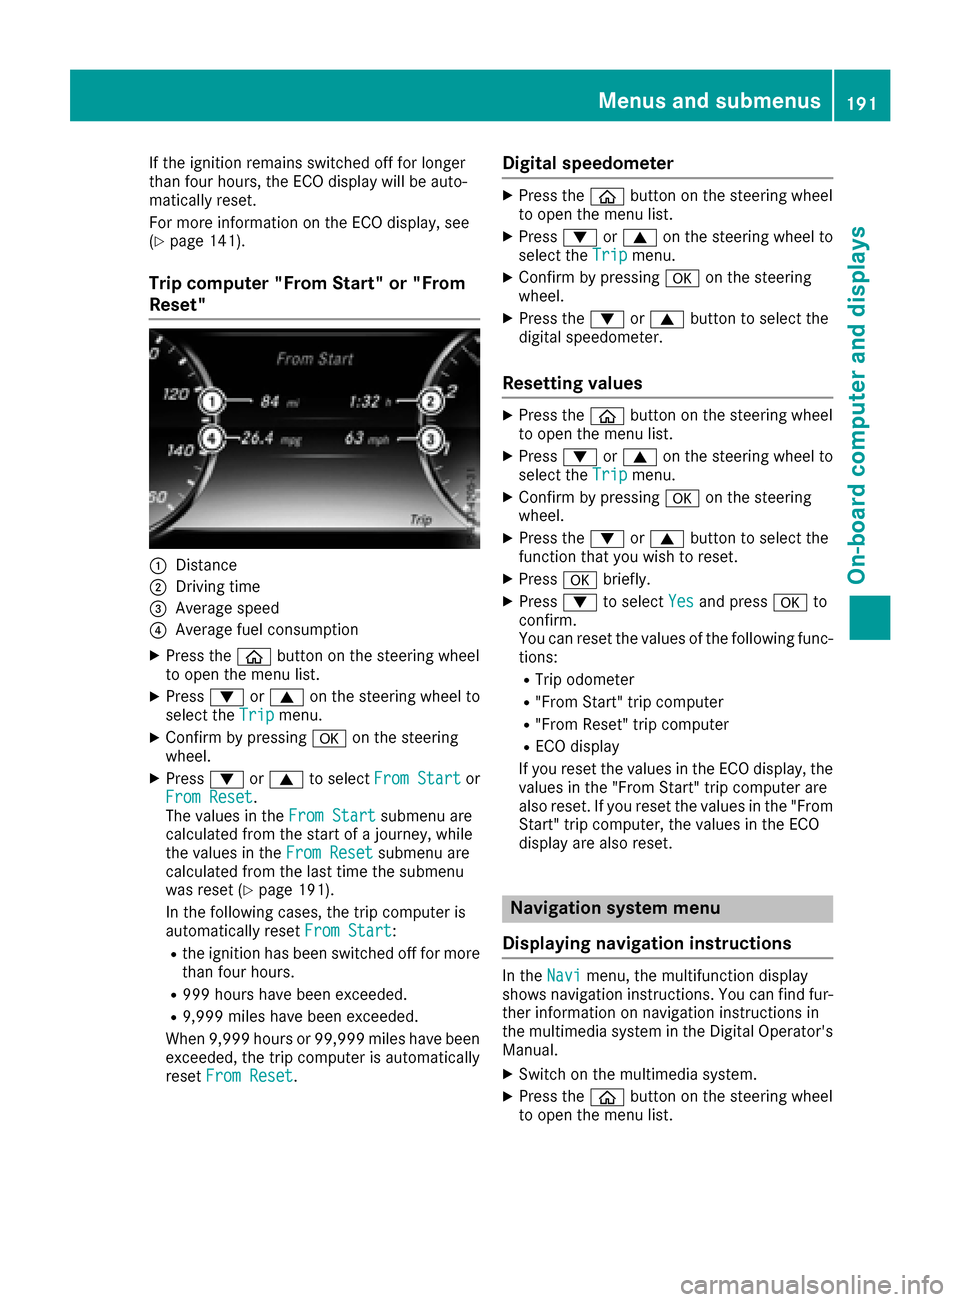
Trip computer "From Start" or "From
Reset"
0043Distance
0044Driving time
0087Average speed
0085Average fuel consumption
XPress the00E2button on the steering wheel
to open the menu list.
XPress 0064or0063 on the steering wheel to
select the Tripmenu.
XConfirm by pressing 0076on the steering
wheel.
XPress 0064or0063 to select From Startor
From Reset.
The values in the From Startsubmenu are
calculated from the start of a journey, while
the values in the From Reset
submenu are
calculated from the last time the submenu
was reset (
Ypage 191).
In the following cases, the trip computer is
automatically reset From Start
:
Rthe ignition has been switched off for more
than four hours.
R999 hours have been exceeded.
R9,999 miles have been exceeded.
When 9,999 hours or 99,999 miles have been
exceeded, the trip computer is automatically
reset From Reset
.
Digital speedometer
XPress the 00E2button on the steering wheel
to open the menu list.
XPress 0064or0063 on the steering wheel to
select the Tripmenu.
XConfirm by pressing 0076on the steering
wheel.
XPress the 0064or0063 button to select the
digital speedometer.
Resetting values
XPress the 00E2button on the steering wheel
to open the menu list.
XPress 0064or0063 on the steering wheel to
select the Tripmenu.
XConfirm by pressing 0076on the steering
wheel.
XPress the 0064or0063 button to select the
function that you wish to reset.
XPress 0076briefly.
XPress 0064to select Yesand press 0076to
confirm.
You can reset the values of the following func-
tions:
RTrip odometer
R"From Start" trip computer
R"From Reset" trip computer
RECO display
If you reset the values in the ECO display, the values in the "From Start" trip computer are
also reset. If you reset the values in the "From
Start" trip computer, the values in the ECO
display are also reset.
Navigation system menu
Displaying navigation instructions
In the Navimenu, the multifunction display
shows navigation instructions. You can find fur-
ther information on navigation instructions in
the multimedia system in the Digital Operator's Manual.
XSwitch on the multimedia system.
XPress the 00E2button on the steering wheel
to open the menu list.
Menus and submenus191
On-board computer and displays
Z
Page 250 of 338
Adjusting thefootwell temperature
XCall up th eclimat econtrol men u
(Ypage 247).
XTo select Adjust Footwell:tur nand press
th econtroller.
XTo change sides: slide1 thecontroller.
XTo change th esetting: turnth econtroller.
XTo exit th emenu: press th e0038 button.
Settings in the bottom bar of the cli-
mate control menu
Switching cooling with air dehumidifica-
tion on/off
iActivating th ecoolin gwit hair dehumidifi-
cation facilitate sth ecoolin gof th evehicl e
interio reve nwit hhigh outside temperatures .
XCall up theclimat econtrol men u
(Ypage 247).
XSlide 6thecontroller repeatedly until th e
botto mbar is activated.
XTo select 0073A/C:tur nand press th econ-
troller .
XThe coolin gwit hair dehumidification function
is activated 0073or deactivate d0053.
iThe curren tstatus of th ecoolin gfunction is
displayed in th eclimat econtrol bar: A/ C ON
– activated, A/ C OFF –deactivated.
iDeactivating th ecoolin gwit hair dehumidi-
fication function reduce sfuel consumption .
Synchronizing the climate control set-
tings
Use 0073Sync(synchronization) to select th ecli -
mat econtrol settin gfor all zone stogether 0073or
separately 0053.
XCall up theclimat econtrol men u
(Ypage 247).
XSlide 6thecontroller repeatedly until th e
botto mbar is activated.
XTo select 0073Sync:tur nand press th econ-
troller .
XThe synchronizatio nfunction is activated 0073
or deactivate d0053. Wit
hth esynchronizatio nfunction switched off ,
you can alternate between driver and fron t
passenger .
XTo switch from th efoote rto th emain area:
slide 5thecontroller.
XTo switch between left and right :slide 1
th econtroller.
Not all climat econtrol function sallow switch -
ing between th edriver and fron tpassenger .
Fo rfurther information on synchronizing climat e
control settings, see (
Ypage 115).
Navigation mode
Important safety notes
GWARNIN G
If you operate information systems and com-
munication equipmen tintegrate din th evehi-
cle while driving ,you will be distracte dfrom
traffic conditions. You could also lose control
of th evehicle. Ther eis aris kof an accident.
Only operate th eequipmen twhen th etraffic
situation permits. If you are no tsure that this
is possible, park th evehicl epayin gattentio n
to traffic condition sand operate th eequip-
men twhen th evehicl eis stationary.
You must observ eth elegal requirements for th e
country in whic hyou are currently driving when
operating th enavigation system.
General notes
Amon gother things, correct functioning of th e
navigation system depend son GPS reception .In
certai nsituations, GPS reception may be
impaired ,there may be interferenc eor there
may be no reception at all, e.g. in tunnels or
parking garages.
Further information can be foun din th eDigita l
Operator's Manual.
Selecting a route type and route options
Multimedia system:
XSelec tNav i007BNavigation.
The map shows th evehicle's curren tposition.
XSlide 6thecontroller.
248Operating system
Multimedia system
Page 310 of 338
The tire temperature and pressure increase
when the vehicle is in motion. This is dependent
on the driving speed and the load.
Therefore, you should only correct tire pres-
sures when the tires are cold.
The tires are cold:
Rif the vehicle has been parked with the tires
out of direct sunlight for at least three hours
and
Rif the vehicle has not been driven further than
1 mile (1.6 km)
The tire temperature changes depending on the outside temperature, the vehicle speed and the
tire load. If the tire temperature changes by
18 ‡ (10 †), the tire pressure changes by
approximately 10 kPa (0.1 bar/1.5 psi). Take
this into account when checking the pressure of
warm tires. Only correct the tire pressure if it is
too low for the current operating conditions. If
you check the tire pressure when the tires are
warm, the resulting value will be higher than if
the tires were cold. This is normal. Do not
reduce the tire pressure to the value specified
for cold tires. The tire pressure would otherwise
be too low.
Observe the recommended tire pressures for
cold tires:
Ron the Tire and Loading Information placard
on the B-pillar on the driver's side
Rin the tire pressure table on the fuel filler flap
(Ypage 137)
Underinflated or overinflated tires
Underinflated tires
GWARNING
Tires with pressure that is too low can over-
heat and burst as a consequence. In addition, they also suffer from excessive and/or irreg-
ular wear, which can severely impair the brak-
ing properties and the driving characteristics.
There is a risk of an accident.
Avoid tire pressures that are too low in all the
tires, including the spare wheel.
Underinflated tires may:
Roverheat, leading to tire defects
Radversely affect handling
Rwear excessively and/or unevenly
Rhave an adverse effect on fuel consumption
Overinflated tires
GWARNING
Tires with excessively high pressure can burst
because they are damaged more easily by
road debris, potholes etc. In addition, they
also suffer from irregular wear, which can
severely impair the braking properties and the driving characteristics. There is a risk of an
accident.
Avoid tire pressures that are too high in all the
tires, including the spare wheel.
Overinflated tires may:
Rincrease the braking distance
Radversely affect handling
Rwear excessively and/or unevenly
Rhave an adverse effect on ride comfort
Rbe more susceptible to damage
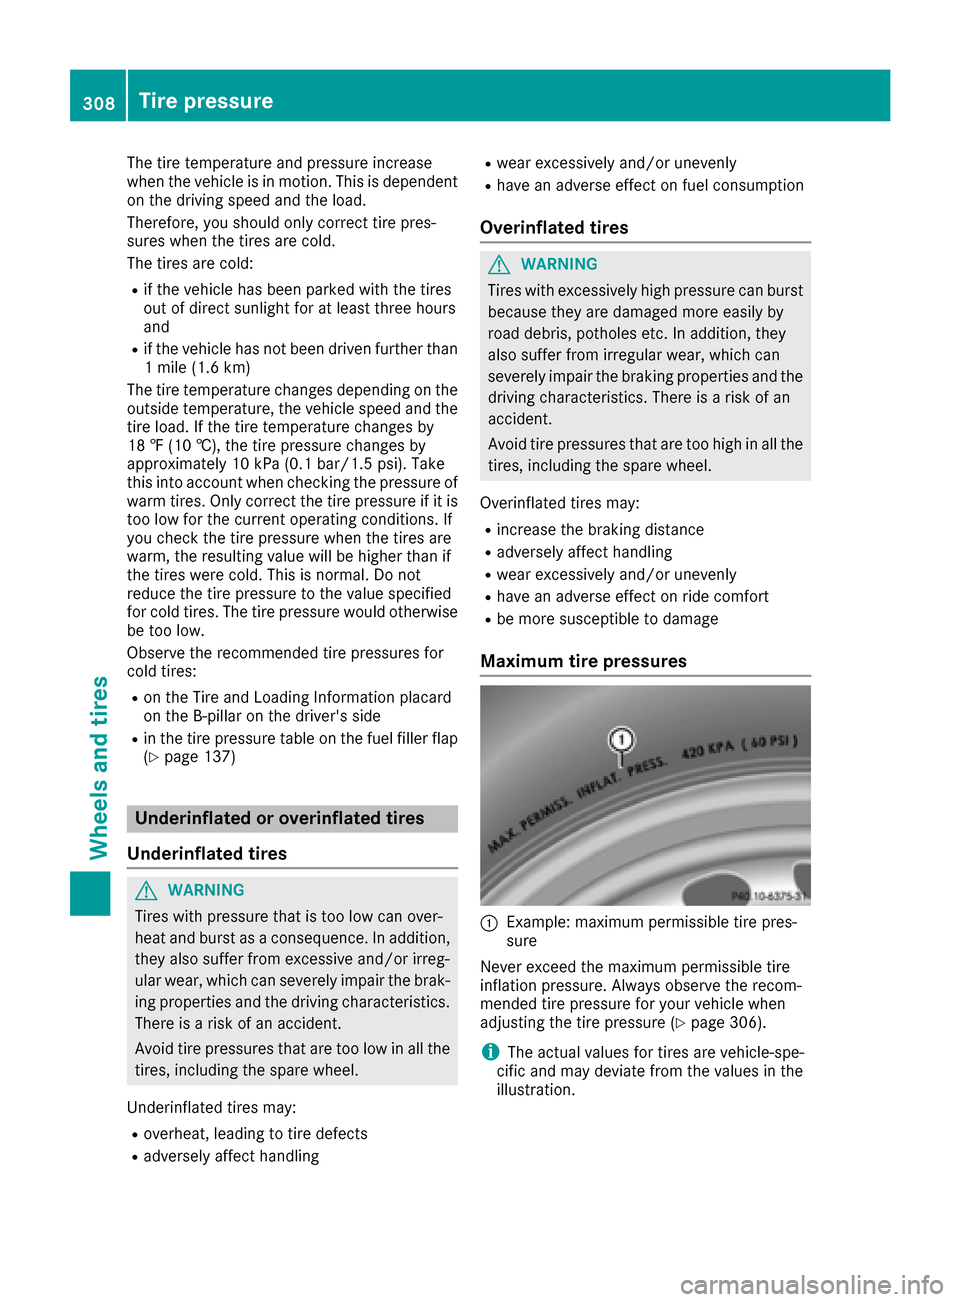
Maximum tire pressures
0043Example: maximum permissible tire pres-
sure
Never exceed the maximum permissible tire
inflation pressure. Always observe the recom-
mended tire pressure for your vehicle when
adjusting the tire pressure (
Ypage 306).
iThe actual values for tires are vehicle-spe-
cific and may deviate from the values in the
illustration.
308Tire pressure
Wheels and tires
Page 328 of 338

Lowering the vehicle
GWARNING
The wheels could work loose if the wheel nuts and bolts are not tightened to the specified
tightening torque. There is a risk of accident.
Have the tightening torque immediately
checked at a qualified specialist workshop
after a wheel is changed.
XPlace the ratchet wrench onto the hexagon
nut of the jack so that the letters ABare visi-
ble.
XTurn the ratchet wrench until the vehicle is
once again standing firmly on the ground.
XPlace the jack to one side.
XTighten the wheel bolts evenly in a crosswise pattern in the sequence indicated (0043 to0083).
The tightening torque must be 110 lb-ft
(150 Nm) .
XTurn the jack back to its initial position.
XStow the jack and the rest of the vehicle tools
in the trunk again.
XCheck the tire pressure of the newly mounted
wheel and adjust it if necessary.
Observe the recommended tire pressure
(
Ypage 306).
iVehicles with a tire pressure control
system: all mounted wheels must be equip-
ped with functioning sensors for the tire pres-
sure monitor.
Wheel-tire combination
You can ask for information regarding permitted wheel-tire combinations at an authorized
Mercedes-Benz Center.
!For safety reasons, Mercedes-Benz recom-
mends that you only use tires and wheels
which have been approved by Mercedes-Benz
specifically for your vehicle.
These tires have been specially adapted for
use with the control systems, such as ABS or
ESP
®, and are marked as follows:
RMO = Mercedes-Benz Original
RMOE = Mercedes-Benz Original Extended
(tires featuring run-flat characteristics)
RMO1 = Mercedes-Benz Original (only cer-
tain AMG tires)
Mercedes-Benz Original Extended tires may
only be used on wheels that have been spe-
cifically approved by Mercedes-Benz.
Only use tires, wheels or accessories tested
and approved by Mercedes-Benz. Certain
characteristics, e.g. handling, vehicle noise
emissions or fuel consumption, may other-
wise be adversely affected. In addition, when
driving with a load, tire dimension variations
could cause the tires to come into contact
with the bodywork and axle components. This
could result in damage to the tires or the vehi- cle.
Mercedes-Benz accepts no liability for dam-
age resulting from the use of tires, wheels or
accessories other than those tested and
approved.
Information on tires, wheels and approved
combinations can be obtained from any quali-
fied specialist workshop.
!Retreaded tires are neither tested nor rec-
ommen
ded by Mercedes-Benz, since previ-
ous damage cannot always be detected on
retreaded tires. As a result, Mercedes-Benz
cannot guarantee vehicle safety if retreaded
tires are mounted. Do not mount used tires if
you have no information about their previous
usage.
The recommended pressures for various oper-
ating conditions can be found:
Ron the Tire and Loading Information placard
on the B-pillar on the driver's side
Rin the tire pressure table in the fuel filler flap
Observe the notes on recommended tire pres-
sures under various operating conditions
(
Ypage 306).
Check tire pressures regularly, and only when
the tires are cold. Comply with the maintenance
326Wheel-tire combination
Wheels and tires
Page 334 of 338
If standard unleaded gasoline is unavailable
and you have to refuel with unleaded gasoline
of a lower grade, observe the following pre-
cautions:
ROnly fill the fuel tank to half full with regular unleaded gasoline and fill the rest with pre-
mium-grade unleaded gasoline as soon as
possible.
RDo not drive at the maximum speed.
RAvoid sudden acceleration and engine
speeds over 3,000 rpm.
You will usually find information about the fuel
grade on the pump. If you cannot find the label
on the pump, ask the staff for assistance.
iFor further information, consult a qualified
specialist workshop or visit
http://www.mbusa.com (USA only).
As a temporary measure, if the recommended
fuel is not available, you may also use regular
unleaded gasoline with an octane rating of
87 AKI/91 RON. This may reduce engine per-
formance and increase fuel consumption. Avoid
driving at full throttle and sudden acceleration.
Never refuel using gasoline with a lower AKI.
Information on refueling (
Ypage 135).
Additives
!Operating the engine with fuel additives
added later can lead to engine failure. Do not
mix fuel additives with fuel. This does not
include additives for the removal and preven-
tion of residue buildup. gasoline must only be mixed with additives recommended by
Mercedes-Benz. Comply with the instructions
for use on the product label. More information
about recommended additives can be
obtained from any authorized Mercedes-Benz Center.
Mercedes-Benz recommends that you use bran-
ded fuels that have additives.
The fuel quality available in some countries may
not be sufficient. Residue could build up in the
fuel injection system as a result. In such cases,
and in consultation with an authorized
Mercedes-Benz Center, the fuel may be mixed
with the cleaning additive recommended by
Mercedes-Benz. You must observe the notes
and mixing ratios specified on the container.
Engine oil
General notes
!Never use engine oil or an oil filter of a spec-
ification other than is necessary to fulfill the
prescribed service intervals. Do not change
the engine oil or oil filter in order to achieve
longer replacement intervals than those pre-
scribed. You could otherwise cause engine
damage or damage to the exhaust gas after-
treatment.
Follow the instructions in the service interval display regarding the oil change. Otherwise,
you may damage the engine and the exhaust
gas aftertreatment.
When handling engine oil, observe the important
safety notes on service products (
Ypage 330).
The engine oils are matched to the performance
of Mercedes-Benz engines and service intervals.
You should therefore only use engine oils and oil
filters that are approved for vehicles with main- tenance systems.
For a list of approved engine oils and oil filters,
consult an authorized Mercedes-Benz Center.
Or visit the website
http://bevo.mercedes-benz.com.
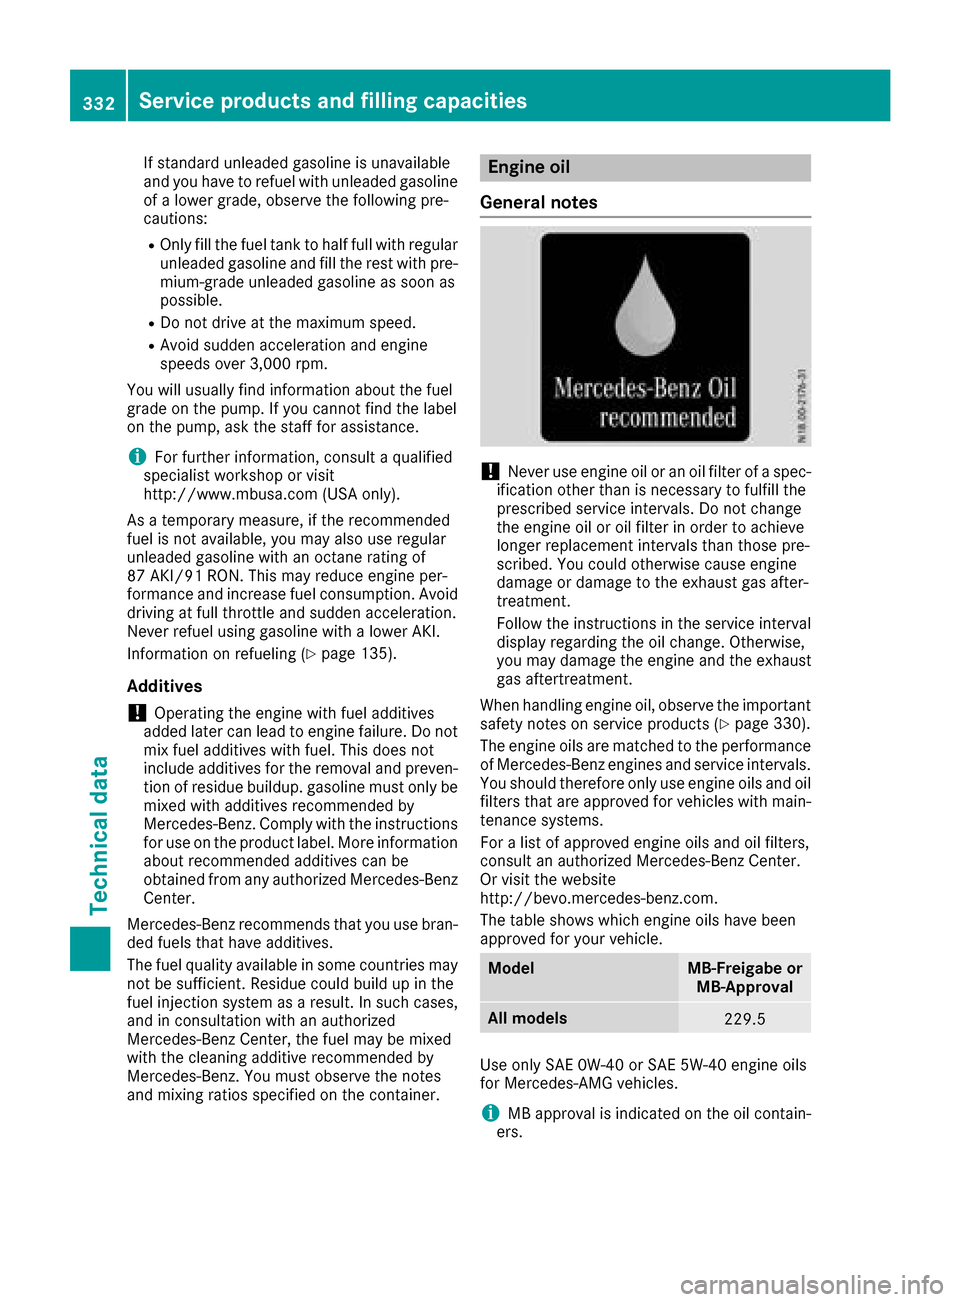
The table shows which engine oils have been
approved for your vehicle.
ModelMB-Freigabe or MB-Approval
All models229.5
Use only SAE 0W-40 or SAE 5W-40 engine oils
for Mercedes-AMG vehicles.
iMB approval is indicated on the oil contain-
ers.
332Service products and filling capacities
Technical data