2017 MERCEDES-BENZ S-Class CABRIOLET heating
[x] Cancel search: heatingPage 101 of 338

Switching the seat heating on/off
Switching on/off
GWARNING
Repeatedly switching on the seat heating can
cause the seat cushion and backrest pads to
become very hot. The health of persons with
limited temperature sensitivity or a limited
ability to react to excessively high tempera-
tures may be affected or they may even suffer
burn-like injuries. There is a risk of injury.
Therefore, do not switch the seat heating on
repeatedly.
For vehicles equipped with the Warmth Comfort
package: the armrest in the door and the center
console can also be heated when you switch on
the seat heating of one of the front seats. You
can set this via the multimedia system; see the
Digital Operator's Manual.
The three red indicator lamps in the button indi-
cate the heating level you have selected.
The system automatically switches down from
level 3to level 2after approximately eight
minutes.
The system automatically switches down from
level 2to level 1after approximately ten
minutes.
The system automatically switches off approx-
imately 20 minutes after it is set to level 1.
You can set the distribution of the heated sec-
tions of the seat cushions and backrests on the
front seats using the multimedia system; see the
Digital Operator's Manual.
Front seats
XSwitch on the power supply or the ignition
(Ypage 125).
XTo switch on: press button:repeatedly
until the desired heating level is set.
XTo switch off: press button:repeatedly
until all the indicator lamps go out.
iIf the battery voltage is too low, the seat
heating may switch off.
Rear seats
XSwitch on the power supply or the ignition
(Ypage 125).
XTo switch on: press button:repeatedly
until the desired heating level is set.
XTo switch off: press button:repeatedly
until all the indicator lamps go out.
iIf the battery voltage is too low, the seat
heating may switch off.
Switching the seat ventilation on/off
Front seats
The three blue indicator lamps in the buttons
indicate the blower setting you have selected.
Seats99
Seats, steering wheel and mirrors
Z
Page 102 of 338
XSwitch on the power supply or the ignition
(Ypage 125).
XTo switch on:press button:repeatedly
until the desired blower setting is set.
XTo switch off: press button:repeatedly
until all the indicator lamps go out.
iIf the battery voltage is too low, the seat
ventilation may switch off.
iYou can open the side windows using the
"Convenience opening" feature (Ypage 87).
The seat ventilation of the driver's seat auto-
matically switches to the highest level.
iWhen the vehicle is stationary, the fan
speed can be reduced automatically. This
reduces the noises of the seat ventilation.
Problems with the seat heating/ventilation
ProblemPossible causes/consequences and MSolutions
The seat heating or seat
ventilation has switched
off prematurely or can-
not be switched on.The on-board voltage is too low because too many electrical consum-
ers are switched on.
XSwitch off electrical consumers that you do not need, such as the
rear window defroster or interior lighting.
Once the battery is sufficiently charged, the seat heating or seat
ventilation can be switched back on manually.
AIRSCARF
GWARNING
When AIRSCARF is switched on, very hot air
can flow from the vents in the head restraints. This could result in burns in the immediate
vicinity of the air vents. There is a risk of injury.
Reduce the heater output before it becomes
too hot.
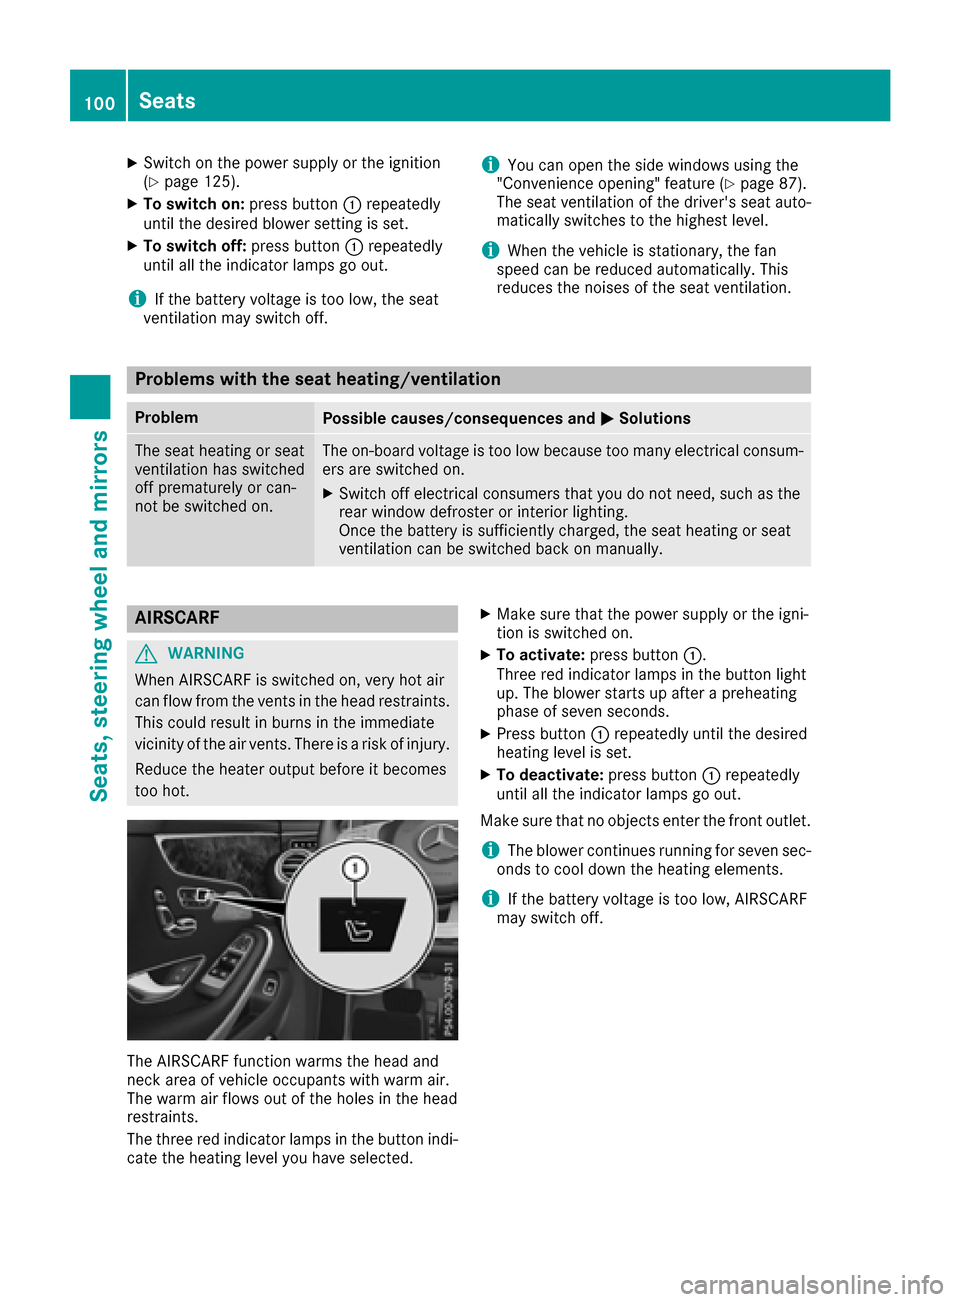
The AIRSCARF function warms the head and
neck area of vehicle occupants with warm air.
The warm air flows out of the holes in the head
restraints.
The three red indicator lamps in the button indi-
cate the heating level you have selected.
XMake sure that the power supply or the igni-
tion is switched on.
XTo activate: press button :.
Three red indicator lamps in the button light
up. The blower starts up after a preheating
phase of seven seconds.
XPress button :repeatedly until the desired
heating level is set.
XTo deactivate: press button:repeatedly
until all the indicator lamps go out.
Make sure that no objects enter the front outlet.
iThe blower continues running for seven sec-
onds to cool down the heating elements.
iIf the battery voltage is too low, AIRSCARF
may switch off.
100Seats
Seats, steering wheel and mirrors
Page 103 of 338

Steering wheel
Important safety notes
GWARNING
You could lose control of your vehicle if you do the following while driving:
Radjust the driver's seat, head restraint,
steering wheel or mirrors
Rfasten the seat belt
There is a risk of an accident.
Adjust the driver's seat, head restraint, steer-
ing wheel and mirror and fasten your seat belt before starting the engine.
GWARNING
Children could injure themselves if they
adjust the steering wheel. There is a risk of
injury.
When leaving the vehicle, always take the
SmartKey with you and lock the vehicle. Never
leave children unsupervised in the vehicle.
The electrically adjustable steering wheel can
still be adjusted when there is no SmartKey in
the ignition lock.
Adjusting the steering wheel
:Adjusts the steering wheel height
;Adjusts the steering wheel position (fore-
and-aft adjustment)
iFurther related subjects:
REASY-ENTRY/EXIT feature (Ypage 102)
RStoring settings (Ypage 106)
Steering wheel heating
Switching on/off
XSwitch on the ignition (Ypage 125).
XTo switch on/off: turn the lever in the direc-
tion of arrow :or;.
Indicator lamp =lights up or goes out.
If you switch off the ignition, the steering wheel
heating is deactivated.
Steering wheel101
Seats, steering wheel and mirrors
Z
Page 104 of 338

Problems with the steering wheel heating
ProblemPossible causes/consequences andMSolutions
The steering wheel heat-
ing has switched off pre-
maturely or cannot be
switched on.The on-board voltage is too low because too many electrical consum-
ers are switched on.
XSwitch off electrical consumers that you do not need, such as the
rear window defroster or interior lighting.
EASY-ENTRY/EXIT feature
Important safety notes
GWARNING
When the EASY-ENTRY/EXIT feature adjusts
the steering wheel and the driver's seat, you
and other vehicle occupants – particularly
children – could become trapped. There is a
risk of injury.
While the EASY-ENTRY/EXIT feature is mak-
ing adjustments, make sure that no one has
any body parts in the sweep of the seat and
the steering wheel.
If there is a risk of becoming trapped by
Rthe steering wheel: move the steering
wheel adjustment lever.
Rthe seat: press the switch for seat adjust-
ment.
The adjustment process is stopped.
You can stop the adjustment process by press-
ing one of the memory function's position but-
tons. This function is only available on vehicles
with memory function.
GWARNING
If children activate the EASY-ENTRY/EXIT fea-
ture, they can become trapped, particularly
when unattended. There is a risk of injury.
When leaving the vehicle, always take the
SmartKey with you and lock the vehicle. Never
leave children unsupervised in the vehicle.
GWARNING
If you drive off while the EASY-ENTRY/EXIT
feature is making adjustments, you could lose
control of the vehicle. There is a risk of an
accident.
Always wait until the adjustment process is
complete before driving off.
The EASY-ENTRY/EXIT feature makes getting in
and out of your vehicle easier.
You can activate and deactivate the EASY-
ENTRY/EXIT feature using the multimedia sys-
tem (see the Digital Operator's Manual).
Position of the steering wheel and the
driver's seat when the EASY-ENTRY/
EXIT feature is active
The steering wheel tilts upwards and the driver's seat moves backwards if you:
Rremove the SmartKey from the ignition lock
Rwith the start/stop button: open the driv-
er's door; the ignition must be switched off
Rwith the SmartKey: open the driver's door;
the SmartKey must be in position 0or 1in the
ignition lock (
Ypage 124)
iThe steering wheel only tilts upwards and
the driver's seat only moves backwards if the
driving position is stored after the seat or
steering column has been adjusted.
The last position of the steering wheel or seat is
stored if:
Rthe ignition is switched off
Rthe setting is stored with the memory function
(Ypage 106).
iThe steering wheel only moves upwards if it
has not already reached the upper stop. The
driver's seat only moves backwards if it is not
already in the rearmost position.
102Steering wheel
Seats, steering wheel and mirrors
Page 108 of 338
pants – particularly children – could become
trapped. There is a risk of injury.
While the memory function is making adjust-
ments, make sure that no one has any body
parts in the sweep of the seat or steering
wheel. If somebody becomes trapped, imme-diately release the memory function position
button. The adjustment process is stopped.
GWARNING
Children could become trapped if they acti-
vate the memory function, particularly when
unattended. There is a risk of injury.
When leaving the vehicle, always take the
SmartKey with you and lock the vehicle. Never
leave children unsupervised in the vehicle.
The memory function can be used at any time,
even if the power supply is switched off.
Storing settings
With the memory function, you can store up to
three different settings, e.g. for three different
people.
The following settings are stored as a single
memory preset:
Rseat, backrest, head restraint position and
contour of the backrest in the lumbar region
Ractive multicontour seat: side bolsters of the
backrest, shoulder of the backrest, contour of the backrest, dynamic function level
Rseat heating: distribution of the heated sec-
tions of the seat cushion and backrest
Rdriver's side: position of the exterior mirrors
on the driver's and front-passenger sides
Rposition of the head-up display
XAdjust the seat accordingly (Ypage 95).
XOn the driver's side, adjust the steering wheel(Ypage 101) and the exterior mirrors
(Ypage 103).
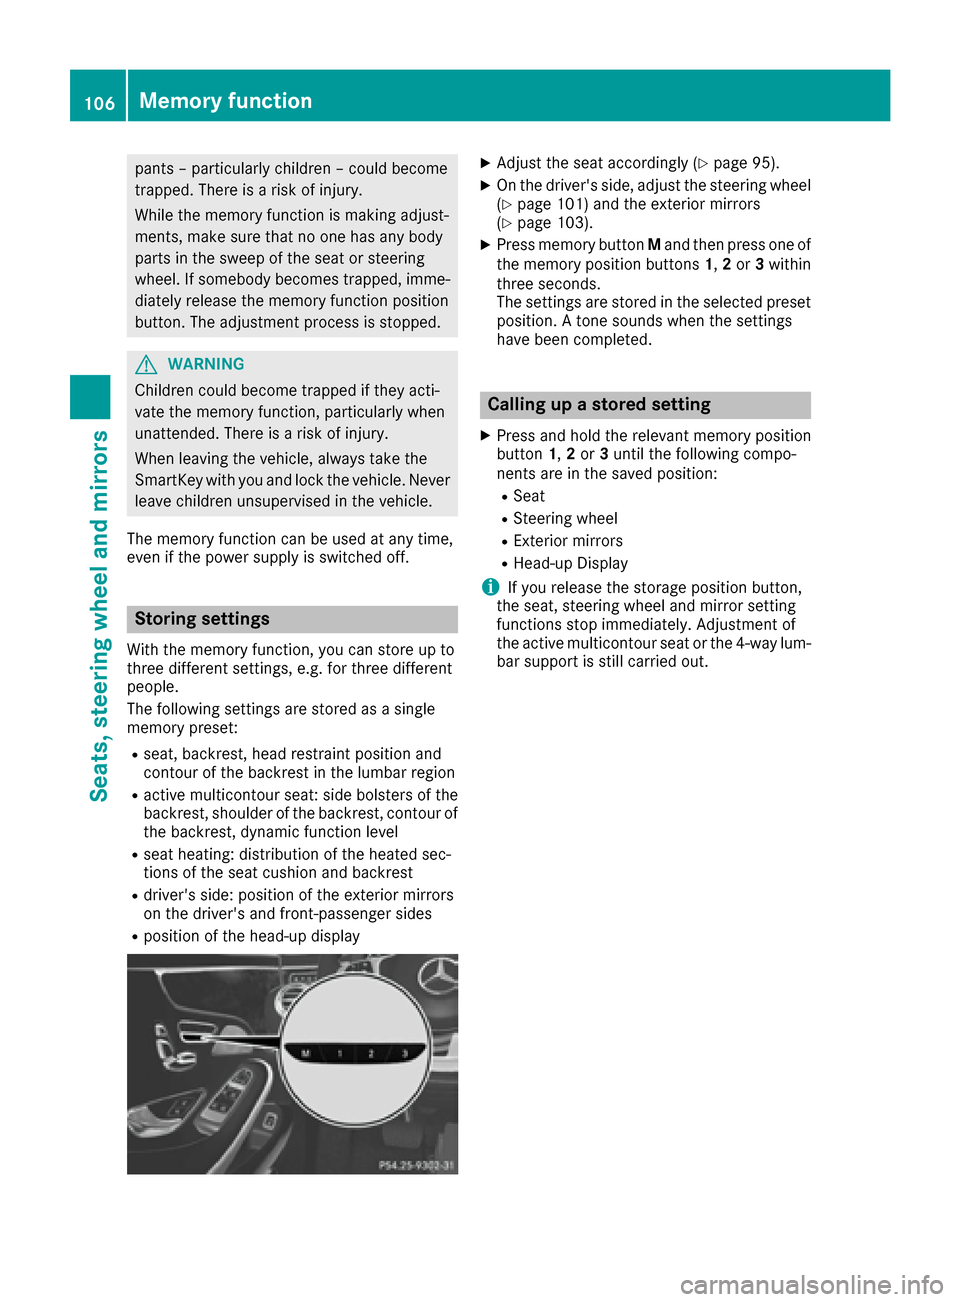
XPress memory button Mand then press one of
the memory position buttons 1,2or 3within
three seconds.
The settings are stored in the selected preset
position. A tone sounds when the settings
have been completed.
Calling up a stored setting
XPress and hold the relevant memory position
button 1,2or 3until the following compo-
nents are in the saved position:
RSeat
RSteering wheel
RExterior mirrors
RHead-up Display
iIf you release the storage position button,
the seat, steering wheel and mirror setting
functions stop immediately. Adjustment of
the active multicontour seat or the 4-way lum-
bar support is still carried out.
106Memory function
Seats, steering wheel and mirrors
Page 120 of 338

Setting the air distribution via the mul-
timedia system
The air distribution for the left and right sides of
the driver's and front-passenger areas can be
adjusted using the multimedia system (see the
Digital Operator's Manual).
Setting the airflow
General notes
You can select different airflow settings for the
driver's and front-passenger sides.
Setting the airflow
XTurn the SmartKey to position 2in the ignition
lock (Ypage 124).
XTo increase or reduce: press theK
rocker switch up or down.
iYou can also set the airflow using the mul-
timedia system (see the Digital Operator's
Manual).
Activating or deactivating the syn-
chronization function
Climate control can be set centrally using the
synchronization function. The settings for tem-
perature, air distribution and airflow on the driv-
er's side are adopted for the front-passenger
side.
XTo activate or deactivate: activate or deac-
tivate the "Synchronization" function via the
multimedia system (see the Digital Operator's
Manual).
The synchronization function deactivates if the
settings for the front-passenger side are
changed.
Defrosting the windshield
General notes
You can use this function to defrost the wind-
shield or to clear a fogged up windshield or front
side windows on the inside.
Switch off the "Windshield defrosting" function
as soon as the windshield is clear again.
Switching the "Windshield defrosting"
function on or off
XTurn the SmartKey to position 2in the ignition
lock (Ypage 124).
XTo activate: press the¬rocker switch on
the front control panel up or down.
The indicator lamp in the ¬rocker switch
lights up.
The climate control system switches to the
following functions:
Rhigh airflow
Rhigh temperature
Rair distribution to the windshield and front
side windows
Rair-recirculation mode off
Rwindshield heating on
Rcooling with air dehumidification on
XTo deactivate: press the¬rocker switch
up or down.
The indicator lamp in the ¬rocker switch
goes out. The previously selected settings are restored. Air-recirculation mode remains
deactivated.
Defrosting the windows
Windows fogged up on the inside
XActivate the "Cooling with air dehumidifica-
tion" function with the Árocker switch.
or
XActivate the "Cooling with air dehumidifica-
tion" function via the multimedia system; see
the Digital Operator's Manual.
XSwitch on automatic mode using the Ã
rocker switch.
XIf the windows continue to fog up: activate the
"Windshield defrosting" function using the
¬ rocker switch. The windshield heating is
switched on.
iYou should only select this setting until the
windshield is clear again.
Windows fogged up on the outside
XActivate the windshield wipers.
XSwitch on automatic mode using the Ã
rocker switch.
118Operating the climate control systems
Climate control
Page 121 of 338

iIf you clean the windows regularly, they do
not fog up so quickly.
Rear window defroster
General notes
The rear window defroster has a high current
draw. You should therefore switch it off as soon
as the rear window is clear. Otherwise, the rear
window defroster switches off automatically
after several minutes. If the battery voltage is too low, the rear window
defroster may switch off.
Activating or deactivating
XTurn the SmartKey to position 2in the ignition
lock (Ypage 124).
XPress the ¤rocker switch up or down.
The indicator lamp in the ¤rocker switch
lights up or goes out.
Problems with the rear window defroster
ProblemPossible causes/consequences and MSolutions
The rear window
defroster has deactiva-
ted prematurely or can-
not be activated.The battery has not been sufficiently charged.
XSwitch off any consumers that are not required, e.g. reading lamps,
interior lighting or the seat heating.
When the battery is sufficiently charged, the rear window defroster
can be activated again.
Switching air-recirculation mode
on/off
General notes
You can also temporarily deactivate the flow of
fresh air manually if unpleasant odors are enter-
ing the vehicle from outside. The air already
inside the vehicle will then be recirculated.
If you switch on air-recirculation mode, the win-
dows can fog up more quickly, in particular at
low temperatures. Only use air-recirculation
mode briefly to prevent the windows from fog-
ging up.
When the soft top is open, air-recirculation
mode is deactivated and cannot be activated
manually.
Activating/deactivating
XTurn the SmartKey to position 2in the ignition
lock (Ypage 124).
XTo activate: press thegrocker switch up
or down.
The indicator lamp in the grocker switch
lights up. Air-recirculation mode switches on automati-
cally:
Rat high outside temperatures
Rat high levels of pollution
Rin a tunnel
The indicator lamp in the grocker switch is
not lit when automatic air-recirculation mode is
activated. Outside air is added after about
30 minutes.
XTo deactivate: press thegrocker switch
up or down.
The indicator lamp in the grocker switch
goes out.
Air-recirculation mode deactivates automati-
cally:
Rafter approximately five minutes at outside
temperatures below approximately 41 ‡
(5 †)
Rafter approximately five minutes if cooling
with air dehumidification is deactivated
Rafter approximately 30 minutes at outside
temperatures above approximately 41 ‡
(5 †) if the "Cooling with air dehumidifica-
tion" function is activated
Operating the climate control systems119
Climate control
Page 122 of 338
Switching the residual heat on or off
General notes
Once the engine is switched off, it is possible to
make use of the residual heat of the engine to
continue heating or ventilating the front com-
partment of the vehicle for approximately
30 minutes.
The heating or ventilation time depends on the
temperature that has been set.
Activating/deactivating
XTurn the SmartKey to position 0in the ignition
lock or remove it (Ypage 124).
XTo activate: press theÁrocker switch up
or down.
The indicator lamp in the Árocker switch
lights up.
The blower will run at a low speed regardless of
the airflow setting.
If you activate the residual heat function at high
temperatures, only the ventilation will be acti-
vated. The blower runs at medium speed.
XTo deactivate: press theÁrocker switch
up or down.
The indicator lamp in the Árocker switch
goes out.
Residual heat is deactivated automatically:
Rafter approximately 30 minutes
Rwhen the ignition is switched on
Rif the battery voltage drops
Perfume atomizer
Operating the perfume atomizer
GWARNING
If children open the vial, they could drink the
perfume or it could come into contact with
their eyes. There is a risk of injury. Do not
leave children unsupervised in the vehicle.
If the perfume liquid has been drunk, consult
a doctor. If perfume comes into contact with
your eyes or skin, rinse the eyes with clean
water. If you continue to experience difficul-
ties, consult a doctor.
HEnvironmental note
Full vials must not be dis-
posed of with household
waste. They must be collec-
ted separately and recycled
to protect the environment.
Dispose of full vials in an
environmentally responsible
manner and take them to a
harmful substance collec-
tion point.
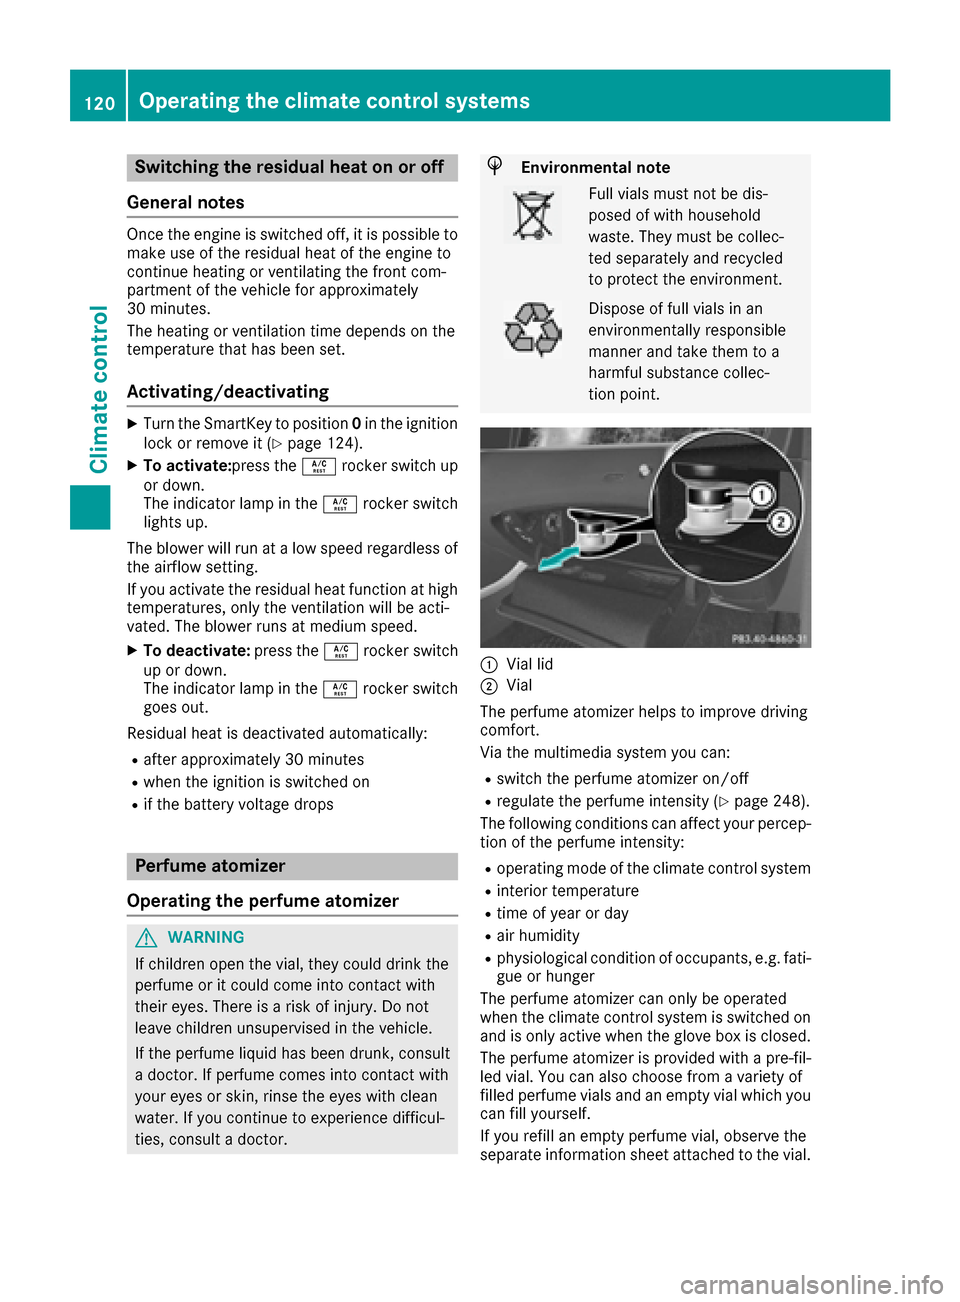
:Vial lid
;Vial
The perfume atomizer helps to improve driving
comfort.
Via the multimedia system you can:
Rswitch the perfume atomizer on/off
Rregulate the perfume intensity (Ypage 248).
The following conditions can affect your percep-
tion of the perfume intensity:
Roperating mode of the climate control system
Rinterior temperature
Rtime of year or day
Rair humidity
Rphysiological condition of occupants, e.g. fati-
gue or hunger
The perfume atomizer can only be operated
when the climate control system is switched on
and is only active when the glove box is closed.
The perfume atomizer is provided with a pre-fil- led vial. You can also choose from a variety of
filled perfume vials and an empty vial which you
can fill yourself.
If you refill an empty perfume vial, observe the
separate information sheet attached to the vial.
120Operating the climate control systems
Climate control