2017 MERCEDES-BENZ GLE43AMG SUV spare wheel
[x] Cancel search: spare wheelPage 5 of 366

Breakdown assistance.....................306
Where will I find...? .............................. 306
Flat tire ................................................ 306
Battery (vehicle) .................................. 311
Jump-starting ....................................... 313
Towing and tow-starting ...................... 316
Fuses ................................................... 318
Wheels and tires ............................... 321
Important safety notes ........................ 321
Operation ............................................ 321
Winter operation .................................. 323
Tire pressure ....................................... 324
Loading the vehicle .............................. 331
All about wheels and tires ................... 334
Changing a wheel ................................ 341
Wheel and tire combinations ............... 345
Emergency spare wheel ....................... 346
Technical data ................................... 350
Information regarding technical data ... 350
Vehicle electronics .............................. 350
Identification plates ............................. 351
Service products and filling capaci-
ties ...................................................... 352
Vehicle data ......................................... 358
Vehicle data for off-road driving .......... 359
Trailer tow hitch ................................... 361
Contents3
Page 9 of 366

Cargo compartment floorImportant safety notes .................. 276
Opening/closing ............................ 276
Stowage well (under) .................... .276
Cargo tie down rings ......................... 274
CD
see also Digital Operator's Man-
ual ..................................................2 63
CD player (on-board computer) ........212
Center console
Lower section .................................. 36
Upper section .................................. 35
Central locking
Automatic locking (on-board com-
puter) ............................................. 216
Locking/unlocking (SmartKey) ........7 1
Child
Restraint system .............................. 56
Child seat
Forward-facing restraint system ...... 59
LATCH-type (ISOFIX) child seat
anchors ............................................ 57
On the front-passenger seat ............ 58
Rearward-facing restraint system .... 58
Top Tether ...................................... .57
Child-proof locks
Important safety notes .................... 59
Rear doors ...................................... .60
Children
Special seat belt retractor .............. .55
Cigarette lighter ................................ 280
Cleaning
Mirror turn signal .......................... .302
Trailer tow hitch .............................3 04
C
limate control
Automatic climate control (3-
zone) .............................................. 115
Controlling automatically ...............1 18
Cooling with air dehumidification .. 118
Defrosting the windows ................. 120
Defrosting the windshield .............. 120
Dual-zone automatic climate con-
trol ................................................. 113
General notes ................................ 113
Indicator lamp ................................ 118
Ionization ....................................... 122
Maximum cooling .......................... 120 Notes on using the automatic cli-
mate control .................................. 117
Overview of systems ......................1
13
Problem with the rear window
defroster ........................................ 121
Problems with cooling with air
dehumidification ............................ 118
Rear control panel ......................... 115
Refrigerant ..................................... 357
Refrigerant filling capacity ............. 358
Setting the air distribution ............. 119
Setting the air vents ......................1 22
Setting the airflow ......................... 119
Setting the climate mode (AIR
FLOW) ............................................ 118
Setting the temperature ................ 119
Switching air-recirculation mode
on/off ............................................ 121
Switching on/off ........................... 117
Switching residual heat on/off ...... 121
Switching the rear window
defroster on/off ............................ 121
Switching the ZONE function
on/off ............................................ 120
Coat hooks ......................................... 276
Cockpit
Overview .......................................... 32
see Instrument cluster
Collapsible spare wheel
Inflating ......................................... 349
see Emergency spare wheel
COMAND
Switching on/off ........................... 264
COMAND display
Cleaning ......................................... 304
Combination switch .......................... 105
Connectin g a USB de
vice
see also Digital Operator's Man-
ual ..................................................2 63
Consumption statistics (on-board
computer) .......................................... 209
Controller ...........................................2 64
Convenience closing feature .............. 84
Convenience opening feature ............ 84
Coolant (engine)
Checking the level ......................... 297
Display message ............................ 234
Index7
Page 12 of 366

Wet road surface ........................... 151
DSR (Downhill Speed Regulation)
Display message ............................2 39
Function/notes .............................1 68
DVD video
Operating (on-board computer) ..... 212
see also Digital Operator's Man-
ual ..................................................2 63
DYNAMIC SELECT controller
Automatic transmission ................. 132
E
EASY-ENTRY featureActivating/deactivating ................. 217
Function/notes ................................ 98
EASY-EXIT feature
Crash-responsive .............................9 9
Function/notes ................................ 98
Switching on/off ........................... 217
EBD (electronic brake force distri-
bution)
Display message ............................ 224
Function/notes ................................ 66
ECO display
Function/notes ............................. 149
On-board computer ....................... 209
ECO start/stop function
Automatic engine start .................. 130
Automatic engine switch-off .......... 129
Deactivating/activating ................. 130
General information ....................... 129
Important safety notes .................. 129
Introduction ................................... 129
Emergency
Automatic measures after an acci-
dent ................................................. 54
Emergency release
Driver's door .................................... 78
Vehicle ............................................. 78
Emergency spare wheel
General notes ................................ 346
Important safety notes .................. 346
Removing ....................................... 347
Storage location ............................ 347
Stowing .......................................... 347
Emergency Tensioning Devices
Activation ......................................... 51 Emergency unlocking
Tailgate ............................................ 82
Emissions control
Service and warranty information .... 25
Engine
Check Engine warning lamp ........... 259
Display message ............................ 234
ECO start/stop function ................ 129
Engine number ............................... 352
Irregular running ............................ 131
Jump-starting ................................. 313
Starting (important safety notes) ... 126
Starting problems .......................... 131
Starting the engine with the
SmartKey ....................................... 127
Starting via smartphone ................ 127
Starting with KEYLESS-GO ............. 127
Switching off .................................. 146
Tow-starting (vehicle) ..................... 318
Engine electronics
Problem (malfunction) ................... 131
Engine oil
Adding ........................................... 296
Additives ........................................ 356
Checki ng the o
il level ..................... 295
Checking the oil level using the
dipstick .......................................... 296
Display message ............................ 236
Filling capacity ............................... 356
Notes about oil grades ................... 355
Notes on oil level/consumption .... 295
Temperature (on-board computer,
Mercedes-AMG vehicles) ............... 218
Engine switch-off
see ECO start/stop function
Entering an address
see also Digital Operator's Man-
ual .................................................. 263
ESP
®(Electronic Stability Pro-
gram)
AMG menu (on-board computer) ... 218
Characteristics ................................. 65
Deactivating/activating ................... 65
Display message ............................ 222
Function/notes ................................ 64
General notes .................................. 64
Important safety information ........... 64
Trailer stabilization ........................... 66
10Index
Page 13 of 366

Warning lamp ................................. 255
ETS/4ETS (Electronic Traction Sys-
tem) ...................................................... 64
Exhaust check ................................... 149
Exhaust pipe (cleaning instruc-
tions) .................................................. 303
Exterior lighting
see Lights
Exterior mirrors
Adjusting ......................................... 99
Dipping (automatic) ....................... 101
Folding in when locking (on-board
computer) ...................................... 217
Folding in/out (automatically) .......1 00
Folding in/out (electrically) ........... 100
Out of position (troubleshooting) ... 100
Setting ...........................................1 00
Storing settings (memory func-
tion) ............................................... 102
Storing the parking position .......... 101
Eyeglasses compartment ................. 272
F
Favorites
Overview ........................................ 265
Filler cap
see Refueling
Flat tire
MOExtended tires .......................... 307
Preparing the vehicle ..................... 306
TIREFIT kit ...................................... 308
see Emergency spare wheel
Floormats ...........................................2 92
Fog lamps (extended range) ............. 107
Folding the rear bench seat for-
wards/back ....................................... 273
Fording
Off-road ......................................... 152
On flooded roads ........................... 152
Frequencies
Mobile phone ................................. 350
Two-way radio ................................ 350
Fuel
Additives ........................................ 354
Consumption statistics .................. 209
Displaying the current consump-
tion ................................................ 210 Displaying the range ......................2
10
Driving tips ....................................1 48
Fuel gauge ....................................... 33
Grade (gasoline) ............................ 353
Important safety notes .................. 353
Low outside temperatures ............. 354
Problem (malfunction) ................... 142
Quality (diesel) ............................... 354
Refueling ........................................ 139
Tank content/reserve fuel ............. 353
Fuel filler flap
Opening ......................................... 141
Fuel filter (display message) ............ 237
Fuel level
Calling up the range (on-board
computer) ...................................... 210
Fuel tank
Capacity ........................................ 353
Problem (malfunction) ................... 142
Fuses
Allocation chart ............................. 318
Before changing ............................. 319
Dashboard fuse box ....................... 319
Fuse box in the engine compart-
ment .............................................. 319
Fuse box under rear bench seat .... 320
Important safety notes .................. 318
G
Garage door openerClearing the memory ..................... 292
General notes ................................ 289
Important safety notes .................. 290
Opening/closing the garage doo r..2 92
Problems when programming ........2 91
Programming (button in the rear-
view mirror) ................................... 290
Synchronizing the rolling code ....... 291
Gear indicator (on-board com-
puter, Mercedes-AMG vehicles) ....... 218
Genuine parts ...................................... 24
Glove box ...........................................2 71
Google™ Local Search
see also Digital Operator's Man-
ual ..................................................2 63
GTW (Gross Trailer Weight) (defini-
tion) .................................................... 339
Index11
Page 25 of 366

Overview .......................................... 33
Parking brake ................................ 258
PASSENGER AIR BAG ......................40
Reserv efuel .................................. .259
Restraint system ............................ 258
Seat belt ........................................ 250
Tire pressure monitor .................... 262
Warranty .............................................. 25
Washer fluid
Display message ............................ 248
Weather display (COMAND)
see also Digital Operator's Man-
ual ..................................................2 63
Wheel and tire combinations
Tires ............................................... 345
Wheel bolt tightening torque ........... 345
Wheel chock ...................................... 342
Wheels
Changing a wheel .......................... 341
Checking ........................................ 321
Cleaning ......................................... 301
Emergency spare wheel ................. 346
Important safety notes .................. 321
Information on driving .................... 321
Interchanging/changing ................ 341
Mounting a new wheel ................... 344
Mounting a wheel .......................... 341
Overview ........................................ 321
Removing a wheel .......................... 343
Snow chains .................................. 323
Storing ...........................................3 41
Tightening torque ........................... 345
Wheel size/tire size ....................... 345
Window curtain air bag
Display message ............................ 230
Operation ......................................... 46
Windows
see Side windows
Windshield
Defrosting ...................................... 120
Windshield washer fluid
see Windshield washer system
Windshield washer system
Adding washer fluid ....................... 297
Important safety notes .................. 357
Windshield wi pers
Probl
em (malfunction) ................... 112
Replacing the wiper blades ............ 110 Switching on/off ........................... 109
Winter driving
Slippery road surfaces ................... 153
Winter operation
Overview ........................................ 323
Radiator cover ............................... 295
Winter tires
M+S tires ....................................... 323
Wiper blades
Cleaning ......................................... 302
Replacing ....................................... 110
Replacing (windshield) ................... 110
Wooden trim (cleaning instruc-
tions) .................................................. 305
Z
ZONE function
Switching on/off ........................... 120
Index23
Page 272 of 366

Stowage areas
Loading guidelines
GWARNING
If objects, luggage or loads are not secured or
not secured sufficiently, they could slip, tip
over or be flung around and thereby hit vehicle
occupants. There is a risk of injury, particu-
larly in the event of sudden braking or a sud-
den change in direction.
Always store objects so that they cannot be
flung around. Secure objects, luggage or
loads against slipping or tipping before the
journey.
GWARNING
Combustion engines emit poisonous exhaust
gases such as carbon monoxide. If the tailgate
is open when the engine is running, particu-
larly if the vehicle is moving, exhaust fumes
could enter the passenger compartment.
There is a risk of poisoning.
Turn off the engine before opening the tail-
gate. Never drive with the tailgate open.
GWARNING
The exhaust tail pipe and tail pipe trim can
become very hot. If you come into contact
with these parts of the vehicle, you could burn
yourself. There is a risk of injury.
Always be particularly careful around the
exhaust tail pipe and the tail pipe trim. Allow
these components to cool down before touch-
ing them.
The gross vehicle weight (GVW) is the vehicle
weight including fuel, vehicle tool kit, spare
wheel, installed accessories, vehicle occupants
and luggage/cargo.
Do not exceed the load limit or permitted gross
vehicle weight rating (GVWR) for your vehicle.
The gross load limit and the GVWR are specified
on the vehicle identification plate on the B-pillar
of the driver's door (
Ypage 331).
The load must also be distributed so that the
weight on each axle never exceeds the gross
axle weight rating (GAWR) for the front and rear
axles. The specifications for GVWR and GAWR are on the vehicle identification plate on the B-
pillar of the driver's door (
Ypage 331).
Observe the notes on loading the vehicle
(
Ypage 331).
The handling characteristics of a laden vehicle
are dependent on the distribution of the load
within the vehicle. For this reason, you should
observe the following notes when transporting a
load:
RNever exceed the maximum permissible
gross vehicle mass or the gross axle weight
rating for the vehicle (including occupants).
RThe cargo compartment is the preferred place to carry objects.
RPosition heavy loads as far forwards as pos-
sible and as low down in the cargo compart-
ment as possible.
RThe load must not protrude above the upper
edge of the seat backrests.
RAlways place the load against the rear or frontseat backrests. Make sure that the seat
backrests are securely locked into place.
RAlways place the load behind unoccupied
seats if possible.
RUse the cargo tie-down rings and the parcel
nets to transport loads and luggage.
RUse cargo tie-down rings and fastening mate-
rials appropriate for the weight and size of theload.
RSecure the load with sufficiently strong and
wear-resistant tie-downs. Pad sharp edges for
protection.
Stowage spaces
Important safety notes
GWARNING
If you transport objects in the vehicle interior
and these are not adequately secured, they
could slip or be flung around and thereby
strike vehicle occupants. In addition, cup
holders, open stowage spaces and mobile
phone brackets may not always be able to
hold the objects placed in them in the event of
an accident. There is a risk of injury, particu-
larly in the event of sharp braking or sudden
changes of direction.
270Stowage areas
Stowage and features
Page 308 of 366

Where will I find...?
Vehicle tool kit
General notes
The vehicle tool kit can be found in the stowage
well under the cargo compartment floor.
Apart from certain country-specific variations,
the vehicles are not equipped with a tire-change
tool kit. Some tools for changing a wheel are
specific to the vehicle. For more information on
which tools are required to perform a wheel
change on your vehicle, consult a qualified spe-
cialist workshop.
Necessary tire-changing tools can include, for
example:
RJack
RWheel chock
RLug wrench
RRatchet wrench
RAlignment bolt
Vehicles with a TIREFIT kit
:Jack
;Folding wheel chock
=Towing eye
?Alignment bolt
ATire inflation compressor
BLug wrench
CRatchet wrench
DTire sealant filler bottle
XOpen the tailgate.
XLift the cargo compartment floor upwards
(Ypage 276).
XUse the TIREFIT kit (Ypage 308).
Vehicles with a "Minispare" emergency
spare wheel
:Folding wheel chock
;Lug wrench
=Alignment bolt
?Towing eye
AJack
BRatchet wrench
XOpen the tailgate.
XLift the cargo compartment floor upwards
(Ypage 276).
XRemove the "Minispare" emergency spare
wheel (Ypage 347).
Flat tire
Preparing the vehicle
Your vehicle may be equipped with:
RMOExtended tires (tires with run-flat proper-
ties)
Vehicle preparation is not necessary on vehi-
cles with MOExtended tires
Ra TIREFIT kit (Ypage 306)
Ran emergency spare wheel (only for certain
countries)
Information on changing and mounting wheels
(
Ypage 341).
XStop the vehicle on solid, non-slippery and
level ground, as far away as possible from
traffic.
XSwitch on the hazard warning lamps.
XSecure the vehicle against rolling away
(Ypage 145).
XIf possible, bring the front wheels into the
straight-ahead position.
306Flat tire
Breakdown assistance
Page 324 of 366

Check wheels and tires for damage at least once
a month. Check wheels and tires afterdriving
off-road or on rough roads. Damaged wheels
can cause a loss of tire pressure. Pay particular
attention to damage such as:
Rcuts inthe tires
Rpunctures
Rtears inthe tires
Rbulges on tires
Rdeformation or severe corrosion on wheels
Regularly check the tire tread depth and the
condition of the tread across the whole width of
the tire (
Ypage 322). Ifnecessary, turn the
front wheels to full lock inorder to inspect the
inner sideof the tire surface.
All wheels must have a valve cap to protect the valve against dirtand moisture. Do not mount
anything onto the valve other than the standard
valve cap or other valve caps approved by
Mercedes-Benz for your veh icle. Do not use any
other valve caps or systems, e.g. tire pressure
monitoring systems.
Regularly check the pressure of all the tires par-
ticularly prior to long tr ips.Adjust the tire pres-
sure as necessary (
Ypage 324).
Observe the notes on the emergency spare
wheel (
Ypage 346).
The service lifeof tires depends, among other
things, on the foll owing factors:
RDrivin g style
RTire pressure
RDistance covered
Notes on tire tread
GWAR NING
In suff icient tire tread willreduce tire traction.
The tire isno longer abletodissipat e water.
This means that on wet road surfaces, the risk
of hydroplaning increases, inparticular where
speed isnot adapted to suit the driving con-
dit ions. There isa risk of acc ident.
If the tire pressure istoo high or too low,tires
may exhibit diff erent levelsof wear at differ-
ent locations on the tire tread. Thus, you
should regularly check the tread depth and
the condition of the tread across the entire
widt h of all tires.
Minimum tire tread depth for:
RSummer tires: âin(3 mm)
RM+S tires: ãin(4 mm)
For safety reasons, replace the tires before
the legally prescribe d limit for the minimum
tire tread depth is reached.
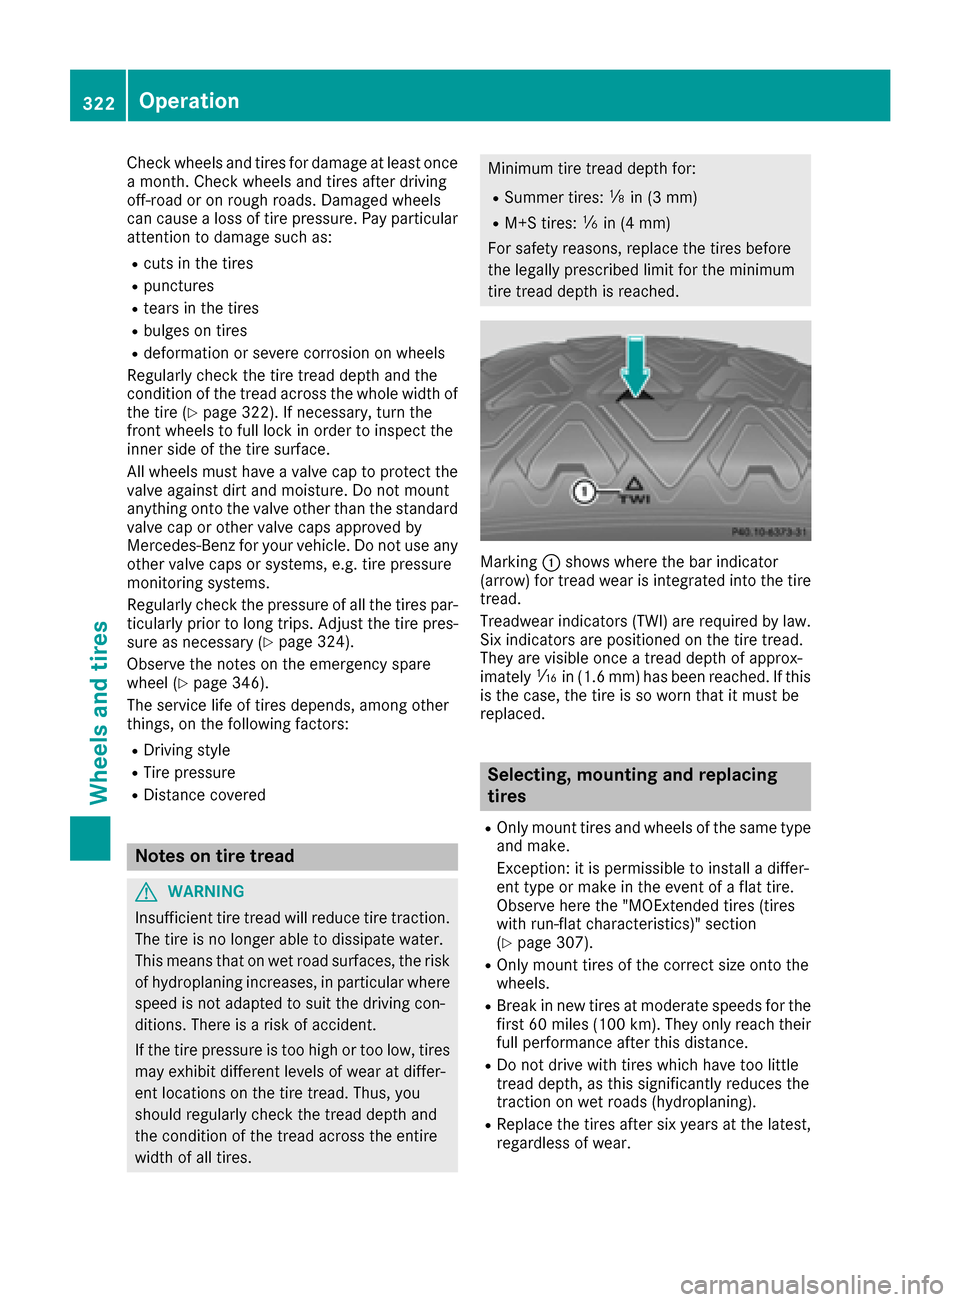
Marking :shows where the bar indicator
(arrow) for tread wear is integrated into the tire
tread.
Treadwear indicators (TWI) are required by law. Six indicators are positioned on the tire tread.
They are vis ibleonce a tread depth of approx-
imately áin (1.6 mm) has been reached. If this
is the case, the tire isso worn that it must be
replaced.
Selecting, mounting and replacing
tires
ROnly mount tires and wheels of the same type
and make.
Exception: itis permissible to install a differ-
ent type or make in the event of a flat tire.
Observe here the "MOExtended tires (tires
with run-flat characteristics)" section
(
Ypage 307).
ROnly mount tires of the correct size onto the
wheels.
RBreak innew tires at moderate speeds for the
first 60 mile s(100 km). They only reach their
full performance after this distance.
RDo not drive with tires which have too little
tread depth, as this significantly reduces the
traction on wet roads (hydroplaning).
RReplace the tires after six years at the latest,
regardless of wear.
322Operation
Wheels and tires