2017 MERCEDES-BENZ GLE43AMG SUV steering wheel
[x] Cancel search: steering wheelPage 187 of 366
360° camera
General notes
The 360° camera is a system consisting of four
cameras.
The system processes images from the follow-
ing cameras:
RRear view camera
RFront camera
RTwo cameras in the exterior rear view mirrors
The cameras capture the immediate surround-
ings of the vehicle. The system supports you,
e.g. when parking or if vision is restricted at an
exit.
You can show pictures from the 360° camera in
full-screen mode or in seven different split-
screen views on the multimedia system display.
A split-screen view also includes a top view of
the vehicle. This view is calculated from the data
supplied by the installed cameras (virtual cam-
era).
The six split-screen views are:
RTop view and picture from the rear view cam-
era (130° viewing angle)
RTop view and image from the front camera
(130° viewing angle without displaying the
maximum steering wheel angle)
RTop view and enlarged rear view
RTop view and enlarged front view
RTop view and rear-view images from the exte- rior mirror cameras (rear wheel view)
RTop view and forward-view images from the
exterior mirror cameras (front wheel view)
When the function is active and you shift the
transmission from Dor Rto N, the dynamic
guidelines are hidden.
When you change between transmission posi-
tions Dand R, you see the previously selected
front or rear view.
Distances measured by Parking Assist
PARKTRONIC will also be optically displayed:
Rin split screen view as red or yellow brackets around the vehicle icon in the top view, or
Rat the bottom right as red or yellow brackets
around the vehicle symbol in full-screen mode
The line thickness and color of the brackets
show how far the vehicle is away from an object:
Ryellow brackets with thin lines: Parking Assist
PARKTRONIC is active
Ryellow brackets with normal lines: an object is present in close range of the vehicle
Rred line: an object is present in the immediate
close range of the vehicle
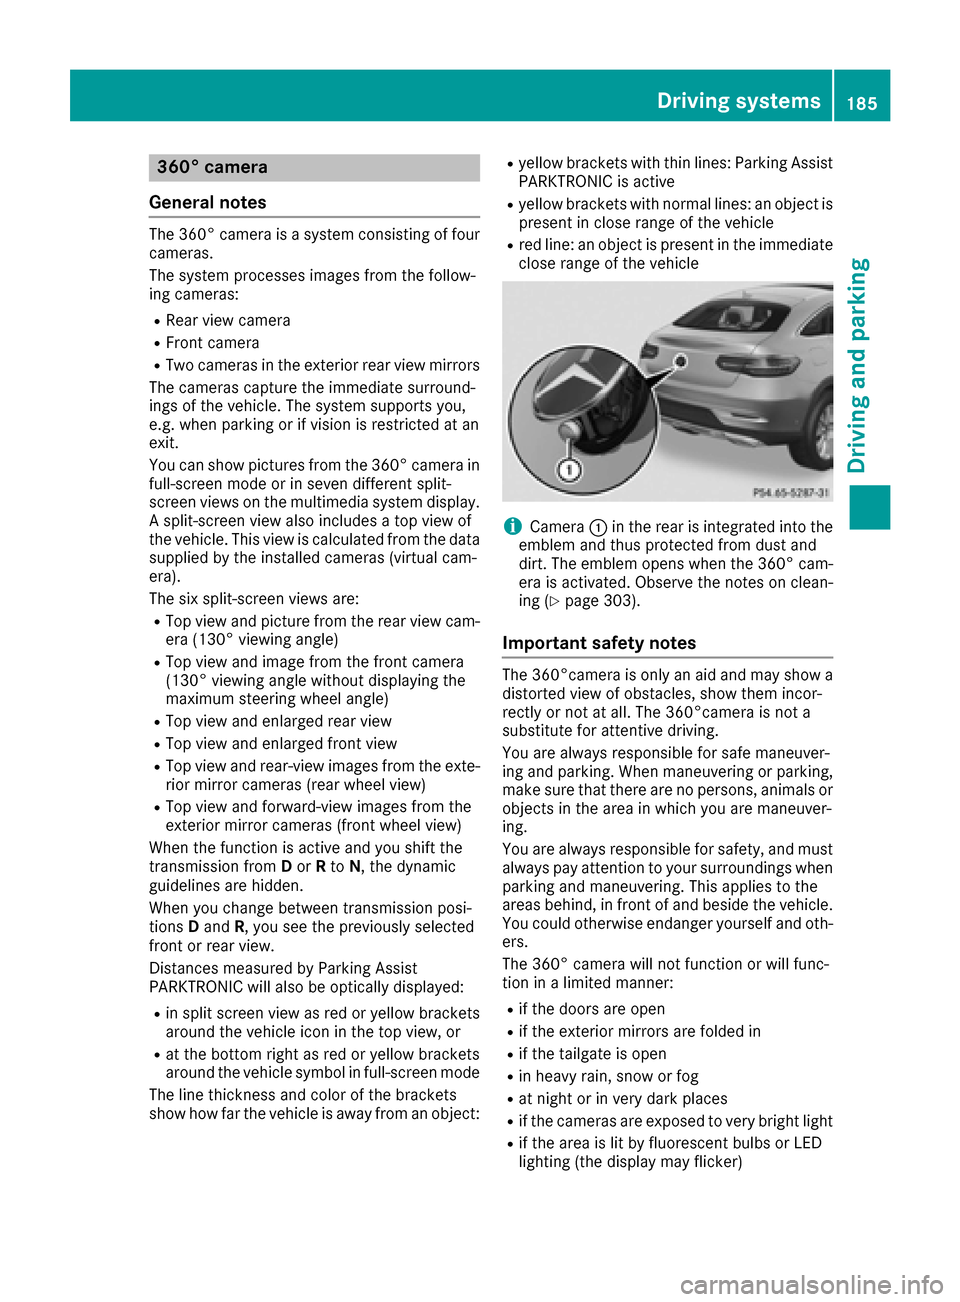
iCamera:in the rear is integrated into the
emblem and thus protected from dust and
dirt. The emblem opens when the 360° cam-
era is activated. Observe the notes on clean-
ing (
Ypage 303).
Important safety notes
The 360°camera is only an aid and may show a
distorted view of obstacles, show them incor-
rectly or not at all. The 360°camera is not a
substitute for attentive driving.
You are always responsible for safe maneuver-
ing and parking. When maneuvering or parking, make sure that there are no persons, animals or
objects in the area in which you are maneuver-
ing.
You are always responsible for safety, and must
always pay attention to your surroundings when parking and maneuvering. This applies to the
areas behind, in front of and beside the vehicle.
You could otherwise endanger yourself and oth-
ers.
The 360° camera will not function or will func-
tion in a limited manner:
Rif the doors are open
Rif the exterior mirrors are folded in
Rif the tailgate is open
Rin heavy rain, snow or fog
Rat night or in very dark places
Rif the cameras are exposed to very bright light
Rif the area is lit by fluorescent bulbs or LED
lighting (the display may flicker)
Driving systems185
Driving and parking
Z
Page 189 of 366
Rvery close to the exterior mirrors
Rin the transitional areas between the various
cameras in the virtual top view
!Objects not at ground level may appear to
be further away than they actually are, e.g.:
Rthe bumper of a parked vehicle
Rthe drawbar of a trailer
Rthe ball coupling of a trailer tow hitch
Rthe rear section of an HGV
Ra slanted post
Use the guidelines only for orientation.
Approach objects no further than the bottom-
most guideline.
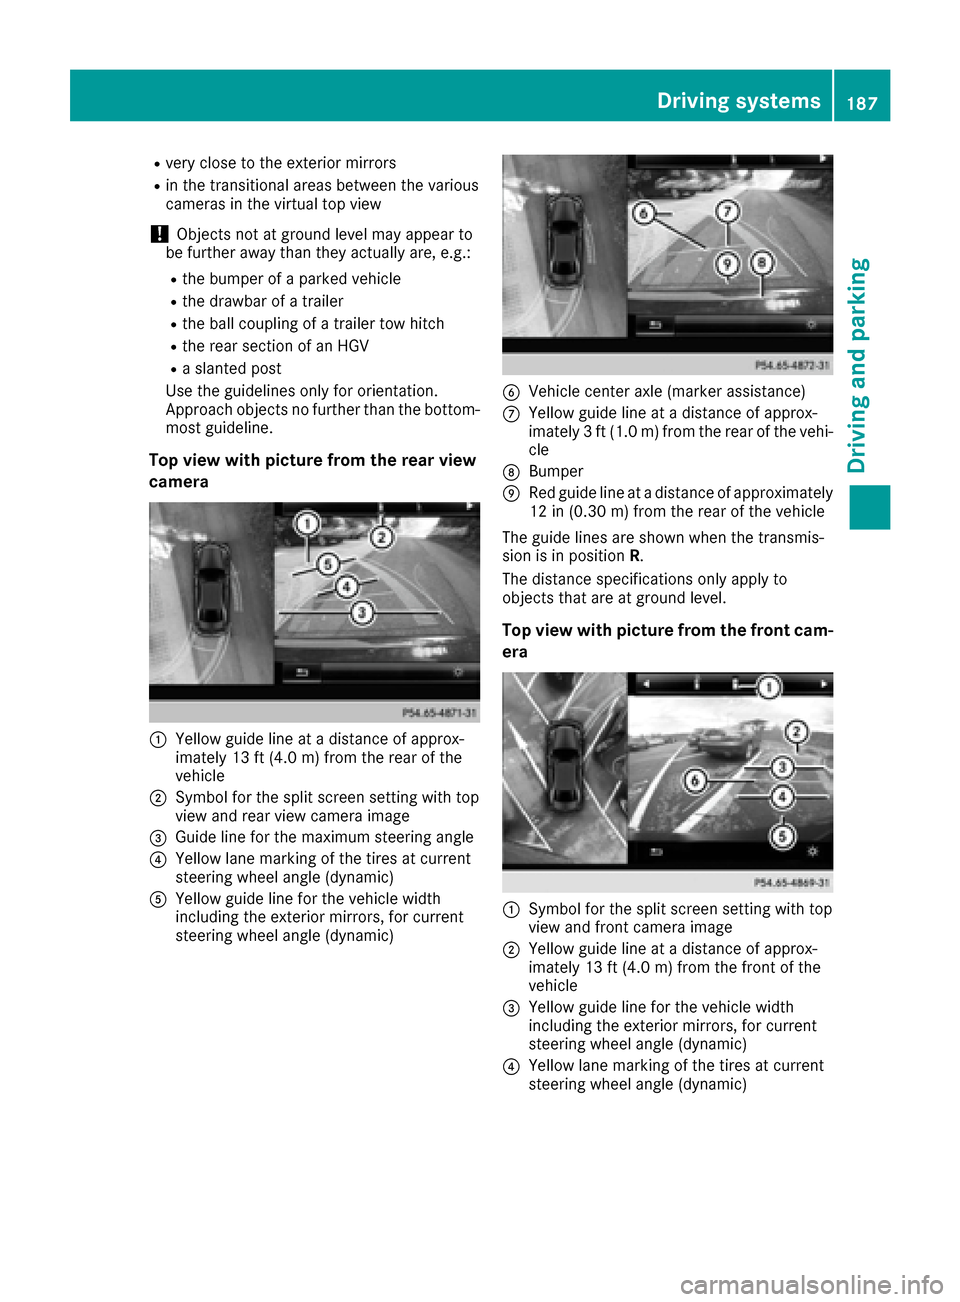
Top view with picture from the rear view
camera
:Yellow guide line at a distance of approx-
imately 13 ft (4.0 m) from the rear of the
vehicle
;Symbol for the split screen setting with top
view and rear view camera image
=Guide line for the maximum steering angle
?Yellow lane marking of the tires at current
steering wheel angle (dynamic)
AYellow guide line for the vehicle width
including the exterior mirrors, for current
steering wheel angle (dynamic)
BVehicle center axle (marker assistance)
CYellow guide line at a distance of approx-
imately 3 ft (1.0 m) from the rear of the vehi-
cle
DBumper
ERed guide line at a distance of approximately
12 in (0.30 m) from the rear of the vehicle
The guide lines are shown when the transmis-
sion is in position R.
The distance specifications only apply to
objects that are at ground level.
Top view with picture from the front cam-
era
:Symbol for the split screen setting with top
view and front camera image
;Yellow guide line at a distance of approx-
imately 13 ft (4.0 m) from the front of the
vehicle
=Yellow guide line for the vehicle width
including the exterior mirrors, for current
steering wheel angle (dynamic)
?Yellow lane marking of the tires at current
steering wheel angle (dynamic)
Driving systems187
Driving and parking
Z
Page 192 of 366
is adapted accordingly and the driver is warned
earlier.
When ATTENTION ASSIST is deactivated, the
Àsymbol and OFF appear in the multifunc-
tion display in the assistance display when the
engine is running.
When ATTENTION ASSIST has been deactivated,
it is automatically reactivated after the engine
has been stopped. The sensitivity selected cor-
responds to the last selection activated (stand-
ard/sensitive).
Warning in the multifunction display
If fatigue or increasing lapses in concentration
are detected, a warning appears in the multi-
function display: Attention
Assist:TakeaBreak!
In addition to the message shown in the multi-
function display, you will then hear a warning
tone.
XIf necessary, take a break.
XConfirm the message by pressing the a
button on the steering wheel.
On long journeys, take regular breaks in good
time to allow yourself to rest. If you do not take
a break, you will be warned again after
15 minutes at the earliest. This will only happen
if ATTENTION ASSIST still detects typical indi-
cators of fatigue or increasing lapses in concen-
tration.
Vehicles with COMAND: if a warning is issued
in the multifunction display, a service station
search is performed in COMAND. You can select a service station and navigation to this service
station will then begin. This function can be acti-
vated and deactivated in COMAND.
Traffic Sign Assist
General notes
Traffic Sign Assist displays the maximum speed
permitted to the driver in the instrument cluster.
The data stored in the navigation system and
general traffic regulations are used to determine
the current speed limit.
As Traffic Sign Assist is a map-based system,
traffic signs put up temporarily (e.g. near road-
works) are not detected. If a traffic sign that is relevant to your vehicle is
passed, the display of the speed limits is upda-
ted.
Traffic signs with a restriction indicated by an
additional sign (e.g. in wet conditions) are also
shown.
The traffic signs are only displayed with the
restrictions if:
Rthe regulation must be observed with the
restriction, or
RTraffic Sign Assist is unable to determine
whether the restriction applies
If Traffic Sign Assist is unable to determine a
maximum permitted speed from any of the avail-
able sources, no speed limit is displayed in the
instrument cluster either.
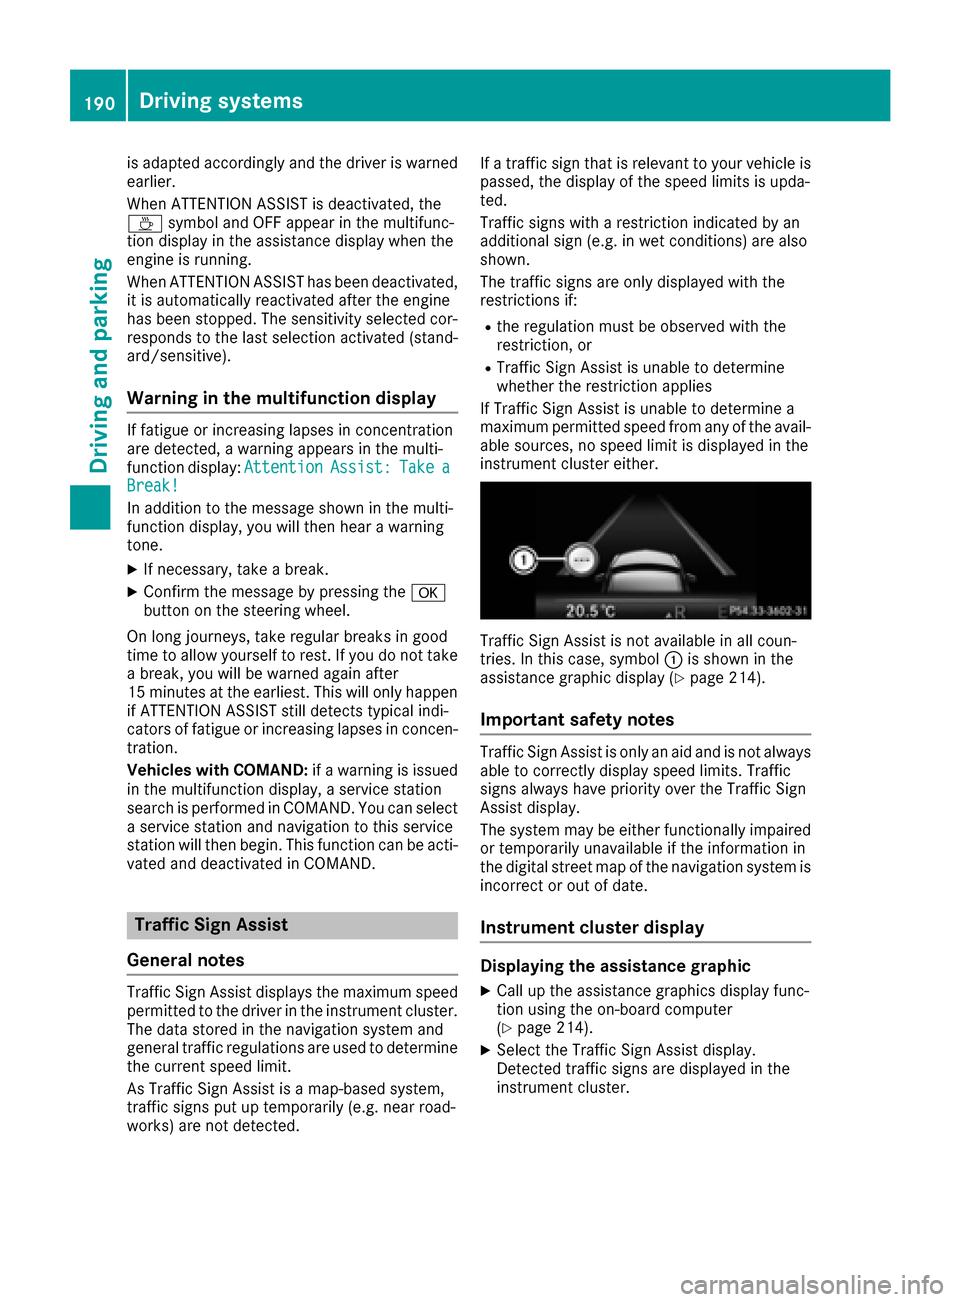
Traffic Sign Assist is not available in all coun-
tries. In this case, symbol :is shown in the
assistance graphic display (
Ypage 214).
Important safety notes
Traffic Sign Assist is only an aid and is not always
able to correctly display speed limits. Traffic
signs always have priority over the Traffic Sign
Assist display.
The system may be either functionally impaired
or temporarily unavailable if the information in
the digital street map of the navigation system is
incorrect or out of date.
Instrument cluster display
Displaying the assistance graphic
XCall up the assistance graphics display func-
tion using the on-board computer
(
Ypage 214).
XSelect the Traffic Sign Assist display.
Detected traffic signs are displayed in the
instrument cluster.
190Driving systems
Driving and parking
Page 195 of 366
Towing a trailer
When you attach a trailer, make sure you have
correctly established the electrical connection.
This can be accomplished by checking the trailer
lighting. In this event, Blind Spot Assist is deac-tivated. The indicator lamp lights up yellow in
the exterior mirrors and the Blind Spot
Assist Not Available When Towing aTrailer See Operator's Manualmessage
appears in the multifunction display.
iYou can deactivate the indicator lamps in
the exterior mirrors.
To do so, switch off Blind Spot Assist when:
Rthe SmartKey is in position 2in the ignition
lock
Rthe engine is not running
Lane Keeping Assist
General notes
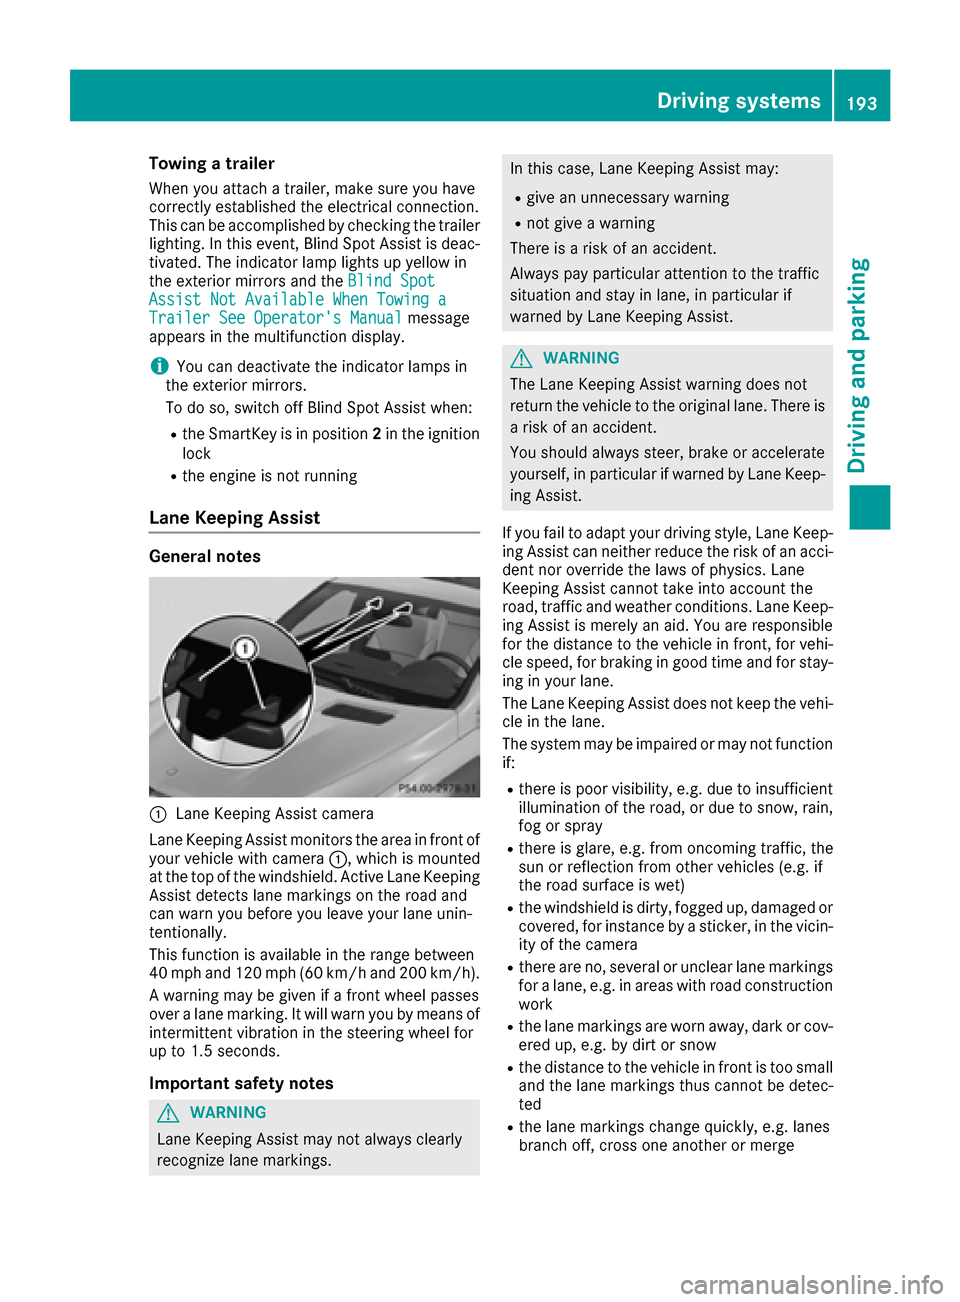
:Lane Keeping Assist camera
Lane Keeping Assist monitors the area in front of
your vehicle with camera :, which is mounted
at the top of the windshield. Active Lane Keeping
Assist detects lane markings on the road and
can warn you before you leave your lane unin-
tentionally.
This function is available in the range between
40 mph and 120 mph (60 km/h and 200 km/h).
A warning may be given if a front wheel passes
over a lane marking. It will warn you by means of
intermittent vibration in the steering wheel for
up to 1.5 second s.
Important safety notes
GWARNING
Lane Keeping Assist may not always clearly
recognize lane markings.
In this case, Lane Keeping Assist may:
Rgive an unnecessary warning
Rnot give a warning
There is a risk of an accident.
Always pay particular attention to the traffic
situation and stay in lane, in particular if
warned by Lane Keeping Assist.
GWARNING
The Lane Keeping Assist warning does not
return the vehicle to the original lane. There is
a risk of an accident.
You should always steer, brake or accelerate
yourself, in particular if warned by Lane Keep-
ing Assist.
If you fail to adapt your driving style, Lane Keep-
ing Assist can neither reduce the risk of an acci-
dent nor override the laws of physics. Lane
Keeping Assist cannot take into account the
road, traffic and weather conditions. Lane Keep- ing Assist is merely an aid. You are responsible
for the distance to the vehicle in front, for vehi-
cle speed, for braking in good time and for stay-
ing in your lane.
The Lane Keeping Assist does not keep the vehi-
cle in the lane.
The system may be impaired or may not function
if:
Rthere is poor visibility, e.g. due to insufficient
illumination of the road, or due to snow, rain,
fog or spray
Rthere is glare, e.g. from oncoming traffic, the
sun or reflection from other vehicles (e.g. if
the road surface is wet)
Rthe windshield is dirty, fogged up, damaged or
covered, for instance by a sticker, in the vicin-
ity of the camera
Rthere are no, several or unclear lane markings
for a lane, e.g. in areas with road construction
work
Rthe lane markings are worn away, dark or cov-
ered up, e.g. by dirt or snow
Rthe distance to the vehicle in front is too small
and the lane markings thus cannot be detec-
ted
Rthe lane markings change quickly, e.g. lanes
branch off, cross one another or merge
Driving systems193
Driving and parking
Z
Page 200 of 366
Rthe road is narrow and winding
Rthere are highly variable shade conditions onthe roadway
Rno vehicle is detected in the adjacent lane andthere are broken lane markings
Warning vibration in the steering wheel
A warning may be given if a front wheel passes
over a lane marking. It will warn you by means of
intermittent vibration in the steering wheel for
up to 1.5 second s.
In orde r that you are warned only when neces-
sary and in good time if you cross the lane mark-
ing, the system detects certain conditions and
warns you accordingly.
The warning vibration occurs earlier if:
Ryou approach the outer lane marking on a
bend
Rthe road has very wide lanes, e.g. a highway
Rthe system detects solid lane markings
The warning vibration occurs later if:
Rthe road has narrow lanes
Ryou cut the corner on a bend
Lane-correcting brake application
GWARNING
A lane-correcting brake application cannot
always bring the vehicle back into the original lane. There is a risk of an accident.
Always steer, brake or accelerate yourself,
especially if Active Lane Keeping Assist warns
you or makes a lane-correcting brake appli-
cation.
GWARNING
Active Lane Keeping Assist does not detect
traffic conditions or road users. In very rare
cases, the system may make an inappropriate brake application, e.g. after intentionally driv-
ing over a solid lane marking. There is a risk of
an accident.
An inappropriate brake application may be
interrupted at any time if you steer slightly in
the opposite direction. Always make sure that
there is sufficient distance on the side for
other traffic or obstacles.
If you leave your lane, under certain circumstan-
ces the vehicle will brake briefly on one side.
This is meant to assist you in bringing the vehicle
back to the original lane.
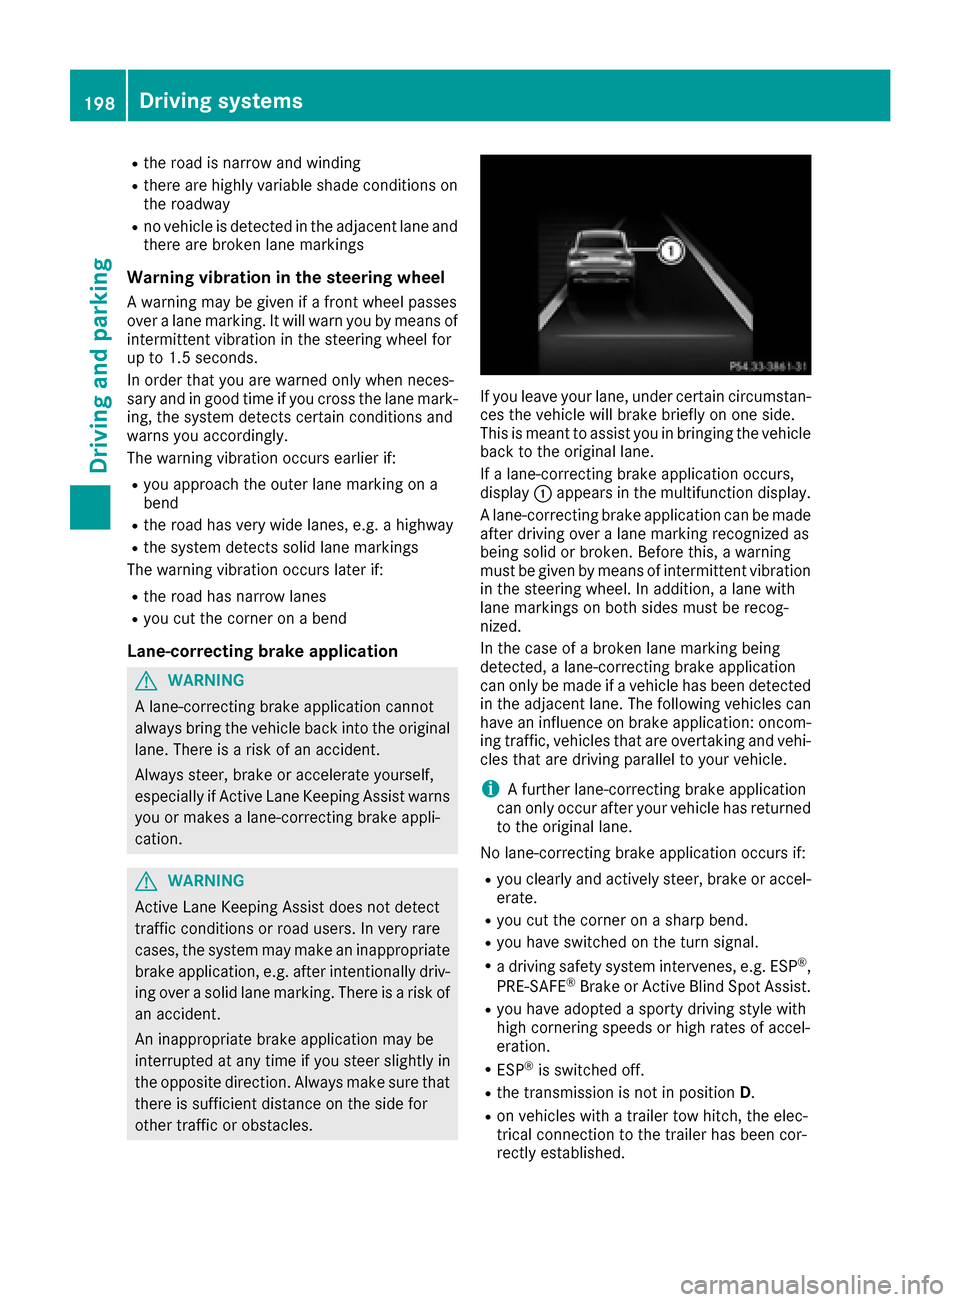
If a lane-correcting brake application occurs,
display :appears in the multifunction display.
A lane-correcting brake application can be made
after driving over a lane marking recognized as
being solid or broken. Before this, a warning
must be given by means of intermittent vibration
in the steering wheel. In addition, a lane with
lane markings on both sides must be recog-
nized.
In the case of a broken lane marking being
detected, a lane-correcting brake application
can only be made if a vehicle has been detected
in the adjacent lane. The following vehicles can
have an influence on brake application: oncom-
ing traffic, vehicles that are overtaking and vehi-
cles that are driving parallel to your vehicle.
iA further lane-correcting brake application
can only occur after your vehicle has returned
to the original lane.
No lane-correcting brake application occurs if:
Ryou clearly and actively steer, brake or accel-
erate.
Ryou cut the corner on a sharp bend.
Ryou have switched on the turn signal.
Ra driving safety system intervenes, e.g. ESP®,
PRE-SAFE®Brake or Active Blind Spot Assist.
Ryou have adopted a sporty driving style with
high cornering speeds or high rates of accel-
eration.
RESP®is switched off.
Rthe transmission is not in position D.
Ron vehicles with a trailer tow hitch, the elec-
trical connection to the trailer has been cor-
rectly established.
198Driving systems
Driving and parking
Page 203 of 366
For certain Mercedes-Benz vehicles, the maxi-
mum permissible rear axle load is increased
when towing a trailer. See "Technical data" to
find out whether this applies to your vehicle
(
Ypage 361). If you utilize any of the added
maximum rear axle load when towing a trailer,
the vehicle/trailer combination may not exceed
a maximum speed of 60 mph (100 km/h) for
reasons concerning the operating permit. This
also applies in countries in which the permissi-
ble maximum speed for vehicle/trailer combi-
nations is above 60 mph (100 km/h).
When towing a trailer, your vehicle's handling
characteristics will be different in comparison
with when driving without a trailer.
Use the left-hand steering wheel paddle shifter
to shift into a lower gear in good time on long
and steep downhill gradients.
This also applies if you have activated cruise
control or Distance Pilot DISTRONIC.
This will use the braking effect of the engine, so
that less braking will be required to maintain the speed. This relieves the load on the brake sys-
tem and prevents the brakes from overheating
and wearing too quickly. If you need additional
braking, depress the brake pedal repeatedly
rather than continuously.
Driving tips
If the trailer swings from side to side:
XDo not accelerate.
XDo not counter-steer.
XBrake if necessary.
RMaintain a greater distance from the vehicle
in front than when driving without a trailer.
RAvoid braking abruptly. If possible, brake gen-tly at first to allow the trailer to run on. Then,
increase the braking force rapidly.
RThe values given for gradient-climbing capa-
bilities from a standstill refer to sea level.
When driving in mountainous areas, note that
the power output of the engine and, conse-
quently, the vehicle's gradient-climbing capa-
bility, decreases with increasing altitude.
Installing the ball coupling
GWARNING
If the ball coupling is not correctly installed
and secured, it can come loose during the
journey and endanger other road users. There is a risk of an accident and injury.
Always install and secure the ball coupling as
described. Before every journey, ensure that
the ball coupling is secured with the bolt and
the corresponding spring cotter.
GWARNING
If the ball coupling is not installed correctly or not secured with the bolt provided and the
corresponding spring cotter, the trailer may
come loose. There is a risk of an accident.
Always install and secure the ball coupling as
described. Before every journey, ensure that
the ball coupling is secured with the bolt and
the corresponding spring cotter.
GWARNING
If the ball coupling is not installed and secured
correctly the trailer may come loose. There is
a risk of an accident.
Install and secure the ball coupling as descri-
bed in the ball coupling installation instruc-
tions. Make sure that the ball coupling is
installed and secured correctly before every
journey.
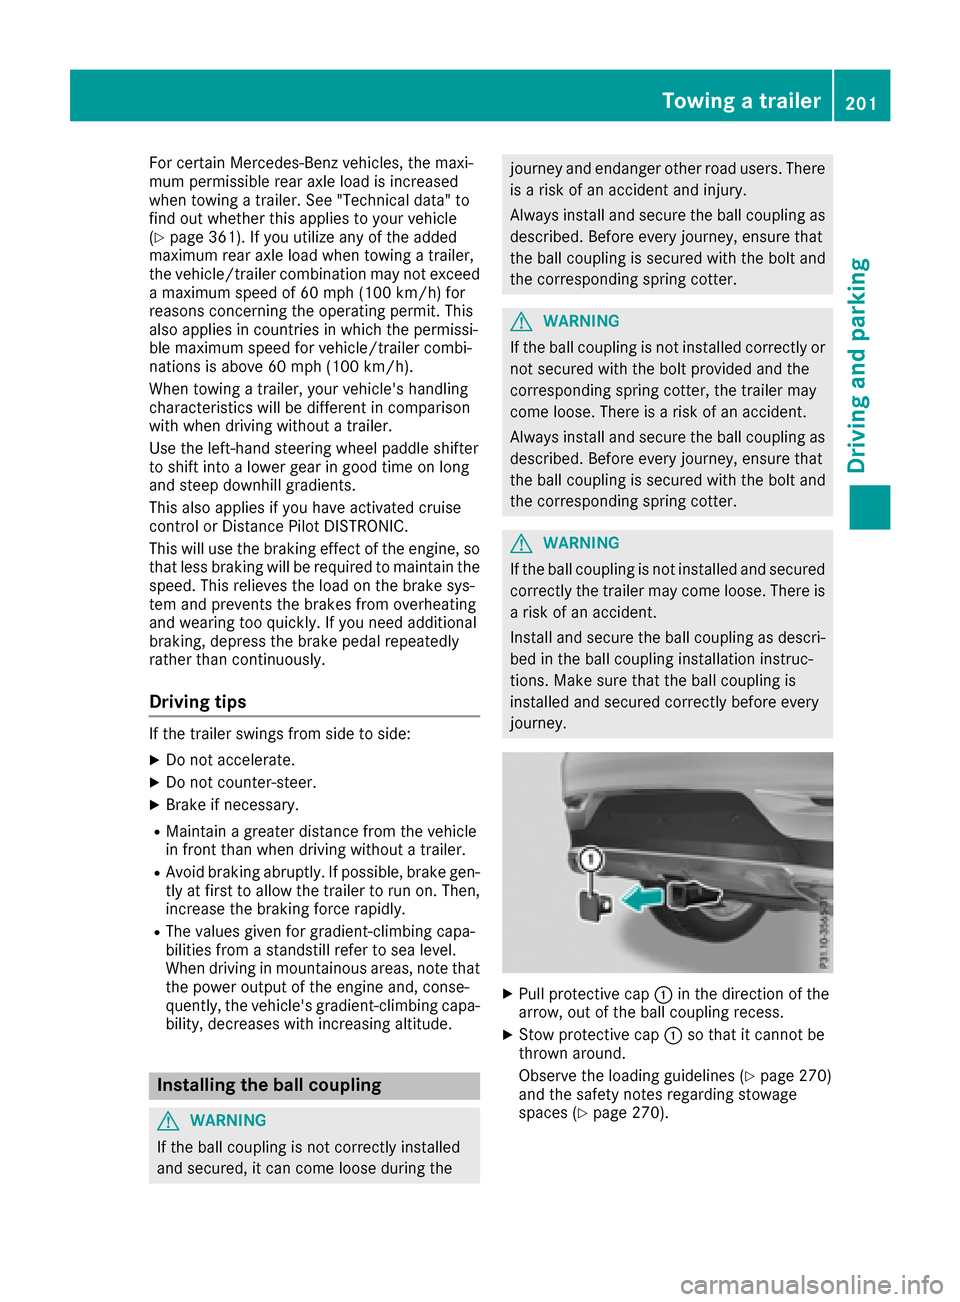
XPull protective cap :in the direction of the
arrow, out of the ball coupling recess.
XStow protective cap :so that it cannot be
thrown around.
Observe the loading guidelines (
Ypage 270)
and the safety notes regarding stowage
spaces (
Ypage 270).
Towing a trailer201
Driving and parking
Z
Page 205 of 366
XEstablish the electrical connection between
the vehicle and the trailer.
XCheck that the trailer lighting system is work-
ing.
XPush the combination switch upwards/down-wards and check whether the corresponding
turn signal on the trailer flashes.
A trailer that is connected is recognized only
when the electrical connection is established
correctly and when the lighting system is work-
ing properly. The function of other systems also
depends on this, for example:
RESP®
RParking Assist PARKTRONIC
RParking Pilot
RActive Blind Spot Assist
RActive Lane Keeping Assist
iVehicles with the AIRMATIC package: if you
couple up a trailer, the vehicle always remains
at normal level. When coupling up a trailer,
please observe the following:
RIf the normal level has not been set man-
ually, the vehicle is automatically lowered
to normal level. This is the case if a speed of
5 mph (8 km/h) is reached.
RThe Sport drive program is not available.
These restrictions apply to all accessories
powered through a connection to the trailer
power socket of your vehicle, e.g. a bicycle
carrier.
Observe the maximum permissible trailer
dimensions (wi
dth and length).
Most U.S. states and all Canadian provinces
require by law:
RSafety chains between the towing vehicle and
the trailer. The chains should be cross-wound
under the trailer drawbar. They must be fas-
tened to the vehicle's trailer coupling, not to
the bumper or the axle.
Leave enough play in the chains to make tight
cornering possible.
RA separate brake system for certain types of
trailer.
RSafety switch for braked trailers. Check the
specific legal requirements applicable to your
state.
If the trailer becomes detached from the tow-
ing vehicle, the safety switch applies the
trailer brakes.
Towing a trailer
There are numerous legal requirements con-
cerning the towing of a trailer, e.g. speed restric- tions. Make sure that your car/trailer combina-
tion complies with the local regulations:
Rin your place of residence
Rin the location to which you are driving
The police and local authorities can provide reli- able information.
Observe the following when towing a trailer:
RTo gain driving experience and to become
accustomed to the new handling characteris-
tics, you should practice the following in a
traffic-free location:
-cornering
-stopping
-backing up
RBefore driving, check:
-trailer tow hitch
-safety switch for braked trailers
-safety chains
-electrical connections
-lights
-wheels
RAdjust the exterior mirrors to provide an
unobstructed view of the rear section of the
trailer.
RIf the trailer has electronically controlled
brakes, pull away carefully. Brake manually
using the brake controller and check whether
the brakes function correctly.
RSecure any objects on the trailer to prevent
the cargo from slipping when the vehicle is in
motion.
RWhen you couple up a trailer, check at regular
intervals that the load is firmly secured. If the
tra
iler is equipped with trailer lights and
brakes, check the trailer to ensure that these
are working.
RBear in mind that the handling will be less
stable when towing a trailer than when driving
without one. Avoid sudden steering move-
ments.
RThe vehicle/trailer combination is heavier,
accelerates more slowly, has a decreased
gradient climbing capability and a longer
braking distance.
It is more susceptible to side winds and
requires more careful steering.
Towing a trailer203
Driving an d parking
Z
Page 206 of 366

RIf possible, do not brake suddenly, but insteaddepress the brake pedal moderately at first so
that the trailer can activate its brakes. Then
increase the pressure on the brake pedal.
RIf the automatic transmission repeatedly
shifts between gears on uphill or downhill gra-
dients, shift to a lower gear using the left-hand
steering wheel paddle shifter.
A lower gear and lower speed reduce the risk
of engine failure.
RWhen driving downhill, shift to a lower gear toutilize the engine's braking effect.
Avoid continuous brake application as this
may overheat the vehicle brakes and, if instal-
led, the trailer brakes.
RIf the coolant temperature increases dramat-
ically while the air-conditioning system is
switched on, switch off the air-conditioning
system.
Coolant heat can also be dissipated by open-
ing the windows and switching the ventilation blower and the interior temperature to the
highest level.
RWhen overtaking, pay particular attention to
the extended length of your vehicle/trailer
combination.
Due to the length of the vehicle/trailer com-
bination, you require additional road space in
relation to the vehicle you are overtaking
before you can change back to the original
lane.
Decoupling a trailer
GWARNING
If you uncouple a trailer with the overrun
brake engaged, you could trap your hand
between the vehicle and the trailer drawbar.
There is a risk of injury.
Do not uncouple a trailer if the overrun brake
is engaged.
GWARNING
Vehicles with level control:
The vehicle is lowered as soon as you discon-
nect the trailer cable. This could result in your
limbs or those of other people that are
between the vehicle body and tires or under-
neath the vehicle being trapped. There is a
risk of injury.
Make sure that nobody is in the immediate
vicinity of the wheel housings or under the
vehicle when you disconnect the trailer cable.
!Do not disconnect a trailer with an engaged
overrun brake. Otherwise, your vehicle could
be damaged by the rebounding of the overrun brake.
XShift the transmission to position P.
XApply the vehicle's electric parking brake.
XStart the engine.
XClose the doors and tailgate.
XApply the trailer's parking brake.
XDetach the trailer cable and decouple the
trailer.
XSwitch off the engine.
Permissible trailer loads and drawbar
loads
Weight specifications
Maximum allowable gross mass
The gross vehicle weight of the trailer is calcu-
lated by adding the weight of the trailer to the
weight of the load and equipment on the trailer. You will find installing dimensions and loads
under "Technical data" (
Ypage 361).
Permissible noseweight
You will find installing dimensions and loads
under "Technical data" (Ypage 361).
Loading a trailer
RWhen loading the trailer, make sure that nei-
ther the permissible gross weight of the trailer
nor the gross vehicle weight are exceeded.
The permissible gross vehicle weight is indi-
cated on the identification plate located on
the B-pillar on the driver's side of the vehicle.
You can find the maximum permissible values
on the type plates of your vehicle and the
trailer. When calculating how much weight
204Towing a trailer
Driving and parking