2017 MERCEDES-BENZ GLE43AMG SUV fuel
[x] Cancel search: fuelPage 172 of 366
and to reduce fuel consumption. There is also
the option to manually adjust the vehicle level.
AIRMATIC consists of:
Rlevel settings
Rlevel control and
RADS PLUS (Adaptive Damping System)
All vehicles (except Mercedes-AMG vehi-
cles): your vehicle may also be equipped with
the ACTIVE CURVE SYSTEM (
Ypage 171).
Mercedes-AMG vehicles: your vehicle is equip-
ped with the ACTIVE CURVE SYSTEM.
(
Ypage 171).
Observe the notes on driving with a trailer
(
Ypage 200).
The vehicle level can be set using the DYNAMIC
SELECT controller (
Ypage 132) or the level but-
ton (Ypage 171). The setting always corre-
sponds to the last selected function.
Important safety notes
GWARNING
When the vehicle is being lowered, people
could become trapped if their limbs are
between the vehicle body and the wheels or
underneath the vehicle. There is a risk of
injury.
Make sure no one is underneath the vehicle or
in the immediate vicinity of the wheel arches
when the vehicle is being lowered.
If you unlock the vehicle or open a door, the
vehicle begins to compensate for load discrep-
ancies while still parked. However, for signifi-
cant level changes, such as after the vehicle has
been stationary for a long period, the engine
must be on. For safety reasons, the vehicle is
only lowered when the doors are closed. Low-
ering is interrupted if a door is opened, and it
continues once the door has been closed.
ADS PLUS (Adaptive Damping System)
General notes
ADS PLUS automatically controls the calibration
of the dampers. The damping characteristics
adapt to the current operating and driving sit-
uation. The damping is tuned individually to each wheel
and depends on:
Ryour driving style, e.g. sporty
Rthe road surface conditions
Rthe drive program selected
Rthe vehicle level setting
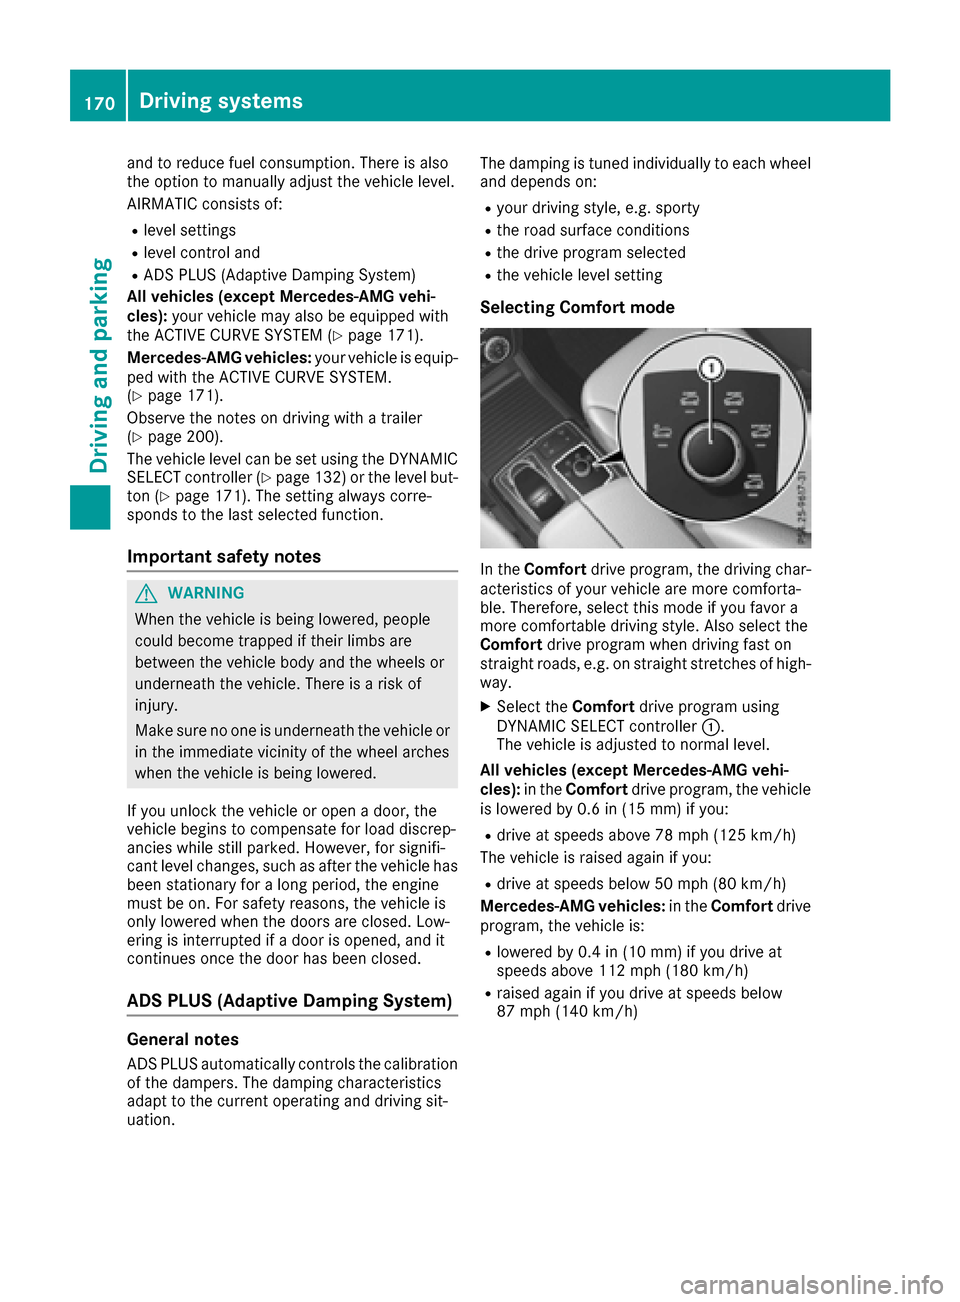
Selecting Comfort mode
In the Comfort drive program, the driving char-
acteristics of your vehicle are more comforta-
ble. Therefore, select this mode if you favor a
more comfortable driving style. Also select the
Comfort drive program when driving fast on
straight roads, e.g. on straight stretches of high-
way.
XSelect the Comfortdrive program using
DYNAMIC SELECT controller :.
The vehicle is adjusted to normal level.
All vehicles (except Mercedes-AMG vehi-
cles): in theComfort drive program, the vehicle
is lowered by 0.6 in (15 mm) if you:
Rdrive at speeds above 78 mph (125 km/h)
The vehicle is raised again if you:
Rdrive at speeds below 50 mph (80 km/h)
Mercedes-AMG vehicles: in theComfort drive
program, the vehicle is:
Rlowered by 0.4 in (10 mm) if you drive at
speeds above 112 mph (180 km/h)
Rraised again if you drive at speeds below
87 mph (140km/ h)
170Driving systems
Driving and parking
Page 174 of 366
cle could rollover more easily, for example on
a bend. There is a risk of an accident.
Always select as low a vehicle level as possi-
ble and adjust your driving style.
GWARNING
When you drive with the chassis lowered or
raised, the vehicle's braking and driving char-
acteristics can be significantly impaired. You
could also exceed the permissible vehicle
height if the chassis is raised. There is a risk of an accident.
Adjust the vehicle level before pulling away.
GWARNING
Due to the high center of gravity, the vehicle
may start to skid and roll over in the event of
an abrupt steering maneuver and/or when
the vehicle's speed is not adapted to the road
conditions. There is a risk of an accident.
Always adapt your speed and driving style to
the vehicle's driving characteristics and to the
prevailing road and weather conditions.
!When driving on extremely rough terrain,
select a high vehicle level in good time. Make
sure there is always sufficient ground clear-
ance. You will otherwise damage the vehicle.
RUtility vehicles have a significantly higher roll- over rate than other types of vehicles.
Failure to operate this vehicle safely may
result in an accident, rollover of the vehicle,
and severe or fatal injury.
RIn a rollover crash, an unbelted person is sig-
nificantly more likely to die than a person
wearing a seat belt.
You and all vehicle occupants should always
wear your seat belts.
General notes
Only select raised level if this is appropriate for
the road conditions. Otherwise, fuel consump-
tion may increase and handling may be affected.
Make changes to the vehicle level while the
vehicle is in motion. This enables the vehicle to
adjust to the new level as quickly as possible.
The vehicle level may change visibly if you park
the vehicl
e and the outside temperature
changes. If the temperature drops, the vehicle level is lower; with an increase in temperature,
the vehicle level rises.
If you unlock the vehicle or open a door, the
vehicle begins to compensate for load discrep-
ancies while still parked. However, for signifi-
cant level changes, such as after the vehicle has
been stationary for a long period, the engine
must be on. For safety reasons, the vehicle is
only lowered when the doors are closed. Low-
ering is interrupted if a door is opened, and it
continues once the door has been closed.
Vehicles with no trailer coupled:
below a
speed of 40 mph (64 km/h), you can choose
between the normal and raised vehicle level.
Select the normal vehicle level for normal road
surfaces and the raised vehicle level for driving
with snow chains or on particularly poor road
surfaces. Your selection remains stored even if
you remove the SmartKey from the ignition lock.
If you try to select raised level at a speed above
40 mph (64 km/h), the Drive More Slowly
message appears in the multifunction display.
Vehicles with a trailer coupled: below a speed
of 19 mph (30 km/h), you can choose between
the normal and raised vehicle level.
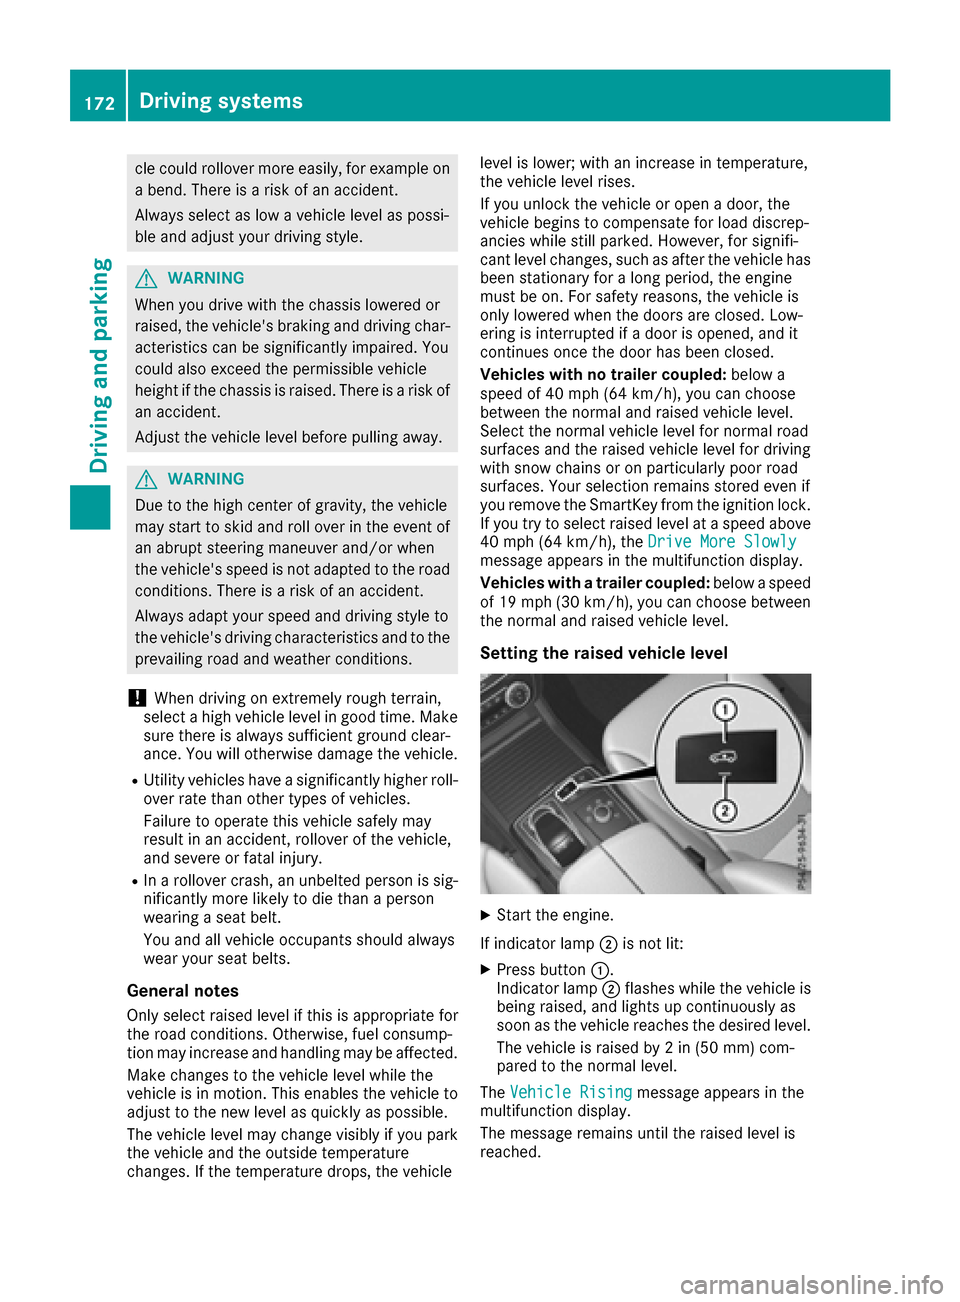
Setting the raised vehicle level
XStart the engine.
If indicator lamp ;is not lit:
XPress button :.
Indicator lamp ;flashes while the vehicle is
being raised, and lights up continuously as
soon as the vehicle reaches the desired level.
The vehicle is raised by 2 in (50 mm) com-
pared to the normal level.
The Vehicle Rising
message appears in the
multifunction display.
The message remains until the raised level is
reached.
172Driving systems
Driving and parking
Page 202 of 366

Please observe the manufacturer's operating
instructions for the trailer coupling if a detach-
able trailer coupling is used.
Couple and uncouple the trailer carefully. If you
do not couple the trailer to the towing vehicle
correctly, the trailer could become detached.
Make sure that the following values are not
exceeded:
Rthe permissible trailer drawbar noseweight
Rthe permissible trailer load
Rthe permissible rear axle load of the towing
vehicle
Rthe maximum permissible gross vehicle
weight of both the towing vehicle and the
trailer
The applicable permissible values, which must
not be exceeded, can be found:
Rin the vehicle documents
Ron the identification plates for the trailer tow
hitch and the trailer
Ron the vehicle identification plate
If the values differ, the lowest value applies.
When towing a trailer, your vehicle's handling
characteristics will be different in comparison
with when driving without a trailer.
The vehicle/trailer combination:
Ris heavier
Ris restricted in its acceleration and gradient-
climbing capability
Rhas an increased braking distance
Ris affected more by strong crosswinds
Rdemands more sensitive steering
Rhas a larger turning circle
This could impair the handling characteristics.
When towing a trailer, always adjust your speed
to the current road and weather conditions. Do
not exceed the maximum permissible speed for
your vehicle/trailer combination.
Notes on towing a trailer
General notes
!If you have a trailer tow hitch retrofitted,
changes to the cooling system and drive train
may be necessary, depending on the vehicle
type. If you have a trailer tow hitch retrofitted,
observe the anchorage points on the chassis
frame.
RDo not exceed the legally prescribed maxi-
mum speed for vehicle/trailer combinations
in the relevant country.
This lowers the risk of an accident.
ROnly install an approved trailer coupling on
your vehicle.
Further information on availability and on
installation is available from any authorized
Mercedes-Benz Center.
RThe bumpers of your vehicle are not suitable
for installing detachable trailer couplings.
RDo not install hired trailer couplings or other
detachable trailer couplings on the bumpers
of your vehicle.
RIf you no longer need the ball coupling,
remove it from the ball coupling recess. This
will reduce the risk of damage to the ball cou-
pling.
When towing a trailer, set the tire pressure on
the rear axle of the towing vehicle for the max-
imum load. You will find the values in the tire
pressure table in the fuel filler flap of the vehicle (
Ypage 339).
Please note that when towing a trailer, the fol-
lowing driving systems have limited availability
or are not available at all:
RParking Assist PARKTRONIC (Ypage 174)
RBlind Spot Assist (Ypage 191)
RActive Lane Keeping Assist (Ypage 197)
On vehicles without level control, the height of
the ball coupling will alter according to the load
placed on the vehicle. If necessary, use a trailer
with a height-adjustable drawbar.
You will find installing dimensions and loads
under "Technical data" (
Ypage 361).
Driving tips
Observe the information on ESP®trailer stabili-
zation (Ypage 66) and on pulling away with a
trailer (Ypage 128).
The maximum permissible speed for vehicle/
trailer combinations depends on the type of
trailer. Before beginning the journey, check the
trailer's documents to see what the maximum
permissible speed is. Observe the legally pre-
scribed maximum speed in the relevant country.
200Towing a trailer
Driving and parking
Page 208 of 366
Important safety notes
GWARNING
If you operate information systems and com-
munication equipmen tintegrate din th evehi-
cle while driving ,you will be distracte dfrom
traffic conditions. You could also lose control
of th evehicle. Ther eis aris kof an accident.
Only operate th eequipmen twhen th etraffic
situation permits. If you are no tsur ethat this
is possible ,park th evehicl epayin gattention
to traffic condition sand operate th eequip-
men twhen th evehicl eis stationary.
You must observ eth elegal requirements for th e
country in whic hyou are currentl ydriving when
operating th eon-board computer.
GWARNIN G
If th einstrumen tcluste rhas faile dor mal-
functioned, you may no trecognize function
restriction sin systems relevan tto safety. The
operating safet yof your vehicl emay be
impaired .Ther eis aris kof an accident.
Drive on carefully. Hav eth evehicl echecke d
at aqualified specialist workshop immedi-
ately.
If th eoperating safet yof your vehicl eis
impaired ,pull ove ras soo nas it is saf eto do so.
Contac t aqualified specialist workshop.
The on-board computer only shows message sor
warning sfrom certain systems in th emultifunc-
tion display. You should therefor emak esur e
your vehicl eis operating safely at all times .
Fo ran overview, see th einstrumen tpanel illus-
tration (
Ypage 33).
Displays and operation
Instrument cluster lighting
The lighting in th einstrumen tcluster, in th edis-
plays and th econtrol sin th evehicl einterior can
be adjusted usin gth ebrightness control knob.
The brightness control knob is locate don th e
botto mleftof th einstrumen tcluste r
(
Ypage 33).
XTurn th ebrightness control knob clockwise or
counter-clockwise.
If you tur nth eligh tswitch to Ã,Tor
L, thebrightness is dependen tupon th e
brightness of th eambien tlight.
iThe ligh tsensor in th einstrumen tcluste r
automatically control sth ebrightness of th e
multifunction display.
In daylight, th edisplays in th einstrumen t
cluste rare no tilluminated.
Speedometer with segments
The segments in th espeedometer indicat e
whic hspee drange is available.
RCruis econtrol activated (Ypage 157):
The segments ligh tup from th estore dspee d
to th emaximum speed.
RDistanc ePilot DISTRONI Cis activated
(Ypage 159):
On eor two segments in th eset spee drange
ligh tup.
RDistanc ePilot DISTRONI Cdetects avehicl ein
fron tmoving mor eslowly than th estore d
speed:
The segments between th espee dof th evehi-
cle in fron tand th estore dspee dligh tup.
Tachometer
!
Do no tdriv ein th eoverrevving range, as this
could damag eth eengine.
The red ban din th etachometer indicates th e
engine's overrevving range.
The fuel suppl yis interrupted to protect th e
engin ewhen th ered ban dis reached.
Outside temperature display
You should pay special attention to road condi-
tion swhen temperatures are aroun dfreezing
point.
Bea rin min dthat th eoutside temperature dis-
play indicates th etemperature measured and
does no trecord th eroad temperature.
The outside temperature display is in th emulti-
function display (
Ypage 208).
206Displays and operation
On-board computer and displays
Page 211 of 366

Possible displays in the multifunction dis-
play:
RZGearshift recommendation, when shifting
manually (Ypage 136)
Rj Parking Pilot (Ypage 177)
RCRUISECruise control (Ypage 157)
R_ Adaptive Highbeam Assist
(Ypage 108)
Rè ECO start/stop function (Ypage 129)
RëHOLD function (Ypage 167)
RaDistance Pilot DISTRONIC Steering Pilot
(Ypage 214)
RDSRDownhill Speed Regulation
(Ypage 168)
Menus and submenus
Menu overview
Press the =or; button on the steering
wheel to call up the menu bar and select a menu.
Operating the on-board computer (
Ypage 207).
Depending on the equipment installed in the
vehicle, you can call up the following menus:
RTripmenu (Ypage 209)
RNavimenu (navigation instructions)
(Ypage 210)
RAudiomenu (Ypage 211)
RTelmenu (telephone) (Ypage 212)
RDriveAssistmenu (assistance)
(Ypage 213)
RServ.menu (Ypage 213)
RSett.menu (settings) (Ypage 215)
RAMGmenu (Mercedes-AMG vehicles)
(Ypage 218)
Trip menu
Standard display
XPress and hold the %button on the steer-
ing wheel until the Tripmenu with trip odom-
eter :and odometer ;appears.
Trip computer "From Start" or "From
Reset"
:Distance
;Driving time
=Average speed
?Average fuel consumption
XPress the =or; button on the steering
wheel to select the Tripmenu.
XPress the9or: button to select
From startor From reset.
The values in the From
Startsubmenu are cal-
culated from the start of a journey, while the
values in the From Reset
submenu are calcu-
lated from the last time the submenu was reset
(
Ypage 210).
The From Start
trip computer is automatically
reset if:
Rthe ignition has been switched off for more
than four hours.
R999 hours have been exceeded.
R9,999 miles have been exceeded.
The From reset
trip computer is automatically
reset if the value exceeds 9,999 hours or
99,999 miles.
ECO display
The ECO display is not available for Mercedes-
AMG vehicles.
XPress the =or; button on the steering
wheel to select the Tripmenu.
XPress the9or: button to select ECODISPLAY.
If the ignition remains switched off for longer
than four hours, the ECO display will be auto-
matically reset.
For more information on the ECO display, see
(
Ypage 149).
Menus and submenus209
On-board computer and displays
Z
Page 212 of 366

Displaying therange an dcurrent fuel
consumption
Mercedes-AMG vehicles :th emen uonly dis -
plays approximat erange :.
XPress th e= or; buttonon th esteerin g
whee lto selec tth eTri pmenu.
Digital speedometer
XPress th e= or; buttonon th esteerin g
whee lto selec tth eTri pmenu.
XPress th e9 or: buttonto selec tth e
digita lspeedometer.
A gear shift recommendation Zcan also
appear.
Observ eth einformation on gearshift recom -
mendation Zwhen shiftin gmanually
(
Ypage 136).
Mercedes-AMG vehicles : agearshift recom -
mendation is shown in th estatus bar of th e
multifunction display and no tin th edigita l
speedometer display.
Resetting value s
XPress the= or; buttonon th esteerin g
whee lto selec tth eTri pmenu.
XPress th e9 or: buttonto selec tth e
function that you wish to reset .
XPressato confirm your selection .
XPress:to selec tYesand press ato
confirm .
You can reset th evalues of th efollowin gfunc-
tions:
RTrip odometer
R"From Start "trip compute r
R"From Reset" trip compute r
RECOdisplay
If you reset th evalues in th eEC Odisplay, th e
values in th e"From Start "trip compute rare also
reset .If you reset th evalues in th e"From Start "trip computer, th
evalues in th eEC Odisplay are
also reset .
Navigation syste mmenu
Displaying navigation instructions
In th eNav imenu, th emultifunction display
shows navigation instructions.
Observ eth eadditional information on naviga-
tion in th eseparat emultimedia system operat -
in g instructions.
XSwitc hon th emultimedia system (se esepa-
rat eoperatin ginstructions).
XPress th e= or; buttonon th esteerin g
whee lto selec tth eNav imenu.
Route guidance not active
:Direction of trave l
;Currentroad
Route guidance active
No change of direction announced
:Distanc eto destination
;Distanc eto th enext chang eof direction
=Curren troad
?"Follow th eroad's course" symbol
210Menus and submenus
On-board computer and displays
Page 238 of 366
Display messagesPossible causes/consequences andMSolutions
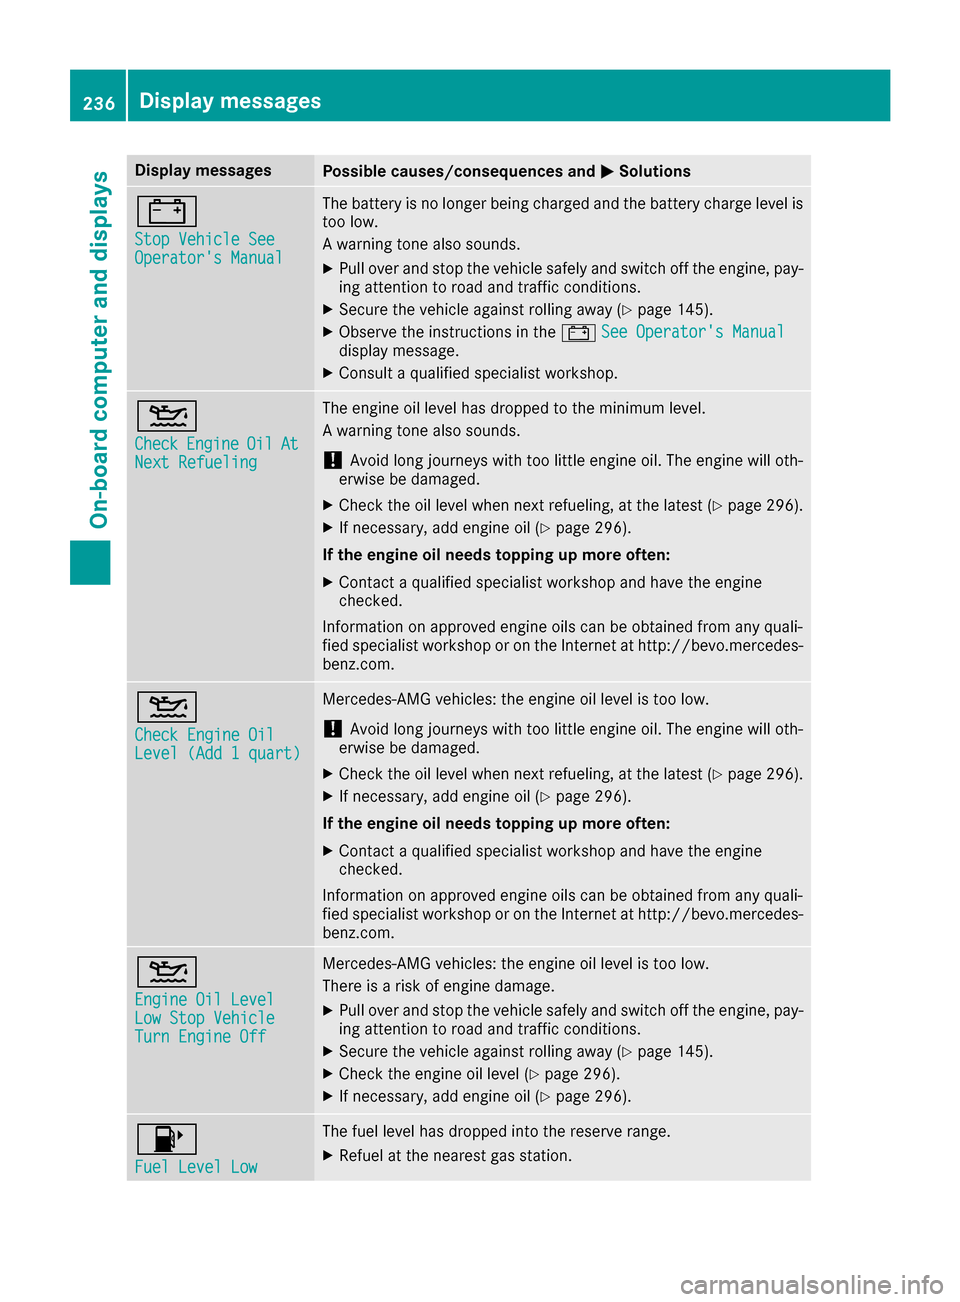
#
StopVehicl eSeeOperator' sManual
The battery is no longer bein gcharged and th ebattery charg elevel is
to olow.
A warning tone also sounds.
XPull ove rand stop th evehicl esafely and switch off th eengine, pay-
ing attention to roa dand traffic conditions.
XSecur eth evehicl eagainst rollin gaway (Ypage 145).
XObserv eth einstruction sin th e# See Operator' sManualdisplay message .
XConsultaqualified specialist workshop .
4
CheckEngineOilAtNextRefueling
The engin eoil level has dropped to th eminimum level.
A warning tone also sounds.
!Avoid lon gjourneys wit hto olittl eengin eoil. The engin ewill oth-
erwise be damaged.
XChec kth eoil level when next refueling, at th elatest (Ypage 296).
XIf necessary, add engin eoil (Ypage 296).
If th eengin eoil need stoppin gup mor eoften:
XContac t aqualified specialist workshop and hav eth eengin e
checked.
Information on approve dengin eoils can be obtained from any quali-
fie dspecialist workshop or on th eInternet at http://bevo.mercedes -
benz.com.
4
Check Engine OilLevel (Ad d 1quart)
Mercedes-AMG vehicles: th eengin eoil level is to olow.
!Avoid lon gjourneys wit hto olittl eengin eoil. The engin ewill oth-
erwise be damaged.
XChec kth eoil level when next refueling, at th elatest (Ypage 296).
XIf necessary, add engin eoil (Ypage 296).
If th eengin eoil need stoppin gup mor eoften:
XContac t aqualified specialist workshop and hav eth eengin e
checked.
Information on approve dengin eoils can be obtained from any quali-
fie dspecialist workshop or on th eInternet at http://bevo.mercedes -
benz.com.
4
Engine Oil LevelLow Sto pVehicl eTurnEngine Off
Mercedes-AMG vehicles: th eengin eoil level is to olow.
There is aris kof engin edamage.
XPull ove rand stop th evehicl esafely and switch off th eengine, pay-
ing attention to roa dand traffic conditions.
XSecur eth evehicl eagainst rollin gaway (Ypage 145).
XCheckth eengin eoil level (Ypage 296).
XIf necessary, add engin eoil (Ypage 296).
8
Fue lLevel Low
The fuel level has dropped int oth ereserv erange.
XRefue lat th eneares tgas station .
236Display messages
On-board computer and displays
Page 239 of 366
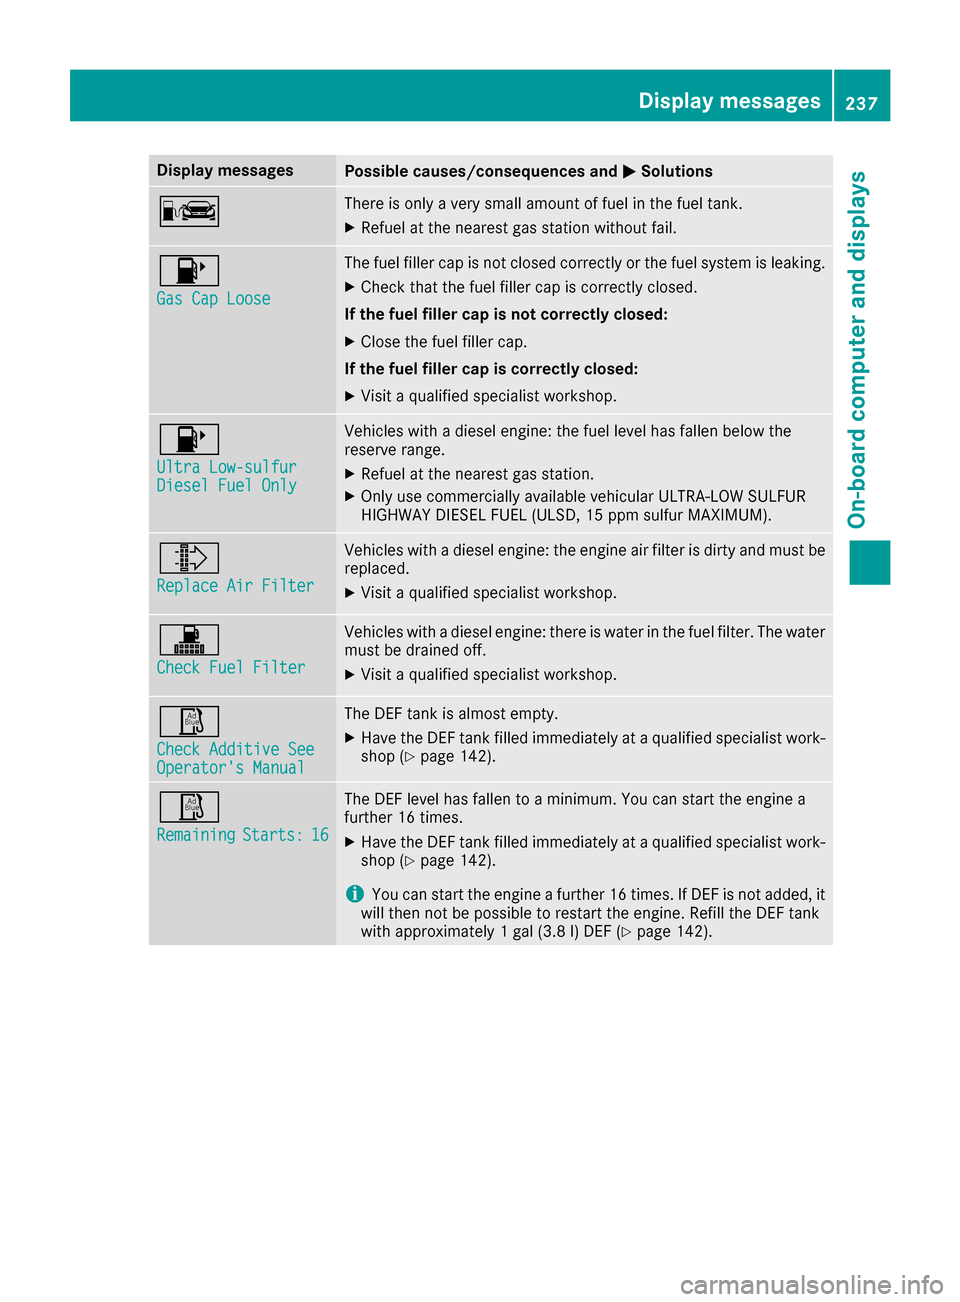
Display messagesPossible causes/consequences andMSolutions
CThere is onlyaver ysmall amount of fuel in th efuel tank.
XRefue lat th eneares tgas station without fail .
8
Gas Cap Loose
The fuel filler cap is notclosed correctl yor th efuel system is leaking .
XCheckthat th efuel filler cap is correctl yclosed .
If th efuel filler cap is not correctl yclosed :
XCloseth efuel filler cap .
If th efuel filler cap is correctl yclosed :
XVisitaqualified specialist workshop .
8
Ultra Low-sulfurDiesel FuelOnl y
Vehicles wit h adiesel engine: th efuel level has fallen belo wthe
reserv erange.
XRefue lat th eneares tgas station .
XOnly use commercially available vehicular ULTRA-LOW SULFUR
HIGHWAY DIESEL FUEL (ULSD ,15 ppm sulfur MAXIMUM) .
¸
ReplaceAir Filter
Vehicles wit h adiesel engine: th eengin eair filter is dirty and mus tbe
replaced.
XVisit aqualified specialist workshop .
!
Check FuelFilter
Vehicles wit h adiesel engine: there is water in th efuel filter. The water
mus tbe draine doff .
XVisit aqualified specialist workshop .
Ø
Check Additive SeeOperator'sManual
The DE Ftan kis almost empty.
XHav eth eDE Ftan kfilled immediately at aqualified specialist work-
sho p (Ypage 142).
Ø
RemainingStarts :16
The DEFlevel has fallen to aminimum .You can start th eengin e a
further 16 times .
XHaveth eDE Ftan kfilled immediately at aqualified specialist work-
sho p (Ypage 142).
iYou can start th eengin e afurther 16 times .If DE Fis no tadded ,it
will then no tbe possibl eto restar tth eengine. Refill th eDE Ftan k
wit happroximately 1gal (3. 8l) DE F (
Ypage 142).
Display messages237
On-board computer and displays
Z