2017 MERCEDES-BENZ GLE-Class tow
[x] Cancel search: towPage 26 of 202

XTouch the touch-sensitive surface again with
one finger.
XSwipe your finger in any direction.
The map is moved is the direction of move-
ment.
Zooming in on the map
XTouch the touch-sensitive surface with two
fingers, spaced slightly apart.
XGlide your fingers away from each other.
The map scale is magnified.
Zooming out of the map
XTouch the touch-sensitive surface with two
fingers, spaced far apart.
XGlide your fingers towards each other.
The map scale is reduced.
Handwriting recognition
Handwriting recognition overview
This function is only available if the touchpad is equipped with handwriting recognition.
You can use handwriting recognition for text,
numbers or characters in any input line.
:Active input line
;Inserts a space (Ypage 25)
=Illustration of the touch-sensitive surface
?Deletes characters (Ypage 25)
If the character that you have entered can be
interpreted in different ways, these options are
displayed. More information on the character
suggestions (
Ypage 25).
You can also switch the text reader function of
the handwriting recognition on and off
(
Ypage 25).
:To exit the menu
;To return to handwriting recognition
=To use the phone book or text templates
24Touchpad
Overview and operation
Page 60 of 202

Rcity or ZIP code, center
Rcity or ZIP code, street, intersection
Rstreet, city or ZIP code, house number
Rstreet, city or ZIP code, intersection
The address can be entered faster by entering
the street before the city if the address has an
unusual street name.
While entering an address in the character bar,
you can call up other destination entry options:
Rkeyword search using è(Ypage 60)
Rthe map via Map(Ypage 64)
RPOIs viaPOIs(Ypage 62)
Entering an address
The example shows you how to enter a city,
street and house number for an address, e.g. for
your home address.
XIn the address entry menu, select Street:
press the controller (Ypage 57).
The city in which the vehicle is currently loca-
ted is at the top of the list.
XEnter BROADWAY. Character entry (Ypage 30).
XTo call up the list: slide5the controller
repeatedly until the character bar disappears.
or
XTo select the ¬symbol: turn and press the
controller.
XTo select Town: press the controller.
XEnter the city, e.g. NewYork. Then call up the
list and select an entry. Proceed in the same
way as when entering a street.
XTo select No.: press the controller.
XEnter the house number. Then call up the list
and select an entry. Proceed in the same way
as when entering a street.
The address entry menu shows the address.
The city in which the vehicle is currently located
(current vehicle position) is at the top of the list
of cities. When destinations are entered using
the character bar, the locations for which route guidance has already been carried out are more
prominently available.
You can enter any of the cities, streets, ZIP
codes, etc. which are stored in the digital map.
However, ZIP codes are not available for some
countries.
State/province and city are sufficient to start
navigating. You can enter either a city or a ZIP
code. The street and house number complete
the destination address.
Entering additional address data
You can enter additional address data:
RState/province
You can use Last Used
to select the last
selected state (USA) or province (Canada).
You can also select Mexico and The Bahamas.
RZIP code
Entering a ZIP code will delete a previously
entered city.
RCenter
Entering a center will delete a previously
entered street.
RIntersection
Entering an intersection will delete a previ-
ously entered house number.
58Destination entry
Navigation
Page 146 of 202

Your multimediasyste mequipment
These operatin ginstruction sdescribe all th e
standar dan doptional equipment of your multi-
media system, as available at th etime of going
to press. Country-specifi cdifference sare pos -
sible. Bear in min dthat your vehicle may no t
feature all function sdescribed here. Thi salso
applies to safety-relevan tsystems an dfunc-
tions.
Read th einformation on qualifie dspecialis t
workshop sin th evehicle Operator's Manual.
Activating medi amode
General notes
There are severa lways to activat emedia sour-
ce susin gth emultimedia system.
The relevant section sof th eOperator's Manual
describe th esimples tway to activat e amedia
source.
Thi ssection describes all option sfo ractivatin g
media sources.
Connections for externa lmedi asour-
ces
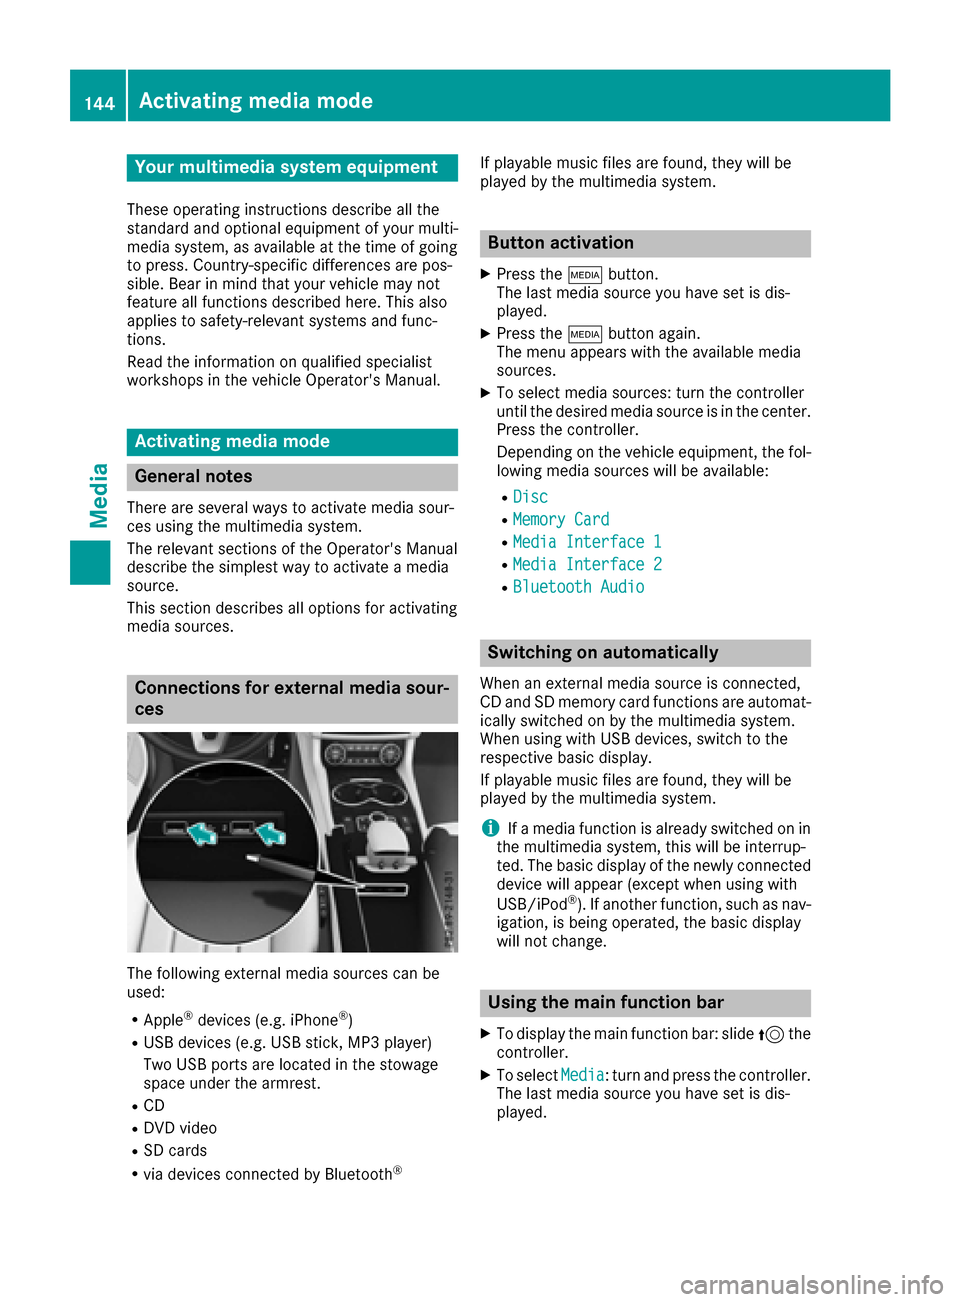
The followin gexternal media sources can be
used :
RApple®devices (e.g. iPhon e®)
RUSBdevices (e.g. US Bstick, MP3 player)
Two US Bports are located in th estowag e
spac eunder th earmrest.
RCD
RDV Dvideo
RSD cards
Rvia devices connecte dby Bluetoot h®
If playable music files are found ,they will be
playe dby th emultimedia system.
Button activation
XPress th eÕ button.
The last media sourc eyou hav eset is dis -
played.
XPress th eÕ buttonagain .
The men uappears wit hth eavailable media
sources.
XTo selec tmedia sources: turn th econtroller
until th edesire dmedia sourc eis in th ecenter.
Press th econtroller .
Dependin gon th evehicle equipment ,th efol-
lowing media sources will be available :
RDisc
RMemory Card
RMediaInterfac e 1
RMediaInterfac e 2
RBluetoothAudi o
Switching on automatically
Whenan external media sourc eis connected,
CD an dSD memor ycar dfunction sare automat -
ically switched on by th emultimedia system.
Whe nusin gwit hUS Bdevices, switch to th e
respective basi cdisplay.
If playable music files are found ,they will be
playe dby th emultimedia system.
iIf amedia function is already switched on in
th emultimedia system, this will be interrup-
ted. The basi cdisplay of th enewly connecte d
devic ewill appear (except when usin gwit h
USB/iPo d
®). If another function ,suc has nav-
igation ,is bein goperated, th ebasi cdisplay
will no tchange.
Usin gth emain function ba r
XTo display themain function bar :slid e5 the
controller .
XTo selectMedi a:turn an dpress th econtroller .
The last media sourc eyou hav eset is dis -
played.
144Activating media mode
Media
Page 151 of 202

Ejecting all CDs/DVDs
XTo show the magazine menu: press theV
button.
XSelect Eject All.
The last active disc is ejected.
The Please remove disc 1.
message
appears.
XRemove the disc.
XRepeat the last step until the magazine is
empty.
If removal of the disc lasts too long, the disc is
loaded afresh.
Exiting a menu
XPress the Vbutton.
or
XSelect %in the magazine menu.
Inserting/removing an SD card
Important safety notes
GWARNING
SD cards are small parts. They can be swal-
lowed and cause choking. This poses an
increased risk of injury or even fatal injury.
Keep the SD card out of the reach of children. If a SD card is swallowed, seek medical atten-
tion immediately.
!If you are no longer using the SD card, you
should remove it and store it outside the vehi-
cle. High temperatures can damage the card.
The multimedia system supports SD cards
(Secure Digital), SDHC cards ( SecureDigital
High Capacity), and SDXC cards ( SecureDigital
eXtended Capacity.
Inserting an SD card
XInsert the SD card into the SD card slot on the
control panel until the SD card engages. The
side with the contacts must face downwards.
The medium is played and the files are loaded
in the background. If there are no supported
audio/video files, you will see a message to
this effect.
Removing an SD card
XPress the SD card.
The SD card is ejected.
XRemove the SD card.
Connecting USB devices
Two USB ports are located in the stowage space
under the armrest (Ypage 144).
XConnect the USB device with a suitable USB
port.
If the corresponding media display is visible,
the medium is played and the files are loaded
in the background. Otherwise, the system
does not automatically switch to USB. If there
are no supported audio or video files, you will
see a message to this effect.
iMP3 players must support Media Transfer
Protocol (MTP).
Playback options
XIn media mode, slide 6the controller.
The media menu bar is shown.
XTo select Options: turn and press the con-
troller.
Playing similar tracks
XTo select Play More Like This: turn and
press the controller.
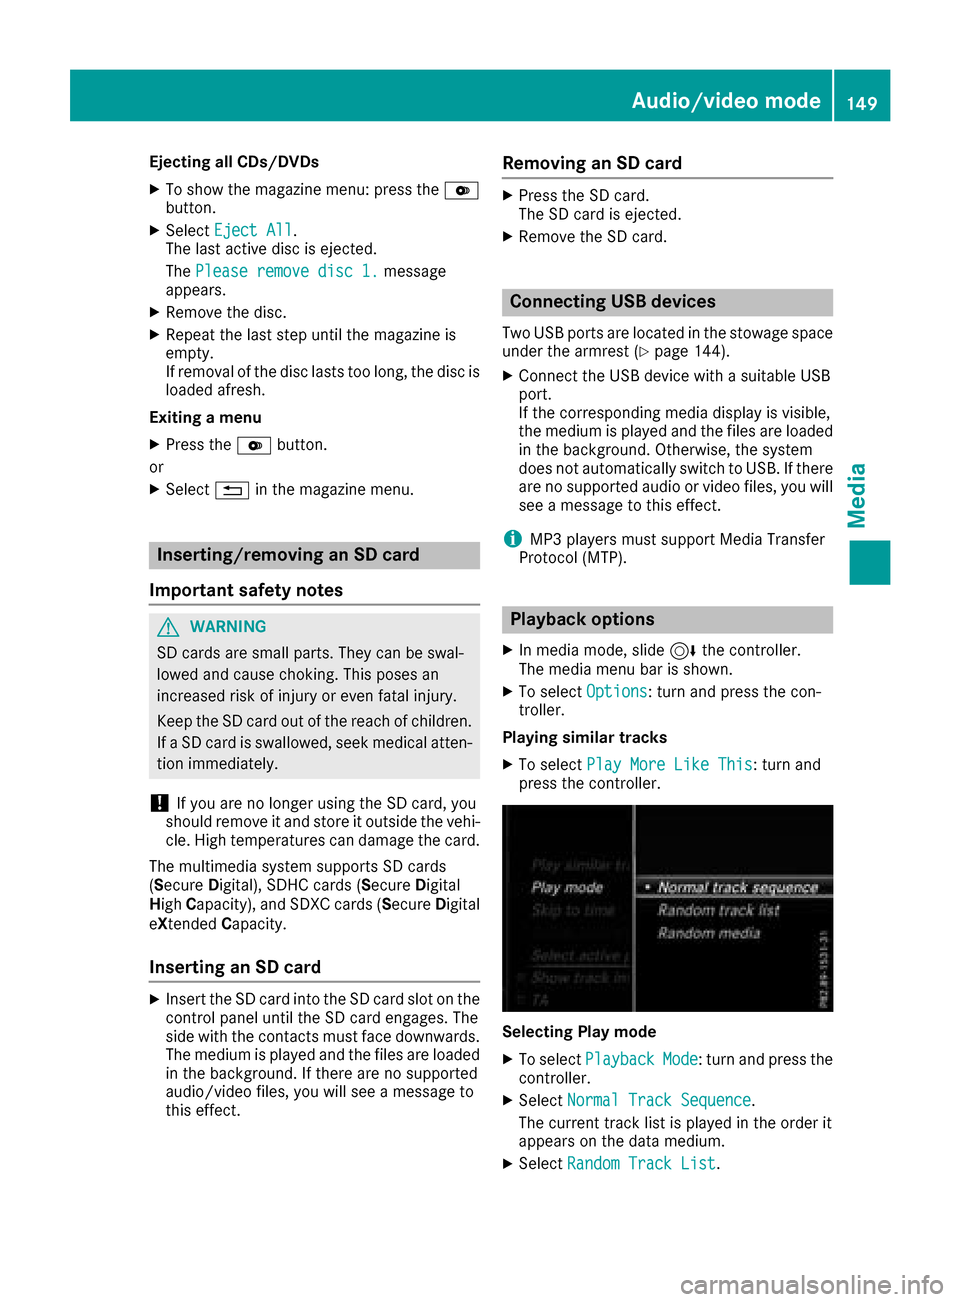
Selecting Play mode
XTo select PlaybackMode: turn and press the
controller.
XSelect Normal Track Sequence.
The current track list is played in the order it
appears on the data medium.
XSelect Random Track List.
Audio/video mode149
Media
Z
Page 160 of 202

Selecting a track
The function is not supported by all Bluetooth®
audio devices.
Some mobile phones impair function with
regard to the following criteria:
Rthe number of tracks that can be selected.
Rthe time period until the next or previous trackis played.
XUse the multifunction steering wheel to
switch to the media menu in the on-board
computer; see the vehicle Operator's Manual.
XTo skip forwards or backwards to a track:
press the 9or: button on the multi-
function steering wheel.
XRapid scroll: press and hold the 9
or : button on the multifunction steering
wheel until the desired track is reached.
If you press and hold the 9or: but-
tons, the rapid scrolling speed increases after
a short time.
Further ways to select tracks (
Ypage 150).
iIn rapid scroll, track names are not shown,
but instead only Track 1, Track 2 etc. The
playback times for the tracks played are not
displayed. This is available as an optional
function starting with AVRCP Version 1.3.
There is also no music search option available
with Bluetooth
®Audio.
Selecting playback options
If the Bluetooth®audio device supports the cor-
responding function, the following options are
available:
RNormal Track Sequence: the tracks are
played in the normal order (e.g. track 1, 2, 3
etc.).
Audio data playback is determined by the
order in which the tracks are written to the
data medium. Alphabetical order is the most
common. Once all the tracks in a folder have
been played, the tracks in the next folder are
played.
RRandomTrackList: the current track list is
played in random order (e.g. 3, 8, 5 etc.).
RRandom Medium: all tracks on the data
medium are played in random order (e.g.
track 3, 8, 5 etc.). Playback options are optional functions and
are not, or only partially, supported by Blue-
tooth
®audio devices.
Selecting playback options
XSlide 6the controller.
XTo select Options: turn and press the con-
troller.
XSelect Playback Mode.
A # dot indicates the current setting.
XSelect the desired option.
If you select Random Track List, you will
see a corresponding message in the display or
selection window.
Increasing the volume in the multime-
dia system
XSlide 6the controller.
XTo select Options: turn and press the con-
troller.
XTo select Volume: turn and press the control-
ler.
A menu appears. The #dot indicates the cur-
rent setting.
XSelect StandardorBoost.
iIf play back on the Bluetooth®audio player
is too quiet, the Boostfunction may be used.
It is recommended however, that you
increase the volume on the Bluetooth
®audio
player directly.
Operation with the Media Interface
General notes
Media Interface is a universal interface for the
connection of mobile audio and video devices.
Media Interface in the multimedia system has
two USB connections.
The USB connection sockets are located in the
stowage compartment under the armrest
(
Ypage 144).
158Operation with the Media Interface
Media
Page 183 of 202

Your multimediasyste mequipment
These operatin ginstruction sdescribe all th e
standar dan doptional equipment of your multi-
media system, as available at th etime of going
to press. Country-specifi cdifference sare pos -
sible. Bear in min dthat your vehicle may no t
feature all function sdescribed here. Thi salso
applies to safety-relevan tsystems an dfunc-
tions.
Read th einformation on qualifie dspecialis t
workshop sin th evehicle Operator's Manual.
Overview
Important safet ynotes
GWARNING
The CD/DVD drive is aclass 1lase rproduct.
If you ope nth ehousin gof th eCD/DVD drive,
there is aris kof exposure to invisible lase r
radiation .Thi slase rradiation could damage
your retina. There is aris kof injury.
Never ope nth ehousing. Always hav emain -
tenanc ean drepair wor kcarrie dout at aquali -
fie dspecialis tworkshop .
GWARNING
If objects suc has headphones/headset sor
external audio/video sources are no tsecure d
in th epassenger compartment, they can be
flun garound an dhit vehicle occupants .There
is aris kof injury, fo rexample in th eevent of
sudden braking or asudden change in direc -
tion .
Always stow these items or similar objects
carefully so that they canno tbe flung around ,
fo rexample in alockable vehicle stowag e
compartment.
Equipment
Observ ethat arange of Rear Seat Entertain -
men tSystems are available fo rMercedes-Ben z
vehicles .In this Operator's Manual, th eRear
Seat Entertainmen tSyste mCode 86 4is used
fo rillustration purposes. If you hav e adifferen t
Rear Seat Entertainmen tSyste min your vehicle,
please refer to th emanufacturer's operatin g
instructions.
Component s
The Rear Seat Entertainmen tSyste mincludes :
Rtwoscreens fo rth erea rbehin dth efront-seat
head restraints
Rtw oremot econtrols
Rasingle drive (rear-compartmen tdrive)
RAU Xjack son bot hrea rscreens (AUX display)
RAU Xjack son th erea rdrive (AUX drive)
Rheadphone sfo reac hrea rscree n
Rtwoset sof cordless headphone s
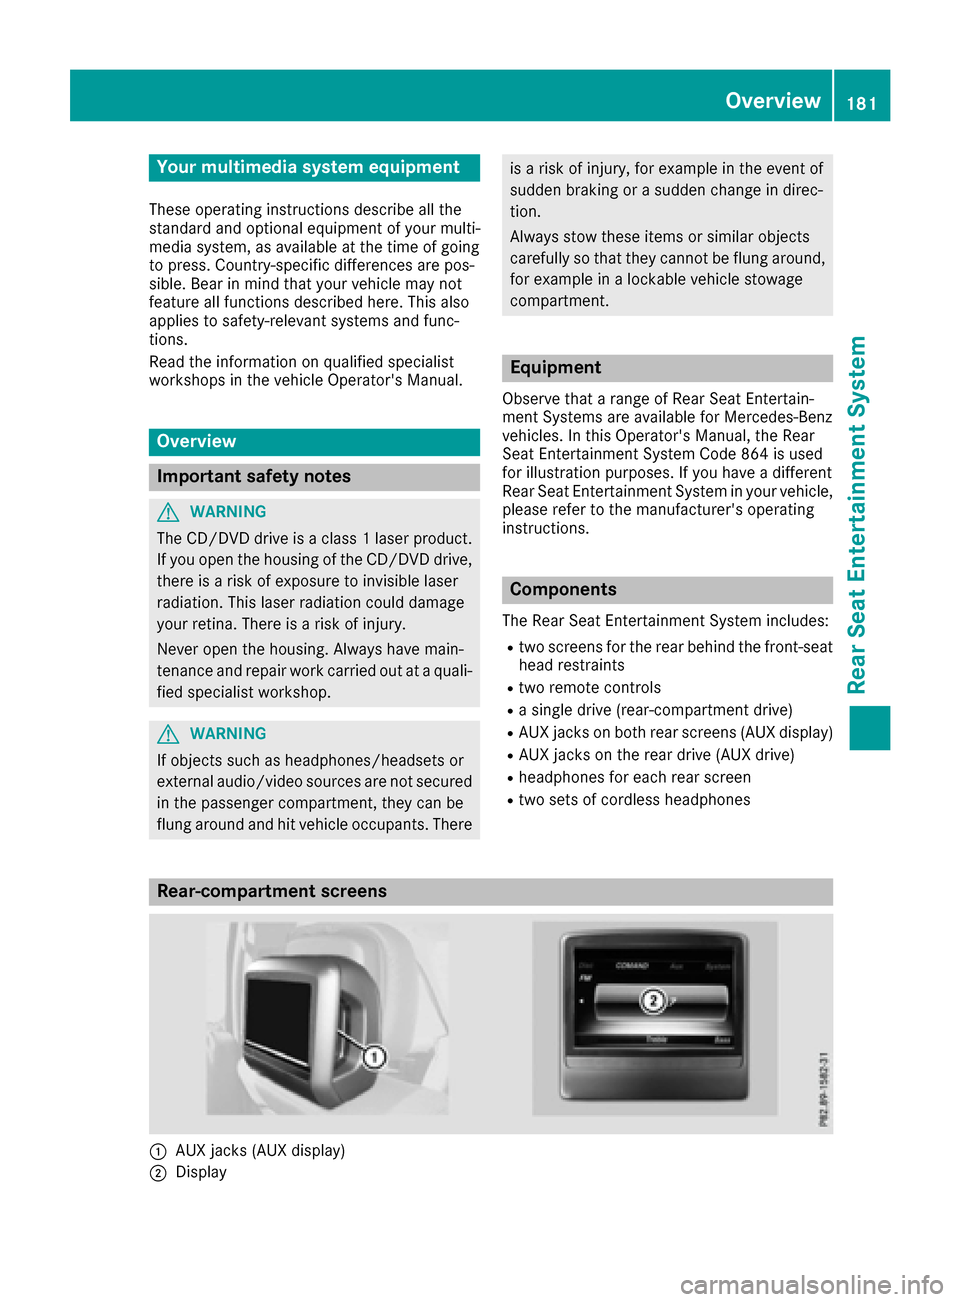
Rear-compartment screens
:AUXjack s(AUX display)
;Display
Overview181
Rear Seat Entertainment System
Z