2017 MERCEDES-BENZ GLC SUV check oil
[x] Cancel search: check oilPage 318 of 374

Cleaning the rear view camera and 360°
camera
!Do not clean the camera lens and the area
around the rear view camera or 360° camera
with a power washer.
XMake sure that the vehicle is stationary.
XTurn the SmartKey to position 1or2 in the
ignition lock (Ypage 132).
or
XPress the Start/Stop button once or twice on
vehicles with KEYLESS-GO or the KEYLESS-
GO start function (
Ypage 133).
XOpen the camera cover for cleaning via the
multimedia system (see Digital Operator's
Manual).
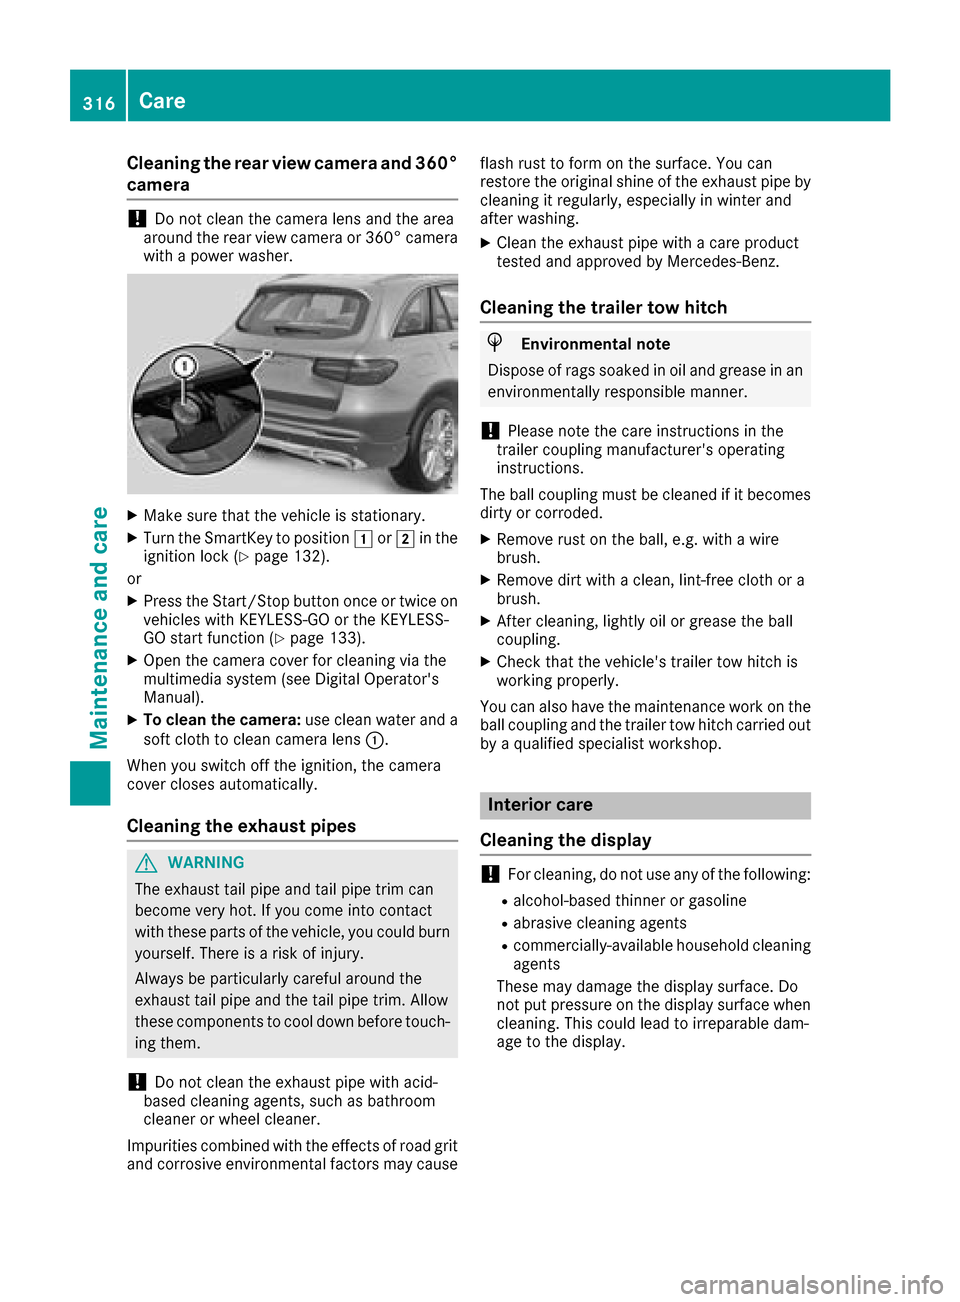
XTo clean the camera: use clean water and a
soft cloth to clean camera lens :.
When you switch off the ignition, the camera
cover closes automatically.
Cleaning the exhaust pipes
GWARNING
The exhaust tail pipe and tail pipe trim can
become very hot. If you come into contact
with these parts of the vehicle, you could burn
yourself. There is a risk of injury.
Always be particularly careful around the
exhaust tail pipe and the tail pipe trim. Allow
these components to cool down before touch-
ing them.
!Do not clean the exhaust pipe with acid-
based cleaning agents, such as bathroom
cleaner or wheel cleaner.
Impurities combined with the effects of road grit and corrosive environmental factors may cause flash rust to form on the surface. You can
restore the original shine of the exhaust pipe by
cleaning it regularly, especially in winter and
after washing.
XClean the exhaust pipe with a care product
tested and approved by Mercedes-Benz.
Cleaning the trailer tow hitch
HEnvironmental note
Dispose of rags soaked in oil and grease in an
environmentally responsible manner.
!Please note the care instructions in the
trailer coupling manufacturer's operating
instructions.
The ball coupling must be cleaned if it becomes dirty or corroded.
XRemove rust on the ball, e.g. with a wire
brush.
XRemove dirt with a clean, lint-free cloth or a
brush.
XAfter cleaning, lightly oil or grease the ball
coupling.
XCheck that the vehicle's trailer tow hitch is
working properly.
You can also have the maintenance work on the ball coupling and the trailer tow hitch carried out
by a qualified specialist workshop.
Interior care
Cleaning the display
!For cleaning, do not use any of the following:
Ralcohol-based thinner or gasoline
Rabrasive cleaning agents
Rcommercially-available household cleaning
agents
These may damage the display surface. Do
not put pressure on the display surface when cleaning. This could lead to irreparable dam-
age to the display.
316Care
Maintenance and care
Page 326 of 374

If your clothes are soiled with tire sealant, have
them cleaned with perchloroethylene at a dry
cleaner as soon as possible.
Tire pressure not reached
If a tire pressure of 200 kPa (2.0 bar/29 psi) has
not been attained after ten minutes:
XSwitch off the tire inflation compressor.
XUnscrew the filler hose from the valve of the
faulty tire.
Tire sealant may escape when the filler hose is
unscrewed.
XVery slowly drive forwards or reverse approx-imately 30 ft (10 m).
XPump up the tire again.
After a maximum of ten minutes, the tire pres-
sure must be at least 200 kPa (2.0 bar/
29 psi).
GWARNING
If the required tire pressure is not reached
after the specified time, the tire is too badly
damaged. The tire sealant cannot repair the
tire in this instance. Damaged tires and a tire
pressure that is too low can significantly
impair the vehicle's braking and driving char-
acteristics. There is a risk of accident.
Do not continue driving. Contact a qualified
specialist workshop.
Tire pressure reached
GWARNING
A tire temporarily sealed with tire sealant
impairs the driving characteristics and is not
suitable for higher speeds. There is a risk of
accident.
You should therefore adapt your driving style
accordingly and drive carefully. Do not exceed the specified maximum speed with a tire that
has been repaired using tire sealant.
The maximum permissible speed for a tire
sealed with tire sealant is 50 mph (80 km/h).
The upper part of the TIREFIT sticker must be
affixed to the instrument cluster in the driver's
field of vision. If a tire pressure of 200 kPa (2.0 bar/29 psi) has
been attained after ten minutes:
XSwitch off the tire inflation compressor.
XUnscrew the filler hose from the valve of the
faulty tire.
Tire sealant may escape when the filler hose is
unscrewed.
XStow the tire sealant bottle and the tire infla-
tion compressor.
XPull away immediately
.
XStop after driving for approximately ten
minutes and check the tire pressure with the
tire inflation compressor.
The tire pressure must now be at least
130 kPa (1.3 bar/19 psi).
GWARNING
If the required tire pressure is not reached
after driving for a short period, the tire is too
badly damaged. The tire sealant cannot repair
the tire in this instance. Damaged tires and a
tire pressure that is too low can significantly
impair the vehicle's braking and driving char-
acteristics. There is a risk of accident.
Do not continue driving. Contact a qualified
specialist workshop.
In cases such as the one mentioned above, con- tact an authorized Mercedes-Benz Center. Or
call 1-800-FOR-MERCedes (in the USA) or
1-800-387-0100 (in Canada).
XCorrect the tire pressure if it is still at least
130 kPa (1.3 bar/19 psi). See the Tire and
Loading Information placard on the B-pillar on
the driver's side or the tire pressure table in
the fuel filler flap for values.
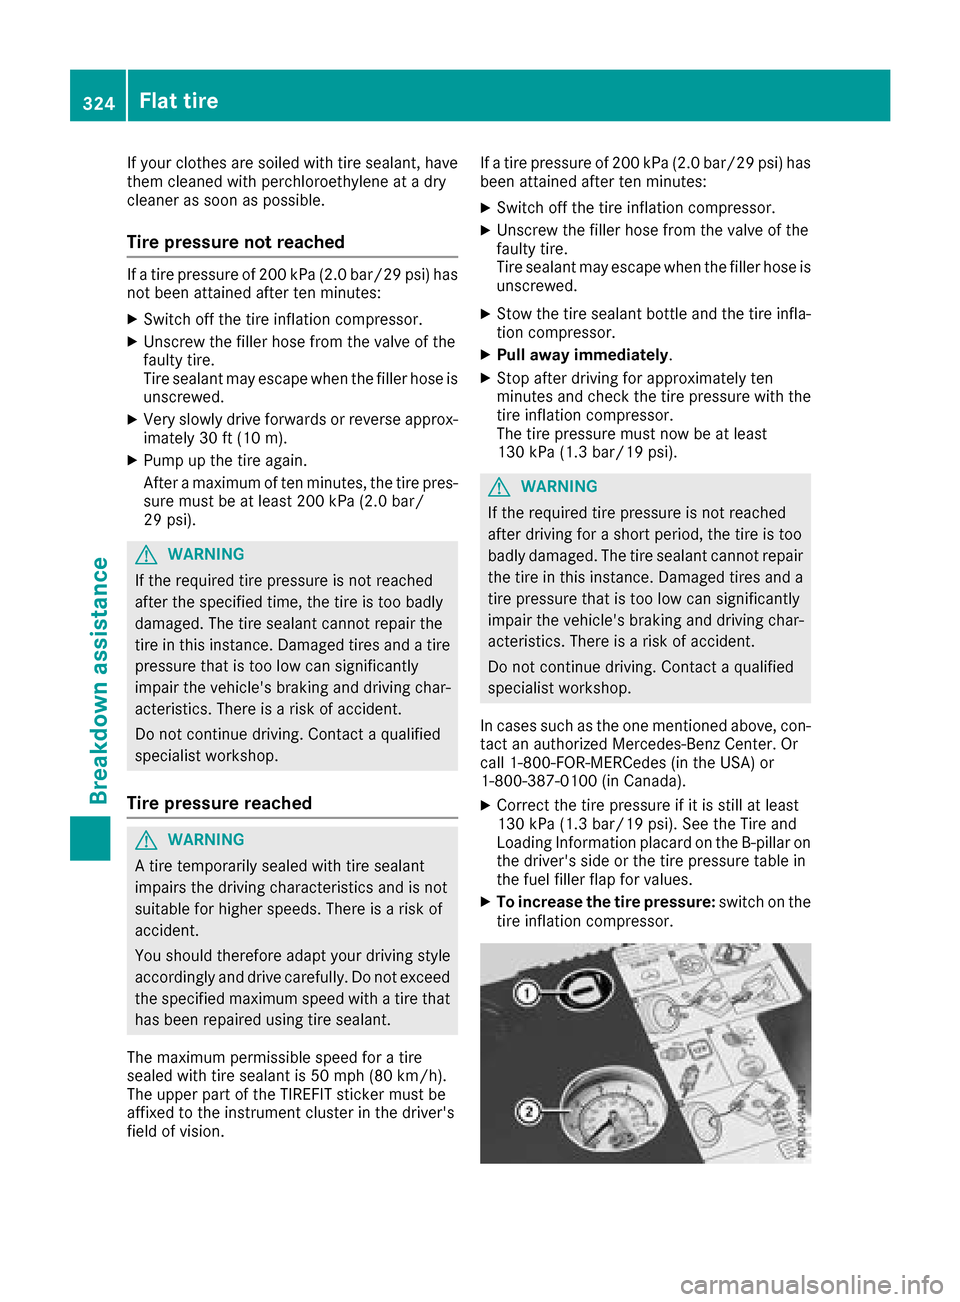
XTo increase the tire pressure: switch on the
tire inflation compressor.
324Flat tire
Breakdown assistance
Page 371 of 374

Otherwise, the engine cooling system is not
sufficiently protected from corrosion and
overheating.
iHave the coolant regularly replaced at a
qualified specialist workshop and the replace-
ment confirmed in the Maintenance Booklet.
Comply with the important safety notes for ser-
vice products when handling coolant
(
Ypage 364).
The coolant is a mixture of water and anti-
freeze/corrosion inhibitor. It performs the fol-
lowing tasks:
RAnti-corrosion protection
RAntifreeze protection
RRaising the boiling point
If the coolant has antifreeze protection down to -35 ‡ (-37 †), the boiling point of the coolant
during operation is approximately 266 ‡
(130 †).
The antifreeze concentrate/corrosion inhibitor
concentration in the engine cooling system
should:
Rbe at least 50%. This will protect the engine
cooling system against freezing down to
approximately -35 ‡ (-37 †).
Rnot exceed 55% (antifreeze protection down
to -49 ‡[-45 †]) .Otherwise ,hea twill no tbe
dissipated as effectively.
Mercedes-Ben zrecommends an antifreeze/
corrosion inhibitor concentrat ein accordance
wit hMB Specification sfo rServic eProducts
310.1.
iWhe nth evehicle is first delivered, it is filled
wit h a coolan tmixture that ensures adequat e
antifreez ean danti-corrosio nprotection .
iThe coolan tis checke dwit hever ymainte-
nanc einterval at aqualifie dspecialis twork-
shop.
Filling capacities
ModelCapacity
GLC 300 d4MATIC10.6 US qt (10.0l)
Mercedes-AMG
GLC 43 4MATIC12.2 US qt (11.5 l)
Allot her models9.5 US qt (9.0 l)
Windshield washer system
Important safety notes
GWARNING
Windshield washer concentrate could ignite if it comes into contact with hot engine compo-
nents or the exhaust system. There is a risk of
fire and injury.
Make sure that no windshield washer con-
centrate is spilled next to the filler neck.
!Only use washer fluid that is suitable for
plastic lamp lenses, e.g. MB SummerFit or MB WinterFit. Unsuitable washer fluid could dam-
age the plastic lenses of the headlamps.
!Only MB SummerFit and MB WinterFit
washer fluid should be mixed together. The
spray nozzles may otherwise become
blocked.
Do not use distilled or de-ionized water. Other-
wise, the level sensor may give a false reading.
When handling washer fluid, observe the impor-
tant safety notes on service products
(
Ypage 364).
At temperatures above freezing:
XFill the washer fluid reservoir with a mixture of
water and windshield washer fluid, e.g. MB
SummerFit.
Add 1 part MB SummerFit to 100 parts water.
At temperatures below freezing:
XFill the washer fluid reservoir with a mixture of
water and washer fluid, e.g. MB WinterFit.
For the correct mixing ratio refer to the infor-
mation on the antifreeze reservoir.
iAdd windshield washer fluid, e.g. MB Sum-
merFit or MB WinterFit, to the washer fluid all
year round.
Climate control system refrigerant
Important safety notes
The climate control system of your vehicle is fil-
led with refrigerant R ‑134a.
The instruction label regarding the refrigerant
type used can be found on the radiator cross
member.
Service products and filling capacities369
Technical data
Z