2017 MERCEDES-BENZ GLC low oil pressure
[x] Cancel search: low oil pressurePage 315 of 374

X
Thoroughly hose down the vehicle with a gen-
tle jet of water. X
Do not point the water jet directly towards the
air inlet. X
Use plenty of water and rinse out the sponge
frequently. X
Rinse the vehicle with clean water and dry
thoroughly with a chamois. X
Do not let the cleaning agent dry on the paint-
work.
Carefully remove all deposits of road salt as
soon as possible when driving in winter.
Power washers
G WARNING
The water jet from a circular jet nozzle (dirt
blasters) can cause invisible exterior damage
to the tires or chassis components. Compo-
nents damaged in this way may fail unexpect-
edly. There is a risk of an accident.
Do not use power washers with circular jet
nozzles to clean the vehicle. Have damaged
tires or chassis components replaced imme-
diately.
! Always maintain a distance of at least
11.8 in (30 cm) between the vehicle and the
power washer nozzle. Information about the
correct distance is available from the equip-
ment manufacturer.
Move the power washer nozzle around when
cleaning your vehicle.
Do not aim directly at any of the following: R
Tires R
Door gaps, roof gaps, joints, etc. R
Electrical components R
Battery R
Connectors R
Lamps R
Seals R
Trim R
Ventilation slots
Damaged seals or electrical components can
lead to leaks or failures.
! Vehicles with decorative film: parts of your
vehicle are covered with a decorative film.
Maintain a distance of at least 27.5 in (70 cm) between the parts of the vehicle covered with
the film and the nozzle of the high pressure
cleaner.
Information about the correct distance is
available from the equipment manufacturer.
Move the power washer nozzle around when
cleaning your vehicle.
! If the SmartKey is within the rear detection
range of KEYLESS-GO, the following situa-
tions, for example, could lead to the uninten-
tional opening of the tailgate: R
using a car wash R
using a power washer
Make sure that the SmartKey is at least 3 m
away from the vehicle.
! If the SmartKey is within the rear detection
range of KEYLESS-GO, the following situa-
tions, for example, could lead to the uninten-
tional opening of the tailgate: R
using a car wash R
using a power washer
Make sure that the SmartKey is at least 10 ft
(3 m) away from the vehicle.
Cleaning the paintwork
! Do not affix: R
stickers R
films R
magnetic plates or similar items
to painted surfaces. You could otherwise
damage the paintwork.
Scratches, corrosive deposits, areas affected by
corrosion and damage caused by inadequate
care cannot always be completely repaired. In
such cases, visit a qualified specialist workshop. X
Remove dirt immediately, where possible,
while avoiding rubbing too hard. X
Soak insect remains with insect remover and
rinse off the treated areas afterwards. X
Soak bird droppings with water and rinse off
the treated areas afterwards. X
Remove coolant, brake fluid, tree resin, oils,
fuels and greases by rubbing gently with a
cloth soaked in petroleum ether or lighter
fluid. X
Use tar remover to remove tar stains. X
Use silicone remover to remove wax. Care 313
Maintenance and care Z
Page 318 of 374

Cleaning the rear view camera and 360°
camera
! Do not clean the camera lens and the area
around the rear view camera or 360° camera
with a power washer.
X
Make sure that the vehicle is stationary. X
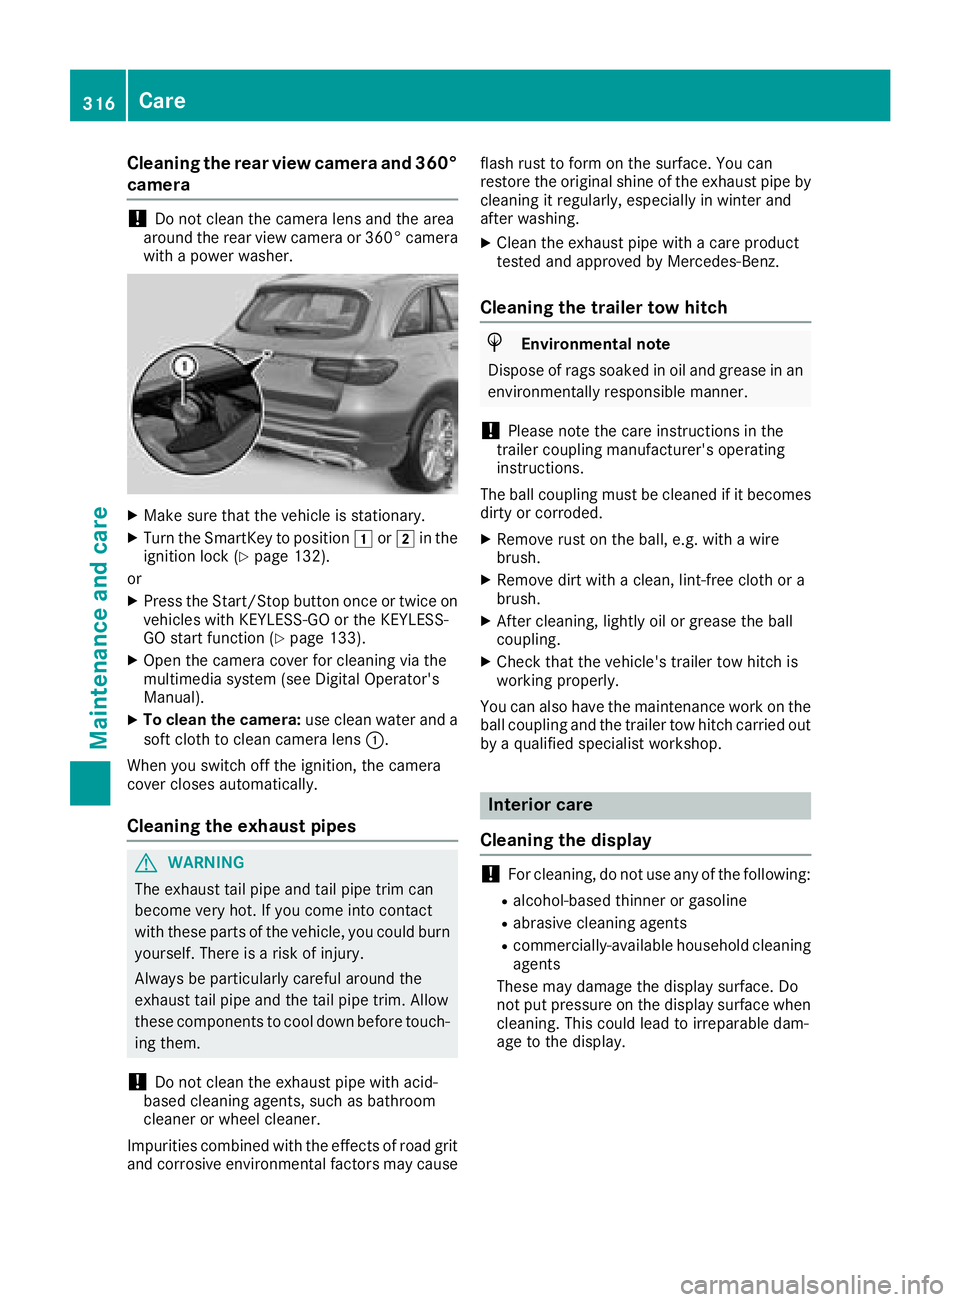
Turn the SmartKey to position �G or �H in the
ignition lock ( Y
page 132).
or X
Press the Start/Stop button once or twice on
vehicles with KEYLESS-GO or the KEYLESS-
GO start function ( Y
page 133).X
Open the camera cover for cleaning via the
multimedia system (see Digital Operator's
Manual). X
To clean the camera: use clean water and a
soft cloth to clean camera lens �C .
When you switch off the ignition, the camera
cover closes automatically.
Cleaning the exhaust pipes
G WARNING
The exhaust tail pipe and tail pipe trim can
become very hot. If you come into contact
with these parts of the vehicle, you could burn
yourself. There is a risk of injury.
Always be particularly careful around the
exhaust tail pipe and the tail pipe trim. Allow
these components to cool down before touch-
ing them.
! Do not clean the exhaust pipe with acid-
based cleaning agents, such as bathroom
cleaner or wheel cleaner.
Impurities combined with the effects of road grit
and corrosive environmental factors may cause flash rust to form on the surface. You can
restore the original shine of the exhaust pipe by
cleaning it regularly, especially in winter and
after washing. X
Clean the exhaust pipe with a care product
tested and approved by Mercedes-Benz.
Cleaning the trailer tow hitch
H Environmental note
Dispose of rags soaked in oil and grease in an
environmentally responsible manner.
! Please note the care instructions in the
trailer coupling manufacturer's operating
instructions.
The ball coupling must be cleaned if it becomes
dirty or corroded. X
Remove rust on the ball, e.g. with a wire
brush. X
Remove dirt with a clean, lint-free cloth or a
brush. X
After cleaning, lightly oil or grease the ball
coupling. X
Check that the vehicle's trailer tow hitch is
working properly.
You can also have the maintenance work on the
ball coupling and the trailer tow hitch carried out
by a qualified specialist workshop.
Interior care
Cleaning the display
! For cleaning, do not use any of the following: R
alcohol-based thinner or gasoline R
abrasive cleaning agents R
commercially-available household cleaning
agents
These may damage the display surface. Do
not put pressure on the display surface when
cleaning. This could lead to irreparable dam-
age to the display.316
Care
Maintenance and care
Page 326 of 374

If your clothes are soiled with tire sealant, have
them cleaned with perchloroethylene at a dry
cleaner as soon as possible.
Tire pressure not reached If a tire pressure of 200 kPa (2.0 bar/29 psi) has
not been attained after ten minutes: X
Switch off the tire inflation compressor. X
Unscrew the filler hose from the valve of the
faulty tire.
Tire sealant may escape when the filler hose is
unscrewed. X
Very slowly drive forwards or reverse approx-
imately 30 ft (10 m). X
Pump up the tire again.
After a maximum of ten minutes, the tire pres-
sure must be at least 200 kPa (2.0 bar/
29 psi).
G WARNING
If the required tire pressure is not reached
after the specified time, the tire is too badly
damaged. The tire sealant cannot repair the
tire in this instance. Damaged tires and a tire
pressure that is too low can significantly
impair the vehicle's braking and driving char-
acteristics. There is a risk of accident.
Do not continue driving. Contact a qualified
specialist workshop.
Tire pressure reached
G WARNING
A tire temporarily sealed with tire sealant
impairs the driving characteristics and is not
suitable for higher speeds. There is a risk of
accident.
You should therefore adapt your driving style
accordingly and drive carefully. Do not exceed
the specified maximum speed with a tire that
has been repaired using tire sealant.
The maximum permissible speed for a tire
sealed with tire sealant is 50 mph (80 km/h).
The upper part of the TIREFIT sticker must be
affixed to the instrument cluster in the driver's
field of vision. If a tire pressure of 200 kPa (2.0 bar/29 psi) has
been attained after ten minutes: X
Switch off the tire inflation compressor. X
Unscrew the filler hose from the valve of the
faulty tire.
Tire sealant may escape when the filler hose is
unscrewed. X
Stow the tire sealant bottle and the tire infla-
tion compressor. X
Pull away immediately .X
Stop after driving for approximately ten
minutes and check the tire pressure with the
tire inflation compressor.
The tire pressure must now be at least
130 kPa (1.3 bar/19 psi).
G WARNING
If the required tire pressure is not reached
after driving for a short period, the tire is too
badly damaged. The tire sealant cannot repair
the tire in this instance. Damaged tires and a
tire pressure that is too low can significantly
impair the vehicle's braking and driving char-
acteristics. There is a risk of accident.
Do not continue driving. Contact a qualified
specialist workshop.
In cases such as the one mentioned above, con-
tact an authorized Mercedes-Benz Center. Or
call 1-800-FOR-MERCedes (in the USA) or
1-800-387-0100 (in Canada). X
Correct the tire pressure if it is still at least
130 kPa (1.3 bar/19 psi). See the Tire and
Loading Information placard on the B-pillar on
the driver's side or the tire pressure table in
the fuel filler flap for values. X
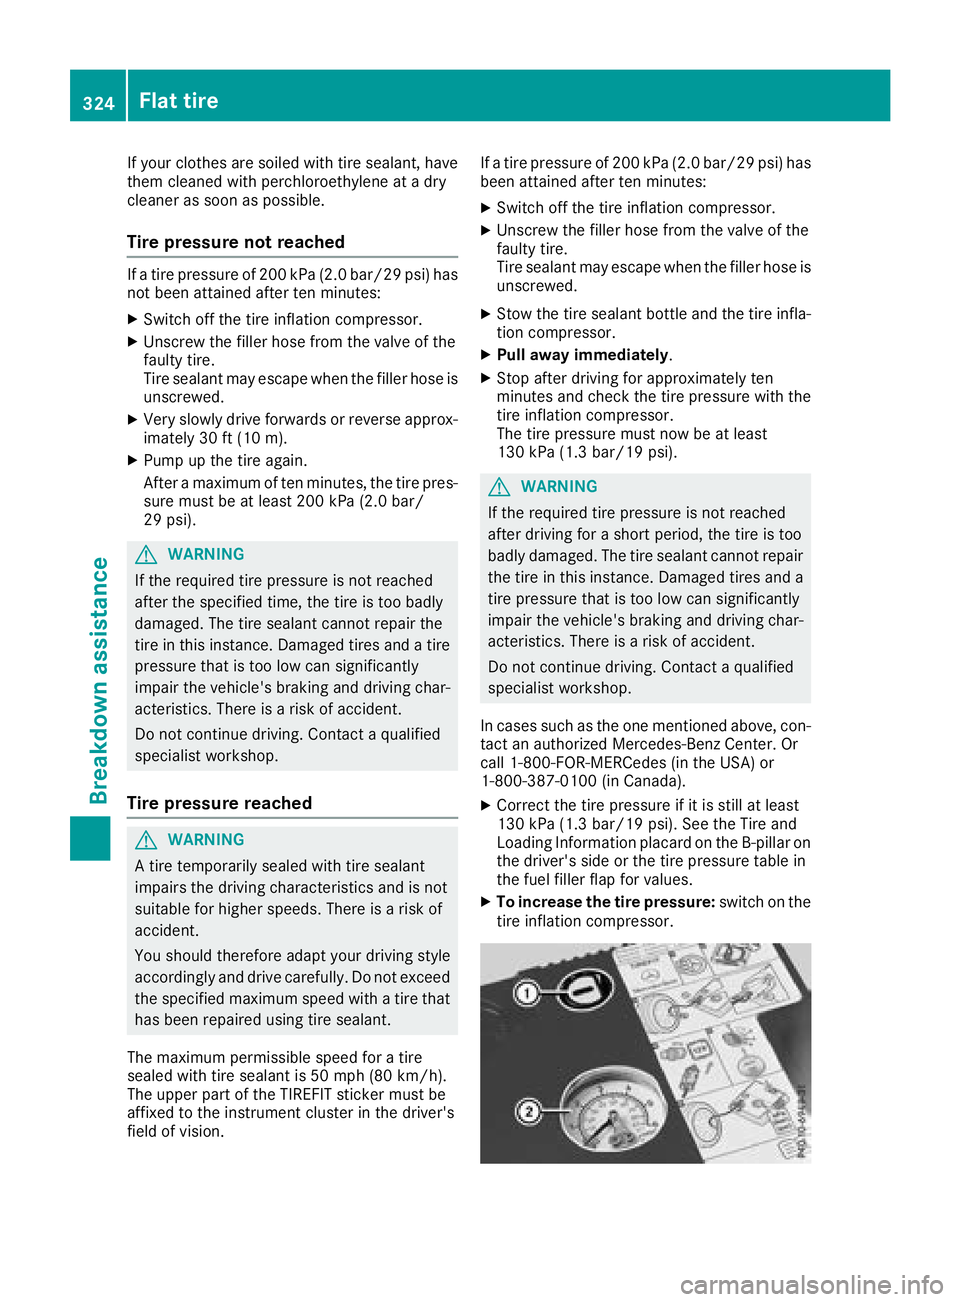
To increase the tire pressure: switch on the
tire inflation compressor.324
Flat tire
Breakdown assistance