2017 MERCEDES-BENZ GLC engine
[x] Cancel search: enginePage 114 of 374
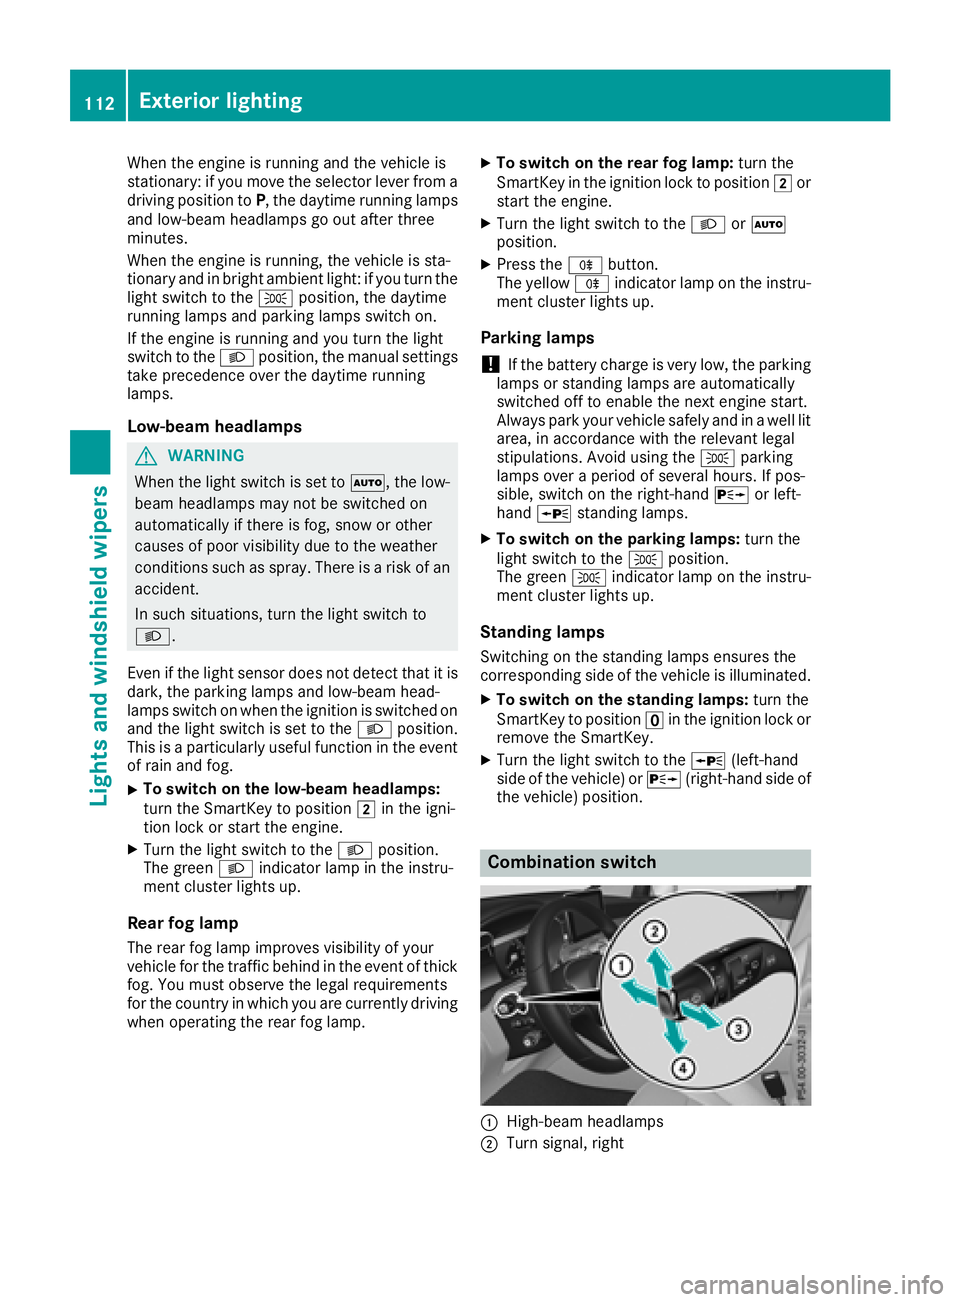
When the engine is running and the vehicle is
stationary: if you move the selector lever from a
driving position to P , the daytime running lamps
and low-beam headlamps go out after three
minutes.
When the engine is running, the vehicle is sta-
tionary and in bright ambient light: if you turn the
light switch to the �` position, the daytime
running lamps and parking lamps switch on.
If the engine is running and you turn the light
switch to the �X position, the manual settings
take precedence over the daytime running
lamps.
Low-beam headlamps
G WARNING
When the light switch is set to �X , the low-
beam headlamps may not be switched on
automatically if there is fog, snow or other
causes of poor visibility due to the weather
conditions such as spray. There is a risk of an
accident.
In such situations, turn the light switch to
�X .
Even if the light sensor does not detect that it is
dark, the parking lamps and low-beam head-
lamps switch on when the ignition is switched on
and the light switch is set to the �X position.
This is a particularly useful function in the event
of rain and fog. X
To switch on the low-beam headlamps:
turn the SmartKey to position �H in the igni-
tion lock or start the engine. X
Turn the light switch to the �X position.
The green �X indicator lamp in the instru-
ment cluster lights up.
Rear fog lamp
The rear fog lamp improves visibility of your
vehicle for the traffic behind in the event of thick
fog. You must observe the legal requirements
for the country in which you are currently driving
when operating the rear fog lamp. X
To switch on the rear fog lamp: turn the
SmartKey in the ignition lock to position �H or
start the engine. X
Turn the light switch to the �X or �X
position. X
Press the �^ button.
The yellow �^ indicator lamp on the instru-
ment cluster lights up.
Parking lamps
! If the battery charge is very low, the parking
lamps or standing lamps are automatically
switched off to enable the next engine start.
Always park your vehicle safely and in a well lit
area, in accordance with the relevant legal
stipulations. Avoid using the �` parking
lamps over a period of several hours. If pos-
sible, switch on the right-hand �d or left-
hand �c standing lamps. X
To switch on the parking lamps: turn the
light switch to the �` position.
The green �` indicator lamp on the instru-
ment cluster lights up.
Standing lamps Switching on the standing lamps ensures the
corresponding side of the vehicle is illuminated. X
To switch on the standing lamps: turn the
SmartKey t o position �
Page 125 of 374
Overview of climate control systems
General notes Observe the settings recommended on the fol-
lowing pages. The windows could otherwise fog
up.
To prevent the windows from fogging up: R
switch off climate control only briefly R
switch on air-recirculation mode only briefly R
switch on the cooling with air dehumidifica-
tion function R
activate the "Windshield defrosting" function
briefly, if required
Climate control regulates the temperature and
air humidity in the vehicle interior. The interior
filter cleans the air, thus improving the interior
climate.
The "Cooling with air dehumidification" function
is only available when the engine is running.
Optimum climate control is only achieved with
the side windows and roof closed.
If you start the engine using your smartphone,
the last selected climate control setting is reac-
tivated ( Y
page 134). The integrated filter filters out most particles of
dust and soot and completely filters out pollen.
It also reduces gaseous pollutants and odors. A
clogged filter reduces the amount of air supplied
to the vehicle interior. For this reason, you
should always observe the interval for replacing
the filter, which is specified in the Maintenance
Booklet. As it depends on environmental condi-
tions, e.g. heavy air pollution, the interval may
be shorter than stated in the Maintenance Book-
let.
i Ventilate the vehicle for a brief period during
warm weather, e.g. using the convenience
opening feature ( Y
page 91). This will speed
up the cooling process and the desired inte-
rior temperature will be reached more
quickly.
i It is possible that the blower may be activa-
ted automatically 60 minutes after the Smart-
Key has been removed depending on various
factors, e.g. the outside temperature. The
vehicle is then ventilated for 30 minutes to dry
the automatic climate control.
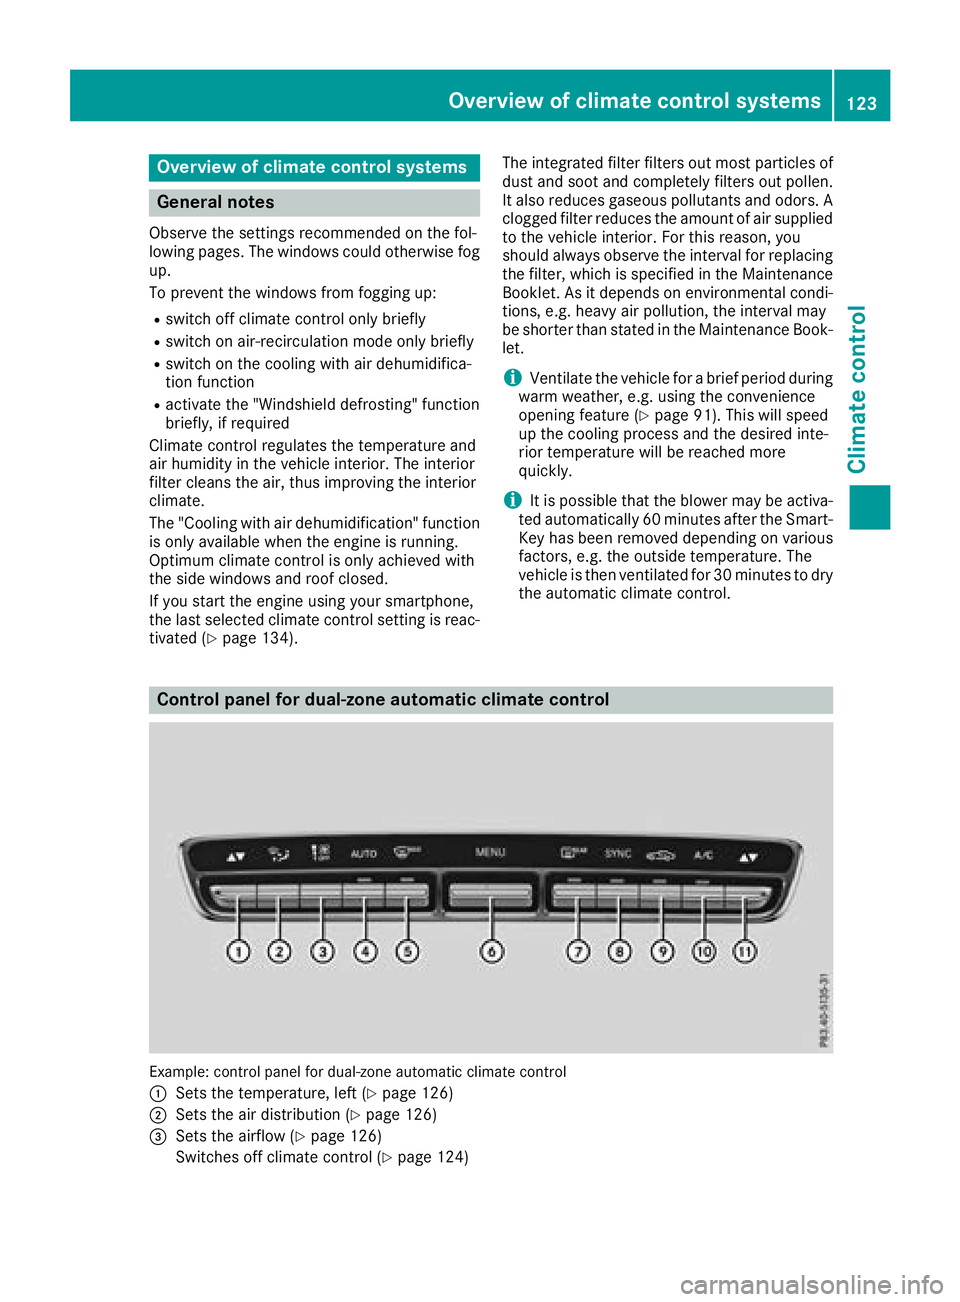
Control panel for dual-zone automatic climate control
Example: control panel for dual-zone automatic climate control
�C
Sets the temperature, left ( Y
page 126)
�D
Sets the air distribution ( Y
page 126)
�
Page 127 of 374
Switching cooling with air dehumidification on/off
General notes If you deactivate the "Cooling with air-dehumidification" function, the air inside the vehicle will not
be cooled. The air inside the vehicle will also not be dehumidified. The windows can fog up more
quickly. Therefore, only deactivate the "Cooling with air-dehumidification" function briefly.
The "Cooling with air dehumidification" function is only available when the engine is running. The air
inside the vehicle is cooled and dehumidified according to the temperature selected.
Condensation may drip from the underside of the vehicle when it is in cooling mode. This is normal
and not a sign that there is a malfunction.
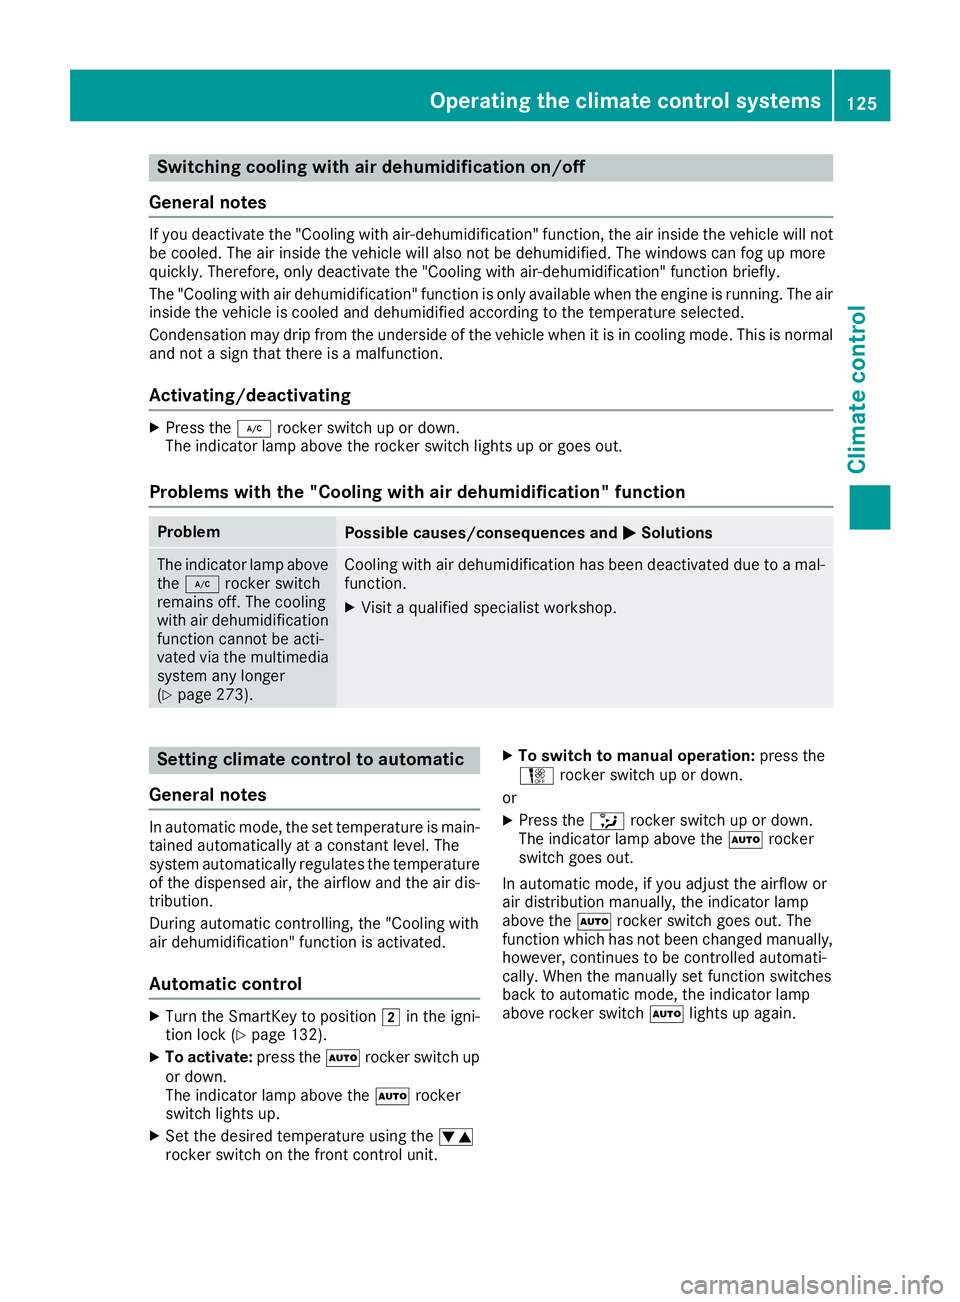
Activating/deactivating X
Press the �Z rocker switch up or down.
The indicator lamp above the rocker switch lights up or goes out.
Problems with the "Cooling with air dehumidification" function Problem
Possible causes/consequences and �P Solutions
The indicator lamp above
the �Z rocker switch
remains off. The cooling
with air dehumidification
function cannot be acti-
vated via the multimedia
system any longer
( Y
page 273). Cooling with air dehumidification has been deactivated due to a mal-
function. X
Visit a qualified specialist workshop.
Setting climate control to automatic
General notes In automatic mode, the set temperature is main-
tained automatically at a constant level. The
system automatically regulates the temperature
of the dispensed air, the airflow and the air dis-
tribution.
During automatic controlling, the "Cooling with
air dehumidification" function is activated.
Automatic control X
Turn the SmartKey to position �H in the igni-
tion lock ( Y
page 132).X
To activate: press the �X rocker switch up
or down.
The indicator lamp above the �X rocker
switch lights up. X
Set the desired temperature using the �
Page 133 of 374
Notes on breaking-in a new vehicle
Important safety notes The sensor system of some driving and driving
safety systems adjusts automatically while a
certain distance is being driven after the vehicle
has been delivered or after repairs. Full system
effectiveness is not reached until the end of this
teach-in procedure.
New and replaced brake pads and discs only
reach their optimum braking effect after several
hundred kilometers of driving. Compensate for
this by applying greater force to the brake pedal.
The first 1000 miles (1500 km) The more you look after the engine when it is
new, the more satisfied you will be with its per-
formance in the future. R
You should therefore drive at varying vehicle
and engine speeds for the first 1000 miles
(1500 km). R
Avoid heavy loads, e.g. driving at full throttle,
during this period. R
When changing gears manually, change up in
good time, before the tachometer needle rea-
ches �
Page 134 of 374
! Do not warm up the engine with the vehicle
stationary. Drive off immediately. Avoid high
engine speeds and driving at full throttle until
the engine has reached its operating temper-
ature.
Only shift the automatic transmission to the
desired drive position when the vehicle is sta-
tionary.
Where possible, avoid spinning the drive
wheels when pulling away on slippery roads.
You could otherwise damage the drive train.
Key positions
SmartKey
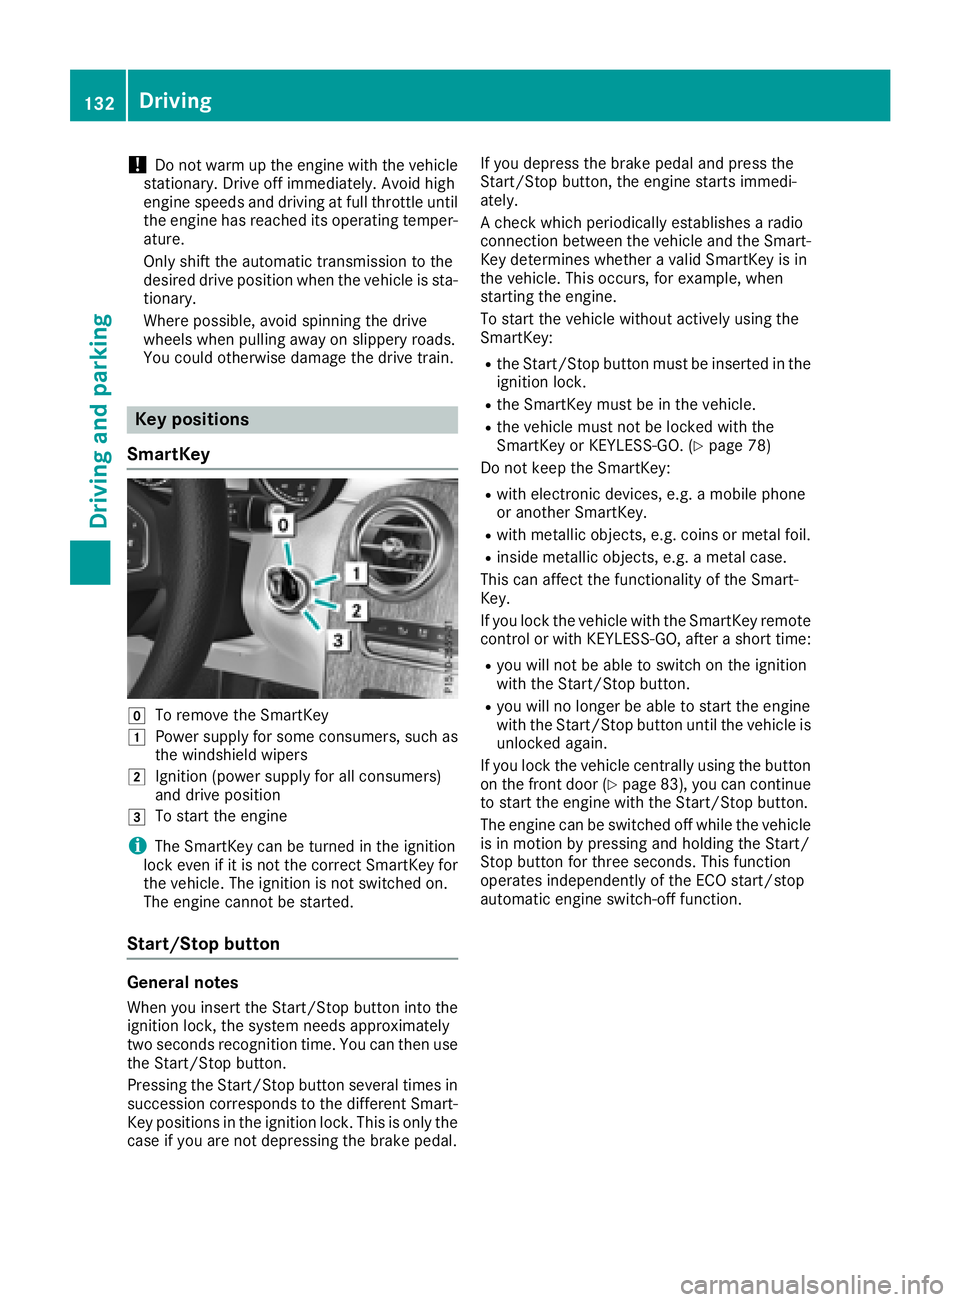
�Z
To remove the SmartKey�G
Power supply for some consumers, such as
the windshield wipers�H
Ignition (power supply for all consumers)
and drive position�I
To start the engine
i The SmartKey can be turned in the ignition
lock even if it is not the correct SmartKey for
the vehicle. The ignition is not switched on.
The engine cannot be started.
Start/Stop button
General notes
When you insert the Start/Stop button into the
ignition lock, the system needs approximately
two seconds recognition time. You can then use
the Start/Stop button.
Pressing the Start/Stop button several times in
succession corresponds to the different Smart-
Key positions in the ignition lock. This is only the
case if you are not depressing the brake pedal. If you depress the brake pedal and press the
Start/Stop button, the engine starts immedi-
ately.
A check which periodically establishes a radio
connection between the vehicle and the Smart-
Key determines whether a valid SmartKey is in
the vehicle. This occurs, for example, when
starting the engine.
To start the vehicle without actively using the
SmartKey: R
the Start/Stop button must be inserted in the
ignition lock. R
the SmartKey must be in the vehicle. R
the vehicle must not be locked with the
SmartKey or KEYLESS-GO. ( Y
page 78)
Do not keep the SmartKey: R
with electronic devices, e.g. a mobile phone
or another SmartKey. R
with metallic objects, e.g. coins or metal foil. R
inside metallic objects, e.g. a metal case.
This can affect the functionality of the Smart-
Key.
If you lock the vehicle with the SmartKey remote
control or with KEYLESS-GO, after a short time: R
you will not be able to switch on the ignition
with the Start/Stop button. R
you will no longer be able to start the engine
with the Start/Stop button until the vehicle is
unlocked again.
If you lock the vehicle centrally using the button
on the front door ( Y
page 83), you can continue
to start the engine with the Start/Stop button.
The engine can be switched off while the vehicle
is in motion by pressing and holding the Start/
Stop button for three seconds. This function
operates independently of the ECO start/stop
automatic engine switch-off function.132
Driving
Driving and parking
Page 135 of 374
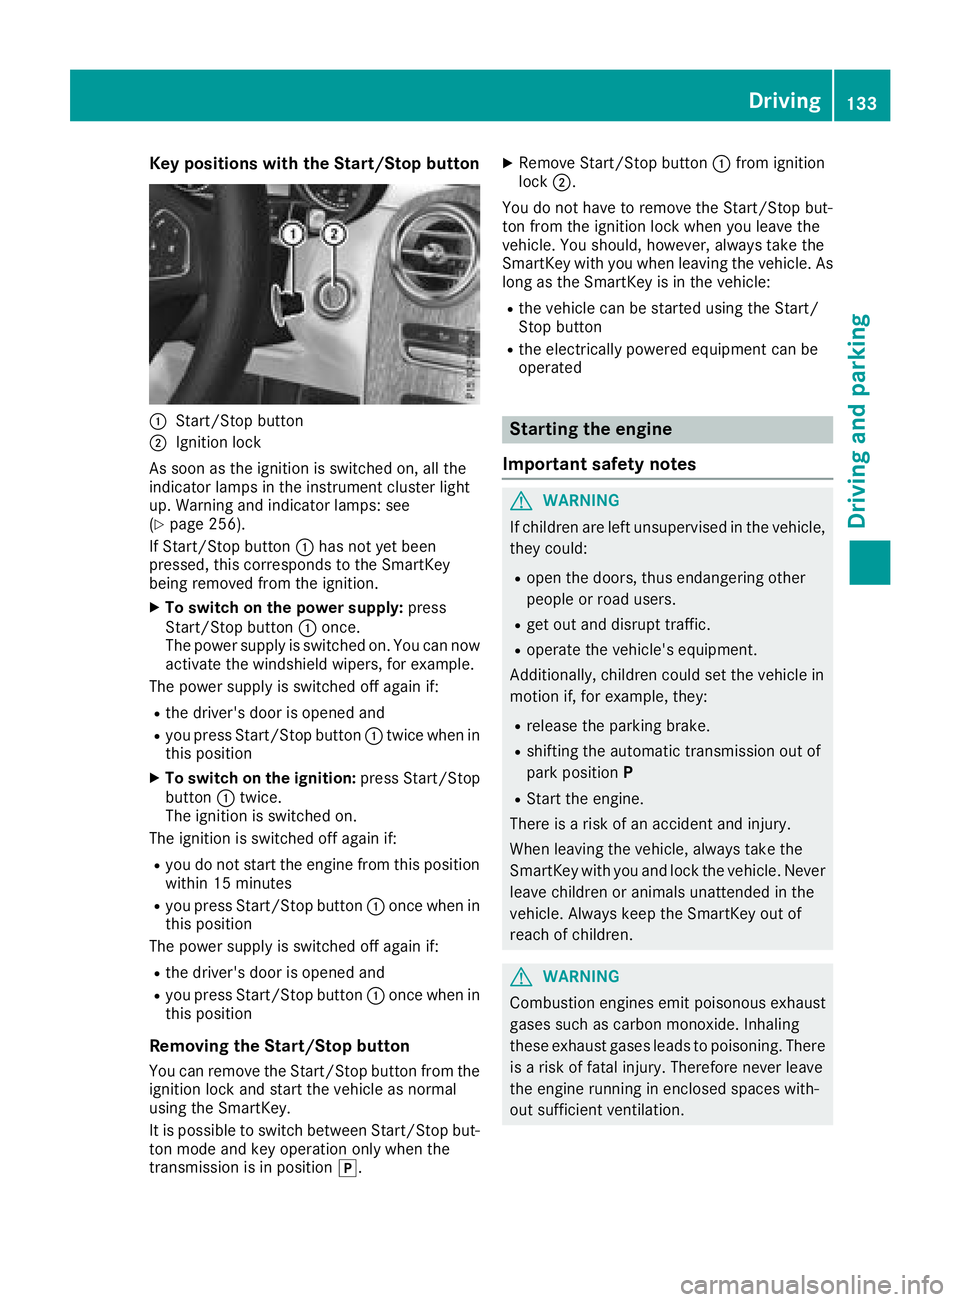
Key positions with th e Start/S top but ton
�C
Start/Sto p butto n�D
Ignition loc k
As soo n as th e ignition is switched on , all th e
indicator lamps in th e instrumen t cluste r ligh t
up. Warning and indicator lamps : see
( Y
page 256).
If Start/Sto p butto n �C has no t yet been
pressed, this correspond s to th e SmartKey
bein g remove d from th e ignition .X
To switch on th e power supply : press
Start/Sto p butto n �C once.
The power suppl y is switched on . You can no w
activat e th e windshield wipers, for example .
The power suppl y is switched off again if:R
th e driver' s door is opened andR
you press Start/Sto p butto n �C twice when in
this position X
To switch on th e ignition: press Start/Sto p
butto n �C twice.
The ignition is switched on .
The ignition is switched off again if: R
you do no t start th e engin e from this position
within 15 minute sR
you press Start/Sto p butto n �C once when in
this position
The power suppl y is switched off again if:R
th e driver' s door is opened andR
you press Start/Sto p butto n �C once when in
this position
Removing the Start/S top but ton
You can remove th e Start/Sto p butto n from th e
ignition loc k and start th e vehicl e as normal
usin g th e SmartKey.
It is possible to switch between St art/Sto p b ut -
to n mo d e and ke y operation only when th e
transmission is in position �] . X
Remove Start/Sto p butto n �C from ignition
loc k �D .
You do no t have to remove th e Start/Sto p but -
to n from th e ignition loc k when you leav e th e
vehicle. You should, however , always tak e th e
SmartKey wit h you when leaving th e vehicle. As
lon g as th e SmartKey is in th e vehicle:R
th e vehicl e can be started usin g th e Start /
Stop butto n R
th e electrically powered equipmen t can be
operate d
Starting the engine
Important safety notes
G WARNIN G
If children are lef t unsupervised in th e vehicle,
they could: R
open th e doors, thus endangering other
people or road users. R
get out and disrupt traffic. R
operate th e vehicle's equipment.
Additionally, children could set th e vehicl e in
motion if, for example , they:R
release th e parking brake. R
shiftin g th e automatic transmission out of
park positio n P R
Start th e engine.
Ther e is a ris k of an acciden t and injury.
When leaving th e vehicle, always tak e th e
SmartKey wit h you and loc k th e vehicle. Never
leav e children or animals unattended in th e
vehicle. Always keep th e SmartKey out of
reac h of children .
G WARNIN G
Combustion engines emit poisonous exhaust
gase s suc h as carbon monoxide. Inhalin g
these exhaust gase s leads to poisoning . Ther e
is a ris k of fatal injury. Therefore never leav e
th e engin e runnin g in enclosed spaces with-
out sufficien t ventilation .Driving 133
Driving and parking Z
Page 136 of 374
G WARNING
Flammable materials introduced through
environmental influence or by animals can
ignite if in contact with the exhaust system or
parts of the engine that heat up. There is a risk
of fire.
Carry out regular checks to make sure that
there are no flammable foreign materials in
the engine compartment or in the exhaust
system.
General notes Vehicles with a gasoline engine: the catalytic
converter is preheated for up to 30 seconds
after a cold start. The sound of the engine may
change during this time.
Automatic transmission X
Shift the transmission to position �]
( Y
page 141).
The transmission position indicator on the
multifunction display shows �]
( Y
page 142).
i You can start the engine in transmission
position �] and �\\ .
Starting procedure with the SmartKey To start the engine using the SmartKey instead
of the Start/Stop button, pull the Start/Stop
button out of the ignition lock. X
To start a diesel engine: turn the SmartKey
to position �H in the ignition lock
( Y
page 132).
The �\( preglow indicator lamp in the instru-
ment cluster lights up. X
Turn the SmartKey to position �I in the igni-
tion lock ( Y
page 132) and release it as soon
as the engine is running.
i Vehicles with a diesel engine: you can
start the engine without preglow if the engine
is warm.
If the engine will not start: X
Remove the SmartKey from the ignition lock. X
Reinsert the SmartKey into the ignition lock
after a short waiting period. X
Turn the SmartKey to position �H in the igni-
tion lock ( Y
page 132).
The indicator lamps in the instrument cluster
light up ( Y
page 256). X
Turn the SmartKey to position �I in the igni-
tion lock ( Y
page 132) and release it as soon
as the engine is running.
Starting procedure with the Start/Stop
button The Start/Stop button is only available on vehi-
cles with KEYLESS-GO or the KEYLESS-GO start
function.
The Start/Stop button can be used to start the
vehicle manually without inserting the SmartKey
into the ignition lock. The Start/Stop button
must be inserted in the ignition lock and the
SmartKey must be in the vehicle. This mode for
starting the engine operates independently of
the ECO start/stop automatic engine start func-
tion.
You can start the engine if a valid SmartKey is in
the vehicle. Switch off the engine and always
take the SmartKey with you when leaving the
vehicle, even if you only leave it for a short time.
Pay attention to the important safety notes. X
Depress the brake pedal and keep it
depressed. X
Press the Start/Stop button once
( Y
page 133).
Vehicles with a gasoline engine: the engine
starts.
Vehicles with a diesel engine: preglow is
activated and the engine starts.
Starting procedure via smartphone Observe the important safety notes on starting
the engine ( Y
page 133).
You can also start your engine via your smart-
phone from outside the vehicle. In this case, the
previously selected climate control setting is
activated. In this way you can cool or heat the
interior of the vehicle before starting the jour-
ney.
Only start the engine via your smartphone if it is
safe to start and run the engine where your vehi-
cle is parked.
Observe the legal stipulations in the area where
your vehicle is parked. Engine start via smart-
phone may be limited to certain countries or
regions.134
Driving
Driving and parking
Page 137 of 374
You can execute a maximum of two consecutive
starting attempts via your smartphone. If you
press the start/stop button or insert the Smart-
Key into the ignition lock, you can carry out two
more starting attempts with your smartphone.
The engine runs for ten minutes when starting
with the smartphone.
Once you have started the engine, you can
switch the engine off via your smartphone at any
time.
You can only start the engine via your smart-
phone if: R
the SmartKey is in the ignition lock R
park position �] is selectedR
the accelerator pedal is not depressed R
the anti-theft alarm system is not activated R
the panic alarm is not activated R
the hazard warning lamps are switched off R
the hood is closed R
the doors are closed and locked R
the windows and sliding sunroof are closed
Also make sure that: R
the fuel tank is sufficiently filled R
the starter battery has been sufficiently
charged
G WARNING
Limbs could be crushed or trapped if the
engine is started unintentionally during ser-
vice or maintenance work. There is a risk of
injury.
Always secure the engine against uninten-
tional starting before carrying out mainte-
nance or repair work.
Make sure that the engine cannot be started via
your smartphone before carrying out mainte-
nance or repairs. You can prevent an engine
start via your smartphone, for example, if you: R
switch on the hazard warning lamps R
do not lock the doors R
open a side window R
open the sliding sunroof Pulling away
General notes
G WARNING
If the engine speed is above the idling speed
and you engage transmission position D or R ,
the vehicle could pull away suddenly. There is
a risk of an accident.
When engaging transmission position D or R ,
always firmly depress the brake pedal and do
not simultaneously accelerate.
Depress the accelerator carefully when pulling
away.
The vehicle locks centrally once you have pulled
away. The locking knobs in the doors drop down.
You can open the doors from the inside at any
time.
You can also deactivate the automatic locking
feature, see the Digital Operator's Manual.
It is possible to shift the transmission from posi-
tion �] to the desired position only if you
depress the brake pedal. Only then is the park-
ing lock released. If you do not depress the
brake pedal, the DIRECT SELECT lever can still
be moved but the parking lock remains
engaged.
i Upshifts take place at higher engine speeds
after a cold start. This helps the catalytic con-
verter to reach its operating temperature
more quickly.
Information on the automatic release of the
electric parking brake ( Y
page 156).
Pulling away with a trailer Driving 135
Driving and parking Z