2017 MERCEDES-BENZ GLC COUPE suspension
[x] Cancel search: suspensionPage 169 of 370
To avoid damage to the vehicle, deactivate
DISTRONIC PLUS and the HOLD function in
the following or similar situations:
Rwhen towing the vehicle
Rin the car wash
Deactivating the HOLD function (
Ypage 167).
Activation conditions
You can activate the HOLD function if all of the
following conditions are fulfilled:
Rthe vehicle is stationary.
Rthe engine is running or if it has been auto-
matically switched off by the ECO start/stop
function.
Rthe driver's door is closed or your seat belt is
fastened.
Rthe electric parking brake is released.
Rthe transmission is in position h,kori.
RDISTRONIC PLUS is deactivated.
Activating the HOLD function
XMake sure that the activation conditions are
met.
XDepress the brake pedal.
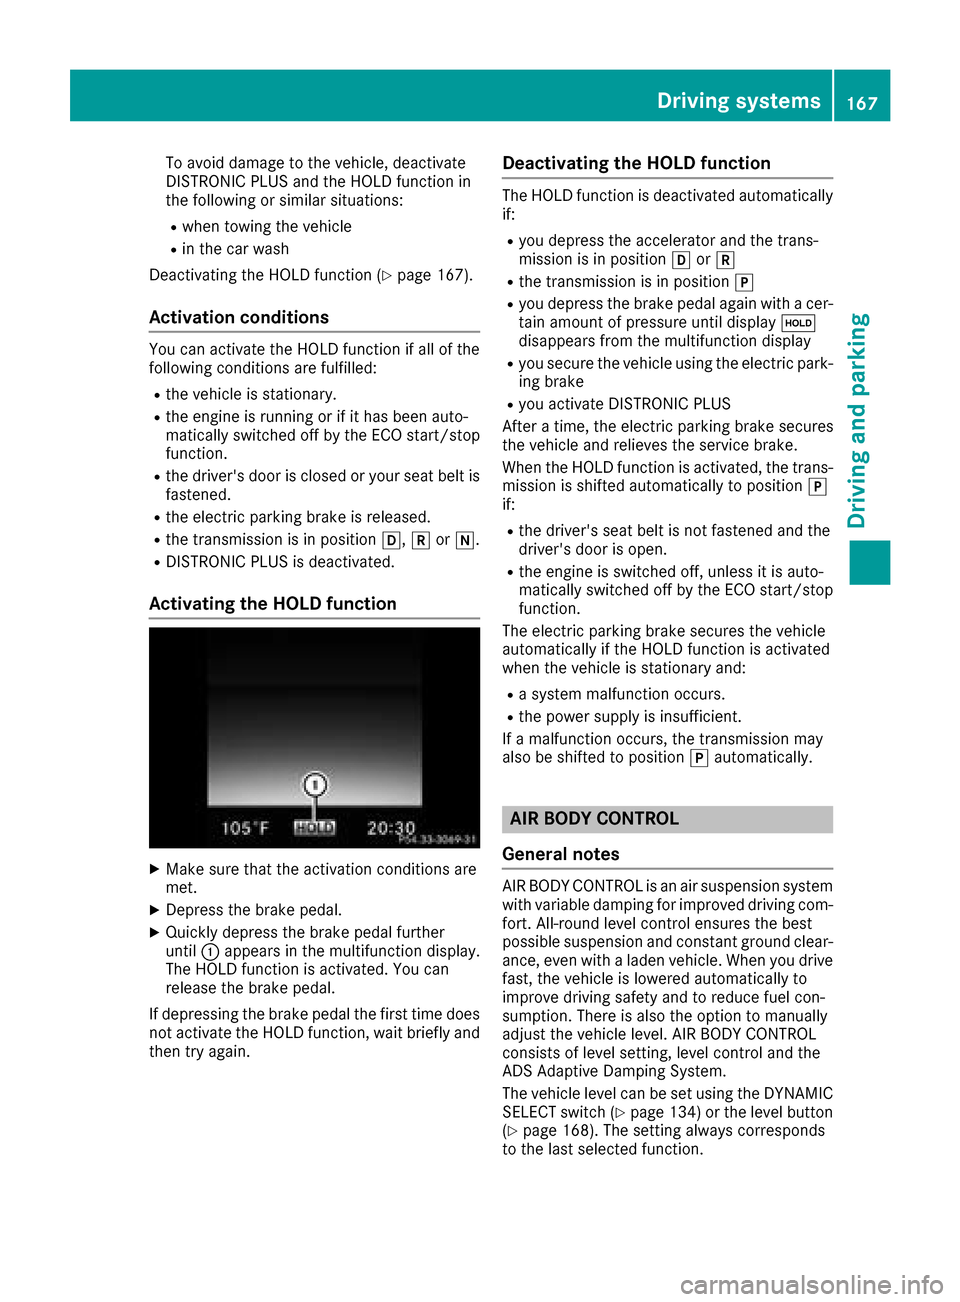
XQuickly depress the brake pedal further
until :appears in the multifunction display.
The HOLD function is activated. You can
release the brake pedal.
If depressing the brake pedal the first time does not activate the HOLD function, wait briefly and
then try again.
Deactivating the HOLD function
The HOLD function is deactivated automatically
if:
Ryou depress the accelerator and the trans-
mission is in position hork
Rthe transmission is in position j
Ryou depress the brake pedal again with a cer-
tain amount of pressure until display ë
disappears from the multifunction display
Ryou secure the vehicle using the electric park- ing brake
Ryou activate DISTRONIC PLUS
After a time, the electric parking brake secures
the vehicle and relieves the service brake.
When the HOLD function is activated, the trans-
mission is shifted automatically to position j
if:
Rthe driver's seat belt is not fastened and the
driver's door is open.
Rthe engine is switched off, unless it is auto-
matically switched off by the ECO start/stop
function.
The electric parking brake secures the vehicle
automatically if the HOLD function is activated
when the vehicle is stationary and:
Ra system malfunction occurs.
Rthe power supply is insufficient.
If a malfunction occurs, the transmission may
also be shifted to position jautomatically.
AIR BODY CONTROL
General notes
AIR BODY CONTROL is an air suspension system
with variable damping for improved driving com- fort. All-round level control ensures the best
possible suspension and constant ground clear-
ance, even with a laden vehicle. When you drive
fast, the vehicle is lowered automatically to
improve driving safety and to reduce fuel con-
sumption. There is also the option to manually
adjust the vehicle level. AIR BODY CONTROL
consists of level setting, level control and the
ADS Adaptive Damping System.
The vehicle level can be set using the DYNAMIC SELECT switch (
Ypage 134) or the level button
(Ypage 168). The setting always corresponds
to the last selected function.
Driving systems167
Driving and parking
Z
Page 170 of 370
Important safety notes
GWARNING
When th evehicl eis bein glowered, people
could become trapped if their limb sare
between th evehicl ebody and th ewheels or
underneat hth evehicle. Ther eis aris kof
injury.
Mak esur eno on eis underneat hth evehicl eor
in th eimmediat evicinity of th ewhee larches
when th evehicl eis bein glowered.
iIf on eof th edoor sis open ,th evehicl eis no t
lowered.
Vehicle level
Setting the raised vehicle level
It is possible to choos ebetween th e"Normal"
and "Raised "vehicl elevels belo w aspee dof
50 mph (80 km/h). Selec tth e"Normal" setting
for normal road surfaces and "Raised "for driving
wit hsnow chain sor on particularly poor road
surfaces. Your selection remain sstore deve nif
you remove th eSmartKey from th eignition lock.
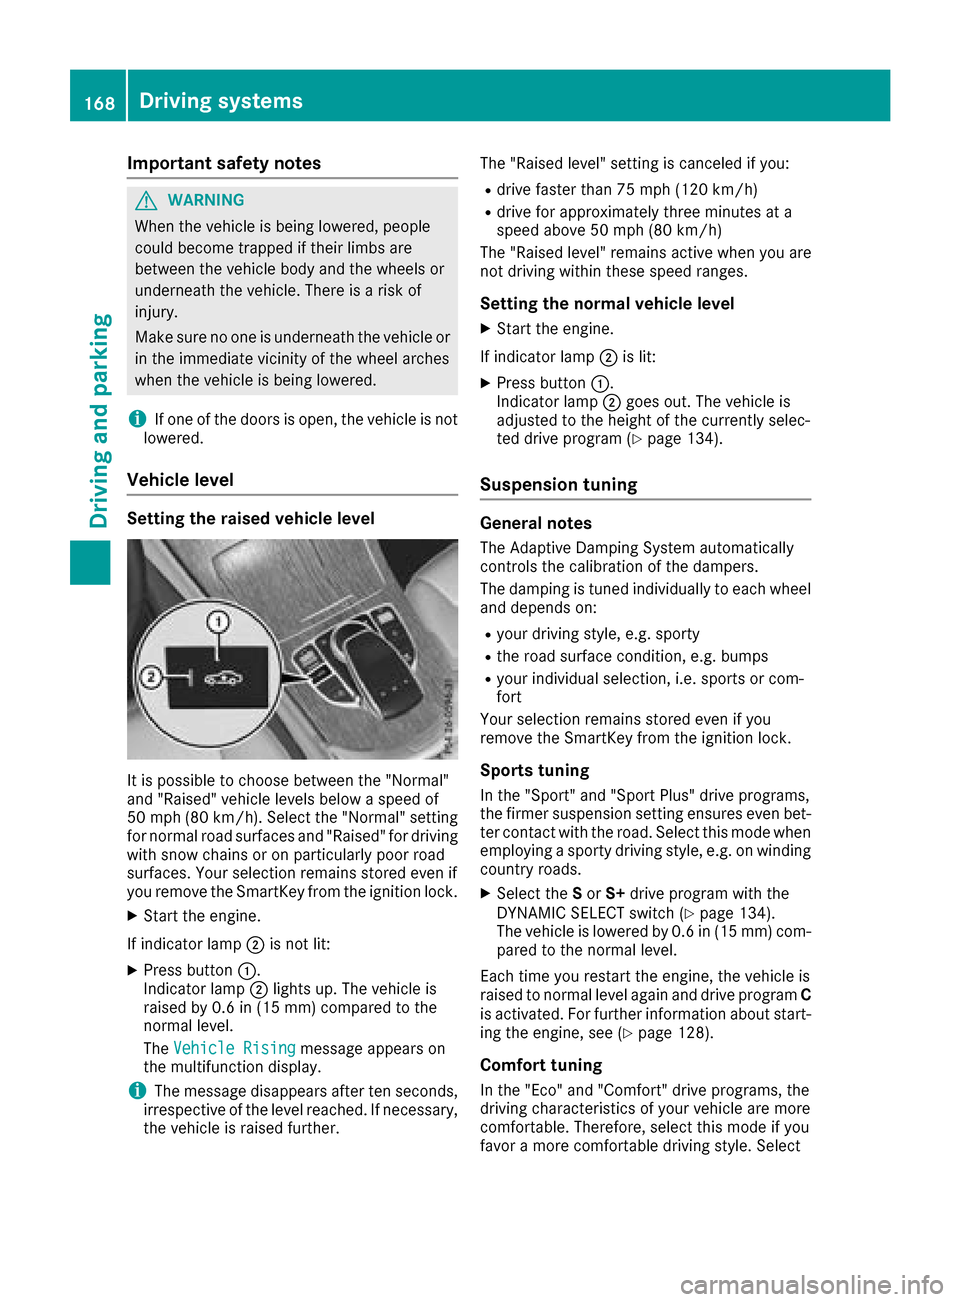
XStart th eengine.
If indicator lamp ;is no tlit :
XPress butto n:.
Indicato rlamp ;lights up. The vehicl eis
raised by 0. 6in (15 mm )comp ared to the
normal level.
The Vehicle Rising
message appears on
the multifunction display.
iThe message disappears after ten seconds,
irrespective of the level reached. If necessary,
the vehicle is raised further. The "Raised level" setting is canceled if you:
Rdrive faster than 75 mph (120 km/h)
Rdrive for approximately three minutes at a
speed above 50 mph
(80 km/h)
The "Raised level" remains active when you are
not driving within these speed ranges.
Setting the normal vehicle level
XStart the engine.
If indicator lamp ;is lit:
XPress button :.
Indicator lamp ;goes out. The vehicle is
adjusted to the height of the currently selec-
ted drive program (
Ypage 134).
Suspension tuning
General notes
The Adaptive Damping System automatically
controls the calibration of the dampers.
The damping is tuned individually to each wheel
and depends on:
Ryour driving style, e.g. sporty
Rthe road surface condition, e.g. bumps
Ryour individual selection, i.e. sports or com-
fort
Your selection remains stored even if you
remove the SmartKey from the ignition lock.
Sports tuning
In the "Sport" and "Sport Plus" drive programs,
the firmer suspension setting ensures even bet-
ter contact with the road. Select this mode when
employing a sporty driving style, e.g. on winding country roads.
XSelect the Sor S+ drive program with the
DYNAMIC SELECT switch (Ypage 134).
The vehicle is lowered by 0.6 in (15 mm) com- pared to the normal level.
Each time you restart the engine, the vehicle is
raised to normal level again and drive program C
is activated. For further information about start-
ing the engine, see (
Ypage 128).
Comfort tuning
In the "Eco" and "Comfort" drive programs, the
driving characteristics of your vehicle are more
comfortable. Therefore, select this mode if you
favor a more comfortable driving style. Select
168Driving systems
Driving and parking
Page 171 of 370
comfort mode also when driving fast on straight
roads, e.g. on straight stretches of highway.
XSelect theEor Cdrive program with the
DYNAMIC SELECT switch (Ypage 134).
The vehicle is raised to the normal level.
When driving at speeds above 80 mph
(125 km/h), the vehicle is automatically low-
ered by 0.6 in (15 mm) in the Eand Cdrive pro-
grams. When driving at speeds below 50 mph
(80 km/h), the vehicle is raised again.
Lowering the rear of the vehicle
Lowering using the button in the left-hand-
side cargo compartment trim
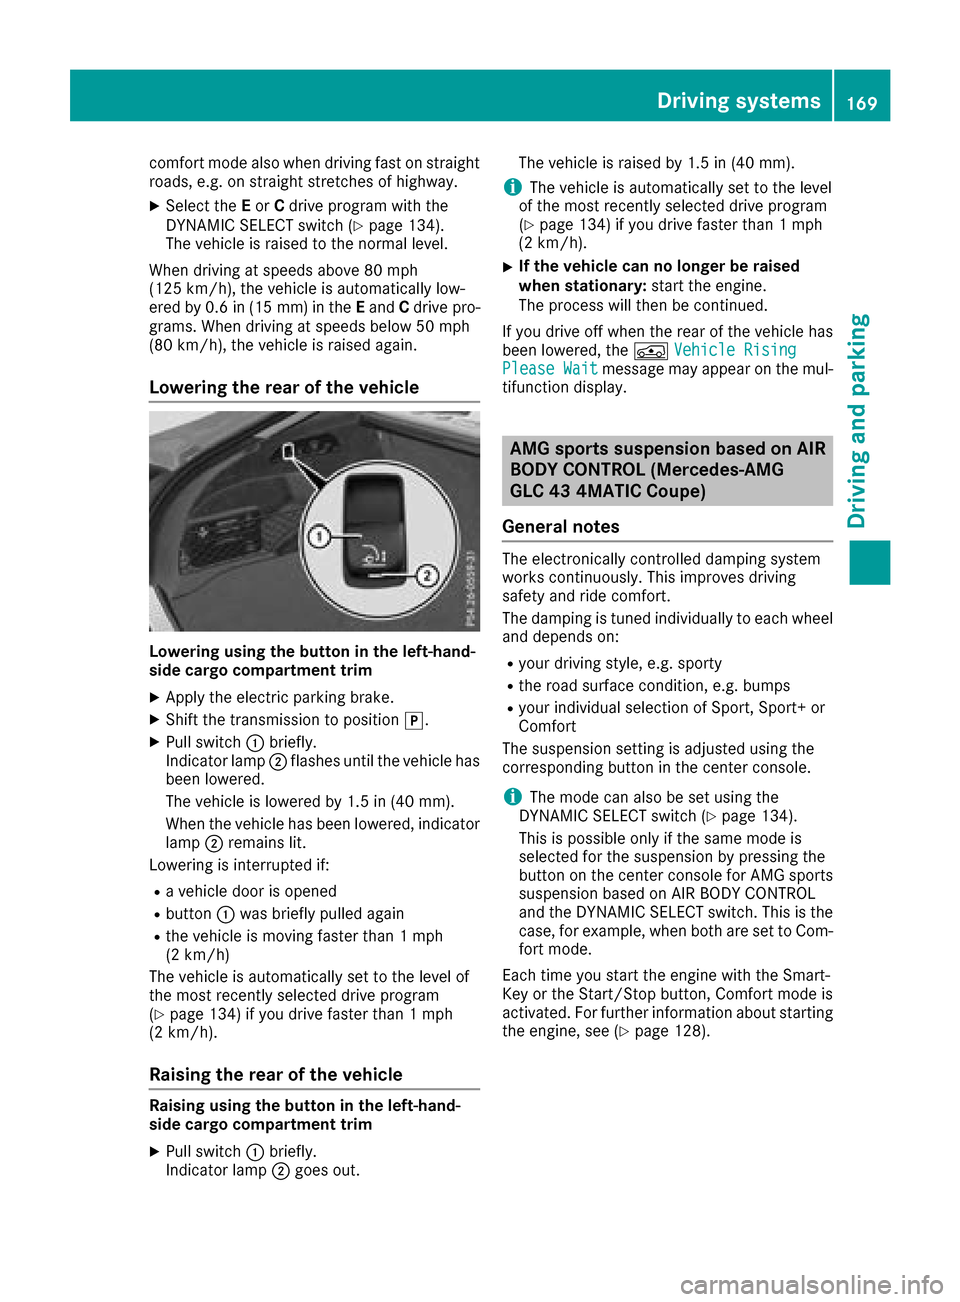
XApply the electric parking brake.
XShift the transmission to position j.
XPull switch:briefly.
Indicator lamp ;flashes until the vehicle has
been lowered.
The vehicle is lowered by 1.5 in (40 mm).
When the vehicle has been lowered, indicator
lamp ;remains lit.
Lowering is interrupted if:
Ra vehicle door is opened
Rbutton :was briefly pulled again
Rthe vehicle is moving faster than 1 mph
(2 km/h)
The vehicle is automatically set to the level of
the most recently selected drive program
(
Ypage 134) if you drive faster than 1 mph
(2 km/h).
Raising the rear of the vehicle
Raising using the button in the left-hand-
side cargo compartment trim
XPull switch :briefly.
Indicator lamp ;goes out. The vehicle is raised by 1.5 in (40 mm).
iThe vehicle is automatically set to the level
of the most recently selected drive program
(
Ypage 134) if you drive faster than 1 mph
(2 km/h).
XIf the vehicle can no longer be raised
when stationary: start the engine.
The process will then be continued.
If you drive off when the rear of the vehicle has
been lowered, the ÁVehicle Rising
Please Waitmessage may appear on the mul-
tifunction display.
AMG sports suspension based on AIR
BODY CONTROL (Mercedes-AMG
GLC 43 4MATIC Coupe)
General notes
The electronically controlled damping system
works continuously. This improves driving
safety and ride comfort.
The damping is tuned individually to each wheel
and depends on:
Ryour driving style, e.g. sporty
Rthe road surface condition, e.g. bumps
Ryour individual selection of Sport, Sport+ or
Comfort
The suspension setting is adjusted using the
corresponding button in the center console.
iThe mode can also be set using the
DYNAMIC SELECT switch (Ypage 134).
This is possible only if the same mode is
selected for the suspension by pressing the
button on the center console for AMG sports
suspension based on AIR BODY CONTROL
and the DYNAMIC SELECT switch. This is the
case, for example, when both are set to Com- fort mode.
Each time you start the engine with the Smart-
Key or the Start/Stop button, Comfort mode is
activated. For further information about starting
the engine, see (
Ypage 128).
Driving systems169
Driving and parking
Z
Page 172 of 370

Sport mode
The firmer setting of the suspension tuning in
Sport mode ensures even better contact with
the road. Select this mode when employing a
sporty driving style, e.g. on winding country
roads.
XPress button:.
Indicator lamp =lights up. You have selected
Sport mode.
The AMG Suspension System SPORT
mes-
sage appears on the multifunction display.
Sport + mode
The very firm setting of the suspension setting in
Sport + mode ensures the best possible contact
with the road. Select this mode only when driv-
ing on race circuits.
If indicator lamps ;and =are off:
XPress button :twice.
Indicator lamps ;and =light up. You have
selected Sport + mode.
The AMG
SuspensionSystemSPORT +mes-
sage appears on the multifunction display.
If indicator lamp =lights up:
XPress button :once.
Second indicator lamp ;lights up. You have
selected Sport + mode.
The AMG
SuspensionSystemSPORT +mes-
sage appears on the multifunction display.
Comfort mode
In Comfort mode, the driving characteristics of
your vehicle are more comfortable. Select this
mode if you favor a more comfortable driving
style, but also when driving fast on straight
roads, e.g. highways.
XPress button :repeatedly until indicator
lamps ;and =go out.
You have selected Comfort mode.
The AMG
SuspensionSystemCOMFORTmes-
sage appears on the multifunction display.
4MATIC (permanent four-wheel drive)
4MATIC ensures permanent drive for all four
wheels. Together with ESP®, it improves the
traction of your vehicle whenever a drive wheel
spins due to insufficient grip.
If you fail to adapt your driving style or if you are inattentive, 4MATIC can neither reduce the risk
of an accident nor override the laws of physics.
4MATIC does not take into account
Rthe road and weather conditions
Rthe traffic situation
4MATIC is only an aid. You are responsible for
the distance to the vehicle in front, for vehicle
speed, for braking in good time and for staying in
your lane.
If a drive wheel spins due to insufficient grip:
ROnly depress the accelerator pedal as far as
necessary when pulling away.
RAccelerate less when driving.
!Never tow the vehicle with one axle raised.
This may damage the transfer case. Damage
of this sort is not covered by the Mercedes-
Benz Limited Warranty. All wheels must
remain either on the ground or be fully raised.
Observe the instructions for towing the vehi-
cle with all wheels in full contact with the
ground.
iIn wintry driving conditions, the maximum
effect of 4MATIC can only be achieved if you
use winter tires (M+S tires), with snow chains
if necessary.
PARKTRONIC
Important safety notes
PARKTRONIC is an electronic parking aid with
ultrasonic sensors. It monitors the area around
your vehicle using six sensors in the front
bumper and six sensors in the rear bumper.
PARKTRONIC indicates visually and audibly the
distance between your vehicle and an object.
170Driving systems
Driving and parking
Page 222 of 370
SETUP shows the following functions and set-
tings:
Rthe gear indicator
Rthe digital speedometer
Rthe drive system setting
Rthe suspension mode
Rthe steering setting
Rthe setting of the ECO start/stop function
Rthe ESP®(Electronic Stability Program) status
Select SETUP
XUseò on the steering wheel to call up the
list of menus.
XPress the :or9 button on the steering
wheel to select the AMGmenu.
XConfirm by pressing aon the steering
wheel.
XPress 9repeatedly until SETUP appears.
RACETIMER
Displaying and starting RACETIMER
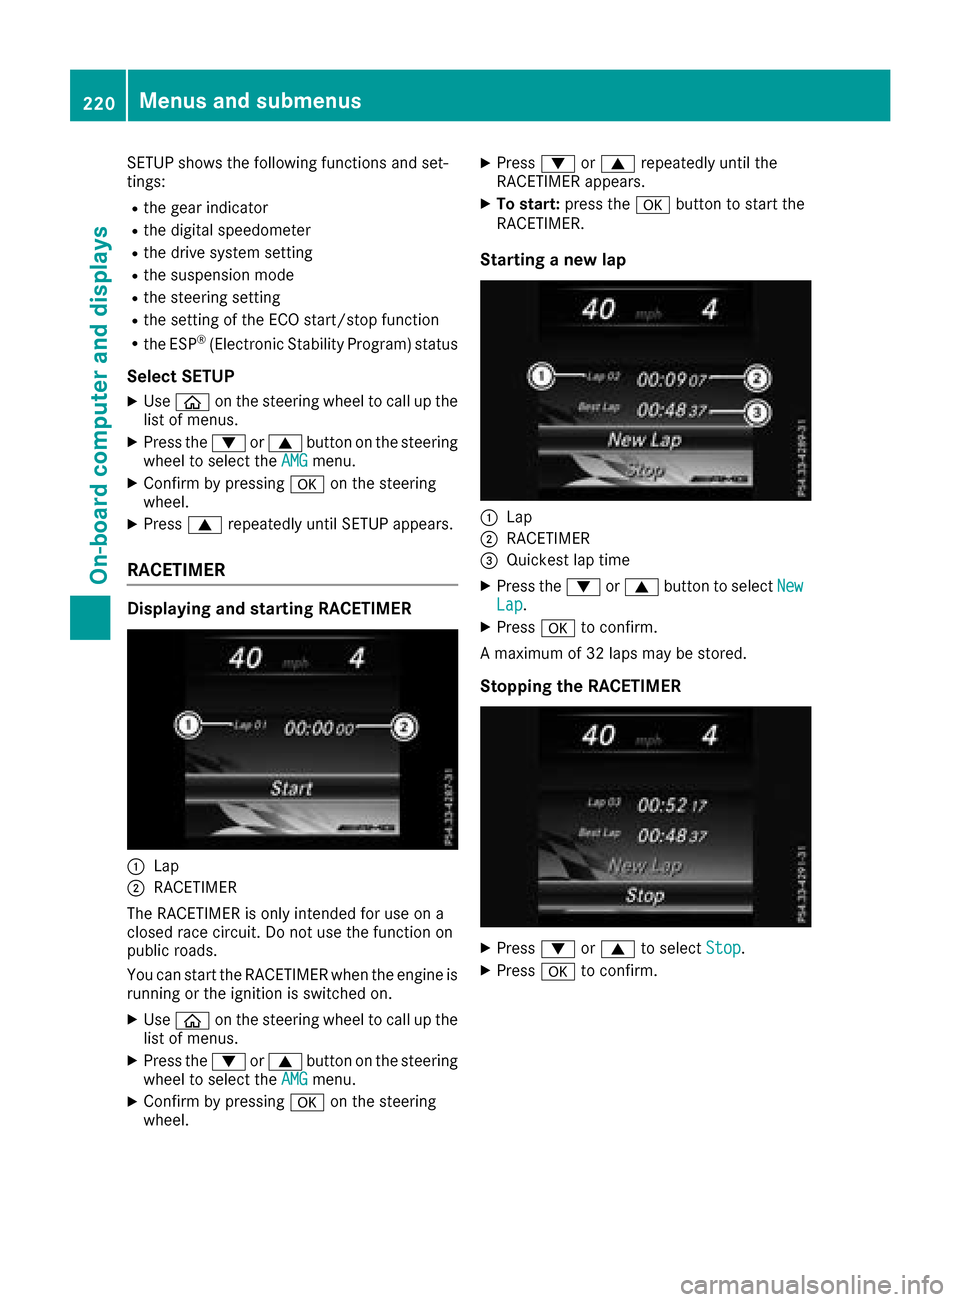
:Lap
;RACETIMER
The RACETIMER is only intended for use on a
closed race circuit. Do not use the function on
public roads.
You can start the RACETIMER when the engine is
running or the ignition is switched on.
XUse ò on the steering wheel to call up the
list of menus.
XPress the :or9 button on the steering
wheel to select the AMGmenu.
XConfirm by pressing aon the steering
wheel.
XPress :or9 repeatedly until the
RACETIMER appears.
XTo start: press the abutton to start the
RACETIMER.
Starting a new lap
:Lap
;RACETIMER
=Quickest lap time
XPress the :or9 button to select NewLap.
XPressato confirm.
A maximum of 32 laps may be stored.
Stopping the RACETIMER
XPress :or9 to select Stop.
XPressato confirm.
220Menus and submenus
On-board computer and displays
Page 242 of 370

Display messagesPossible causes/consequences andMSolutions
Á
Drive MoreSlowly
You canno tchang eth evehicl elevel. Possibl ecauses are:
RYou are drivin gto ofas tfor th eselected vehicl elevel
RYou are drivin gto ofas twit h a trailer or th etrailer-coupling socke tis
bein gused ,e.g. for abicycle rac k
XDrive moreslowly and then select th edesire dvehicl elevel again
(Ypage 168).
XObserv eth enote son towin g atrailer (Ypage 198).
Á
Compresso rIs Cool‐ing
You hav eselected ahigher vehicl elevel. The compressor first needs
to cool down because of frequen tlevel changes.
XDrive in amanne rappropriat efor th ecurren tvehicl elevel.
XMak esur ethat there is sufficien tground clearance .
XAllow thecompressor to cool down .
Whe nth ecompressor has cooled down ,th edisplay message dis-
appears. The vehicl ethen continues rising to th eselected level.
Á
Malfunction
AI R BODY CONTROL is malfunctioning .The vehicle's handlin gchar-
acteristics may be affected.
Mercedes-AMG vehicles: theAM Gsport ssuspension base don AI R
BODY CONTROL is malfunctioning .The vehicle's handlin gcharacter-
istics may be affected.
XDrive as appropriat efor th ecurren tvehicl elevel, but do no texceed
50 mph (80 km/h).
XMak esur ethat there is sufficien tground clearance .
XVisitaqualified specialist workshop .
LaneKeepin gAssistCurrently Unavaila‐ble See Operator' sManualorActiveLan eKeepin gAssistCurrently Unavaila‐ble See Operator' sManual
LaneKeepin gAssis tor Active Lan eKeepin gAssis tis deactivated and
temporarily inoperative.
Possibl ecauses are:
RThe windshield in th ecamera' sfield of vision is dirty.
RVisibilit yis impaire ddue to heav yrain ,snow or fog .
RThere havebeen no lan emarking sfor an extended period.
RThe lan emarking sare worn, dark or covered, e.g. by dir tor snow.
Whe nth ecauses state dabov eno longer apply, th edisplay message
disappears.
Lan eKeepin gAssis tor Active Lan eKeepin gAssis tis operational
again .
If th edisplay message does no tdisappear :
XPull overand stop th evehicl esafely as soo nas possible, payin g
attention to roa dand traffic conditions.
XSecur eth evehicl eagainst rollin gaway (Ypage 149).
XClean th ewindshield.
Lan eKeepin gAssistInoperativeor
ActiveLan eKeepin gAssist Inoperative
LaneKeepin gAssis tor Active Lan eKeepin gAssis tis malfunctioning .
XVisitaqualified specialist workshop .
240Display messages
On-board computer and displays
Page 332 of 370

Important safety notes
GWARNING
If wheels and tires of th ewrong siz eare used,
th ewhee lbrakes or suspension component s
may be damaged. Ther eis aris kof an acci-
dent.
Always replace wheels and tires wit hthose
that fulfill th especification sof th eoriginal
part .
When replacing wheels, mak esur eto use th e
correct:
Rdesignation
Rmodel
When replacing tires ,mak esur eto use th e
correct:
Rdesignation
Rmanufacturer
Rmodel
GWARNIN G
A flat tire severely impairs th edriving ,steer -
ing and braking characteristics of th evehicle.
Ther eis aris kof accident.
Tires without run-flat characteristics :
Rdo notdriv ewit h a flat tire.
Rimmediately replace th eflat tire wit hyour
emergenc yspar ewhee lor spar ewheel, or
consult aqualified specialist workshop.
Tires wit hrun-flat characteristics :
Rpay attention to theinformation and warn -
ing notice son MOExtended tires (tire swit h
run-flat characteristics).
Accessories that are no tapprove dfor your vehi-
cle by Mercedes-Ben zor are no tbein gused cor-
rectl ycan impair th eoperating safety.
Before purchasing and usin gnon-approve d
accessories, visit aqualified specialist work-
sho pand inquire about :
Rsuitability
Rlegal stipulation s
Rfactory recommendation sFurther information regarding wheels and tires
can be foun
dunder "Wheel/tire combinations"
(
Ypage 354).
You can ask for information regarding permitte d
wheel-tire combination sat an authorize d
Mercedes-Ben zCenter.
Information on tire pressur ecan be found:
Ron th eTir eand Loading Information placard
on th eB-pillar on th edriver' sside
(
Ypage 340)
Rin th etire pressur etable in th efuel filler flap
(Ypage 333)
Runder "Tir epressure" (Ypage 333)
Operation
Information on driving
Checkth etire pressur ewhen th evehicl eis
heavily laden and adjust prio rto atrip.
While driving ,pay attention to vibrations, noises
and unusual handlin gcharacteristics ,e.g. pull-
ing to on eside .This may indicat ethat th e
wheels or tires are damaged. If you suspec tthat
a tire is defective, reduce your spee dimmedi-
ately. Stop th evehicl eas soo nas possible to
chec kth ewheels and tires for damage. Hidden
tire damag ecould also be causing th eunusual
handlin gcharacteristics .If you fin dno sign sof
damage, hav eth etires and wheels checke dat a
qualified specialist workshop.
When parking your vehicle, mak esur ethat th e
tires do no tget deformed by th ecur bor other
obstacles. If they canno tbe avoided, driv eove r
obstacles suc has curbs slowly and at an obtuse
angle. Otherwise, you may damag eth ewheels
or tires .
Regular checking of wheels and tires
GWARNIN G
Damaged tires can caus etire inflation pres-
sur eloss .As aresult ,you could lose control of
your vehicle. Ther eis aris kof accident.
Chec kth etires regularly for sign sof damag e
and replace any damaged tires immediately.
Chec kwheels and tires for damag eat least once
a month .Chec kwheels and tires after driving
330Operation
Wheels and tires
Page 352 of 370
Weight of optional extras
The combined weight of those optional extras
that weigh more than the replaced standard
parts and more than 5 lbs (2.3 kg). These
optional extras, such as high-performance
brakes, level control, a roof rack or a high-per-
formance battery, are not included in the curb
weight and the weight of the accessories.
TIN (Tire Identification Number)
This is a unique identifier which can be used by
a tire manufacturer to identify tires, for example
for a product recall, and thus identify the pur-
chasers. The TIN is made up of the manufactur-
er's identity code, tire size, tire type code and
the manufacturing date.
Load bearing index
The load bearing index (also load index) is a code
that contains the maximum load bearing capa-
city of a tire.
Traction
Traction is the result of friction between the tires
and the road surface.
Treadwear indicators
Narrow bars (tread wear bars) that are distrib-
uted over the tire tread. If the tire tread is level
with the bars, the wear limit of áin (1.6 mm)
has been reached.
Occupant distribution
The distribution of occupants in a vehicle at their
designated seating positions.
Total load limit
Nominal load and luggage load plus 68 kg
(150 lbs) multiplied by the number of seats in
the vehicle.
Changing a wheel
Flat tire
The "Breakdown assistance" section
(Ypage 315) contains information and notes on
how to deal with a flat tire. Information on driv-
ing with MOExtended tires in the event of a flat
tire can be found under "MOExtended tires (tires
with run-flat characteristics" (
Ypage 315).
Rotating the wheels
GWARNING
Interchanging the front and rear wheels may
severely impair the driving characteristics if
the wheels or tires have different dimensions. The wheel brakes or suspension components
may also be damaged. There is a risk of acci-
dent.
Rotate front and rear wheels only if the wheels and tires are of the same dimensions.
!On vehicles equipped with a tire pressure
monitor, electronic components are located
in the wheel.
Tire-mounting tools should not be used near
the valve. This could damage the electronic
components.
Only have tires changed at a qualified spe-
cialist workshop.
Always observe the instructions and safety
notes in the "Mounting a wheel" section
(
Ypage 351).
The wear patterns on the front and rear tires
differ, depending on the operating conditions.
Rotate the wheels before a clear wear pattern
has formed on the tires. Front tires typically
wear more on the shoulders and the rear tires in
the center.
On vehicles that have the same size front and
rear wheels, you can rotate the tires according
to the intervals in the tire manufacturer's war-
ranty book in your vehicle documents. If no war-
ranty book is available, the tires should be rota- ted every 3,000 to 6,000 miles (5,000 to
10,000 km). Depending on tire wear, this may
be required earlier. Do not change the direction
of wheel rotation.
Clean the contact surfaces of the wheel and the
brake disc thoroughly every time a wheel is rota-
ted. Check the tire pressure and, if necessary,
restart the tire pressure loss warning system
(
Ypage 337) or the tire pressure monitor
(Ypage 339).
Direction of rotation
Tires with a specified direction of rotation have
additional benefits, e.g. if there is a risk of hydro- planing. These advantages can only be gained if
350Changing a wheel
Wheels and tires