2017 MERCEDES-BENZ GLC COUPE steering
[x] Cancel search: steeringPage 292 of 370
The system is available if:
Rit has been activated and is operational
Rthe corresponding mobile phone network is
available for transmitting data to the Cus-
tomer Center
Ra service subscription is available
Determining the location of the vehicle on a map
is only possible if:
RGPS reception is available
Rthe vehicle position can be forwarded to the
Customer Assistance Center
The mbrace system
To adjust the volume during a call, proceed as
follows:
XPress the WorX button on the multi-
function steering wheel.
or
XUse the multimedia system volume control.
The system offers various services, e.g.:
RAutomatic and manual emergency call
RRoadside Assistance call
RInfo call
You can find information and a description of all
available features under "Owners Online" at
http://www.mbusa.com.
System self-test
After you have switched on the ignition, the sys- tem carries out a self-diagnosis.
A malfunction in the system has been detected
if one of the following occurs:
RThe indicator lamp in the SOS button does notcome on during the system self-test.
RThe indicator lamp in the FRoadside
Assistance button does not light up during
self-diagnosis of the system.
RThe indicator lamp in the ïInfo call button
does not light up during the system self-diag-
nosis
RThe indicator lamp in one or more of the fol-
lowing buttons continues to light up red after
the system self-diagnosis:
-SOS button
-F Roadside Assistance call button
-Info call button ï
Rafter the system self-diagnosis, the Inoper‐ativeorServiceNotActivatedmessage
appears in the multifunction display.
If a malfunction is indicated as outlined above,
the system may not operate as expected. In the
event of an emergency, help will have to be
summoned by other means.
Have the system checked at the nearest
Mercedes-Benz Service Center or contact the
following service hotlines:
Mercedes-Benz Customer Assistance Center at
1-800-FOR-MERCedes (1-800-367-6372) or
1-866-990-9007
Emergency call
Important safety notes
GWARNING
It can be dangerous to remain in the vehicle,
even if you have pressed the SOS button in an emergency if:
Ryou see smoke inside or outside of the vehi-
cle, e.g. if there is a fire after an accident
Rthe vehicle is on a dangerous section of
road
Rthe vehicle is not visible or cannot easily beseen by other road users, particularly when
dark or in poor visibility conditions
There is a risk of an accident and injury.
Leave the vehicle immediately in this or simi-
lar situations as soon as it is safe to do so.
Move to a safe location along with other vehi-
cle occupants. In such situations, secure the
vehicle in accordance with national regula-
tions, e. g. with a warning triangle.
General notes
Observe the notes on system activation
(Ypage 289).
An emergency call is dialed automatically if an
air bag or Emergency Tensioning Device is trig-
290Features
Stowage and features
Page 294 of 370
multifunction display. The audio output is
muted.
If a connection can be made, the Call
Connec‐tedmessage appears in the multifunction dis-
play.
If a mobile phone network and GPS reception
are available, the system transfers data to the
Mercedes-Benz Customer Assistance Center,
for example:
Rcurrent location of the vehicle
Rvehicle identification number
The multimedia system display indicates that a
call is active. During the call, you can change to
the navigation menu by pressing the NAVI but-
ton on the multimedia system, for example.
Voice output is not available in this case.
A voice connection is established between the
Mercedes-Benz Customer Assistance Center
and the vehicle occupants.
From the remote malfunction diagnosis, the
Mercedes-Benz Customer Assistance Center
can ascertain the nature of the problem
(
Ypage 295).
The Mercedes-Benz Customer Assistance Cen-
ter either sends a qualified Mercedes-Benz tech-
nician or makes arrangements for your vehicle
to be transported to the nearest Mercedes-Benz Service Center.
You may be charged for services such as repair
work and/or towing.
You can find more information in the separate
mbrace manual.
The system has not been able to initiate a Road- side Assistance call, if:
Rthe F indicator lamp for the Roadside
Assistance call button is flashing continu-
ously.
Rno voice connection to the Mercedes-Benz
Customer Assistance Center was estab-
lished.
This can occur if the relevant mobile phone net-
work is not available, for example.
The Call Failed
message appears in the mul-
tifunction display.
XTo end a call: press the~button on the
multifunction steering wheel.
or
XPress the corresponding multimedia system
button for ending a phone call.
Info call button
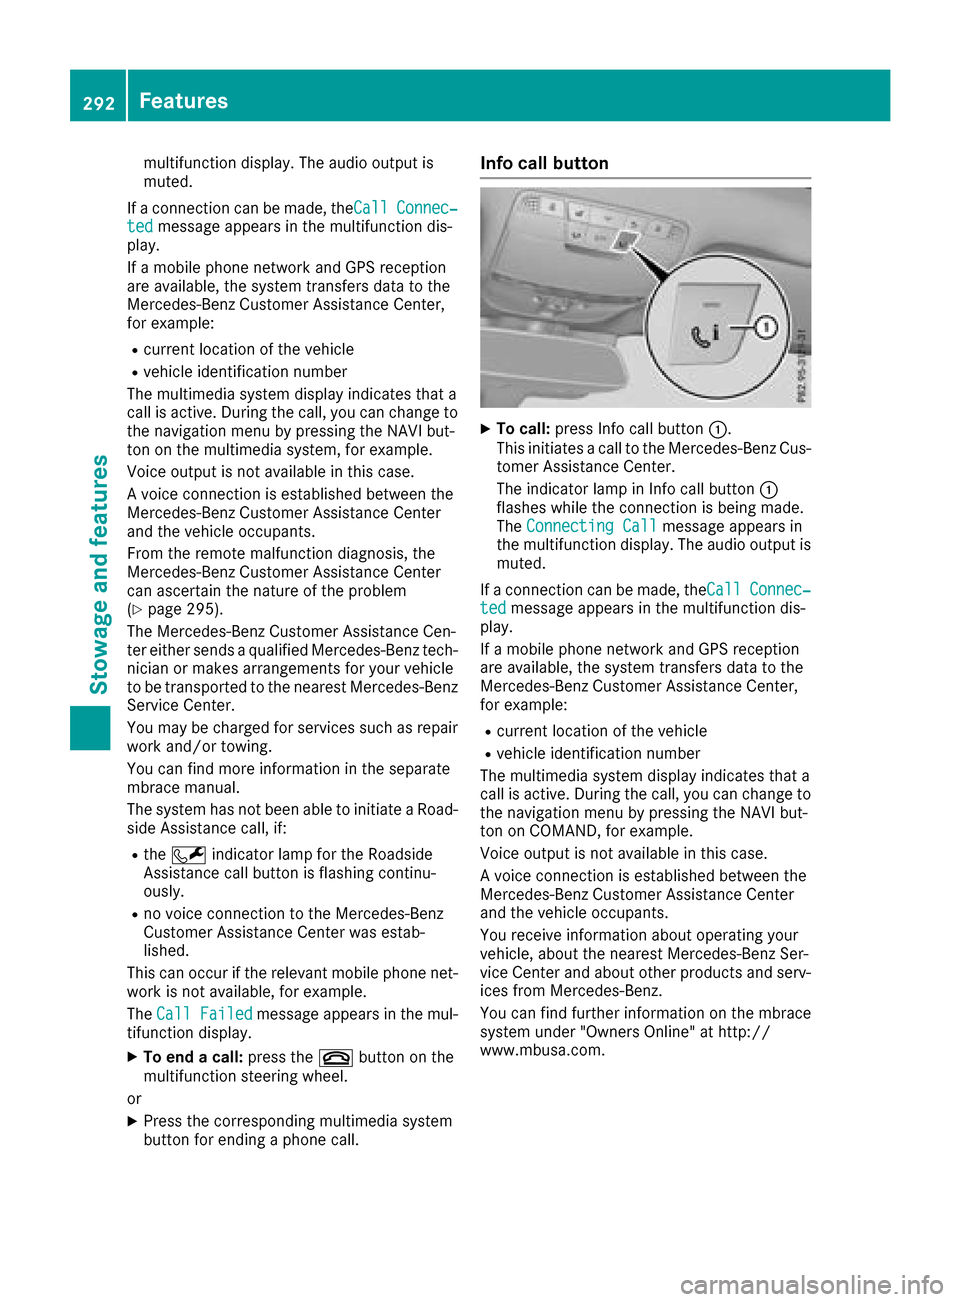
XTo call: press Info call button :.
This initiates a call to the Mercedes-Benz Cus-
tomer Assistance Center.
The indicator lamp in Info call button :
flashes while the connection is being made.
The Connecting Call
message appears in
the multifunction display. The audio output is muted.
If a connection can be made, the Call
Connec‐tedmessage appears in the multifunction dis-
play.
If a mobile phone network and GPS reception
are available, the system transfers data to the
Mercedes-Benz Customer Assistance Center,
for example:
Rcurrent location of the vehicle
Rvehicle identification number
The multimedia system display indicates that a
call is active. During the call, you can change to
the navigation menu by pressing the NAVI but-
ton on COMAND, for example.
Voice output is not available in this case.
A voice connection is established between the
Mercedes-Benz Customer Assistance Center
and the vehicle occupants.
You receive information about operating your
vehicle, about the nearest Mercedes-Benz Ser-
vice Center and about other products and serv-
ices from Mercedes-Benz.
You can find further information on the mbrace
system under "Owners Online" at http://
www.mbusa.com.
292Features
Stowage and features
Page 295 of 370
The system has not been able to initiate an MB
Info call, if:
Rthe indicator lamp in theïInfo call button
is flashing continuously.
Rno voice connection to the Mercedes-Benz
Customer Assistance Center was estab-
lished.
This can occur if the relevant mobile phone net-
work is not available, for example.
The Call Failed
message appears in the mul-
tifunction display.
XTo end a call: press the~button on the
multifunction steering wheel.
or
XPress the corresponding multimedia system
button for ending a phone call.
Call priority
When service calls are active, e.g. Roadside
Assistance or Info calls, an emergency call can
still be initiated. In this case, an emergency call
will take priority and override all other active
calls.
The indicator lamp of the respective button
flashes until the call is ended.
An emergency call can only be terminated by the
Mercedes-Benz Customer Assistance Center.
All other calls can be ended by pressing:
Rthe ~ button on the multifunction steering
wheel
Rthe corresponding button in the multimedia
system to end the voice call
When a call is initiated, the audio system is
muted.
The mobile phone is no longer connected to the multimedia system.
However, if you want to use your mobile phone,
do so only when the vehicle is stationary and in
a safe location.
Downloading destinations
Downloading destinations
Downloading destinations gives you access to a
database with over 15 million points of interest
(POIs). These can be downloaded on the navi-
gation system in your vehicle. If you know the
destination, the address can be downloaded.
Alternatively, you can obtain the location of Points of Interest (POIs)/important destinations
in the vicinity.
Furthermore, you can download routes with up
to four way points.
You are prompted to confirm route guidance to
the address entered.
XSelect Yesby turning 3or sliding 1
the controller and confirm with 7.
The system calculates the route and subse-
quently starts the route guidance with the
address entered.
If you select No
the address can be stored in
the address book.
The destination download function is available
if:
Rthe vehicle is equipped with a navigation sys-
tem.
Rthe relevant mobile phone network is availa-
ble and data transfer is possible.
Route Assistance
This service is part of the mbrace PLUS Package
and cannot be purchased separately.
You can use the Route Assistance function even
if the vehicle is not equipped with a navigation
system.
Within the framework of this service, you receive
a professional and reliable form of navigation
support without having to leave your vehicle.
The customer service representative finds a
suitable route depending on your vehicle's cur-
rent position and the desired destination. You
will then be guided live through the current route
section.
Search & Send
General notes
To use "Search & Send", your vehicle must be
equipped with mbrace and a navigation system.
Additionally, an mbrace service subscription
must be completed.
"Search & Send" is a destination entry service. A
destination address which is found on Google
Maps
®can be transferred via mbrace directly to
your vehicle's navigation system.
Features293
Stowage and features
Z
Page 306 of 370

Adding washer fluid to the windshield
washer system
GWARNING
Windshield washer concentrate could ignit eif
it comes int ocontact wit hhot engin ecompo -
nent sor th eexhaust system. There is aris kof
fir eand injury.
Mak esur ethat no windshield washer con-
centrat eis spilled next to th efiller neck .
Example: addin gliquid to th ewindshield
washer system
XTo open :pull cap :upwards by th etab and
open .
XAddth epremixed washer fluid .
XTo close:press cap :onto th efiller neck
until it engages.
If th ewasher fluid level drops belo wtherecom-
mended minimum fluid level of 1. 1US qt (1. 0l),
a message appear sin th emultifunction display
prompting you to add washer fluid (
Ypage 249).
Further information on washer fluid
(
Ypage 363).
ASSYST PLUS
Service message
The ASSYS TPLU Sservic einterval display
inform syou of th enext servic edue date.
Information on th etyp eof servic eand servic e
intervals (see th eseparat eMaintenance Book -
let).
Further information can be obtained at aquali-
fie dspecialis tworkshop ,e.g. an authorize d
Mercedes-Benz Center, or at
http://www.mbusa.co m(US Aonly).
iThe ASSYS TPLU Sservic einterval display
does no tsho wany information on th eengin e
oil level. Observ eth enote son th eengin eoil
level (
Ypage 301).
The multifunction display shows aservic emes -
sage for several seconds, for example:
RServic e Ain XX Day s
RService ADue
RServic e AOverdu eby XX Day s
Dependingon th eoperating condition sof th e
vehicle, th eremaining time or distanc euntil th e
next servic edue dat eis displayed.
The lette rA
or B,possibl yin connection wit h a
number or another letter, indicates th etyp eof
service. A
standsfor aminor servic eand Bfora
major service.
You can obtain further information from an
authorize dMercedes-Benz Center.
The ASSYS TPLU Sservic einterval display does
no ttak eint oaccoun tany periods of time during
whic hth ebattery is disconnected.
Maintainin gth etime-dependen tservic esched-
ule:
XNot edown th eservic edue dat edisplayed in
th emultifunction display before disconnect -
ing th ebattery.
or
XAfte rreconnecting th ebattery, subtrac tth e
battery disconnection periods from th eser -
vic edat eshown on th edisplay.
Hiding a service message
XPress th ea or% buttonon th esteering
wheel.
Displaying service messages
XSwitc hon th eignition .
XUseò on thesteering whee lto call up th e
list of menus.
XPress 9or: on thesteering whee lto
select th eServic emenuand confirm wit h
a.
XPress 9or: on thesteering whee lto
select th eASSYST PLU Ssubmenuand con-
fir m wit ha.
The servic edue dat eappear sin th emulti-
function display.
304ASSYST PLUS
Maintenance and care
Page 313 of 370
XBefore cleaning the display, make sure that it
is switched off and has cooled down.
XClean the display surface using a commer-
cially available microfiber cloth and TFT/LCD
display cleaner.
XDry the display surface using a dry microfiber
cloth.
Cleaning the plastic trim
GWARNING
Care products and cleaning agents containing solvents cause surfaces in the cockpit to
become porous. As a result, plastic parts may
come loose in the event of air bag deploy-
ment. There is a risk of injury.
Do not use any care products and cleaning
agents to clean the cockpit.
!Never attach the following to plastic surfa-
ces:
Rstickers
Rfilms
Rperfume oil container or similar
You could otherwise damage the plastic.
!Do not allow cosmetics, insect repellent or
sunscreen to come into contact with the plas-
tic trim. This maintains the high-quality look of
the surfaces.
XWipe the plastic trim with a damp, lint-free
cloth, e.g. a microfiber cloth.
XHeavy soiling: use care and cleaning prod-
ucts recommended and approved by
Mercedes-Benz.
The surface may change color temporarily.
Wait until the surface is dry again.
Cleaning the steering wheel and selec-
tor lever
XThoroughly wipe with a damp cloth or use
leather care agents that have been recom-
mended and approved by Mercedes-Benz.
Cleaning genuine wood and trim ele-
ments
!Do not use solvent-based cleaning agents
such as tar remover, wheel cleaners, polishes or waxes. There is otherwise a risk of damag-
ing the surface.
!Do not use chrome polish on trim pieces.
The trim pieces have a chrome look but are
mostly made of anodized aluminum and can
lose their shine if chrome polish is used. Use
a damp, lint-free cloth instead when cleaning
the trim pieces.
If the chrome-plated trim pieces are very
dirty, you can use a chrome polish. If you are unsure as to whether the trim pieces are
chrome-plated or not, consult an authorized
Mercedes-Benz Center.
XWipe the wooden trim and trim pieces with a
damp, lint-free cloth, e.g. a microfiber cloth.
XTrim elements with piano black finish:
wipe with a soft, damp cotton cloth. Use clean
water.
XHeavy soiling: use care and cleaning prod-
ucts recommended and approved by
Mercedes-Benz.
Cleaning the seat covers
General notes
!Do not use a microfiber cloth to clean covers
made out of real leather, artificial leather or
DINAMICA. If used often, these can damage
the cover.
Note that regular care is essential to ensure that
the appearance and comfort of the covers is
retained over time.
Genuine leather seat covers
!To retain the natural appearance of the
leather, observe the following cleaning
instructions:
RClean genuine leather covers carefully with a damp cloth and then wipe the covers
down with a dry cloth.
RMake sure that the leather does not
become soaked. It may otherwise become
rough and cracked.
ROnly use leather care agents that have
been tested and approved by Mercedes-
Benz. You can obtain these from a qualified
specialist workshop.
Leather is a natural product.
It exhibits natural surface characteristics, for
example:
Care311
Maintenance and care
Z
Page 321 of 370
XTo reduce the tire pressure:depress pres-
sure release button :next to pressure
gauge ;.
XWhen the tire pressure is correct, unscrew the
filler hose from the valve of the sealed tire.
Tire sealant may escape when the filler hose is
unscrewed.
XScrew the valve cap onto the tire valve of the
sealed tire.
XPull the tire sealant bottle out of the tire infla-
tion compressor.
The filler hose remains attached to the tire
sealant bottle.
XDrive to the nearest qualified specialist work-
shop and have the tire changed there.
XHave the tire sealant bottle replaced as soon
as possible at a qualified specialist workshop.
XHave the tire sealant bottle replaced every
four years at a qualified specialist workshop.
Battery (vehicle)
12 V battery – important safety notes
Special tools and expert knowledge are required
when working on the battery, e.g. removal and
installation. You should therefore have all work
involving the battery carried out at a qualified
specialist workshop.
GWARNING
Work carried out incorrectly on the battery
can lead, for example, to a short circuit and
thus damage the vehicle electronics. This can
lead to function restrictions applying to
safety-relevant systems, e.g the lighting sys-
tem, the ABS (anti-lock braking system) or the
ESP
®(Electronic Stability Program). The oper-
ating safety of your vehicle may be restricted.
You could lose control of the vehicle, for
example:
Rwhen braking
Rin the event of abrupt steering maneuvers
and/or when the vehicle's speed is not
adapted to the road conditions
There is a risk of an accident.
In the event of a short circuit or a similar inci-
dent, contact a qualified specialist workshop
immediately. Do not drive any further. You
should have all work involving the battery car- ried out at a qualified specialist workshop.
For further information about ABS and ESP
®,
see (Ypage 64) and (Ypage 69).
All vehicles except vehicles with a lithium-
ion battery:
GWARNING
Electrostatic build-up can lead to the creation of sparks, which could ignite the highly explo-
sive gases of a battery. There is a risk of an
explosion.
Before handling the battery, touch the vehicle
body to remove any existing electrostatic
build-up.
The highly flammable gas mixture forms when
charging the battery as well as when jump-start-
ing.
Always make sure that neither you nor the bat-
tery is electrostatically charged. A build-up of
electrostatic charge can be caused, for exam-
ple:
Rby wearing clothing made from synthetic
fibers
Rdue to friction between clothing and seats
Rif you push or pull the battery across the car-
pet or other synthetic materials
Rif you rub the battery with a cloth
GWARNING
During the charging process, a battery produ-
ces hydrogen gas. If a short circuit occurs or
sparks are created, the hydrogen gas can
ignite. There is a risk of an explosion.
RMake sure that the positive terminal of a
connected battery does not come into con- tact with vehicle parts.
RNever place metal objects or tools on a bat-
tery.
RIt is important that you observe the descri-
bed order of the battery terminals when
connecting and disconnecting a battery.
RWhen jump-starting, make sure that the
battery poles with identical polarity are
connected.
Battery (vehicle)319
Breakdo wn assis tance
Z
Page 326 of 370
XConnect positive terminal:on your veh icleto positive terminal ;of donor battery Cusing the
jumper cable, Always begin with positive terminal :on your own vehicle first.
XStart the engine of the donor veh icleand run itat idling speed.
XConnect negative terminal =of donor battery Cto ground point ?of your vehicle using the
jumper cable, connecting the jumper cable to battery of other vehicle Cfirst.
XStart the engine.
XBefore disconnecting the jumper cables, let the engine run for several minutes.
XFirst, remove the jumper cables from ground point? and negative terminal =, then from pos-
itive clamp :and positive terminal ;. Begineach time at the contacts on your own vehicle first.
XClose cover Aof positive terminal :after removing jumper cables.
XFold panel Bshut.
XHave the battery checked at a qualified specialist workshop.
Jump-starting isnot cons idered to bea normal operating condition.
iJumper cables and further information regarding jump-starting can be obtained at any qualified
specialist workshop.
Towing and tow-starting
Important safety notes
GWARNING
Functions relevant to safety are restricted or
no longer availab leif:
Rthe engine isnot running.
Rthe brake system or the power steering is
malfunctioning.
Rthere isa malfunction inthe voltage supply
or the veh icle's electrical system.
If your veh icle is bein g towed, much more
force may benecessary to steer or brake.
There isa risk of an acc ident.
In such cases, use a tow bar. Before to wing,
make sure that the steering moves freely.
GWAR NING
You can no longer steer the veh icle ifthe
steering wheel lock has been engaged. There
is a risk of an acc ident.
Alwa ysswit ch off the ignition when to wingthe
veh icle wit h a tow cable or a tow bar.
GWARNING
When to wingor tow-starting another vehicle
and its weight isgreater than the permissible
gross weight of your vehicle, the:
Rthe to wingeye could detach itself
Rthe vehicle /trailer combination could roll-
over.
There is a risk of an accident.
When towing or tow-starting another vehicle,
its weight should not be greater than the per- missible gross weight of your vehicle.
Details on the permissible gross vehicle weight
of your vehicle can be found on the vehicle iden-
tification plate (
Ypage 357).
!When Active Brake Assist, Distance Pilot
DISTRONIC or the HOLD function is activated,
the vehicle brakes automatically in certain
situations.
To avoid damage to the vehicle, deactivate
these systems in the foll owing or similar sit-
uations:
Rwhen to wingthe vehicle
Rin the car wash
!Make sure that the electric parking brake is
released. Ifthe electric parking brake is faulty,
vis ita qualified specialist workshop.
!Only secure the tow rope or tow bar at the
to wing eyes, or the trailer tow hitch, if availa-
ble. You could otherwise damage the vehicle.
324Towing and tow-starting
Breakdown assistance
Page 328 of 370

XRemove thetowin geye from th eretainer
(Ypage 314).
XMercedes-AM Gvehicles: useasuitable
object, e.g. ascrewdriver, to pry off cover :
on th efron tbumper from underneath. Tak e
th ecover from th eopening ,but do no t
remove it .
Press th emar kon cover :on th erear
bumper inward and remove .
XAll other vehicles:press themar kon
cover :inward and remove .
XScrew in thetowin geye clockwise as far as it
will go and tighten it .
Vehicles wit h atrailer to whitch do no thav e a
bracke tfor th escrew-in towin geye at th eback.
Connect th etowbar to th etrailer to whitch
(
Ypage 199).
Removing the towing eye
XUnscrew and remove th etowin geye.
XAttac hcover :to th ebumper and press until
it engages.
Towing a vehicle with both axles on
the ground
The automatic transmission automatically shifts
to position jwhen you open th edriver' sor
front-passenger door or when you remove th e
SmartKey from th eignition lock. It is essential to
observ eth efollowin gsteps to ensur ethat th e
automatic transmission remain sin position i
during towing.
XMak esur ethat th evehicl eis stationary.
XTurn th eSmartKey to position 2in th eigni-
tion lock.
XDepress and hold th ebrak epedal .
XShift th eautomatic transmission to position
i.
XLeav eth eSmartKey in position 2in th eigni-
tion lock.
XReleas eth ebrak epedal .
XReleas eth eelectric parking brake.
XSwitc hon th ehazard warning lamp s
(Ypage 110).
In order to signal achang eof direction when
towin gth evehicl ewit hth ehazard warning
lamp sswitched on ,use th ecombination switch
as usual. In this case, only th eindicator lamp sfor th
edirection of travel flash. Afte rresetting
th ecombination switch ,th ehazard warning
lamp start sflashin gagain .
Transporting the vehicle
General notes
!When th evehicl eis loade dfor transport, th e
fron tand rear axles mus tbe stationary and on
th esam etransportation vehicle. Positioning
ove rth econnection poin tof th etranspor t
vehicl eis no tpermitted. The driv etrain may
otherwise be damaged.
!You may only secure th evehicl eby th e
wheels, no tby part sof th evehicl esuc has
axl eor steering components. Otherwise, th e
vehicl ecould be damaged.
The towin geye or trailer to whitch can be used
to pull th evehicl eonto atrailer or transporte rif
you wish to transpor tit.
XTurn th eSmartKey to position 2in th eigni-
tion lock.
XShift th eautomatic transmission to position
i.
As soon as th evehicle ha sbeen loaded:
XPreven tth evehicl efrom rollin gaway by
applyin gth eelectric parking brake.
XShift th eautomatic transmission to position
j.
XTurn th eSmartKey to position uin th eigni-
tion loc kand remove it .
XSecureth evehicle.
326Towing and tow-starting
Breakdown assistance