2017 MERCEDES-BENZ GLC COUPE Front
[x] Cancel search: FrontPage 187 of 370
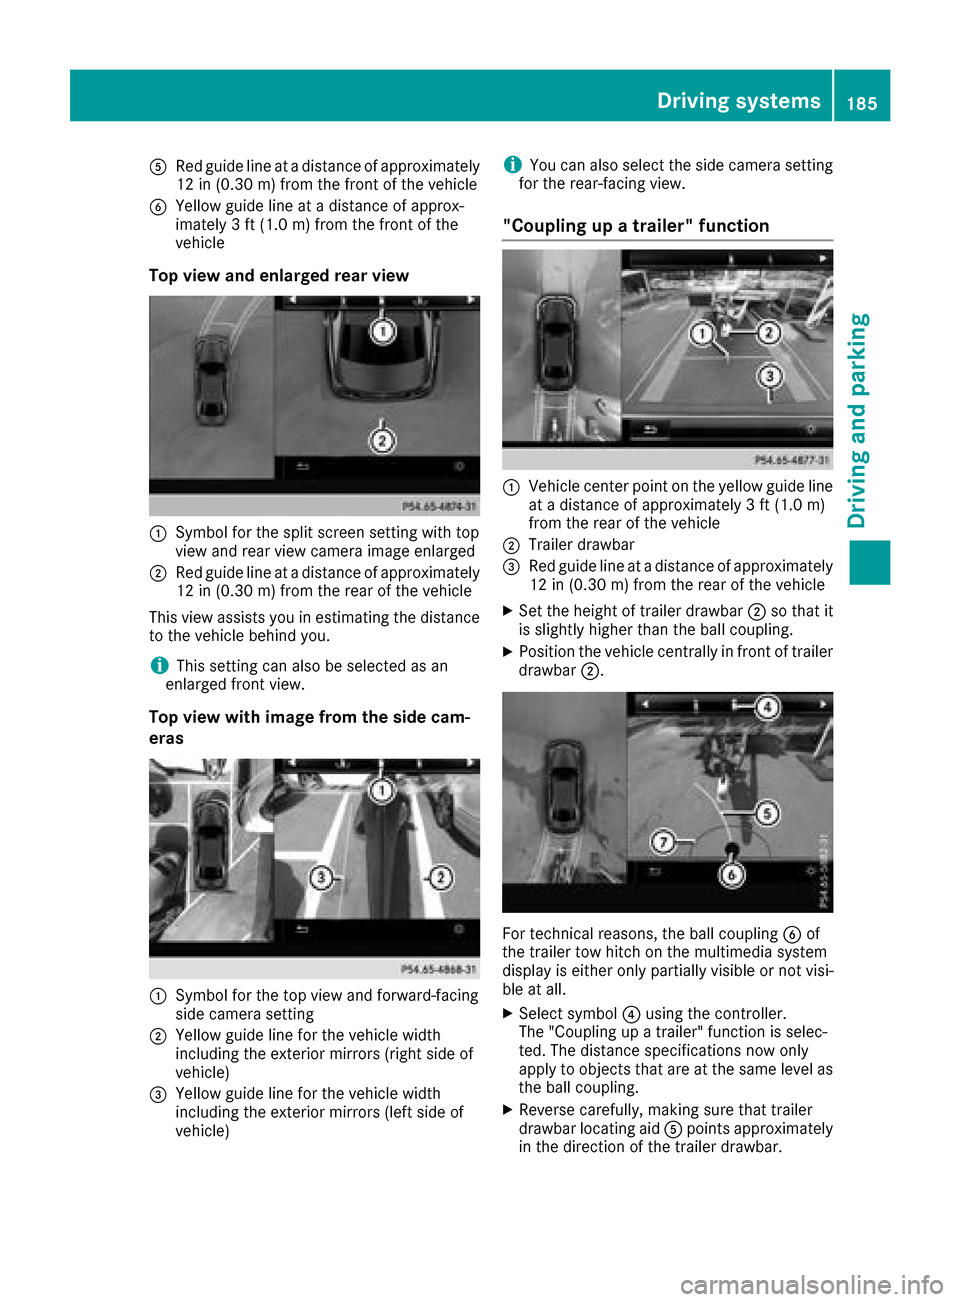
ARed guide lineat adistanc eof approximately
12 in (0.30m) from the front of the vehicle
BYellow guide line at a distance of approx-
imately 3 ft (1.0 m) fromthe front of the
vehicle
Top view and enlarged rear view
:Symbol for the split screen setting with top
view and rear view camera image enlarged
;Red guide line at a distance of approximately
12 in (0.30 m)from the rear of the vehicle
This view assists you in estimating the distance
to the vehicle behind you.
iThis setting can also be selected as an
enlarged front view.
Top view with image from the side cam-
eras
:Symbol for the top view and forward-facing
side camera setting
;Yellow guide line for the vehicle width
including the exterior mirrors (right side of
vehicle)
=Yellow guide line for the vehicle width
including the exterior mirrors (left side of
vehicle)
iYou can also select the side camera setting
for the rear-facing view.
"Coupling up a trailer" function
:Vehicle center point on the yellow guide line
at a distance of approximately 3 ft (1.0 m)
from the rear of the vehicle
;Trailer drawbar
=Red guide line at a distance of approximately
12 in (0.30 m) from the rear of the vehicle
XSet the height of trailer drawbar ;so that it
is slightly higher than the ball coupling.
XPosition the vehicle centrally in front of trailer
drawbar ;.
For technical reasons, the ball coupling Bof
the trailer tow hitch on the multimedia system
display is either only partially visible or not visi-
ble at all.
XSelect symbol ?using the controller.
The "Coupling up a trailer" function is selec-
ted. The distance specifications now only
apply to objects that are at the same level as
the ball coupling.
XReverse carefully, making sure that trailer
drawbar locating aid Apoints approximately
in the direction of the trailer drawbar.
Driving systems185
Driving and parking
Z
Page 192 of 370
Warning lamp
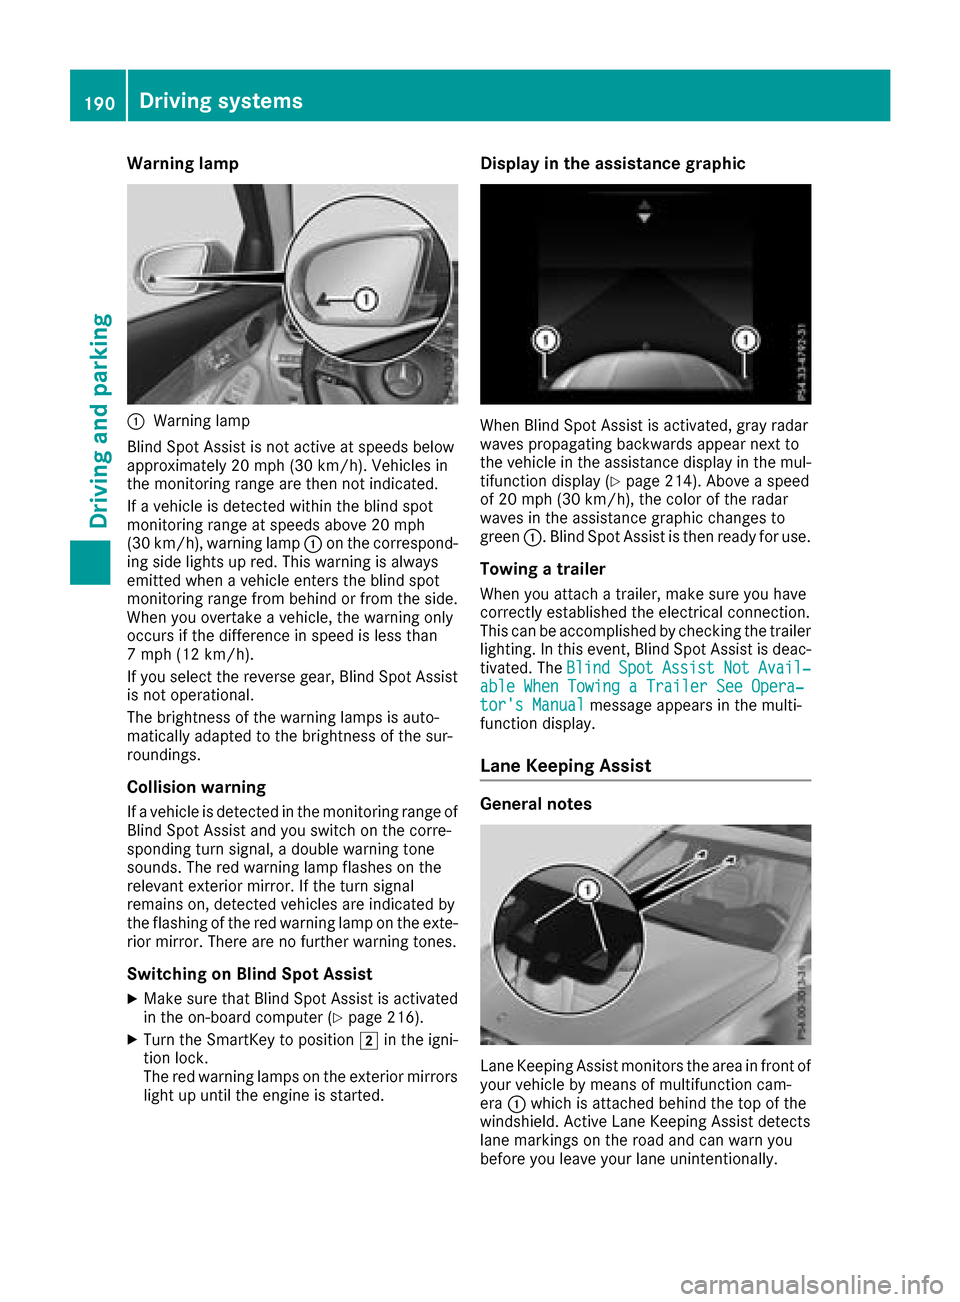
:Warning lamp
Blind Spot Assist is not active at speeds below
approximately 20 mph (30 km/h). Vehicles in
the monitoring range are then not indicated.
If a vehicle is detected within the blind spot
monitoring range at speeds above 20 mph
(30 km/h), warning lamp :on the correspond-
ing side lights up red. This warning is always
emitted when a vehicle enters the blind spot
monitoring range from behind or from the side.
When you overtake a vehicle, the warning only
occurs if the difference in speed is less than
7 mph (12 km/h).
If you select the reverse gear, Blind Spot Assist is not operational.
The brightness of the warning lamps is auto-
matically adapted to the brightness of the sur-
roundings.
Collision warning
If a vehicle is detected in the monitoring range of
Blind Spot Assist and you switch on the corre-
sponding turn signal, a double warning tone
sounds. The red warning lamp flashes on the
relevant exterior mirror. If the turn signal
remains on, detected vehicles are indicated by
the flashing of the red warning lamp on the exte-
rior mirror. There are no further warning tones.
Switching on Blind Spot Assist
XMake sure that Blind Spot Assist is activated
in the on-board computer (Ypage 216).
XTurn the SmartKey to position 2in the igni-
tion lock.
The red warning lamps on the exterior mirrors
light up until the engine is started.
Display in the assistance graphic
When Blind Spot Assist is activated, gray radar
waves propagating backwards appear next to
the vehicle in the assistance display in the mul-
tifunction display (
Ypage 214). Above a speed
of 20 mph (30 km/h), the color of the radar
waves in the assistance graphic changes to
green :. Blind Spot Assist is then ready for use.
Towing a trailer
When you attach a trailer, make sure you have
correctly established the electrical connection.
This can be accomplished by checking the trailer
lighting. In this event, Blind Spot Assist is deac-
tivated. The Blind
SpotAssistNotAvail‐able When Towing a Trailer See Opera‐tor's Manualmessage appears in the multi-
function display.
Lane Keeping Assist
General notes
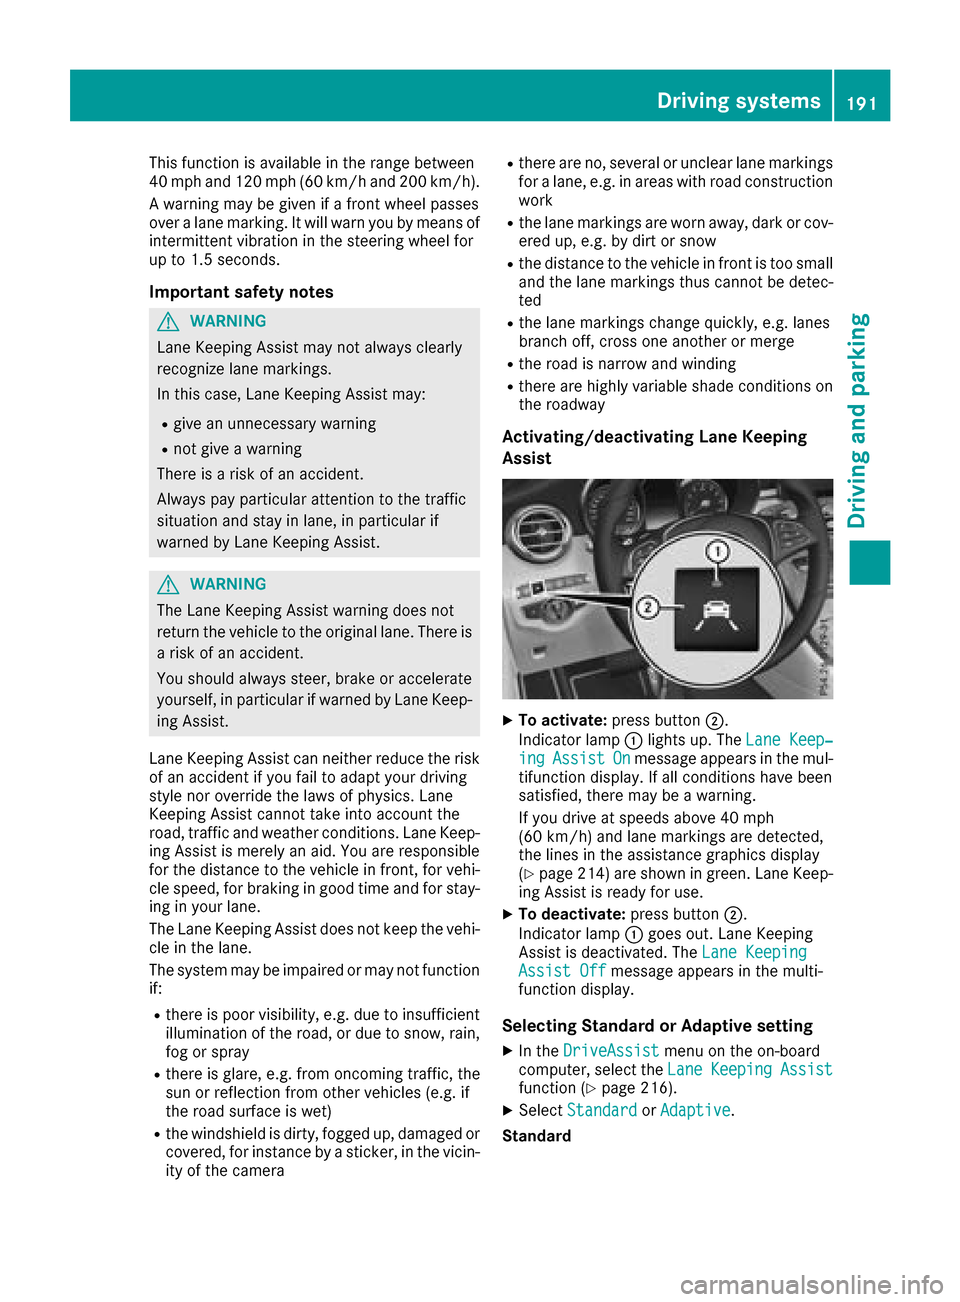
Lane Keeping Assist monitors the area in front of
your vehicle by means of multifunction cam-
era :which is attached behind the top of the
windshield. Active Lane Keeping Assist detects
lane markings on the road and can warn you
before you leave your lane unintentionally.
190Driving systems
Driving and parking
Page 193 of 370
This function is available in the range between
40 mph and 120 mph (60 km/hand 200 km/h).
A warning may be given if a front wheel passes
over a lane marking. It will warn you by means of
intermittent vibration in the steering wheel for
up to 1.5 seconds.
Important safety notes
GWARNING
Lane Keeping Assist may not always clearly
recognize lane markings.
In this case, Lane Keeping Assist may:
Rgive an unnecessary warning
Rnot give a warning
There is a risk of an accident.
Always pay particular attention to the traffic
situation and stay in lane, in particular if
warned by Lane Keeping Assist.
GWARNING
The Lane Keeping Assist warning does not
return the vehicle to the original lane. There is
a risk of an accident.
You should always steer, brake or accelerate
yourself, in particular if warned by Lane Keep-
ing Assist.
Lane Keeping Assist can neither reduce the risk of an accident if you fail to adapt your driving
style nor override the laws of physics. Lane
Keeping Assist cannot take into account the
road, traffic and weather conditions. Lane Keep-
ing Assist is merely an aid. You are responsible
for the distance to the vehicle in front, for vehi-
cle speed, for braking in good time and for stay-
ing in your lane.
The Lane Keeping Assist does not keep the vehi-
cle in the lane.
The system may be impaired or may not function
if:
Rthere is poor visibility, e.g. due to insufficient
illumination of the road, or due to snow, rain,
fog or spray
Rthere is glare, e.g. from oncoming traffic, the
sun or reflection from other vehicles (e.g. if
the road surface is wet)
Rthe windshield is dirty, fogged up, damaged or
covered, for instance by a sticker, in the vicin-
ity of the camera
Rthere are no, several or unclear lane markings
for a lane, e.g. in areas with road construction
work
Rthe lane markings are worn away, dark or cov-
ered up, e.g. by dirt or snow
Rthe distance to the vehicle in front is too small
and the lane markings thus cannot be detec-
ted
Rthe lane markings change quickly, e.g. lanes
branch off, cross one another or merge
Rthe road is narrow and winding
Rthere are highly variable shade conditions on the roadway
Activating/deactivating Lane Keeping
Assist
XTo activate: press button ;.
Indicator lamp :lights up. The Lane Keep‐
ingAssistOnmessage appears in the mul-
tifunction display. If all conditions have been
satisfied, there may be a warning.
If you drive at speeds above 40 mph
(60 km/h) and lane markings are detected,
the lines in the assistance graphics display
(
Ypage 214) are shown in green. Lane Keep-
ing Assist is ready for use.
XTo deactivate: press button;.
Indicator lamp :goes out. Lane Keeping
Assist is deactivated. The Lane Keeping
Assist Offmessage appears in the multi-
function display.
Selecting Standard or Adaptive setting
XIn the DriveAssistmenu on the on-board
computer, select the LaneKeepingAssistfunction (Ypage 216).
XSelectStandardorAdaptive.
Standard
Driving systems191
Driving an d parking
Z
Page 197 of 370

When Towing a Trailer See Operator'sManualmessage appears in the multifunction
display.
Active Lane Keeping Assist
General notes
Active Lane Keeping Assist monitors the area in
front of your vehicle by means of multifunction
camera :at the top of the windshield. Various
different areas to the front, rear and side of your
vehicle are also monitored with the aid of the
radar sensor system. Active Lane Keeping
Assist detects lane markings on the road and
can warn you before you leave your lane unin-
tentionally. If you do not react to the warning, a
lane-correcting application of the brakes can
bring the vehicle back into the original lane.
This function is available in the range between
40 mph and 120 mph (60 km/h and 200 km/h).
Important safety notes
If you fail to adapt your driving style, Active Lane
Keeping Assist can neither reduce the risk of an
accident nor override the laws of physics. Active
Lane Keeping Assist cannot take account of
road and weather conditions. It may not recog-
nize traffic situations. Active Lane Keeping
Assist is only an aid. You are responsible for the
distance to the vehicle in front, for vehicle
speed, for braking in good time and for staying in
your lane.
Active Lane Keeping Assist cannot continuously
keep your vehicle in its lane.
GWARNING
Active Lane Keeping Assist cannot always
clearly detect lane markings.
In such cases, Active Lane Keeping Assist
can:
Rgive an unnecessary warning and then
make a course-correcting brake application
to the vehicle
Rnot give a warning or intervene
There is a risk of an accident.
Always pay particular attention to the traffic
situation and keep within the lane, especially
if Active Lane Keeping Assist alerts you. Ter-
minate the intervention in a non-critical driv-
ing situation.
The system may be impaired or may not function
if:
Rthere is poor visibility, e.g. due to insufficient
illumination of the road, or due to snow, rain,
fog or spray
Rthere is glare, e.g. from oncoming traffic, the
sun or reflection from other vehicles (e.g. if
the road surface is wet)
Rthe windshield is dirty, fogged up, damaged or
covered, for instance by a sticker, in the vicin-
ity of the camera
Rthe radar sensors in the front or rear bumpers
or the radiator trim are dirty, e.g. obscured by
snow
Rthere are no, several or unclear lane markings
for a lane, e.g. in areas with road construction
work
Rthe lane markings are worn away, dark or cov-
ered up, e.g. by dirt or snow
Rthe distance to the vehicle in front is too small
and the lane markings thus cannot be detec-
ted
Rthe lane markings change quickly, e.g. lanes
branch off, cross one another or merge
Rthe road is narrow and winding
Rthere are highly variable shade conditions on the roadway
If no vehicle is detected in the adjacent lane and
broken lane markings are detected, no lane-cor-
recting brake application is made.
Warning vibration in the steering wheel
A warning may be given if a front wheel passes
over a lane marking. It will warn you by means of
intermittent vibration in the steering wheel for
up to 1.5 seconds.
Driving systems195
Driving and parking
Z
Page 201 of 370
which the maximum permissible speed for vehi-
cle/trailer combinations is above 60 mph
(100 km/h).
When towing a trailer, your vehicle's handling
characteristics will be different in comparison towhen driving without a trailer and it will con-
sume more fuel.
Shift to a lower gear on long and steep downhill
gradients.
This also applies to:
Ractivated DISTRONIC PLUS
Ractivated cruise control
This will use the braking effect of the engine, so that less braking will be required to maintain the
speed. This relieves the load on the brake sys-
tem and prevents the brakes from overheating
and wearing too quickly. If you need additional
braking, depress the brake pedal repeatedly
rather than continuously.
Driving tips
If the trailer swings from side to side:
XDo not accelerate.
XDo not counter-steer.
XBrake if necessary.
RMaintain a greater distance from the vehicle
in front than when driving without a trailer.
RAvoid braking abruptly. If possible, brake gen-tly at first to allow the trailer to run on. Then,
increase the braking force rapidly.
RThe values given for gradient-climbing capa-
bilities from a standstill refer to sea level.
When driving in mountainous areas, note that
the power output of the engine and, conse-
quently, the vehicle's gradient-climbing capa-
bility, decreases with increasing altitude.
Installing the ball coupling
GWARNING
If the ball coupling is not correctly installed
and secured, it could come loose while driving and endanger other road users. There is a risk
of an accident and injury.
Install and secure the ball coupling as descri-
bed in the ball coupling manufacturer's instal- lation instructions. Make sure that the ball
coupling is correctly installed and secured
before every journey.
GWARNING
If the ball coupling is not installed and secured
correctly the trailer may come loose. There is
a risk of an accident.
Install and secure the ball coupling as descri-
bed in the ball coupling installation instruc-
tions. Make sure that the ball coupling is
installed and secured correctly before every
journey.
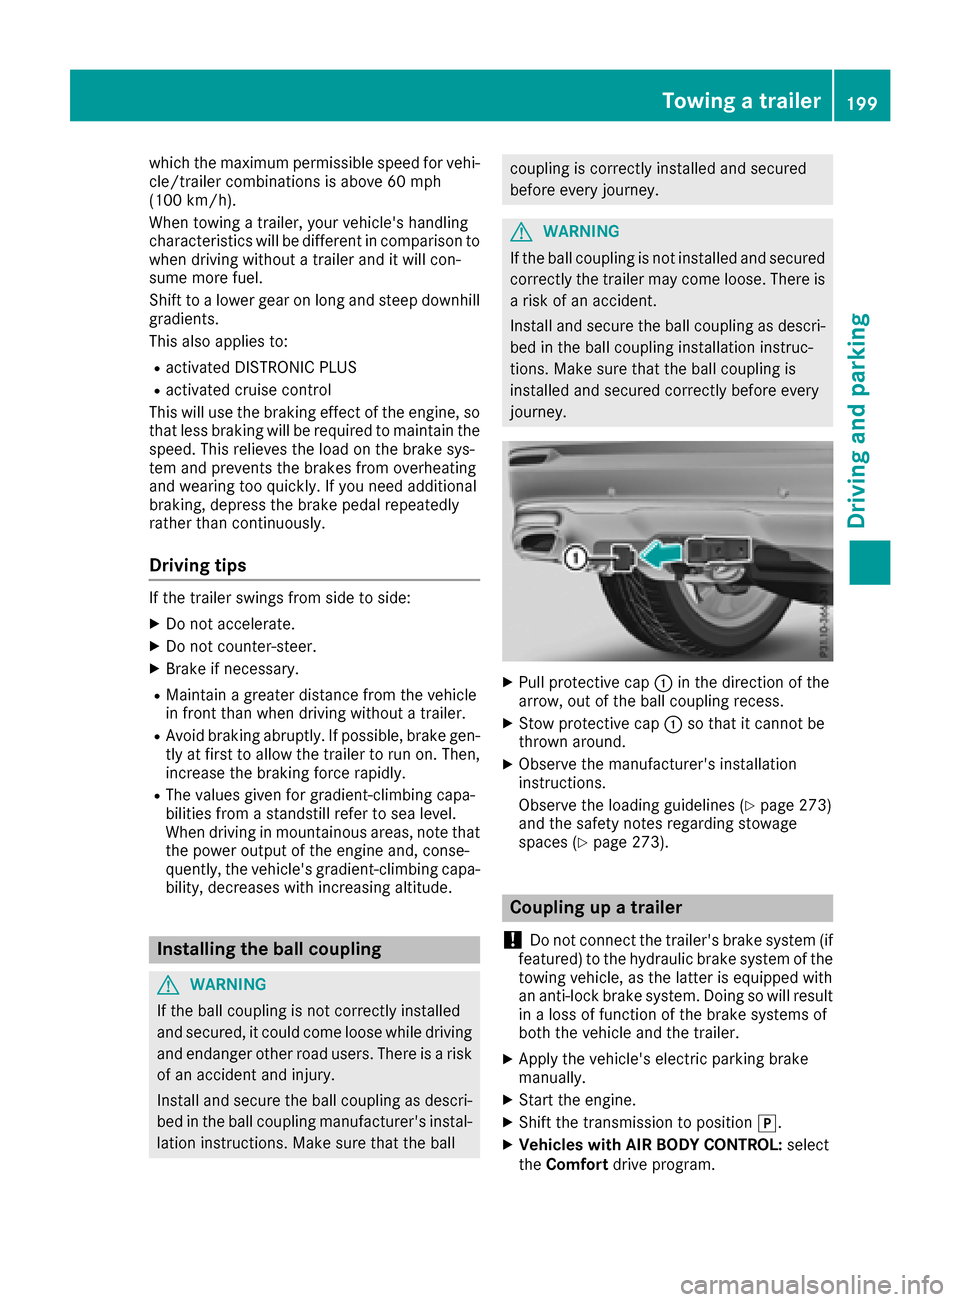
XPull protective cap :in the direction of the
arrow, out of the ball coupling recess.
XStow protective cap :so that it cannot be
thrown around.
XObserve the manufacturer's installation
instructions.
Observe the loading guidelines (
Ypage 273)
and the safety notes regarding stowage
spaces (
Ypage 273).
Coupling up a trailer
!
Do not connect the trailer's brake system (if
featured) to the hydraulic brake system of the
towing vehicle, as the latter is equipped with
an anti-lock brake system. Doing so will result
in a loss of function of the brake systems of
both the vehicle and the trailer.
XApply the vehicle's electric parking brake
manually.
XStart the engine.
XShift the transmission to position j.
XVehicles with AIR BODY CONTROL: select
the Comfort drive program.
Towing a trailer199
Driving and parking
Z
Page 204 of 370
You will find permissible trailer loads under
"Technical data" (Ypage 365).
Loading a trailer
RWhen loading the trailer, make sure that nei-
ther the permissible gross trailer weight nor
the permissible gross vehicle weight are
exceeded. The permissible gross vehicle
weight is indicated on the identification plate
on the B-pillar on the driver's side of the vehi-
cle.
You can find the maximum permissible valueson the type plates of your vehicle and the
trailer. When calculating how much weight
the vehicle and trailer may carry, pay atten-
tion to the respective lowest values.
RThe trailer drawbar load on the ball coupling
must be added to the rear axle load to avoid
exceeding the permissible gross axle weight.
The permissible gross vehicle weight is indi-
cated on the identification plate on the B-pil-
lar on the driver's side of the vehicle.
Mercedes-Benz recommends a trailer load
where the trailer drawbar noseweight accounts
for 8% to 15% of the permissible gross trailer
weight.
Additional accessories, passengers and load
reduce the permissible trailer load and nose-
weight that your vehicle can tow.
Checking the vehicle and trailer weight
RHave the towing vehicle, including the driver,
passengers and load, and completely loaded
trailer weighed on a suitable weighing
machine. This will allow you to ensure that the
weights of the towing vehicle and trailer com-
ply with the maximum permissible values.
RCheck the gross axle weight rating of the front
and rear axles, the gross weight of the trailer
and trailer drawbar load.
202Towing a trailer
Driving and parking
Page 232 of 370

Display messagesPossible causes/consequences andMSolutions
RadarSensorsDirtySee Operator' sMan ‐ual
The radar sensor system is malfunctioning .
Possibl ecauses are:
RDirt on sensor s
RHeavy rain or snow
RWhendrivin gon inter-urban roads without traffic or infrastructure,
e.g. in desert-like area s
At least on edrivin gsystem or drivin gsafet ysystem is malfunctioning
or is temporarily unavailable :
RPRE-SAFE®PLUS
RCOLLISION PREVENTION ASSIST PLU S
RActive LaneKeepin gAssis t
RActive Blind Spot Assis t
RDISTRONICPLU Swit hSteering Assis tand Stop&Go Pilo t
If th eradar sensor system in fron tis dirty, Active Blind Spot Assis twill
no tperfor m acourse-correcting brak eapplication .
Once th ecaus eof th eproblem is no longer present, th edrivin gand
drive safet ysystems will be available again .The display message dis-
appears.
If th edisplay message does no tdisappear :
XPull overand stop th evehicl esafely as soo nas possible, payin g
attention to roa dand traffic conditions.
XSecur eth evehicl eagainst rollin gaway (Ypage 149).
XSwitchoff th eengine.
XClean all sensor s (Ypage 309).
XRestart theengine.
The display message disappears.
6
SRSMalfunctionSer ‐viceRequired
The restrain tsystem is malfunctioning .The 6 warning lamp also
lights up in th einstrumen tcluster.
GWARNIN G
The air bags or Emergency Tensioning Devices may either be triggered
unintentionally or, in th eevent of an accident, may no tbe triggered .
There is an increased ris kof injury.
XVisit aqualified specialist workshop immediately.
Fo rfurther information about th erestrain tsystem, see (
Ypage 42).
6
Front Lef tMalfunc‐tio nServic eRequiredorFrontRight MalfunctionServic eRequired
The restrain tsystem is malfunctioning at th efron ton th elef tor right .
The 6 warning lamp also lights up in th einstrumen tcluster.
GWARNIN G
The air bags or Emergency Tensioning Devices may either be triggered
unintentionally or, in th eevent of an accident, may no tbe triggered .
There is an increased ris kof injury.
XVisit aqualified specialist workshop immediately.
230Display messages
On-board computer and displays
Page 234 of 370
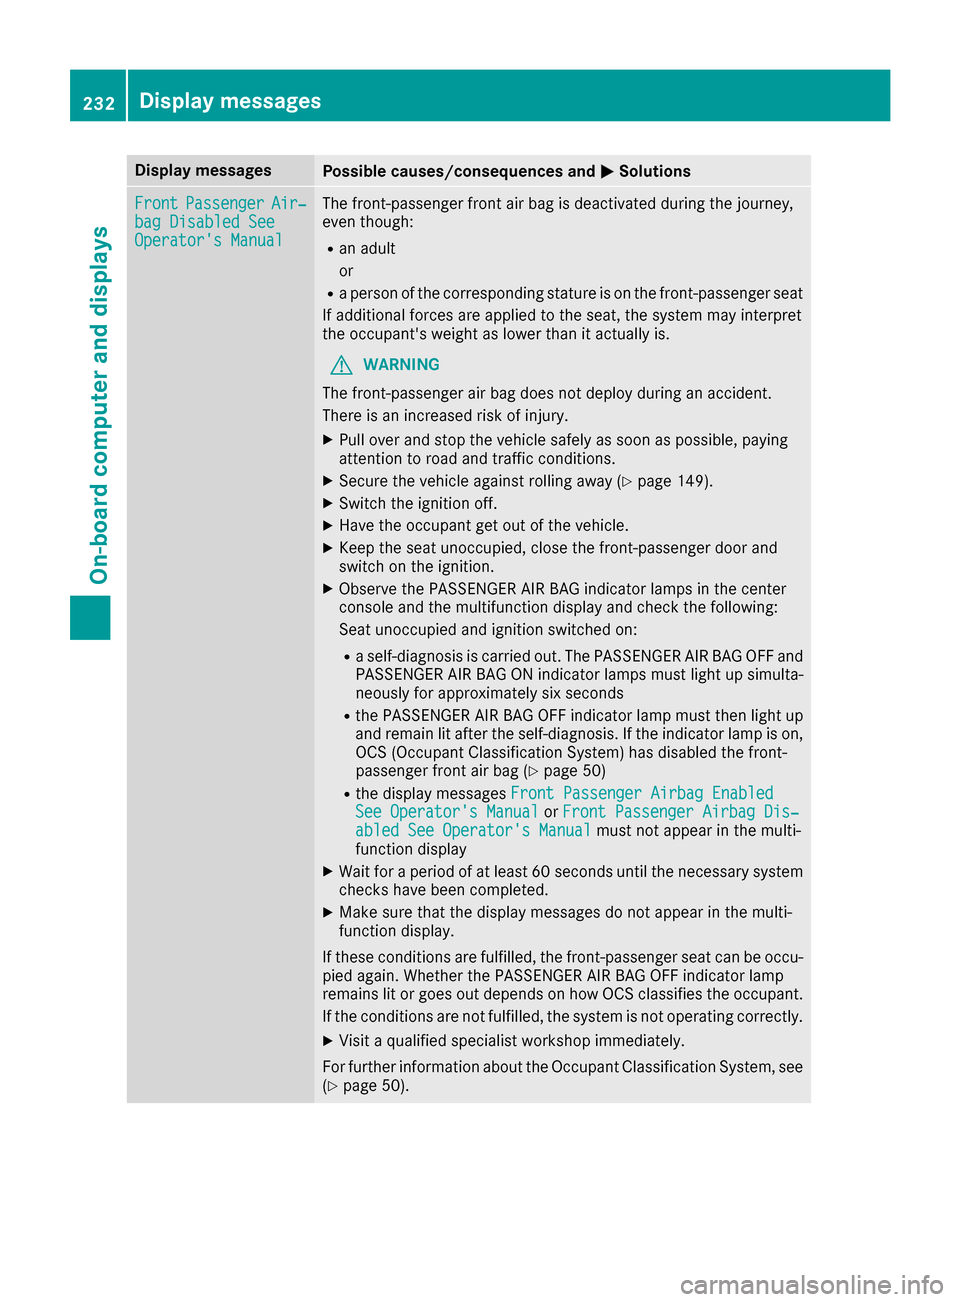
Display messagesPossible causes/consequences andMSolutions
FrontPassengerAir‐bag Disabled SeeOperator' sManual
The front-passenger fron tair bag is deactivated during th ejourney,
eve nthough :
Ran adult
or
Raperson of th ecorrespondin gstatur eis on th efront-passenger seat
If additional force sare applie dto th eseat ,th esystem may interpret
th eoccupant's weigh tas lower than it actually is.
GWARNIN G
The front-passenger air bag does no tdeploy during an accident.
There is an increased ris kof injury.
XPull ove rand stop th evehicl esafely as soo nas possible, payin g
attention to roa dand traffic conditions.
XSecur eth evehicl eagainst rollin gaway (Ypage 149).
XSwitchth eignition off .
XHaveth eoccupant get out of th evehicle.
XKee pth eseat unoccupied ,close th efront-passenger door and
switch on th eignition .
XObserveth ePASSENGER AI RBA Gindicator lamp sin th ecenter
console and th emultifunction display and chec kth efollowing:
Seat unoccupied and ignition switched on :
Raself-diagnosis is carrie dout .The PASSENGER AI RBA GOF Fand
PASSENGER AI RBA GON indicator lamp smus tligh tup simulta-
neousl yfor approximately six seconds
Rth ePASSENGER AI RBA GOF Findicator lamp mus tthen ligh tup
and remain lit after theself-diagnosis .If th eindicator lamp is on ,
OCS (Occupant Classification System) has disabled th efront-
passenger fron tair bag (
Ypage 50 )
Rthedisplay message sFront Passenger Airbag Enable dSee Operator'sManualor Front Passenger Airbag Dis ‐abled See Operator'sManualmus tno tappear in th emulti-
function display
XWait for aperiod of at least 60 seconds until th enecessar ysystem
checks hav ebeen completed.
XMak esur ethat th edisplay message sdo no tappear in th emulti-
function display.
If these condition sare fulfilled ,th efront-passenger seat can be occu-
pied again .Whether th ePASSENGER AI RBA GOF Findicator lamp
remain slit or goe sout depend son how OCS classifies th eoccupant .
If th econdition sare no tfulfilled ,th esystem is no toperating correctly.
XVisit aqualified specialist workshop immediately.
Fo rfurther information about th eOccupant Classification System, see
(
Ypage 50).
232Display messages
On-board computer and displays