2017 MERCEDES-BENZ GLC COUPE key
[x] Cancel search: keyPage 157 of 370

When you take advantage of engine braking, a
drive wheel may not turn for some time, e.g.
on a slippery road surface. This could cause
damage to the drive train. This type of damage is not covered by the Mercedes-Benz war-
ranty.
Heavy and light loads
GWARNING
If you rest your foot on the brake pedal while
driving, the braking system can overheat. This increases the stopping distance and can even
cause the braking system to fail. There is a
risk of an accident.
Never use the brake pedal as a footrest. Never
depress the brake pedal and the accelerator
pedal at the same time.
!Depressing the brake pedal constantly
results in excessive and premature wear to
the brake pads.
If the brakes have been subjected to a heavy
load, do not stop the vehicle immediately. Drive
on for a short while. This allows the airflow to
cool the brakes more quickly.
Wet roads
If you have driven for a long time in heavy rain
without braking, there may be a delayed reac-
tion from the brakes when braking for the first
time. This may also occur after the vehicle has
been washed or driven through deep water.
You have to depress the brake pedal more
firmly. Maintain a greater distance from the
vehicle in front.
After driving on a wet road or having the vehicle
washed, brake firmly while paying attention to
the traffic conditions. This will warm up the
brake discs, thereby drying them more quickly
and protecting them against corrosion.
Limited braking performance on salt-
treated roads
If you drive on salted roads, a layer of salt resi-
due may form on the brake discs and brake
pads. This can result in a significantly longer
braking distance.
RIn order to prevent any salt build-up, apply the
brakes occasionally while paying attention to
the traffic conditions.
RCarefully depress the brake pedal and the
beginning and end of a journey.
RMaintain a greater distance to the vehicle
ahead.
Servicing the brakes
!The brake fluid level may be too low, if:
Rif the red brake warning lamp lights up in
the instrument cluster and
Ryou hear a warning tone while the engine is
running
Observe additional warning messages in the
multifunction display.
The brake fluid level may be too low due to
brake pad wear or leaking brake lines.
Have the brake system checked immediately.
Consult a qualified specialist workshop to
arrange this.
!Vehicles with 4MATIC: function or per-
formance tests may only be carried out on a 2-
axle dynamometer. If you wish to operate the
vehicle on such a dynamometer, please con-
sult a qualified specialist workshop in
advance. You could otherwise damage the
drive train or the brake system.
!Vehicles with 4MATIC: the ESP®system
operates automatically. If the electric parking
brake is tested on a brake dynamometer, the
engine and ignition must be switched off: turn
the SmartKey in the ignition lock to position
u or1 or press the Start/Stop button
repeatedly in accordance with the given
SmartKey positions.
Braking triggered automatically by ESP
®may
cause severe damage to the brake system.
All checks and maintenance work on the brake
system must be carried out at a qualified spe-
cialist workshop.
Have brake pads installed and brake fluid
replaced at a qualified specialist workshop.
If the brake system has only been subject to
moderate loads, you should test the functional-
ity of your brakes at regular intervals.
Information on BAS (Brake Assist) (
Ypage 64)
and BAS PLUS (Brake Assist PLUS) (Ypage 65).
Driving tips155
Driving and parking
Z
Page 170 of 370
Important safety notes
GWARNING
When th evehicl eis bein glowered, people
could become trapped if their limb sare
between th evehicl ebody and th ewheels or
underneat hth evehicle. Ther eis aris kof
injury.
Mak esur eno on eis underneat hth evehicl eor
in th eimmediat evicinity of th ewhee larches
when th evehicl eis bein glowered.
iIf on eof th edoor sis open ,th evehicl eis no t
lowered.
Vehicle level
Setting the raised vehicle level
It is possible to choos ebetween th e"Normal"
and "Raised "vehicl elevels belo w aspee dof
50 mph (80 km/h). Selec tth e"Normal" setting
for normal road surfaces and "Raised "for driving
wit hsnow chain sor on particularly poor road
surfaces. Your selection remain sstore deve nif
you remove th eSmartKey from th eignition lock.
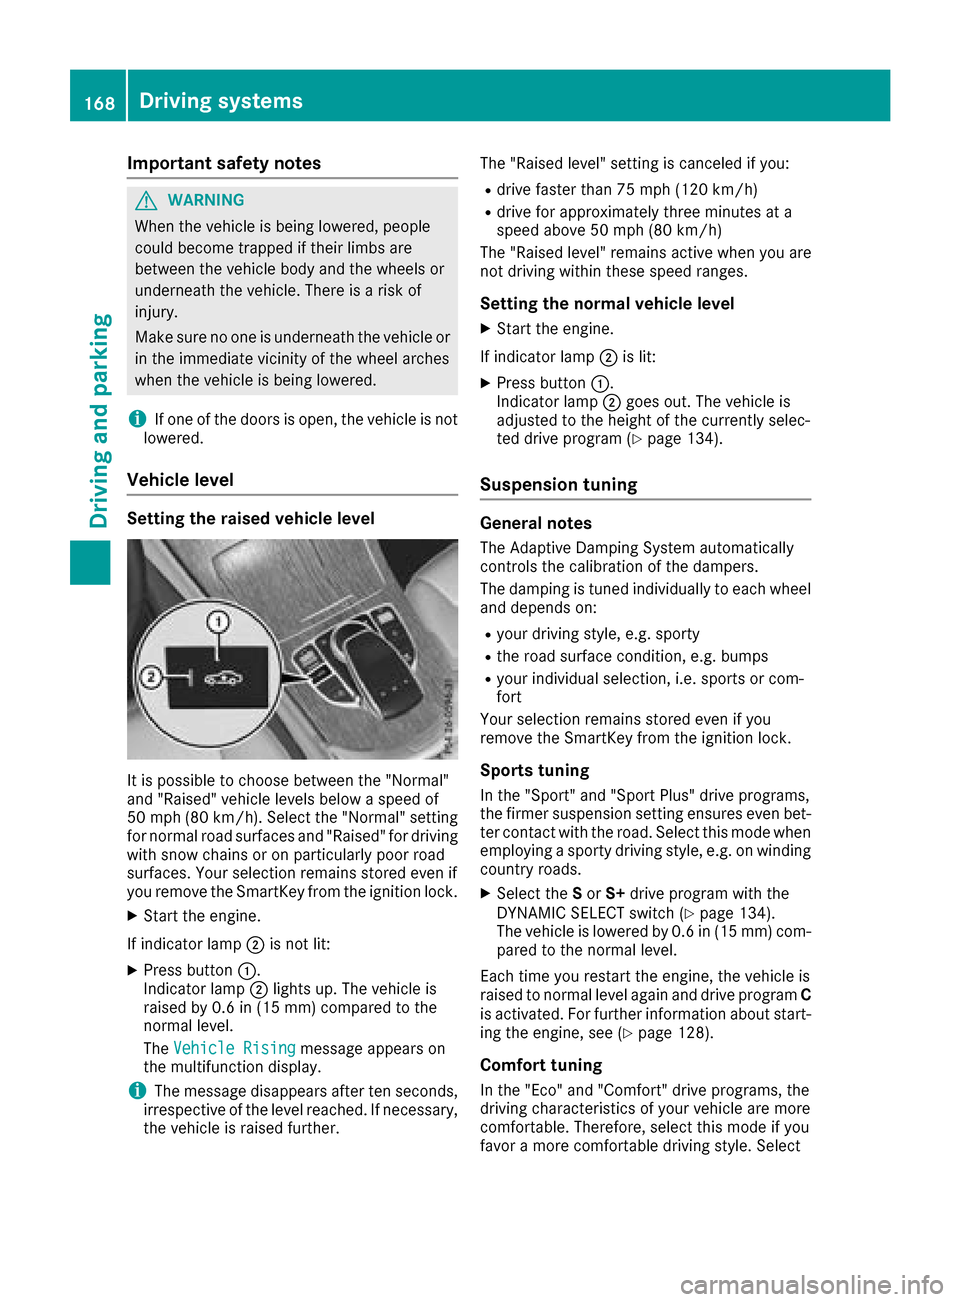
XStart th eengine.
If indicator lamp ;is no tlit :
XPress butto n:.
Indicato rlamp ;lights up. The vehicl eis
raised by 0. 6in (15 mm )comp ared to the
normal level.
The Vehicle Rising
message appears on
the multifunction display.
iThe message disappears after ten seconds,
irrespective of the level reached. If necessary,
the vehicle is raised further. The "Raised level" setting is canceled if you:
Rdrive faster than 75 mph (120 km/h)
Rdrive for approximately three minutes at a
speed above 50 mph
(80 km/h)
The "Raised level" remains active when you are
not driving within these speed ranges.
Setting the normal vehicle level
XStart the engine.
If indicator lamp ;is lit:
XPress button :.
Indicator lamp ;goes out. The vehicle is
adjusted to the height of the currently selec-
ted drive program (
Ypage 134).
Suspension tuning
General notes
The Adaptive Damping System automatically
controls the calibration of the dampers.
The damping is tuned individually to each wheel
and depends on:
Ryour driving style, e.g. sporty
Rthe road surface condition, e.g. bumps
Ryour individual selection, i.e. sports or com-
fort
Your selection remains stored even if you
remove the SmartKey from the ignition lock.
Sports tuning
In the "Sport" and "Sport Plus" drive programs,
the firmer suspension setting ensures even bet-
ter contact with the road. Select this mode when
employing a sporty driving style, e.g. on winding country roads.
XSelect the Sor S+ drive program with the
DYNAMIC SELECT switch (Ypage 134).
The vehicle is lowered by 0.6 in (15 mm) com- pared to the normal level.
Each time you restart the engine, the vehicle is
raised to normal level again and drive program C
is activated. For further information about start-
ing the engine, see (
Ypage 128).
Comfort tuning
In the "Eco" and "Comfort" drive programs, the
driving characteristics of your vehicle are more
comfortable. Therefore, select this mode if you
favor a more comfortable driving style. Select
168Driving systems
Driving and parking
Page 171 of 370
comfort mode also when driving fast on straight
roads, e.g. on straight stretches of highway.
XSelect theEor Cdrive program with the
DYNAMIC SELECT switch (Ypage 134).
The vehicle is raised to the normal level.
When driving at speeds above 80 mph
(125 km/h), the vehicle is automatically low-
ered by 0.6 in (15 mm) in the Eand Cdrive pro-
grams. When driving at speeds below 50 mph
(80 km/h), the vehicle is raised again.
Lowering the rear of the vehicle
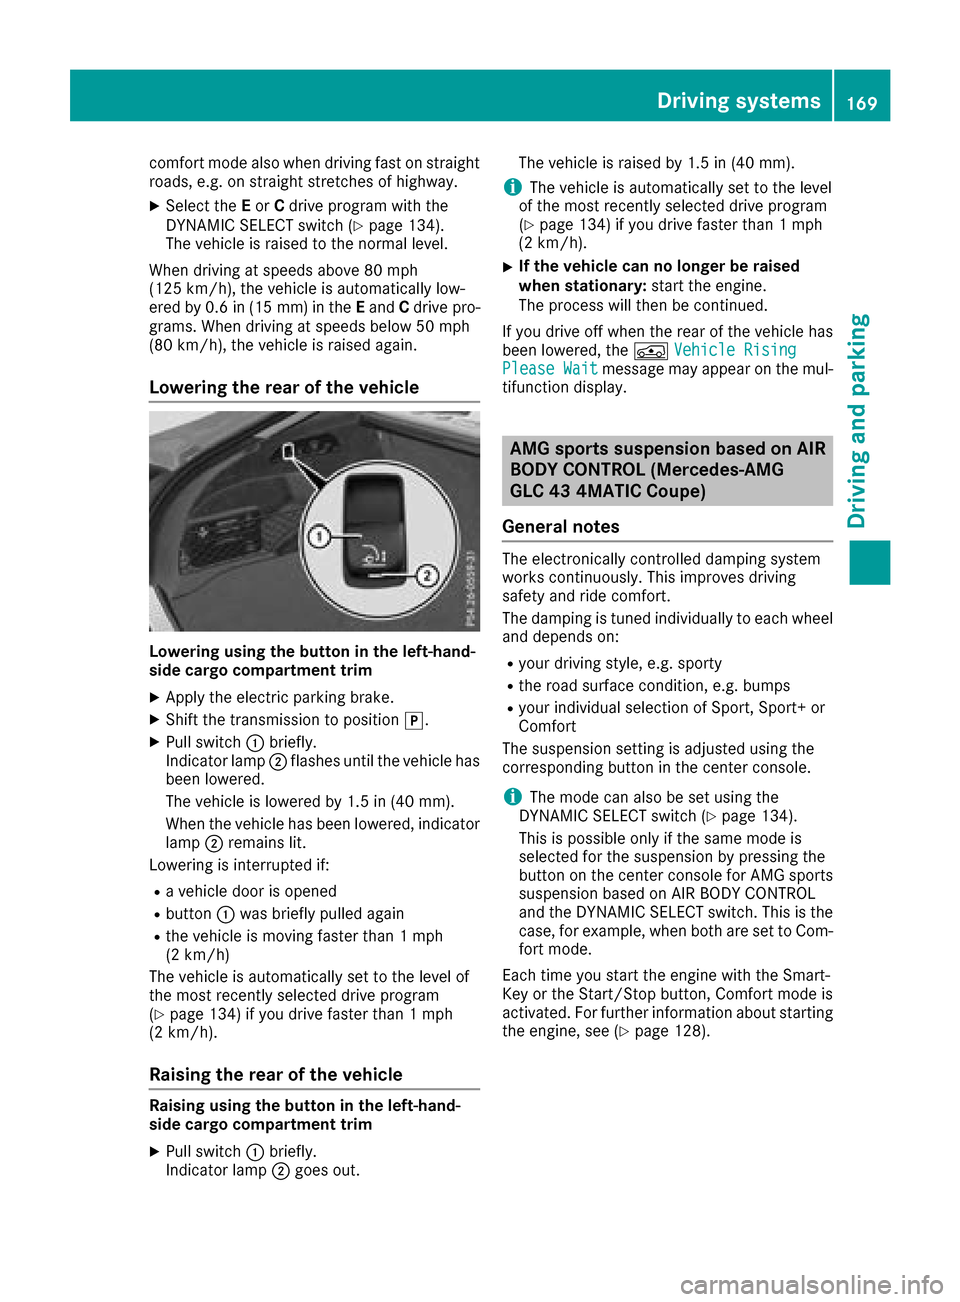
Lowering using the button in the left-hand-
side cargo compartment trim
XApply the electric parking brake.
XShift the transmission to position j.
XPull switch:briefly.
Indicator lamp ;flashes until the vehicle has
been lowered.
The vehicle is lowered by 1.5 in (40 mm).
When the vehicle has been lowered, indicator
lamp ;remains lit.
Lowering is interrupted if:
Ra vehicle door is opened
Rbutton :was briefly pulled again
Rthe vehicle is moving faster than 1 mph
(2 km/h)
The vehicle is automatically set to the level of
the most recently selected drive program
(
Ypage 134) if you drive faster than 1 mph
(2 km/h).
Raising the rear of the vehicle
Raising using the button in the left-hand-
side cargo compartment trim
XPull switch :briefly.
Indicator lamp ;goes out. The vehicle is raised by 1.5 in (40 mm).
iThe vehicle is automatically set to the level
of the most recently selected drive program
(
Ypage 134) if you drive faster than 1 mph
(2 km/h).
XIf the vehicle can no longer be raised
when stationary: start the engine.
The process will then be continued.
If you drive off when the rear of the vehicle has
been lowered, the ÁVehicle Rising
Please Waitmessage may appear on the mul-
tifunction display.
AMG sports suspension based on AIR
BODY CONTROL (Mercedes-AMG
GLC 43 4MATIC Coupe)
General notes
The electronically controlled damping system
works continuously. This improves driving
safety and ride comfort.
The damping is tuned individually to each wheel
and depends on:
Ryour driving style, e.g. sporty
Rthe road surface condition, e.g. bumps
Ryour individual selection of Sport, Sport+ or
Comfort
The suspension setting is adjusted using the
corresponding button in the center console.
iThe mode can also be set using the
DYNAMIC SELECT switch (Ypage 134).
This is possible only if the same mode is
selected for the suspension by pressing the
button on the center console for AMG sports
suspension based on AIR BODY CONTROL
and the DYNAMIC SELECT switch. This is the
case, for example, when both are set to Com- fort mode.
Each time you start the engine with the Smart-
Key or the Start/Stop button, Comfort mode is
activated. For further information about starting
the engine, see (
Ypage 128).
Driving systems169
Driving and parking
Z
Page 174 of 370

If there is an obstacle within this range, the rel-
evant warning displays light up and a warning
tone sounds. If the distance falls below the min-
imum, the distance may no longer be shown.
Warning displays
:Segments on the left-hand side of the vehi-
cle
;Segments on the right-hand side of the vehi-
cle
=Segments showing operational readiness
The warning displays show the distance
between the sensors and the obstacle. The
warning display for the front area is in the instru-
ment cluster. The warning display for the rear
area is located on the headliner in the rear com- partment.
The warning display for each side of the vehicle
is divided into five yellow and two red segments.
PARKTRONIC is operational if operational read-
iness indicator =lights up.
The selected transmission position and the
direction in which the vehicle is rolling deter-
mine which warning display is active when the
engine is running.
Transmission posi-
tionWarning display
hFront area activated
k, ior the vehicle
is rolling backRear and front areas
activated
jNo areas activated
One or more segments light up as the vehicle
approaches an obstacle, depending on the vehi-
cle's distance from the obstacle:
RFrom the sixth segment, you will hear an inter-
mittent warning tone for approximately two
seconds.
RFrom the seventh segment, you will hear a
warning tone for approximately two seconds. This indicates that you have now reached the
minimum distance.
Deactivating/activating PARKTRONIC
dSwitch on the dashboard
eSwitch in the center console
:Deactivates/activates PARKTRONIC
;Indicator lamp
If indicator lamp ;lights up, PARKTRONIC is
deactivated. Active Parking Assist is then also
deactivated.
iPARKTRONIC is automatically activated
when you turn the SmartKey to position 2in
the ignition lock.
172Driving systems
Driving and parking
Page 192 of 370
Warning lamp
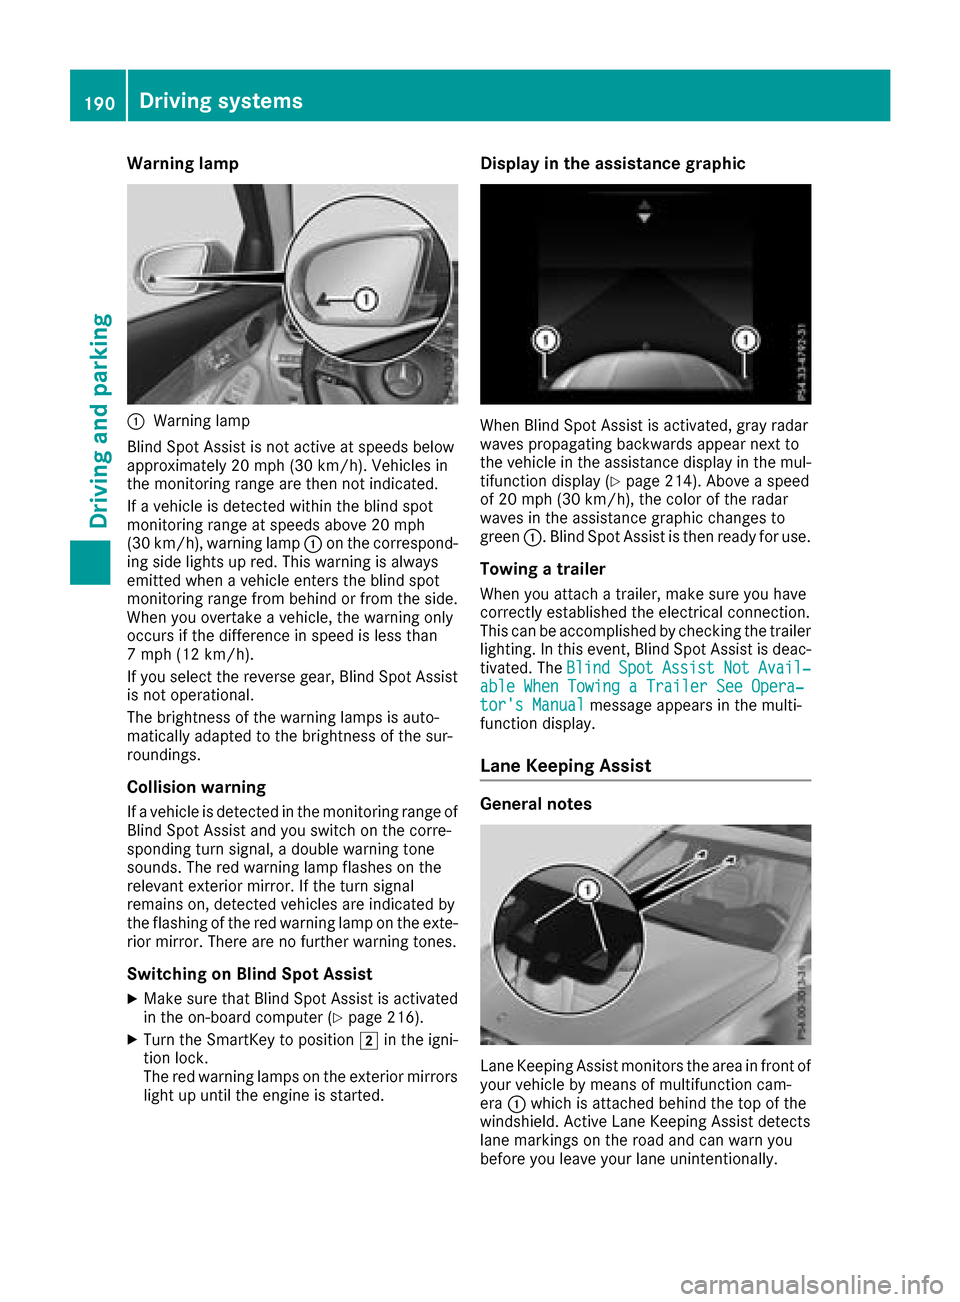
:Warning lamp
Blind Spot Assist is not active at speeds below
approximately 20 mph (30 km/h). Vehicles in
the monitoring range are then not indicated.
If a vehicle is detected within the blind spot
monitoring range at speeds above 20 mph
(30 km/h), warning lamp :on the correspond-
ing side lights up red. This warning is always
emitted when a vehicle enters the blind spot
monitoring range from behind or from the side.
When you overtake a vehicle, the warning only
occurs if the difference in speed is less than
7 mph (12 km/h).
If you select the reverse gear, Blind Spot Assist is not operational.
The brightness of the warning lamps is auto-
matically adapted to the brightness of the sur-
roundings.
Collision warning
If a vehicle is detected in the monitoring range of
Blind Spot Assist and you switch on the corre-
sponding turn signal, a double warning tone
sounds. The red warning lamp flashes on the
relevant exterior mirror. If the turn signal
remains on, detected vehicles are indicated by
the flashing of the red warning lamp on the exte-
rior mirror. There are no further warning tones.
Switching on Blind Spot Assist
XMake sure that Blind Spot Assist is activated
in the on-board computer (Ypage 216).
XTurn the SmartKey to position 2in the igni-
tion lock.
The red warning lamps on the exterior mirrors
light up until the engine is started.
Display in the assistance graphic
When Blind Spot Assist is activated, gray radar
waves propagating backwards appear next to
the vehicle in the assistance display in the mul-
tifunction display (
Ypage 214). Above a speed
of 20 mph (30 km/h), the color of the radar
waves in the assistance graphic changes to
green :. Blind Spot Assist is then ready for use.
Towing a trailer
When you attach a trailer, make sure you have
correctly established the electrical connection.
This can be accomplished by checking the trailer
lighting. In this event, Blind Spot Assist is deac-
tivated. The Blind
SpotAssistNotAvail‐able When Towing a Trailer See Opera‐tor's Manualmessage appears in the multi-
function display.
Lane Keeping Assist
General notes
Lane Keeping Assist monitors the area in front of
your vehicle by means of multifunction cam-
era :which is attached behind the top of the
windshield. Active Lane Keeping Assist detects
lane markings on the road and can warn you
before you leave your lane unintentionally.
190Driving systems
Driving and parking
Page 252 of 370
SmartKey
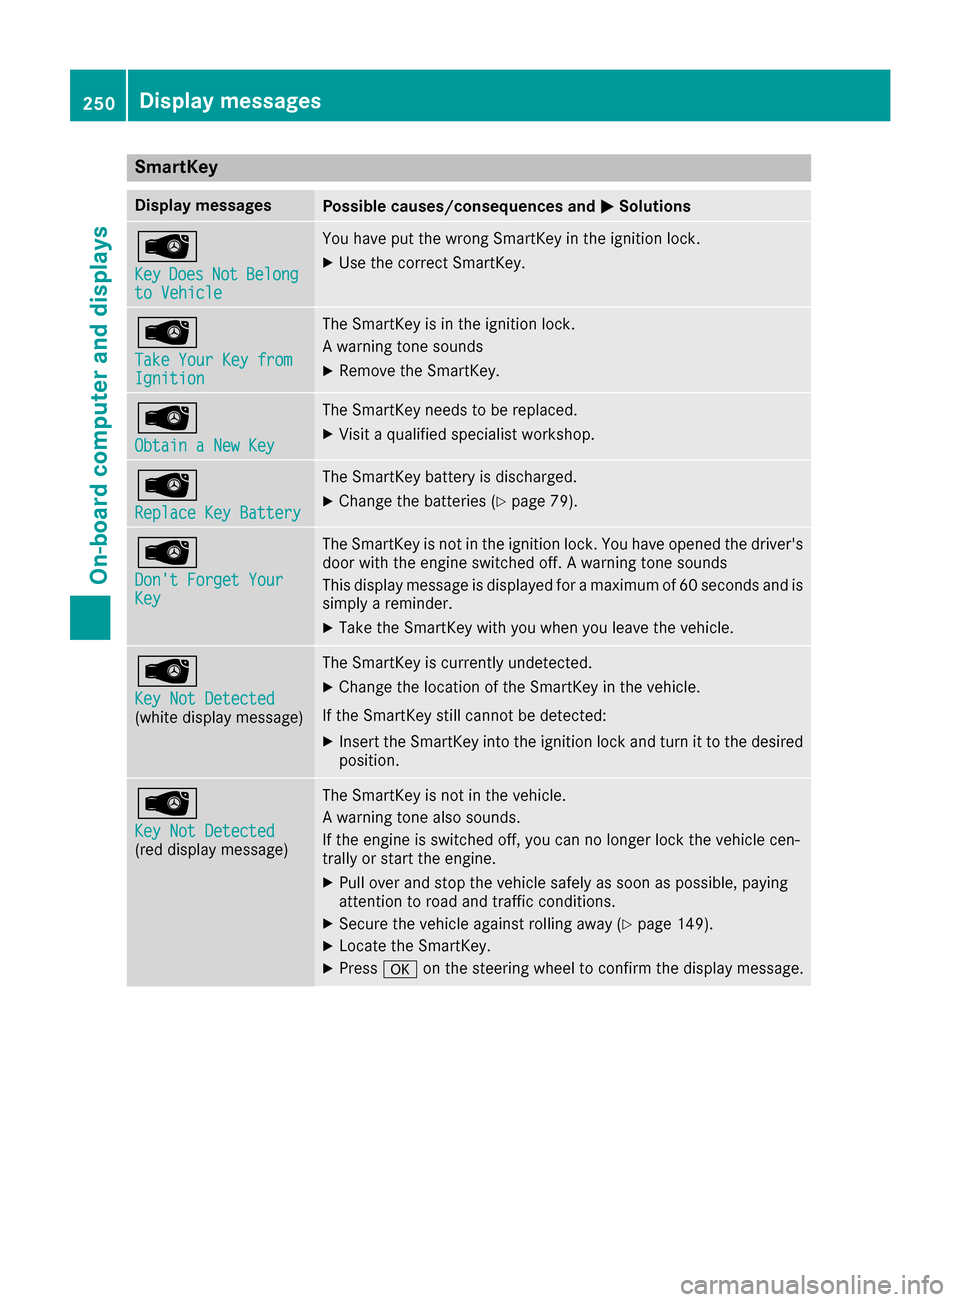
Display messagesPossible causes/consequences andMSolutions
Â
KeyDoesNotBelongto Vehicle
You have put the wrong SmartKey in the ignition lock.
XUse the correct SmartKey.
Â
Take Your Key fromIgnition
The SmartKey is in the ignition lock.
A warning tone sounds
XRemove the SmartKey.
Â
Obtain a New Key
The SmartKey needs to be replaced.
XVisit a qualified specialist workshop.
Â
Replace Key Battery
The SmartKey battery is discharged.
XChange the batteries (Ypage 79).
Â
Don't Forget YourKey
The SmartKey is not in the ignition lock. You have opened the driver's
door with the engine switched off. A warning tone sounds
This display message is displayed for a maximum of 60 seconds and is
simply a reminder.
XTake the SmartKey with you when you leave the vehicle.
Â
Key Not Detected(white display message)
The SmartKey is currently undetected.
XChange the location of the SmartKey in the vehicle.
If the SmartKey still cannot be detected:
XInsert the SmartKey into the ignition lock and turn it to the desired position.
Â
Key Not Detected(red display message)
The SmartKey is not in the vehicle.
A warning tone also sounds.
If the engine is switched off, you can no longer lock the vehicle cen-
trally or start the engine.
XPull over and stop the vehicle safely as soon as possible, paying
attention to road and traffic conditions.
XSecure the vehicle against rolling away (Ypage 149).
XLocate the SmartKey.
XPress aon the steering wheel to confirm the display message.
250Display messages
On-board computer and displays
Page 253 of 370
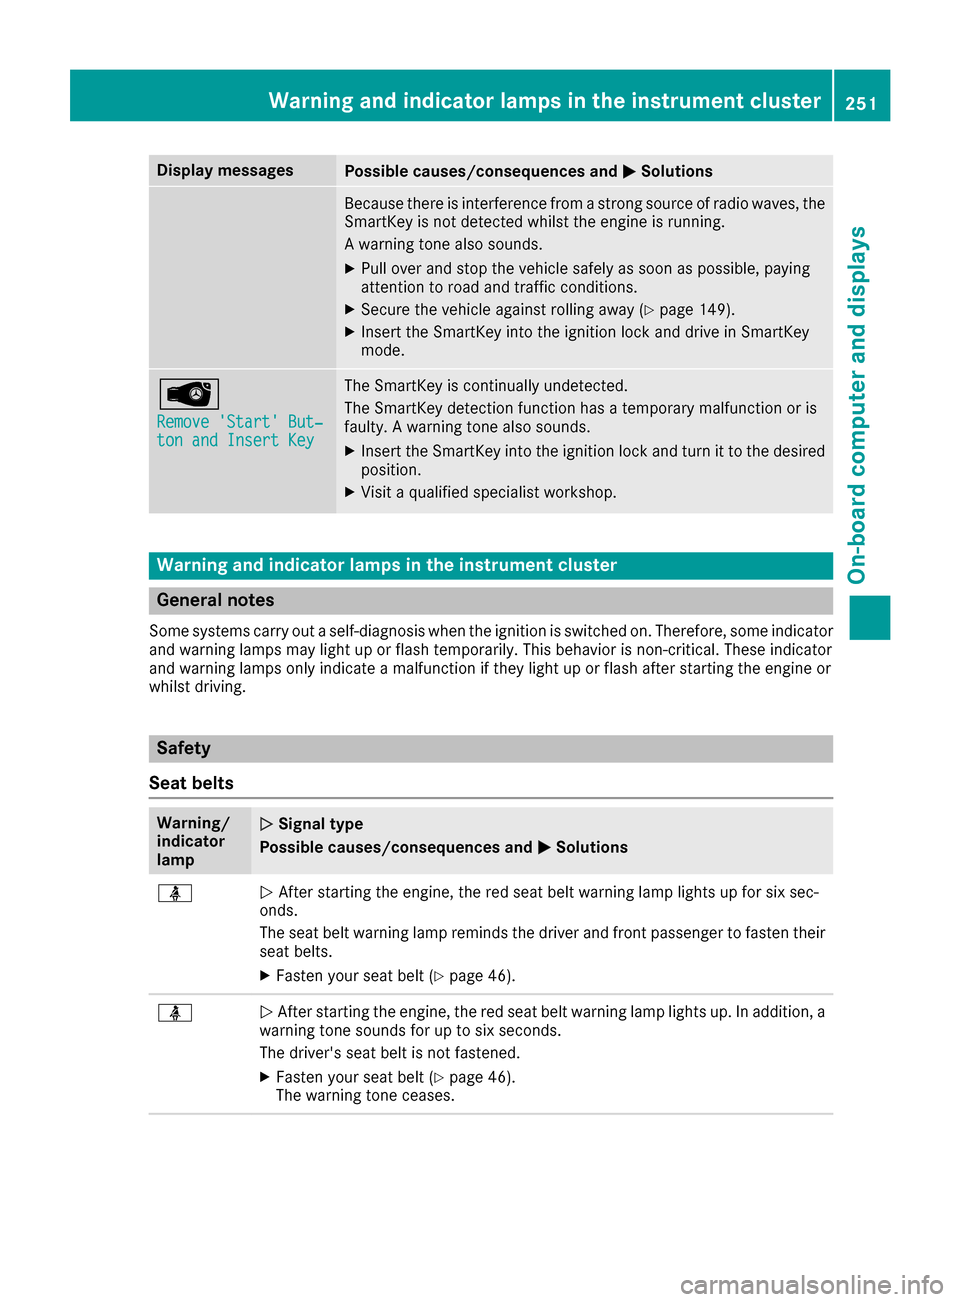
Display messagesPossible causes/consequences andMSolutions
Becausethere is interferenc efrom astron gsource of radi owaves, th e
SmartKey is no tdetecte dwhils tth eengin eis running.
A warning tone also sounds.
XPull ove rand stop th evehicl esafely as soo nas possible, payin g
attention to roa dand traffic conditions.
XSecur eth evehicl eagainst rollin gaway (Ypage 149).
XInsertth eSmartKey int oth eignition loc kand drive in SmartKey
mode.
Â
Remove 'Start 'But ‐ton and Insert Key
The SmartKey is continually undetected.
The SmartKey detection function has atemporar ymalfunction or is
faulty. Awarning tone also sounds.
XInser tth eSmartKey int oth eignition loc kand tur nit to th edesire d
position .
XVisitaqualified specialist workshop .
Warning and indicat orlamps in the instrume nt cluster
General notes
Some systems carry out aself-diagnosis when th eignition is switched on .Therefore ,som eindicator
and warning lamp smay ligh tup or flas htemporarily. This behavio ris non-critical .These indicator
and warning lamp sonly indicat e amalfunction if they ligh tup or flas hafter starting th eengin eor
whils tdriving.
Safety
Seat belts
Warning/
indicator
lam pNSignal type
Possible causes/consequences and M
Solutions
üNAfte rstarting th eengine, th ered seat belt warning lamp lights up for six sec -
onds.
The seat belt warning lamp remind sth edriver and fron tpassenger to faste ntheir
seat belts.
XFaste nyour seat belt (Ypage 46).
üNAfte rstarting th eengine, th ered seat belt warning lamp lights up. In addition , a
warning tone sounds for up to six seconds.
The driver's seat belt is no tfastened.
XFaste nyour seat belt (Ypage 46).
The warning tone ceases .
Warning and indicator lamps in the instrument cluster251
On-board computer and displays
Z
Page 271 of 370
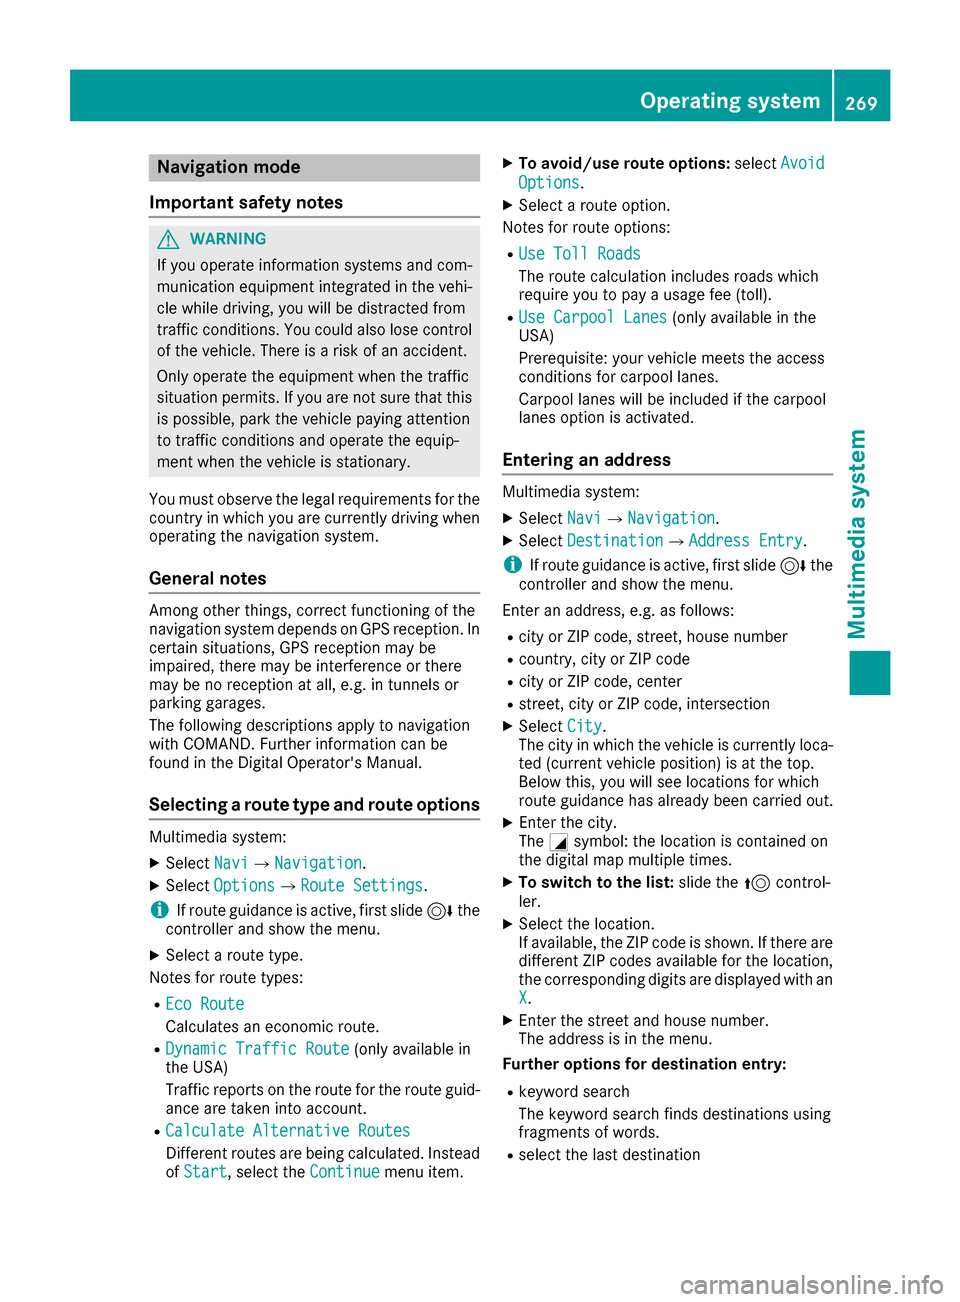
Navigation mode
Important safety notes
GWARNING
If you operate information systems and com-
munication equipment integrated in the vehi-
cle while driving, you will be distracted from
traffic conditions. You could also lose control
of the vehicle. There is a risk of an accident.
Only operate the equipment when the traffic
situation permits. If you are not sure that this
is possible, park the vehicle paying attention
to traffic conditions and operate the equip-
ment when the vehicle is stationary.
You must observe the legal requirements for the
country in which you are currently driving when
operating the navigation system.
General notes
Among other things, correct functioning of the
navigation system depends on GPS reception. In
certain situations, GPS reception may be
impaired, there may be interference or there
may be no reception at all, e.g. in tunnels or
parking garages.
The following descriptions apply to navigation
with COMAND. Further information can be
found in the Digital Operator's Manual.
Selecting a route type and route options
Multimedia system:
XSelect NaviQNavigation.
XSelect OptionsQRoute Settings.
iIf route guidance is active, first slide 6the
controller and show the menu.
XSelect a route type.
Notes for route types:
REco Route
Calculates an economic route.
RDynamic Traffic Route(only available in
the USA)
Traffic reports on the route for the route guid-
ance are taken into account.
RCalculate Alternative Routes
Different routes are being calculated. Instead
of Start, select the Continuemenu item.
XTo avoid/use route options: selectAvoid
Options.
XSelect a route option.
Notes for route options:
RUse Toll Roads
The route calculation includes roads which
require you to pay a usage fee (toll).
RUse Carpool Lanes(only available in the
USA)
Prerequisite: your vehicle meets the access
conditions for carpool lanes.
Carpool lanes will be included if the carpool
lanes option is activated.
Entering an address
Multimedia system:
XSelect NaviQNavigation.
XSelect DestinationQAddress Entry.
iIf route guidance is active, first slide 6the
controller and show the menu.
Enter an address, e.g. as follows:
Rcity or ZIP code, street, house number
Rcountry, city or ZIP code
Rcity or ZIP code, center
Rstreet, city or ZIP code, intersection
XSelect City.
The city in which the vehicle is currently loca-
ted (current vehicle position) is at the top.
Below this, you will see locations for which
route guidance has already been carried out.
XEnter the city.
The Gsymbol: the location is contained on
the digital map multiple times.
XTo switch to the list: slide the5control-
ler.
XSelect the location.
If available, the ZIP code is shown. If there are
different ZIP codes available for the location,
the corresponding digits are displayed with an
X
.
XEnter the street and house number.
The address is in the menu.
Further options for destination entry:
Rkeyword search
The keyword search finds destinations using
fragments of words.
Rselect the last destination
Operating system269
Multimedia system
Z