2017 MERCEDES-BENZ GLC-Class seat adjustment
[x] Cancel search: seat adjustmentPage 13 of 178

Setting route options (avoiding:
highways, toll roads, tunnels, fer-
ries) ................................................. 55
Setting the route type (short
route, fast route, dynamic route or
economic route) ............................... 55
Starting calculation .......................... 59
Route guidance
Canceling/continuing ...................... 74
Freeway information ........................ 73
General notes .................................. 71
Lane recommendations ................... 72
Off-road ........................................... 76
Traffic reports .................................. 77
S
Safety notesAudio CD/DVD and MP3 mode ..... 142
Using the telephone ......................... 91
Satellite radio
Displaying information ................... 139
Overview ........................................ 137
Presets menu view ......................... 138
Registering .................................... 136
Switching to ................................... 137
SatRadio
Channel list updates ...................... 140
Memory functions .......................... 138
Music and sports alerts ................. 138
Notes ............................................. 136
Selecting a category ...................... 137
Selecting a channel ....................... 137
Tagging music tracks ..................... 139
SD card
Inserting ........................................ 145
Inserting/removing ........................ 144
Removing ....................................... 145
Searching for a gas station
When the fuel level is low ................ 66
Seat-belt adjustment function
Activating/deactivating
(COMAND) ....................................... 45
Selecting stations
Radio ............................................. 133
Sending DTMF tones ........................... 99
Setting access data
Online and Internet ........................ 122 Setting the language
COMAND ......................................... 41
Setting the night design ..................... 35
Setting the text reader speed ............ 38
Setting the volume
Telephone calls ................................ 28
Setting the waveband
Radio ............................................. 132
Settings
Sound settings ............................... 165
Short message
see Text messages (SMS)
SIRIUS weather display
5-day forecast ................................ 168
Daily forecast ................................. 168
Detail information .......................... 169
Information chart ........................... 168
Selecting a location for the
weather forecast ............................ 169
Switching on/off ........................... 168
Weather map ................................. 171
Sound
Switching on/off .............................. 28
Sound settings
Balance/fader ............................... 165
Calling up the sound menu ............ 165
Equalizer ........................................ 165
Sound system
see Burmester
®surround sound system
Speed dial
Deleting ......................................... 112
Setting up ...................................... 112
State
/province
Selecting .......................................... 58
Stop function
Video DVD ..................................... 163
Storing stations
Radio ............................................. 134
Street name announcements
Switching on/off (COMAND) ........... 56
Switching between summer time
and standard time ............................... 36
Switching on media mode
Using the Media button ................. 141
Via the device list .......................... 142
Via the main function bar ............... 141
Index11
Page 47 of 178

You can find further information on the easy
entry and exit feature in the vehicle Operator's
Manual.
Activating/deactivating the acoustic
locking verification signal
You can also set an audible signal to confirm
that the vehicle has been locked.
XCall upVehicle Settings(Ypage 44).
XTo select Acoustic Lock Feedback: turn
and press the controller.
The function switches on or off, depending on
the previous setting.
You can find further information on the locking
feature in the vehicle Operator's Manual.
Switching the seat belt adjustment
on/off
The BeltAdjustmentfunction adjusts the driv-
er's and front-passenger seat belt to the upper
body of the occupants.
XCall up Vehicle Settings(Ypage 44).
XTo select Belt Adjustment: turn and press
the controller.
The function switches on or off, depending on
the previous setting.
You can find further information on seat belt
adjustment in the vehicle Operator's Manual.
Switching the automatic mirror fold-
ing function on/off
When the Automatic Mirror Foldingfunc-
tion is activated, the outside mirrors fold in auto-
matically as soon as you lock the vehicle from
the outside. The outside mirrors fold out auto-
matically again as soon as you unlock the vehi-
cle.
XCall up Vehicle Settings(Ypage 44).
XTo select Automatic Mirror Folding: turn
and press the controller.
The function switches on or off, depending on
the previous setting.
You can find further information on the auto-
matic folding mirror function in the vehicle Oper-
ator's Manual.
Switching locator lighting on/off
If you switch on the Locator Lightingfunc-
tion, the exterior lighting is switched on for a
short time when it is dark. The light switch must
be set to Ã; see the vehicle Operator's Man-
ual.
The exterior lighting remains on for 40 seconds
after the vehicle is unlocked. When you start the
engine, the locator lighting is switched off and
the automatic driving lights are activated.
XCall up Vehicle Settings(Ypage 44).
XTo select LocatorLighting: turn and press
the controller.
XPress the controller.
The function is switched on or off, depending
on the previous status.
You can find further information on the locator
lighting in the vehicle Operator's Manual.
Activating/deactivating the auto-
matic door locking mechanism
The vehicle is locked automatically when the
ignition is switched on and the vehicle is travel-
ing faster than walking pace.
XCall up Vehicle Settings(Ypage 44).
XTo select Automatic Locking: turn and
press the controller.
The function switches on or off, depending on
the previous setting.
You can find further information on the locking
feature in the vehicle Operator's Manual.
Setting the switch-off delay time
Interior lighting switch-off delay time
The interior lighting is activated for the duration
of the switch-off delay time when the SmartKey
is removed from the ignition lock.
XCall up Vehicle Settings(Ypage 44).
XTo select Interior Lighting DelayedSwitch-off: turn and press the controller.
The setting element is active.
XTo change the delayed switch-off time: turn
and press the controller.
You can find further information on the interior
lighting in the vehicle Operator's Manual.
Vehicle settings45
Vehicle functions
Z
Page 168 of 178

XTo activate the menu for balance and fader:
press the controller.
XTo adjust the balance focus: slide8or
9 the controller.
XTo adjust the fader focus: slide 6or5 the
controller.
An image shows the sound focus set.
XTo exit the menu: press the %button.
Burmester®surround sound system
General notes
The Burmester®surround sound system is avail-
able for all functions in the radio and media
modes.
For the best sound, we recommend that the
Automatic Volume Adjustment
function is
deactivated (Ypage 41). For further information
on automatic volume adjustment, see
(
Ypage 40).
If using Bluetooth®audio mode, we recommend
you select the Boostsetting (Ypage 156).
Calling up the sound menu
You can make various sound settings for the
different audio and video sources. It is possible
to set more bass for radio mode than for CD
audio mode, for example. The respective sound
menu is called up from the menu of the desired mode.
XSwitch to radio mode (Ypage 132).
or
XSwitch to media mode (Ypage 141).
XTo switch to the menu bar: slide 6the con-
troller.
XTo select à: turn and press the controller.
The menu appears with the last setting
accessed, e.g. Equalizer
. Overview of Burmester
®surround sound sys-
tem
FunctionOptions
EqualizerSets treble, mid-
range and bass
Balance/faderMoves the sound
focus: left/right and
front/rear
SurroundOptimizes sound
playback for all seats
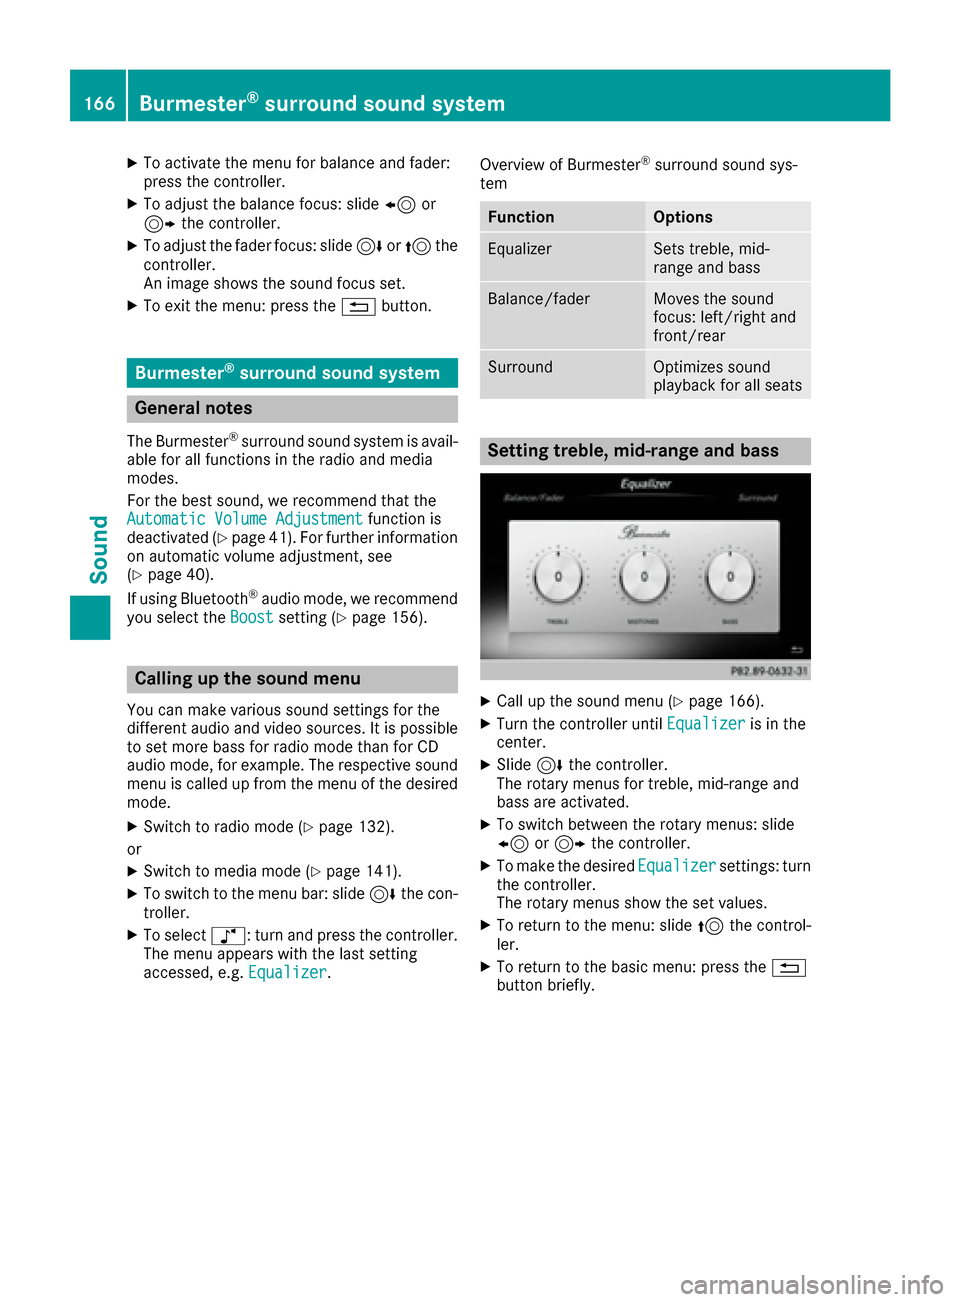
Setting treble, mid-range and bass
XCall up the sound menu (Ypage 166).
XTurn the controller until Equalizeris in the
center.
XSlide 6the controller.
The rotary menus for treble, mid-range and
bass are activated.
XTo switch between the rotary menus: slide
8 or9 the controller.
XTo make the desired Equalizersettings: turn
the controller.
The rotary menus show the set values.
XTo return to the menu: slide 5the control-
ler.
XTo return to the basic menu: press the %
button briefly.
166Burmester®surround sound system
Sound