2017 MERCEDES-BENZ GLC-Class ESP
[x] Cancel search: ESPPage 145 of 178

If MP3 or WMA files are stored in the root direc-
tory itself, the root directory will also be treatedas a folder.
You should observe the following when assign-
ing track names:
Rtrack names must have at least one character
Rtrack names must have an extension of a sup-
ported audio or video format, e.g. mp3, aac orm4v.
Rthere must be a dot between the track name
and the extension
Example of a correct track name:
"Track1.mp3".
Permissible formats
The multimedia system supports the following
audio and video formats:
Audio for-
matsMP3, WMA, CDA, AAC for-
mats (.aac, .mp4, .m4a
and .m4b)
Video for-
matsDVD-V, MPEG, WMV, M4V,
AVI up to 720p
Copy-protected iTunes®music files with
the .m4p file extension are not supported.
Permissible bit and sampling rates
The multimedia system supports MP3 and WMA
files of the following type:
FormatBit rates [kbit/
s]Sampling
rates [kHz]
MP332-320
(fixed and varia-
ble bit rates)8-48
WMA5-384
(fixed bit rates)8-48
The multimedia system does not support WMA
files of the following type:
RDRM (Digital Rights Management) encrypted
files
RFiles with variable bit rates
RWMA Pro
R5.1 surround sound
iOnly use tracks with a bit rate of at least
128 kbit/s and a sampling rate of at least
44.1 kHz. Lower rates can cause a noticeable
deterioration in quality. This is especially the
case if you have activated a surround sound
function.
Selecting an active partition (USB mass
storage devices only)
You can select this function for USB storage
devices when the storage device is partitioned.
Up to 9 partitions (primary or logical, FAT, FAT32
and NTFS) are supported.
Selecting an active partition
XSelect a USB storage device (Ypage 141).
XSlide 6the controller.
The media menu bar is shown.
XTo select Options: turn and press the con-
troller.
XSelect Select Active Partition.
Notes on copyright
Audio or video files that you create or reproduce
yourself for playback are generally subject to
copyright protection.
In many countries, reproductions, even for pri-
vate use, are not permitted without the prior
consent of the copyright holder.
Make sure that you know about the applicable
copyright regulations and that you comply with
these.
Notes on CDs/DVDs
!Do not affix stickers or labels to the discs.
They could peel off and damage the drive.
The drive is designed to receive EN 60908 standard discs. Therefore, you can
only use discs with a maximum thickness of
1.3 mm.
If you insert thicker discs, e.g. those that con-
tain data on both sides (DVD on one side and
audio data on the other), they cannot be ejec-
ted and can damage the drive.
Do not use discs with an 8 cm diameter, even
when using an adapter. Only use round discs
with a 12 cm diameter.
Discs with copy protection are not compatible
with the audio CD standard and therefore may
not be able to be played.
Audio/video mode143
Media
Z
Page 146 of 178

Playback problems may occur when playing
copied discs.
There may be playback problems if you play CDs
that you have copied yourself with a storage
capacity of more than 700 MB.
iThe multimedia system is able to play back
audio CDs in multichannel audio format.
Inserting and removing a disc from
the single CD/DVD drive
Before inserting or removing a CD or DVD,
ensure that the cup holder is empty.
Inserting
XPress the þbutton on the single drive.
If there is a disc already inserted, it will be
ejected.
XInsert a disc into the disc slot with the printed
side facing upwards.
The drive closes and the disc is played.
If the CD or DVD is started in Media mode, the
corresponding basic menu will be shown. If
the CD or DVD is started from another appli-
cation (e.g. navigation), the display will not
change.
iThe drive may not be able to play discs with
copy protection.
Removing
XPress the þbutton.
The drive ejects the disc.
XRemove the ejected disc from the slot.
If you do not take the disc out of the slot, it is
drawn in again automatically after a short
while.
Menu overview
:Main function bar
;Media menu bar
=Track display on the disc
?Track number and number of tracks in the
track list
AArtist and album
BNumerical time display
CGraphic time display
DCover view (if available)
Inserting and removing an SD card
Important safety notes
GWARNING
SD cards are small parts. They can be swal-
lowed and cause choking. This poses an
increased risk of injury or even fatal injury.
Keep the SD card out of the reach of children. If a SD card is swallowed, seek medical atten-
tion immediately.
!If you are no longer using the SD card, you
should remove it and store it outside the vehi-
cle. High temperatures can damage the card.
The multimedia system supports the following
memory cards:
RSD cards ( SecureDigital)
RSDHC cards (Secure DigitalHighCapacity)
RSDXC cards (Secure Digital eXtendedCapac-
ity)
144Audio/video mode
Media
Page 147 of 178

Inserting an SD card
XInsertth eSD car dint oth eSD car dslot until
th eSD car dengages. The side wit hth econ-
tacts must fac edown .
If Memory
Car dhas been selected as amedia
source ,th emedium is played and th efile sare
loade din th ebackground. If there are no sup-
porte daudio or vide ofiles, you will see ames -
sage to this effect.
XSelec tth emedia source (Ypage 141).
Removing an SD card
XPress theSD card.
The SD car dis ejected.
XRemove th eSD card.
Connecting USB devices
Ther eare two US Bports in th estowage spac e
under th earmres t (Ypage 141).
XConnect th eUS Bdevice to th eUS Bport.
If th ecorresponding media display is visible,
th emedium is played and th efile sare loade d
in th ebackground. If there are no supported
audio or vide ofiles, you will see amessage to
this effect.
iMP3 player smust support Medi aTransfer
Protoco l(MTP).
Activating media mode
Afte rinserting aCD or DVD, th emedia mod eis
automatically switched on by th emultimedia
system.
If playable musi cfile sare found, they will be
played by th emultimedia system.
If amedia function is already switched on in th e
multimedia system, this will be interrupted and
th ebasic display of th eCD or DV Dmod ewill
appear .If another function ,suc has navigation ,
is bein goperated, th ebasic display will no t
change. Only th emusi cfrom th elast inserted
CD or DV Dwill be played.
Dependin gon th evehicl eequipment, th ebasic
display must already be turne don when usin g
wit hUS Bdevice sor SD cards.
XInser tth eCDs/DVD s (Ypage 144)
or
XInser tan SD card: (Ypage 145)
or
XConnect aUS Bdevice : (Ypage 145)
The multimedia system loads th emedium
inserted and playbac kstart sautomatically.
Further option sfor switching on :
RUsing themain function bar (Ypage 141)
RUsing thedevice list (Ypage 142)
RUsing theÕ button (Ypage 141)
Selecting the playback option
Playing similar tracks
XIn media mode, slide 6thecontroller .
XTo select Options:tur nand press th econ-
troller .
XTo select PlayMor eLik eThi s:tur nand
press th econtroller .
The multimedia system automatically creates
and plays atrack list wit hsimilar tracks. If
there are no comparable track son th edat a
carrier, you will see amessage to this effect.
XSelec tth erequire dtrack .
Selecting Play mode
XIn media mode, slide 6thecontroller .
XTo select Options:tur nand press th econ-
troller .
XTo select PlaybackMode:tur nand press th e
controller .
XSelectNormal Track Sequence.
The curren ttrack list is played in th eorder it is
store don th edat amedium.
XSelec tRandom Track Lis t.
The curren ttrack list is played in random
order.
XSelec tRandom Medium.
All track son th edat amedium are played in
random order.
Entering a track number directly
XIn media mode, slide 6thecontroller .
XTo select Options:tur nand press th econ-
troller .
Audio/video mode145
Media
Z
Page 149 of 178

Searching for a track
XIn media mode, slide6the controller.
The media menu bar is shown.
XTo select Search: turn and press the control-
ler.
The category list is shown.
XSelect a category, e.g. Genres.
Sub-categories appear with the selection of
the main category (depends on the multime-
dia system default settings and the music
tracks available).
XSelect a sub-category, for example Rock.
If the sub-category Rock
contains music
tracks, these will be displayed.
Gracenote®Media Database
General notes
This function is available in audio CD mode.
There is a version of
Gracenote®music recognition technology,
Emeryville, California, USA on the multimedia
system hard disk. You will recognize this by the
logo in the bottom right-hand corner of certain
audio displays.
If the audio CD does not contain any CD text
information, the multimedia system can use the
Gracenote
®Media Database to identify
unknown audio tracks when in CD audio mode.
Carrying out an Internet update of met-
adata
The Updating Metadata Via Internetoption allows any missing metadata for an audio
CD (e.g. cover, track, album, artist) to be uploa-
ded retrospectively to the internal Gracenote
®
database.
An Internet connection is required for this
(
Ypage 124). Selecting Internet update of metadata
XIn media mode, slide
6the controller.
The media menu bar is shown.
XTo select Options: turn and press the con-
troller.
XSelect Updating Metadata Via Internetin the selection list.
A connection with the Gracenote®data server
is established. The missing data is loaded,
saved and displayed in the main display field.
If there is no data found or there is no Internet
connection, a corresponding error message
will appear.
Switching the Gracenote®data display
on/off
XSwitch on audio CD mode (Ypage 145).
XTo select Gracenote Media Database: turn
and press the controller.
XTo switch the display off: select None.
In the basic display, Track 1is shown instead
of the Gracenote®data, for example.
XTo switch on the display: press the controller.
Media search
General notes
The multimedia system plays back files from the following data media:
RDisc (audio CD or DVD)
RMemory card
RMedia Register
RUSB storage device
RApple®devices (folder, year and photos are
not available)
The categories are displayed according to the
data available.
Starting the media search
XIn media mode, slide 6the controller.
The media menu bar is shown.
XTo select Search: turn and press the control-
ler.
The category list appears.
Media search147
Media
Z
Page 154 of 178

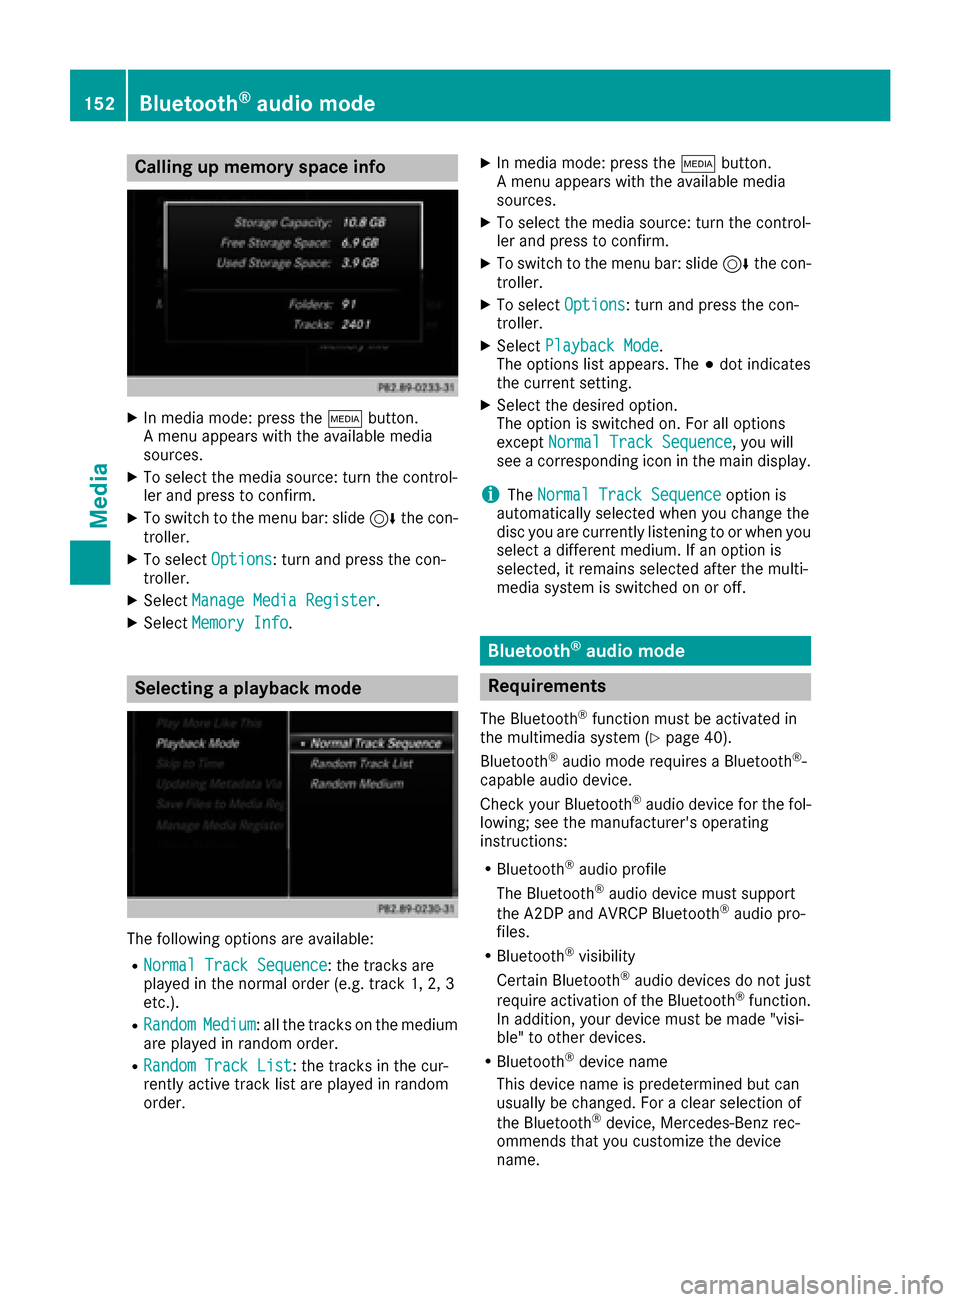
Calling up memory space info
XIn media mode: press theÕbutton.
A menu appears with the available media
sources.
XTo select the media source: turn the control-
ler and press to confirm.
XTo switch to the menu bar: slide 6the con-
troller.
XTo select Options: turn and press the con-
troller.
XSelect Manage Media Register.
XSelectMemory Info.
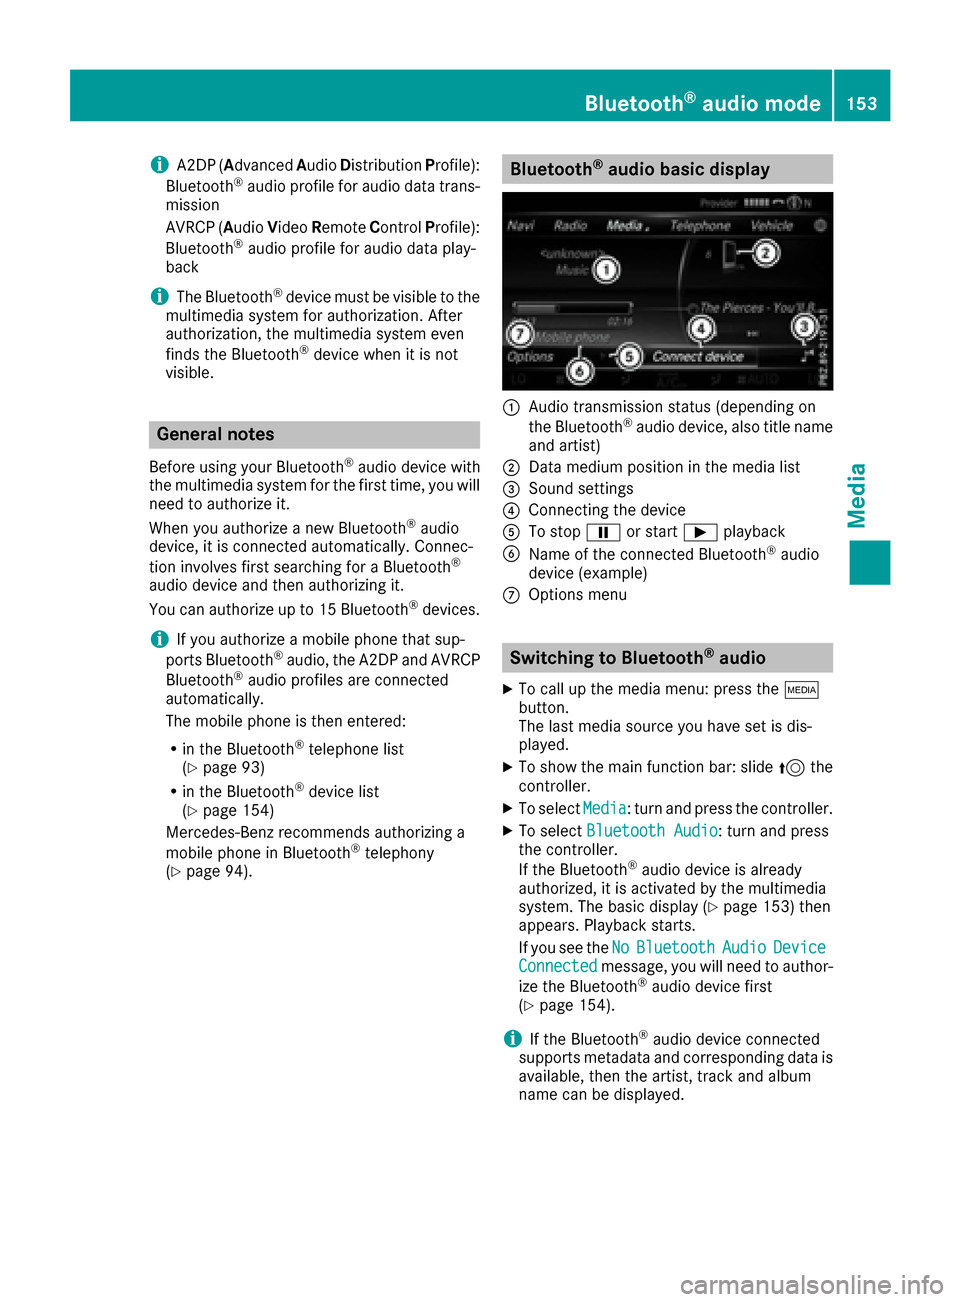
Selecting a playback mode
The following options are available:
RNormal Track Sequence: the tracks are
played in the normal order (e.g. track 1, 2, 3
etc.).
RRandomMedium: all the tracks on the medium
are played in random order.
RRandom Track List: the tracks in the cur-
rently active track list are played in random
order.
XIn media mode: press the Õbutton.
A menu appears with the available media
sources.
XTo select the media source: turn the control-
ler and press to confirm.
XTo switch to the menu bar: slide 6the con-
troller.
XTo select Options: turn and press the con-
troller.
XSelect Playback Mode.
The options list appears. The #dot indicates
the current setting.
XSelect the desired option.
The option is switched on. For all options
except Normal Track Sequence
, you will
see a corresponding icon in the main display.
iThe Normal Track Sequenceoption is
automatically selected when you change the
disc you are currently listening to or when you
select a different medium. If an option is
selected, it remains selected after the multi-
media system is switched on or off.
Bluetooth®audio mode
Requirements
The Bluetooth®function must be activated in
the multimedia system (Ypage 40).
Bluetooth®audio mode requires a Bluetooth®-
capable audio device.
Check your Bluetooth
®audio device for the fol-
lowing; see the manufacturer's operating
instructions:
RBluetooth®audio profile
The Bluetooth®audio device must support
the A2DP and AVRCP Bluetooth®audio pro-
files.
RBluetooth®visibility
Certain Bluetooth®audio devices do not just
require activation of the Bluetooth®function.
In addition, your device must be made "visi-
ble" to other devices.
RBluetooth®device name
This device name is predetermined but can
usually be changed. For a clear selection of
the Bluetooth
®device, Mercedes-Benz rec-
ommends that you customize the device
name.
152Bluetooth®audio mode
Media
Page 155 of 178

iA2DP (Advanced Audio Distribution Profile):
Bluetooth®audio profile for audio data trans-
mission
AVRCP ( Audio Video Remote Control Profile):
Bluetooth
®audio profile for audio data play-
back
iThe Bluetooth®device must be visible to the
multimedia system for authorization. After
authorization, the multimedia system even
finds the Bluetooth
®device when it is not
visible.
General notes
Before using your Bluetooth®audio device with
the multimedia system for the first time, you will
need to authorize it.
When you authorize a new Bluetooth
®audio
device, it is connected automatically. Connec-
tion involves first searching for a Bluetooth
®
audio device and then authorizing it.
You can authorize up to 15 Bluetooth®devices.
iIf you authorize a mobile phone that sup-
ports Bluetooth®audio, the A2DP and AVRCP
Bluetooth®audio profiles are connected
automatically.
The mobile phone is then entered:
Rin the Bluetooth®telephone list
(Ypage 93)
Rin the Bluetooth®device list
(Ypage 154)
Mercedes-Benz recommends authorizing a
mobile phone in Bluetooth
®telephony
(Ypage 94).
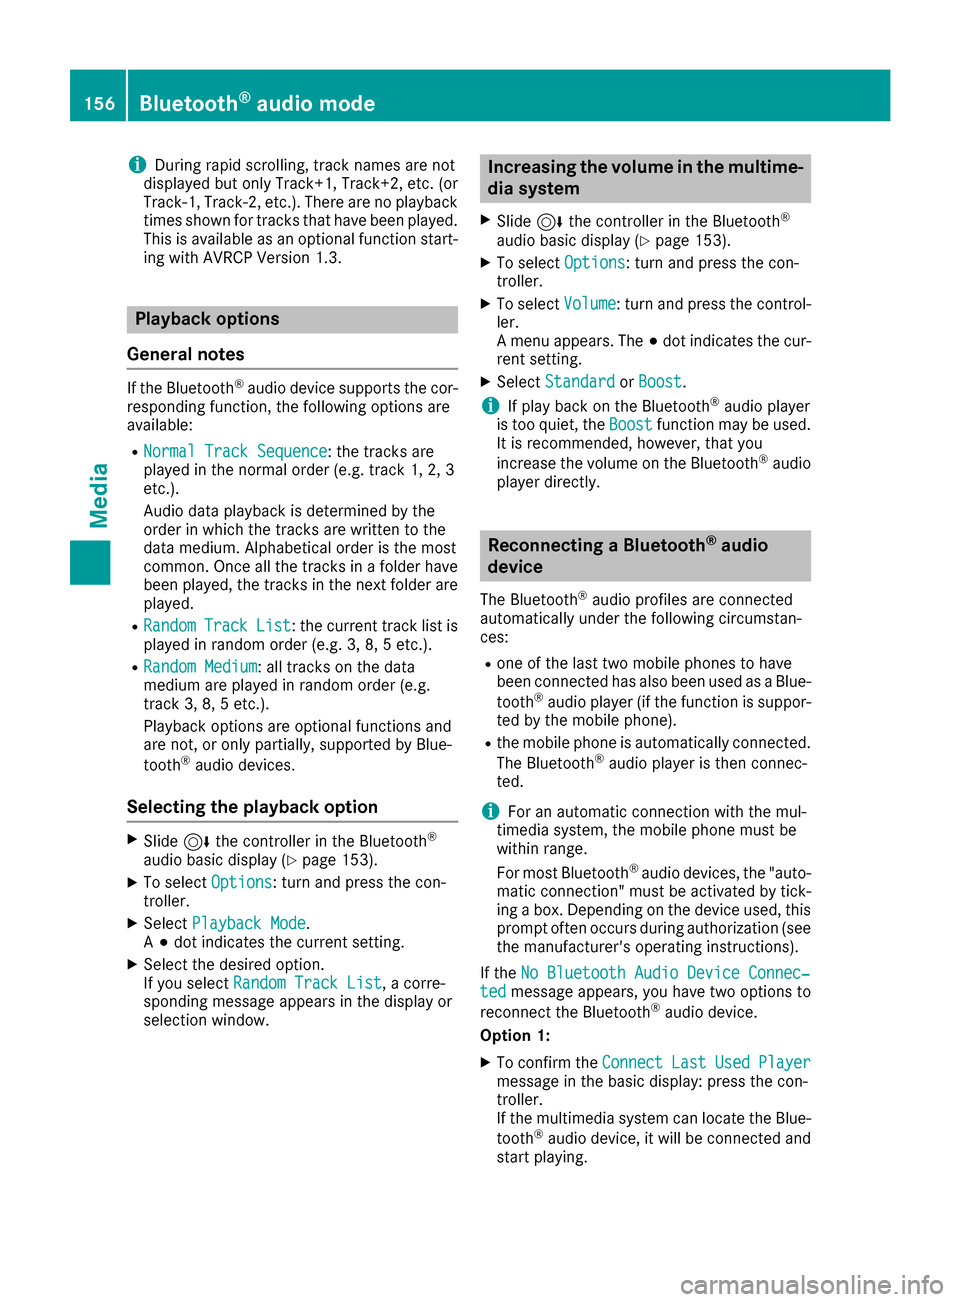
Bluetooth®audio basic display
:Audio transmission status (depending on
the Bluetooth®audio device, also title name
and artist)
;Data medium position in the media list
=Sound settings
?Connecting the device
ATo stop Ëor start Ìplayback
BName of the connected Bluetooth®audio
device (example)
COptions menu
Switching to Bluetooth®audio
XTo call up the media menu: press the Õ
button.
The last media source you have set is dis-
played.
XTo show the main function bar: slide 5the
controller.
XTo select Media: turn and press the controller.
XTo select Bluetooth Audio: turn and press
the controller.
If the Bluetooth
®audio device is already
authorized, it is activated by the multimedia
system. The basic display (
Ypage 153) then
appears. Playback starts.
If you see the No
BluetoothAudioDeviceConnectedmessage, you will need to author-
ize the Bluetooth®audio device first
(Ypage 154).
iIf the Bluetooth®audio device connected
supports metadata and corresponding data is
available, then the artist, track and album
name can be displayed.
Bluetooth®audio mode153
Media
Z
Page 158 of 178

iDuring rapid scrolling, track names are not
displayed but only Track+1, Track+2, etc. (or
Track-1, Track-2, etc.). There are no playback
times shown for tracks that have been played.
This is available as an optional function start-
ing with AVRCP Version 1.3.
Playback options
General notes
If the Bluetooth®audio device supports the cor-
responding function, the following options are
available:
RNormal Track Sequence: the tracks are
played in the normal order (e.g. track 1, 2, 3
etc.).
Audio data playback is determined by the
order in which the tracks are written to the
data medium. Alphabetical order is the most
common. Once all the tracks in a folder have
been played, the tracks in the next folder are played.
RRandomTrackList: the current track list is
played in random order (e.g. 3, 8, 5 etc.).
RRandom Medium: all tracks on the data
medium are played in random order (e.g.
track 3, 8, 5 etc.).
Playback options are optional functions and
are not, or only partially, supported by Blue-
tooth
®audio devices.
Selecting the playback option
XSlide 6the controller in the Bluetooth®
audio basic display (Ypage 153).
XTo select Options: turn and press the con-
troller.
XSelect Playback Mode.
A # dot indicates the current setting.
XSelect the desired option.
If you select Random Track List, a corre-
sponding message appears in the display or
selection window.
Increasing the volume in the multime-
dia system
XSlide 6the controller in the Bluetooth®
audio basic display (Ypage 153).
XTo select Options: turn and press the con-
troller.
XTo select Volume: turn and press the control-
ler.
A menu appears. The #dot indicates the cur-
rent setting.
XSelect StandardorBoost.
iIf play back on the Bluetooth®audio player
is too quiet, the Boostfunction may be used.
It is recommended, however, that you
increase the volume on the Bluetooth
®audio
player directly.
Reconnecting a Bluetooth®audio
device
The Bluetooth®audio profiles are connected
automatically under the following circumstan-
ces:
Rone of the last two mobile phones to have
been connected has also been used as a Blue-
tooth
®audio player (if the function is suppor-
ted by the mobile phone).
Rthe mobile phone is automatically connected.
The Bluetooth®audio player is then connec-
ted.
iFor an automatic connection with the mul-
timedia system, the mobile phone must be
within range.
For most Bluetooth
®audio devices, the "auto-
matic connection" must be activated by tick-
ing a box. Depending on the device used, this
prompt often occurs during authorization (see
the manufacturer's operating instructions).
If the No Bluetooth Audio Device Connec‐
tedmessage appears, you have two options to
reconnect the Bluetooth®audio device.
Option 1:
XTo confirm the ConnectLastUsedPlayermessage in the basic display: press the con-
troller.
If the multimedia system can locate the Blue-
tooth
®audio device, it will be connected and
start playing.
156Bluetooth®audio mode
Media
Page 167 of 178

Your multimediasyste mequipment
These operatin ginstruction sdescribe all th e
standar dan doptional equipment of your multi-
media system, as available at th etime of going
to press. Country-specifi cdifference sare pos -
sible. Bear in min dthat your vehicle may no t
feature all function sdescribed here. Thi salso
applies to safety-relevan tsystems an dfunc-
tions.
Read th einformation on qualifie dspecialis t
workshop sin th evehicle Operator's Manual.
Sound settings
Calling up th esound menu
You can mak evarious sound setting sfo rth e
differen taudio an dvideo sources. It is possible
to set more bass fo rradio mode than fo rCD
audio mode, fo rexample. The respective sound
men ucan be called up from th emen uof th e
desire dmode.
XSwitch to radio mode (Ypage 132).
or
XSwitch to media mode (Ypage 141).
XTo switch to themen ubar :slid e6 thecon-
troller.
XTo selec tà :turn an dpress th econtroller .
The men uappears wit hth elast setting
accessed, e.g. Equalizer
.
Sound men uoverview
FunctionOptions
EqualizerSets treble ,mid -
range an dbass
Balance/faderMoves th esound
focus :left/right an d
front/rea r
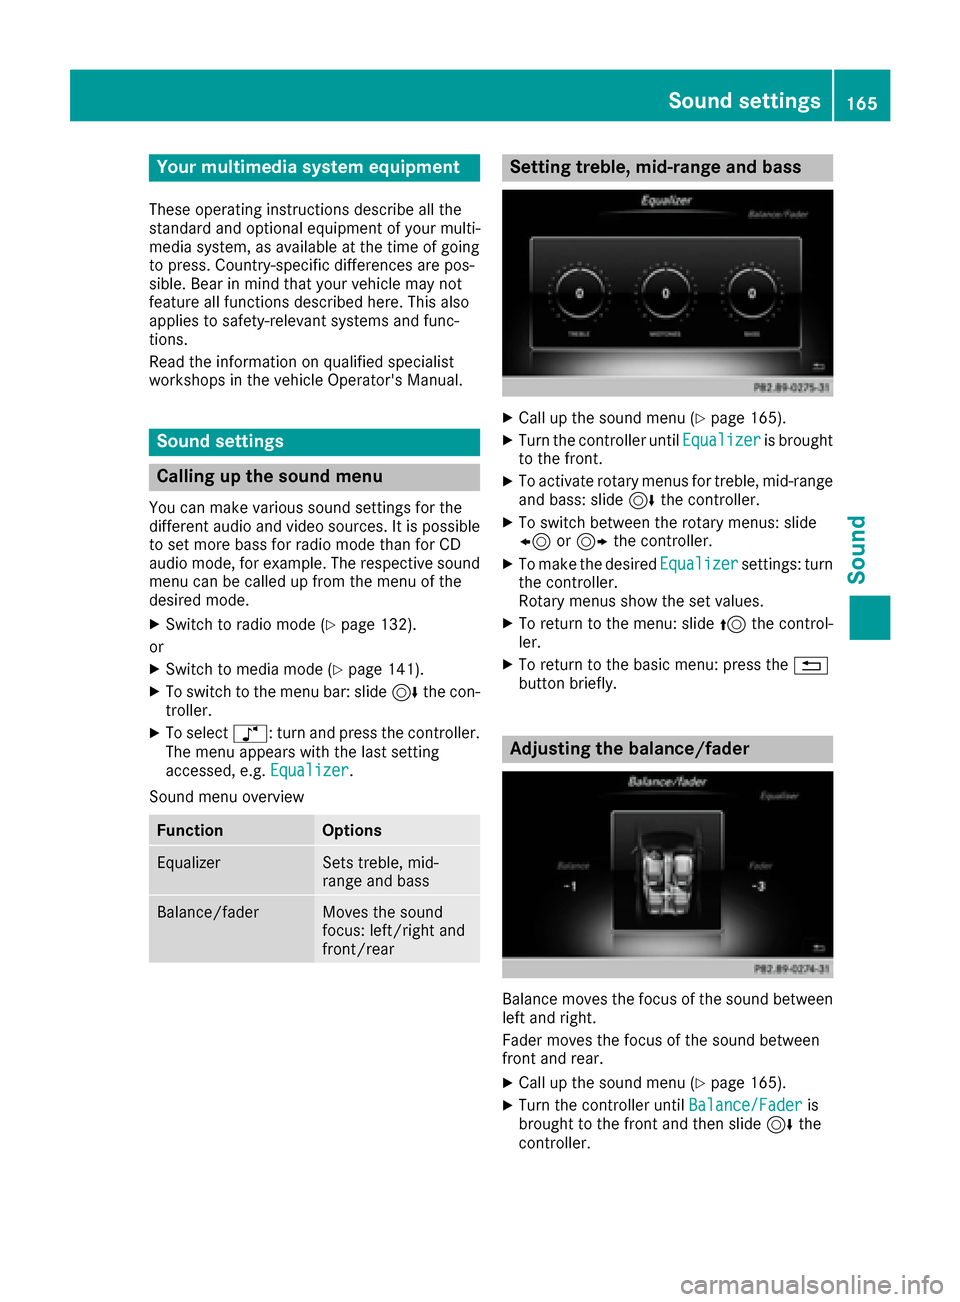
Setting treble, mid-range an dbass
XCall up th esound men u (Ypage 165).
XTurnth econtroller until Equalizeris brought
to th efront.
XTo activat erotary menus fo rtreble ,mid-range
an dbass :slid e6 thecontroller .
XTo switch between th erotary menus: slid e
8 or9 thecontroller .
XTo maketh edesire dEqualize rsettings: turn
th econtroller .
Rotary menus sho wtheset values.
XTo return to th emenu: slid e5 thecontrol-
ler .
XTo return to th ebasi cmenu: press th e%
butto nbriefly.
Adjusting th ebalance/fader
Balance moves th efocus of th esound between
lef tan dright .
Fader moves th efocus of th esound between
fron tan drear.
XCall up th esound men u (Ypage 165).
XTurnth econtroller until Balance/Faderis
brought to th efron tan dthen slid e6 the
controller .
Sound settings165
Sound