2017 MERCEDES-BENZ E-CLASS SALOON jump start
[x] Cancel search: jump startPage 22 of 497
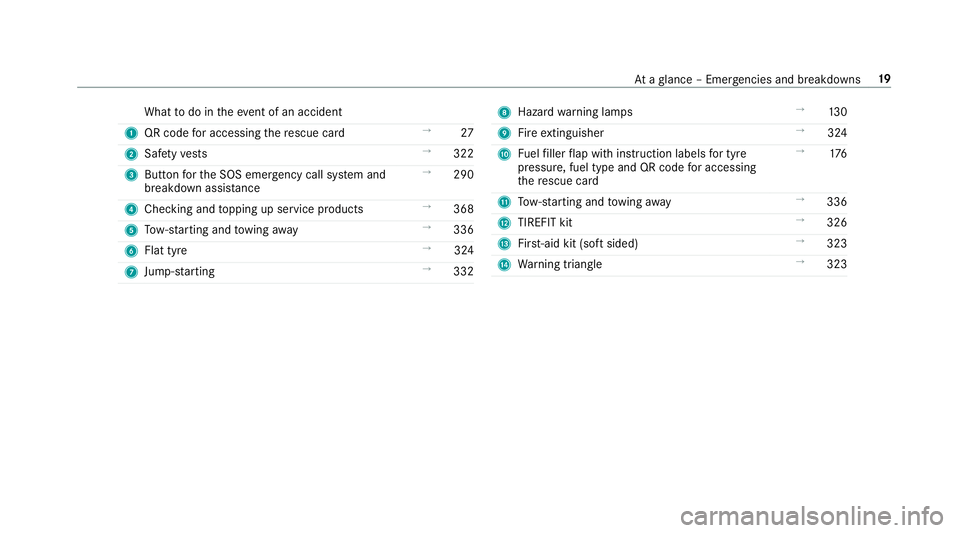
What
todo in theeve nt of an accident
1 QR code for accessing there scue card →
27
2 Safetyve sts →
322
3 Button forth e SOS emer gency call sy stem and
breakdown assis tance →
290
4 Checking and topping up service products →
368
5 Tow- starting and towing away →
336
6 Flat tyre →
324
7 Jump -sta rting →
332 8
Hazard warning lamps →
13 0
9 Fire extinguisher →
324
A Fuelfiller flap with instruction labels for tyre
pressu re, fuel type and QR code for accessing
th ere scue card →
176
B Tow- starting and towing away →
336
C TIREFIT kit →
326
D First-aid kit (so ftsided) →
323
E Warning triangle →
323 At
aglance – Emer gencies and breakdowns 19
Page 335 of 497
We
ar saf etygl asses. Ke
ep children away. Obser
vethis Owner's Manual.
If yo u do not intend touse theve hicle over an
ex tended pe riod of time:
R Activate standby mode, or
R Connect the battery toa bat tery charger
appr ovedby Mercedes-Benz, or
R Consult a qualified specialist workshop to
disconnect the battery St
arting assi stance and charging the12 V
battery Ve
hicles with a lithium-ion battery #
When charging the battery and during start‐
ing assis tance, al ways use the jump-s tart
connection point in the engine compartment.
* NO
TEDama getothe battery from over‐
vo ltage When
charging using a bat tery charge r with‐
out a maximum charging voltage, the battery
or the on-board electronics may be damaged. #
Only use battery charge rs with a maxi‐
mum charging voltage of 14.4 V. All
other vehicles #
When charging the battery and during start‐
ing assis tance, al ways use the jump-s tart
connection point in the engine compartment. *
NO
TEDamaging the battery thro ugh
ove rvoltage When using a battery
charge r without a maxi‐
mum charging voltage, the battery or the
ve hicle electronics may be damaged. #
Only use battery charge rs with a maxi‐
mum charging voltage of 14.8 V. &
WARNING Risk ofexplosion from hydro‐
ge nga s igniting
A battery generates hydrogen gas during the
ch arging process. If there is a short circuit or
spar ksstart toform ,th ere is a danger of the
hy drogen gas igniting. #
Make sure that the positive term inal of
th e connected battery does not come
into conta ct withvehicle parts. #
Never place me tal objects or tools on a
batter y. #
When connecting and disconnecting the
batter y,yo u must obse rveth e descri‐
bed order forth e battery clamps. 332
Breakdown assis tance
Page 336 of 497

#
When giving starting assis tance, al ways
make sure that you on lyconnect bat‐
te ry term inals with identical polarity. #
During starting assis tance, you must
obse rveth e described order for con‐
necting and disconnecting the jump
lead. #
Do not connect or disconnect the bat‐
te ry cla mp s while the engine is running. &
WARNING Risk ofexplosion during
ch arging process and starting assis tance
During thech arging process and starting
assis tance, the battery may release an explo‐
sive gas mixture. #
Avoid fire , naked flames, creating
spar ksand smoking. #
Make sure that there is suf ficient venti‐
lation du ring thech arging process and
during starting assis tance. #
Do not lean over a batter y. If
th e indicator/warning lamps in the instrument
clus ter do not light up at low temp eratures, it is
ve ry likely that the dischar ged battery has fro‐
zen. &
WARNING Risk ofexplosion from a fro‐
zen battery
A dischar ged battery may freeze at temp era‐
tures slightly abo veor below freezing point.
During starting assis tance or battery charg‐
ing, bat tery gas may be released. #
Alw aysth aw a frozen bat tery out first
before charging it or per form ing start‐
ing assis tance. The service li
feof a battery that has been
th awe d may be dramatically shor tened.
It is recommended that you ha veathaw ed bat‐
te ry checked at a qualified specialist workshop. All
vehicles
* NO
TEDama gecaused bynumerous or
ex tended attem ptsto start the engine Nume
rous or extended attem ptsto start the
engine may damage the catalytic con verter
due tonon-combu sted fuel. #
Avoid numerous and extended attem pts
to start the engine. Obser
vethefo llowing points during starting
assis tance and when charging the battery:
R Only use undamaged jump lead/charging
cables with a suf ficient cross-section and
insula tedte rm inal clamps.
R Non- insulated parts of thete rm inal clamps
must not come into con tact wi thother me tal
parts while the jump lead/charging cable is
connected tothe battery/jump-s tart connec‐
tion point.
R The jump lead/charging cable must not
come into contact wi thany parts which may
mo vewhen the engine is running. Breakdown assi
stance 333
Page 337 of 497
R
Alw ays make sure that nei ther you nor the
battery is elect rostatically charge d.
R Keep away from fire and naked flames.
R Do not lean over the batter y.
R When charging: only use battery charge rs
te sted and appr ovedby Mercedes-Benz and
re ad the battery charge r's operating instruc‐
tions before charging the batter y.
Obser vethe additional following points during
st arting assis tance:
R Starting assis tance may only be pr ovided
using batteries with a nominal voltage of
12 V.
R The vehicles must not touch.
R Petrol engine: only acceptstarting assis‐
ta nce if the engine and exhaust sy stem are
cold. #
Secure theve hicle byapplying the electric
parking brake. #
Automatic transmission: shiftthe transmis‐
sion toposition j. #
Manual transmission: shift into neutral. #
Make sure that the ignition and all electrical
consumers are switched off. #
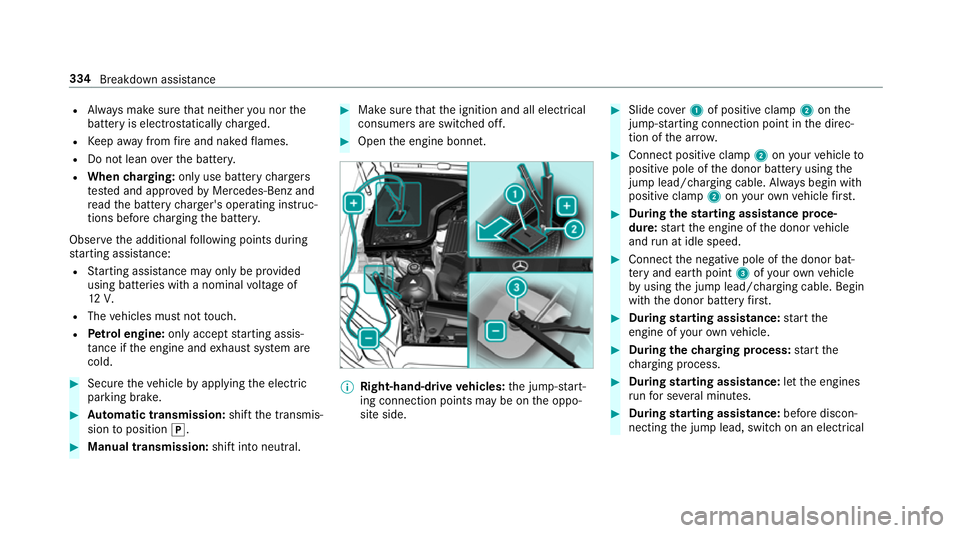
Open the engine bonn et. %
Right-hand-drive vehicles: the jump-s tart‐
ing connection points may be on the oppo‐
site side. #
Slide co ver1 of positive clamp 2onthe
jump-s tarting connection point in the direc‐
tion of the ar row. #
Connect positive clamp 2onyour vehicle to
positive pole of the donor battery using the
jump lead/charging cable. Alw ays begin with
positive clamp 2onyour ow nve hicle firs t. #
During thest arting assi stance proce‐
dure: start the engine of the donor vehicle
and run at idle speed. #
Connect the negative pole of the donor bat‐
te ry and ear thpoint 3ofyour ow nve hicle
by using the jump lead/charging cable. Begin
with the donor battery firs t. #
During starting assi stance: start the
engine of your ow nve hicle. #
During thech arging process: start the
ch arging process. #
During starting assi stance: letthe engines
ru nfo r se veral minutes. #
During starting assi stance: before discon‐
necting the jump lead, switch on an electrical 334
Breakdown assis tance
Page 338 of 497
consumer in
your ow nve hicle, e.g. there ar
wind owheater or lighting.
When thest arting assis tance/charging process
is compl ete: #
First,re mo vethe jump lead/charging cable
from ear thpoint 3and negative pole of the
donor batter y,then from positive clamp 2
and positive pole of the donor batter y.Begin ea
ch time wi th the conta cts onyour own
ve hicle firs t. #
Afterre moving the jump lead/charging
cable, close co ver1 of positive clamp 2.
Fu rther information can be obtained at a quali‐
fi ed specialist workshop. To
w- starting or towing away Pe
rm itted towing me thods Mercedes-Benz
recommends transporting your
ve hicle in the case of a breakdown, rath er than
to wing it away. *
NO
TEDama getotheve hicle due to tow‐
ing away incor rectly #
Obser vethe instructions and no tes on
to wing away. Breakdown assis
tance 335
Page 413 of 497
Display messages
Possible causes/consequences and M
MSolutions
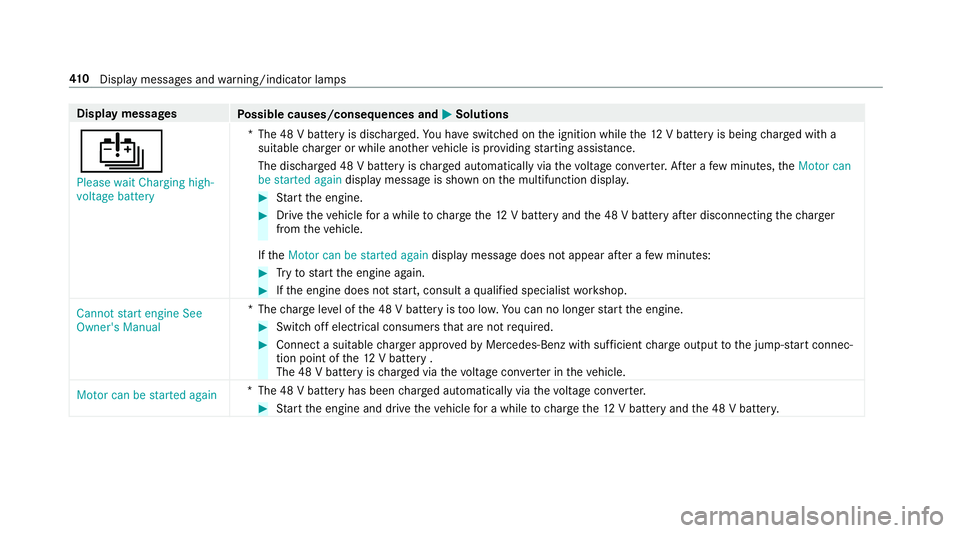
Û Please wait Charging high-
voltage battery *T
he 48 V battery is dischar ged. You ha veswitched on the ignition while the12 V battery is being charge d with a
suitable charge r or while ano ther vehicle is pr oviding starting assis tance.
The discha rged 48 V battery is charge d automatically via thevo ltage con verter. Af ter a few minutes, theMotor can
be started again display message is shown on the multifunction displa y. #
Start the engine. #
Drive theve hicle for a while tocharge the12 V battery and the 48 V battery af ter disconnecting thech arger
from theve hicle.
If th eMotor can be started again display message does not appear af ter a few minutes: #
Tryto start the engine again. #
Ifth e engine does not start, consult a qualified specialist workshop.
Cannot start engine See
Owner's Manual *T
hecharge leve l of the 48 V battery is too lo w.You can no lon gerst art the engine. #
Switch off electrical consumers that are not required. #
Connect a suitable charge r appro vedby Mercedes-Benz with suf ficient charge output tothe jump-s tart connec‐
tion point of the12 V battery .
The 48 V battery is charge d via thevo ltage con verter in theve hicle.
Motor can be started again *T
he 48 V battery has been charge d automatically via thevo ltage con verter. #
Start the engine and drive theve hicle for a while tocharge the12 V battery and the 48 V batter y. 41 0
Displaymessa ges and warning/indicator lamps
Page 476 of 497
Instrument clus
ter
see Instrument Display
see Warning/indicator lamps
Instrument Display .................................. 251
Ad justing the lighting .......................... 255
Fu nction/no tes .................................... 251
Overview ........................................1 0, 251
Wa rning/indicator lamps .................... 438
Instrument lighting .................................255
Intelligent Light Sy stem .......................... 13 0
Ac tive headla mps function ...................1 31
Ad aptive Highbeam Assist Plus .......... .134
Ad versewe ather light .......................... 13 2
City lighting ........................................ .132
Cornering light ..................................... 131
Fo g light (extended range) ................... 13 2
Mo torw ay mode ................................... 131
Overview ............................................. 13 0
Switching on/off ................................. 13 2
Interior lighting ........................................ 13 6
Ambient lighting .................................. 13 6
Setting ................................................. 13 6
Switch-off del aytime ........................... 13 6Interior lighting
see In terior lighting
see Lighting
see Lights
Interior pr otection
Fu nction ................................................ 93
Switching on/o ff................................... 93
In tern etconnection
Cancelling permission ........................ .294
Closing ................................................ 294
Connection status .............................. .295
Displ aying the connection status ........ 295
Editing access data ............................ .294
Es tablishing .........................................2 94
Mobile phone de tails .......................... .294
Re strictions ......................................... 293
Setting access da ta............................. 293
Setting up ............................................ 293
Ionisation .................................................. 151
ISOFIX child seat securing sy stem .......... 49
Fitting .................................................... 50
No tes ..................................................... 49
Seats suitable for attaching ................... 58 J
Jack Declaration of Conformity .................... .24
St orage location ..................................3 56
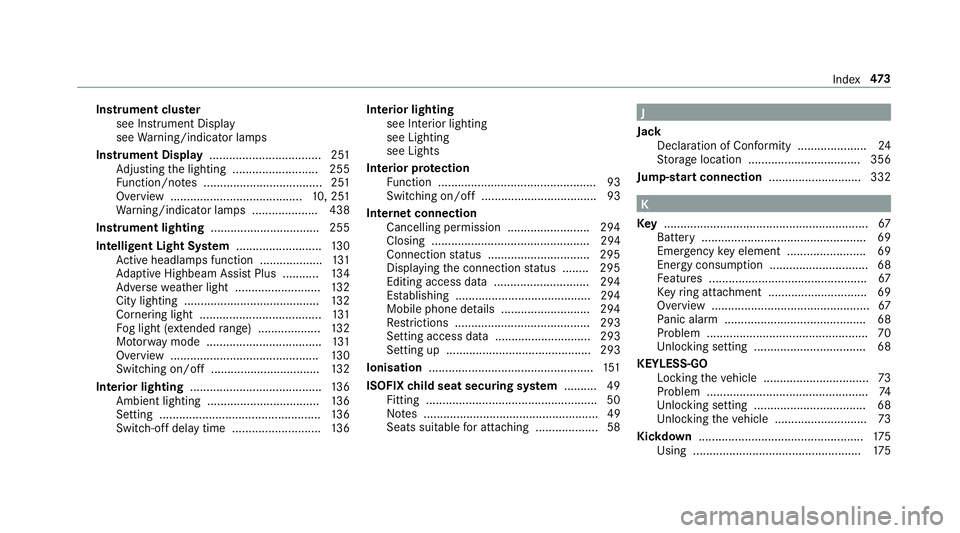
Jump-start connection ............................ 332 K
Ke y.............................................................. 67
Battery .................................................. 69
Emer gency key element ........................ 69
Energy consum ption .............................. 68
Fe atures ................................................ 67
Ke yring attachment .............................. 69
Overview ................................................ 67
Pa nic alarm ........................................... 68
Problem ................................................ .70
Un locking setting .................................. 68
KEYLESS-GO Locking theve hicle ................................ 73
Problem .................................................74
Un locking setting .................................. 68
Un locking theve hicle ............................73
Kickd own.................................................. 175
Using ................................................... 175 Index
473
Page 486 of 497
Sliding sunroof
.......................................... 86
Au tomatic features ................................ 89
Closing .................................................. 86
Closing using theke y ............................ 85
Opening ................................................ .86
Opening with theke y ............................ .84
Problem .................................................90
Ra in-closing feature .............................. .89
Smartphone Locking theve hicle ................................ 72
Un locking theve hicle ............................72
Smartphone see Telephone
Snow chains ............................................ 345
Soc ket (12 V) ............................................ 121
Boot ..................................................... 12 3
Fr ont centre console ............................ 121
Re ar passenger compartment ............ .122
Soc ket (230 V) ......................................... 12 2
Re ar passenger compartment ............ .122
Sound PRE-SAFE ®
Sound ................................. 45
wheels and tyres ................................. 344 Sound
see Burmes ter®
sur round sound sy stem
see Tone settings
Spare wheel see Emergency spa rewheel
Spectacles compa rtment ...................... .109
Speed dial list Calling up ............................................ 285
Deleting speed dial presets ................. 285
Setting up ............................................ 285
Speed limit for winter tyres
Setting ................................................. 205
Speedome ter
Digital .................................................. 257
St andby mode
Ac tivating/deactivating ...................... .190
Fu nction .............................................. 189
St anding lights ......................................... 127
St art/s top button
St arting theve hicle ............................. 16 0
Switching off theve hicle ......................1 81
Switching on the po wer supply or
ignition ................................................ 15 9St
art/s top function
see ECO start/ stop function
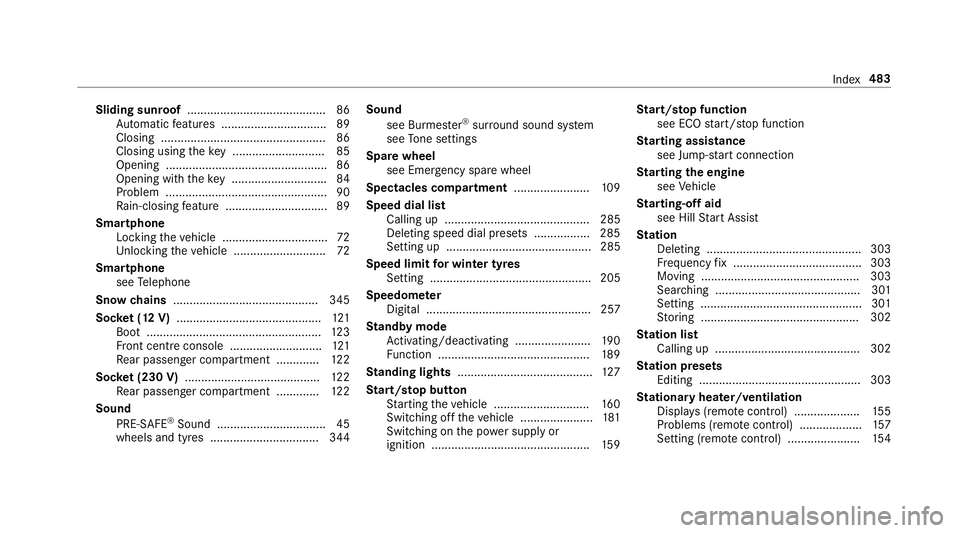
St arting assi stance
see Jump -sta rt connection
St arting the engine
see Vehicle
St arting-o ffaid
see Hill Start Assist
St ation
Deleting ............................................... 303
Fr equency fix ....................................... 303
Moving ................................................ 303
Sea rching ............................................ 301
Setting .................................................3 01
St oring ................................................ 302
St ation list
Calling up ............................................ 302
St ation presets
Editing ................................................. 303
St ationary heater/ventilation
Displ ays (remo tecontrol) .................... 15 5
Problems (remo tecontrol) ................... 157
Setting (remo tecontrol) ...................... 154 Index
483