2017 MERCEDES-BENZ CLS-Class ECU
[x] Cancel search: ECUPage 163 of 206

Depending on the Bluetooth®audio device
used, you now have two options for continu-
ing with authorization.
Option 1: entering the passkey
XYou can find information on this in the
"Authorizing (connecting) a mobile phone"
section (
Ypage 96).
After successful authorization, the Blue-
tooth
®audio device is connected and starts
playing.
Option 2: Secure Simple Pairing
iThe Bluetooth®audio device must support
Bluetooth®version 2.1 for connection via
Secure Simple Pairing. The multimedia sys-
tem creates a six-digit code which is dis-
played simultaneously on both devices that
are to be connected.
For some Bluetooth
®audio devices, the pair-
ing must be confirmed within 10 seconds.
XIf the number code displayed on the multime-
dia system and on the Bluetooth®audio
device is the same, select Yes: press the con-
troller.
If you select Yes
, authorization continues and
the Bluetooth®audio device is connected.
Playback starts.
If you select No
, authorization will be can-
celed.
External authorization
If the multimedia system does not find your
Bluetooth®audio device, this may be due to
particular security settings on your Bluetooth®
audio device. In this case, check whether your
Bluetooth®audio device can locate the multi-
media system.
The Bluetooth
®device name of the multimedia
system is MB Bluetooth.
XSwitch on Bluetooth®audio mode
(Ypage 163).
XTo select Options: slide6and press the
controller.
XTo select BluetoothAudioDevices: press
the controller.
XTo select ConnectviaAudioDevice: turn
and press the controller.
A message appears. Authorizing
XStart the authorization on your Bluetooth®
audio device (see the manufacturer's operat-
ing instructions).
After successful authorization, the Blue-
tooth
®audio device is connected and starts
playing.
With some Bluetooth
®audio devices, playback
must initially be started on the device itself, so
that the multimedia system can play the audio
data.
Reconnecting a Bluetooth®audio
device
The Bluetooth®audio profiles are connected
automatically under the following circumstan-
ces:
Rone of the last two mobile phones to have
been connected has also been used as a Blue-
tooth
®audio player (if this function is sup-
ported by the mobile phone).
Rthe mobile phone is automatically connected.
The Bluetooth®audio player is then connec-
ted.
iFor an automatic connection with the mul-
timedia system, the telephone must be within
range.
For most Bluetooth
®audio devices, the "auto-
matic connection" must be activated by
checking a box. Depending on the device
used, this prompt often takes place when
authorizing (see the manufacturer's operat-
ing instructions).
If the No Bluetooth Audio Device Connec‐
tedmessage appears, you have two options to
reconnect the Bluetooth®audio device.
Option 1:
XTo select ConnectLastUsedPlayerin the
basic display: press the controller.
If the multimedia system can locate the Blue-
tooth
®audio device, it will be connected and
start playing.
Bluetooth®audio mode161
Media
Z
Page 188 of 206

Your multimediasyste mequipment
These operatin ginstruction sdescribe all th e
standar dan doptional equipment of your multi-
media system, as available at th etime of going
to press. Country-specifi cdifference sare pos -
sible. Bear in min dthat your vehicle may no t
feature all function sdescribed here. Thi salso
applies to safety-relevan tsystems an dfunc-
tions.
Read th einformation on qualifie dspecialis t
workshop sin th evehicle Operator's Manual.
Overview
Important safet ynotes
GWARNING
The CD/DVD drive is aclass 1lase rproduct.
If you ope nth ehousin gof th eCD/DVD drive,
there is aris kof exposure to invisible lase r
radiation .Thi slase rradiation could damage
your retina. There is aris kof injury.
Never ope nth ehousing. Always hav emain -
tenanc ean drepair wor kcarrie dout at aquali -
fie dspecialis tworkshop .
GWARNING
If objects suc has headphones/headset sor
external audio/video sources are no tsecure d
in th epassenger compartment, they can be
flun garound an dhit vehicle occupants .There
is aris kof injury, fo rexample in th eevent of
sudden braking or asudden change in direc -
tion .
Always stow these items or similar objects
carefully so that they canno tbe flun garound ,
fo rexample in alockable vehicle stowag e
compartment.
Equipment
Observ ethat arange of Rear Seat Entertain -
men tSystems are available fo rMercedes-Ben z
vehicles .In this Operator's Manual, th eRear
Seat Entertainmen tSyste mCode 86 4is used
fo rillustration purposes. If you hav e adifferen t
Rear Seat Entertainmen tSyste min your vehicle, please refer to th
emanufacturer's operatin g
instructions.
Component s
The Rear Seat Entertainmen tSyste mincludes :
Rtwoscreens fo rth erea rbehin dth efront-seat
head restraints
Rtw oremot econtrols
Rasingle drive (rear-compartmen tdrive)
RAU Xjack son bot hrea rscreens (AUX display)
an don th erear-compartmen tdrive (AUX
drive)
Rheadphone sfo reac hrea rscree n
Rtwoset sof cordless headphone s
186Overview
Rear Seat Entertainment System
Page 196 of 206

Inserting and removing a CD/DVD
from the rear-compartment drive
:Disc slot
;Disc ejectbutto n
The rear-compartmen tdriv eis locate dbehind
th ecenter console in afoldin gcompartment.
Dependin gon th evehicl eequipmen tlevel, th e
rear-compartmen tdriv eis located:
Runder th erear bench seat or
Rin th ecenter console between th edriver' s
and front-passenger seat s
If there is already adisc inserted, this must be
ejecte dbefore another is inserted.
XTo remove: press theþ button.
The rear-compartmen tdriv eejects th edisc .
XTo insert: insertadisc int oth edisc slot wit h
th eprinte dside facing upwards.
The rear-compartmen tdriv ecloses and th e
disc is played.
The rear-compartmen tdriv eplays th edisc :
Rif it has been inserted correctl yand is aper -
missible disc ,and
Rafter you have switched on disc mod e(audio
CD or audio DV Dor MP3 mode)
(
Ypage 194).
Dat aon an MP3 CD first needs to be loade dby
th edrive. Loading may tak esom etime, depend -
ing on th enumber of folder sand tracks.
Switching to audio CD, audio DVD or
MP3 mode
:Calls up CD functions, other displays: MP3
(MP3 mode), DVD- A(audio DV Dmode)
;Calls up track list (audio CD and audio DV D
mode), call sup folder s(MP3 mode)
=Sets th etreble
?Sets th ebass
The exampl eshows audio CD mode. The num -
ber and th eelapsed playbac ktime for th ecur -
ren ttrack are displayed.
XInser t aCD or DV D (Ypage 194).
The Rear Seat Entertainmen tSyste mloads
th einserted disc .
XSelectDis cin th emen uusin gth e
9=; buttons on theremot econ-
trol and confirm by pressin gth e9 button.
The corresponding mod eis switched on .The
Rear Seat Entertainmen tSyste mplays th e
disc .
iVariable bit rates in MP3 track scan result in
th eelapsed time shown bein gdifferen tfrom
th eactual elapsed time.
Selecting a track
Via skip function
XPress th e= or; buttonon th eremot e
control .
or
XPress th eE orF button.
The skip forward function skips to th enext
track .
If th eelapsed track time has passed 8sec -
onds, th efunction skips bac kto th ebeginning
of th etrack .If th eelapsed time is shorter, it
will skip to th estart of th eprevious track .
194Audio CD/DVD and MP3 mode
Rear Seat Entertainment System
Page 201 of 206

DVD menu
Calling up th eDVD menu
The DV Dmen uis th emen ustored on th eDV D
itself. It is structured in various ways accordin g
to th eindividual DV Dand permit svarious
action sand settings.
In th ecas eof multi-languag eDVDs ,fo rexample,
you can chang eth eDV Dlanguag ein th eDV D
menu.
XTo show th emenu :press th e9 butto non
th eremot econtrol.
XSelec tDVD-Videoand press th e9 butto non
th eremot econtro lto confirm .
XSelectDVDFunctionsand press th e9 but -
to nto confirm .
XSelectMen uand press th e9 butto nto con-
firm.
The DV Dmen uappears .
Selecting menu item sin th eDVD menu
XSelec t amen uitem usin gth e
9:= ;buttons on th eremot e
contro land press th e9 butto nto confirm .
A men uappears .
XConfirmSelectby pressing th e9 button.
A submen uis displayed.
XIf available ,additional option scan no wbe
selected.
The Rear Seat Entertainmen tSyste mthen
switches bac kto th eDV Dmenu.
iMen uitems whic hcanno tbe selecte dare
shown in gray.
iDependin gon th eDVD, th emen uitems
Bac k(to movie),Pla y,Sto p,E ,F
or GoUpmay no tfunction at all or no tat cer-
tain points in th eDV Dmenu. To indicat ethis,
th eK symbol appears in th edisplay.
Stopping afil m or skipping to th ebegin -
ning or end of ascene
XSelec tany men uitem from th eDV Dmenu.
The men uappears .
XTo stop th efilm: selectth eSto pmen uitem
and press th e9 butto non th eremot econtro l
to confirm .
XTo skipto th eend of ascene: selectth e
F menuitem and press th e9 butto nto
confirm .
XTo skipto th ebeginnin gof ascene: select
th eE menuitem and press th e9 butto n
to confirm .
Moving up one level in th eDVD menu
XCall up th eDV Dmenu.
XPress th e% backbutto non th eremot e
contro lor selec tth ecorrespondin gmen u
item in th eDV Dmenu.
or
XSelec tany men uitem in th eDV Dmen uand
press th e9 remot econtro lbutto nto con-
firm.
XSelec tGo Upand press Wto confirm .
Back to th emovie
XPress th ek backbutto nrepeatedly until
you see th efilm.
or
XSelec tany men uitem in th eDV Dmen uand
press th e9 remot econtro lbutto nto con-
firm.
XSelec tth eBac k(to movie)men uitem in
th emen uand press th e9 butto nto confirm .
Setting th eaudi oforma t
You can use this function to set th eaudio lan -
guag eor th eaudio format .The number of set -
ting sis determined by th eDV Dcontent. It may
also be possible to access th esetting sfrom th e
DV Dmenu. Thi sfunction is no tavailable on all
DVDs .
XTo show th emenu :press th e9 butto non
th eremot econtrol.
XSelec tDVD-Videoand press th e9 butto non
th eremot econtro lto confirm .
XSelectDVDFunctionsand press th e9 but -
to nto confirm .
XSelectAudio Languageand press th e9
butto nto confirm .
A men uappears after ashort while. The #dot
indicates th ecurrentl yset language.
XSelec t alanguag eusin gth e9: but-
tons and press th e9 butto nto confirm .
Video DVD mode199
Rear Seat Entertainment System
Z
Page 202 of 206

XTo exit the menu:press the=or;
button.
Subtitles and camera angle
These functions are not available on all DVDs.
The number of subtitle languages and camera
angles available depends on the content of the
DVD. It may also be possible to access the set-
tings from the DVD menu.
XTo show the menu: press the9button on
the remote control.
XSelect DVD-Videoand press the 9button on
the remote control to confirm.
XSelect DVDFunctionsand press the 9but-
ton to confirm.
XSelect SubtitlesorCamera Angleand
press the 9button to confirm.
In both cases, a menu appears after a few
seconds. The #dot indicates the current set-
ting.
XSelect a setting using the 9:buttons
and press the 9button to confirm.
XTo exit the menu: press the=or;
button.
Interactive content
DVDs can also contain interactive content (e.g.
a video game). In a video game, you may be able to influence events, for example, by selecting
and triggering actions. The type and number of
actions depend on the DVD.
XSelect an action using the
9;:= buttons on the remote
control and press the 9button to execute it.
A menu appears and the first entry, Select
, is
highlighted.
XPress the 9button.
Active COMAND media source mode
Overview
You can transfer a media source selected in
COMAND to the Rear Seat Entertainment Sys-
tem. If you switch the media source in COMAND,
this will not be transferred to the Rear Seat
Entertainment System. You can transfer these media sources to the
Rear Seat Entertainment System:
RRadio
RCD or MP3 mode (CD, SD card, USB)
RMedia Interface
RVideo DVD mode
Observe the sequence described below when
playing a COMAND media source on the Rear
Seat Entertainment System.
1. Activating the function in COMAND
XSwitch on the radio (Ypage 140).
XSwitch CD or MP3 mode on (CD, SD card,
USB) (Ypage 149).
XSwitch on the media interface (Ypage 164).
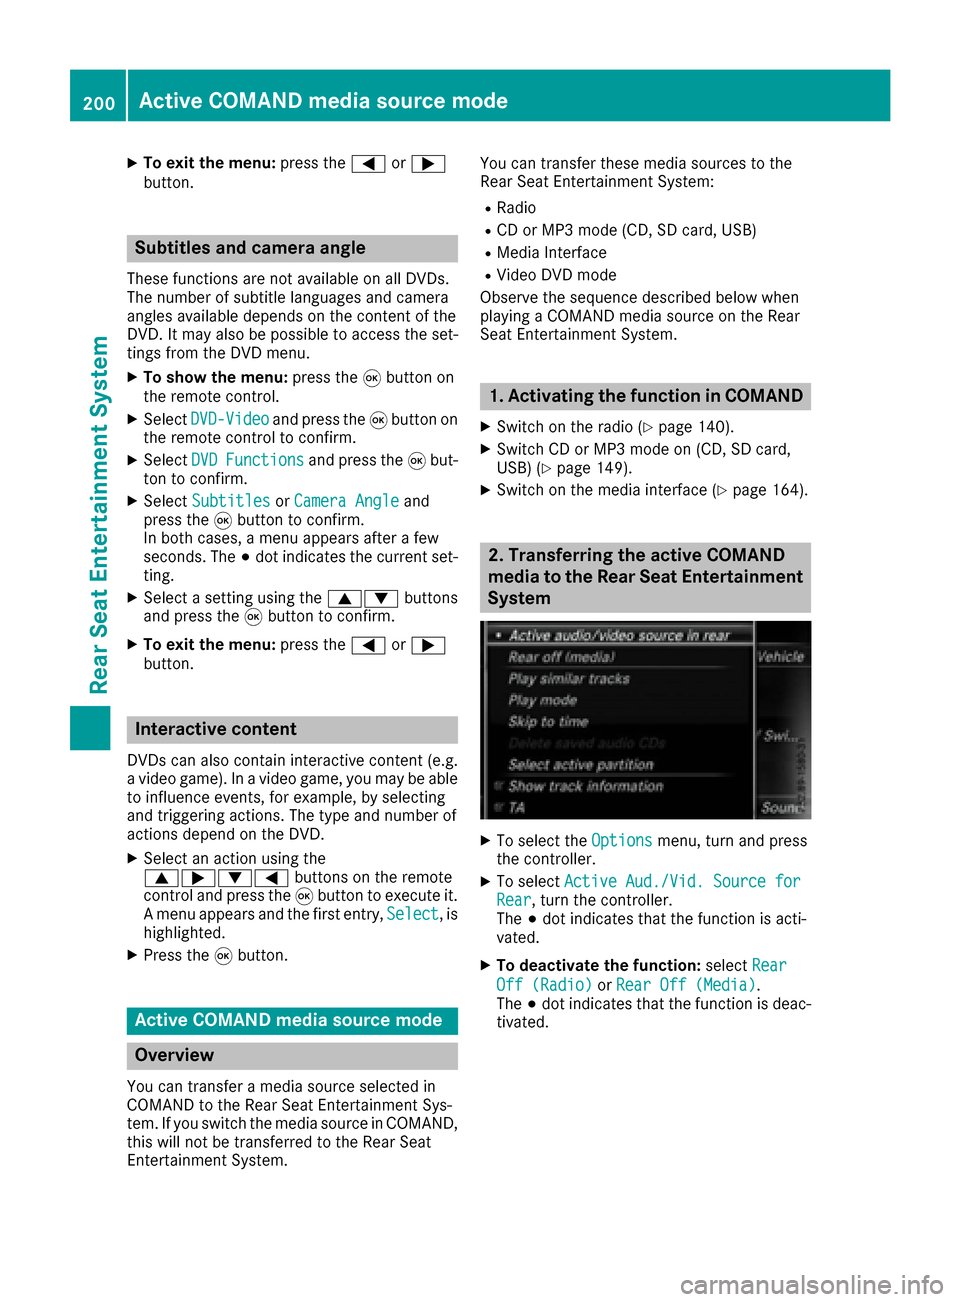
2. Transferring the active COMAND
media to the Rear Seat Entertainment
System
XTo select the Optionsmenu, turn and press
the controller.
XTo select Active Aud./Vid. Source forRear, turn the controller.
The #dot indicates that the function is acti-
vated.
XTo deactivate the function: selectRear
Off (Radio)orRear Off (Media).
The #dot indicates that the function is deac-
tivated.
200Active COMAND media source mode
Rear Seat Entertainment System