2017 MERCEDES-BENZ CLA wheel
[x] Cancel search: wheelPage 47 of 318

G WARNING
If you modify the air bag cover or affix objects
such as stickers to it, the air bag can no longer
function correctly. There is an increased risk
of injury.
Never modify an air bag cover or affix objects
to it.
G WARNING
Sensors to control the air bags are located in
the doors. Modifications or work not per-
formed correctly to the doors or door panel-
ing, as well as damaged doors, can lead to the
function of the sensors being impaired. The air
bags might therefore not function properly
anymore. Consequently, the air bags cannot
protect vehicle occupants as they are
designed to do. There is an increased risk of
injury.
Never modify the doors or parts of the doors.
Always have work on the doors or door pan-
eling carried out at a qualified specialist work-
shop.
Front air bags
! Do not place heavy objects on the front-
passenger seat. This could cause the system
to identify the seat as being occupied. In the
event of an accident, the restraint systems on
the front-passenger side may be triggered
and have to be replaced.
Driver's air bag �C deploys in front of the steer-
ing wheel. Front-passenger front air bag �D
deploys in front of and above the glove box. When deployed, the front air bags offer addi-
tional head and thorax protection for the occu-
pants in the front seats.
The PASSENGER AIR BAG OFF indicator lamp
informs you about the status of the front-
passenger front air bag ( Y
page 40).
The front-passenger front air bag will only
deploy if: R
the system, based on the OCS weight sensor
readings, detects that the front-passenger
seat is occupied ( Y
page 46). The
PASSENGER AIR BAG OFF indicator lamp is
not lit ( Y
page 47) R
the restraint system control unit predicts a
high accident severity
Knee bags
Driver's knee bag �C deploys under the steering
column and front-passenger knee bag �D under
the glove box. The driver's and front-passenger
knee bags are triggered together with the front
air bags.
The driver's and front-passenger knee bags
offer additional thigh, knee and lower leg pro-
tection for the occupants in the front seats.
Side impact air bags
G WARNING
Unsuitable seat covers can obstruct or pre-
vent deployment of the air bags integrated
into the seats. Consequently, the air bags
cannot protect vehicle occupants as they are
designed to do. In addition, the operation of
the occupant classification system (OCS)
could be adversely affected. This poses an
increased risk of injury or even fatal injury.Occupant safety 45
Safety Z
Page 62 of 318

Drivin g safet y systems
Overview of drivin g safet y systemsIn this section , you will fin d information about
th e followin g drivin g safet y systems :R
AB S ( A n ti-loc k B rakin g S ystem)
( Y
page 60)R
BA S ( B rak e A ssist S ystem) ( Y
page 60)R
Active Brak e Assis t ( Y
page 61 )R
ES P ®
( E lectronic S t ability P r ogram)
( Y
page 63)R
EB D ( E lectroni c B rak e forc e D istribution )
( Y
page 66 )R
ADAPTIV E BRAKE ( Y
page 66 )R
STEE R CONTROL ( Y
page 66)
Important safet y notesIf you fail to adapt your drivin g style or if you are
inattentive , th e drivin g safet y systems can nei-
ther reduce th e ris k of an acciden t no r override
th e laws of physics. Driving safet y systems are
merely aids designed to assist driving. You are
responsible fo r maintainin g th e distanc e to th e
vehicle in front, fo r vehicle speed, fo r braking in
goo d time, and fo r stayin g in lane. Always adapt
your drivin g style to suit th e prevailin g road and
weather condition s and maintain a saf e distanc e
from th e vehicle in front. Drive carefully.
The drivin g safet y systems described only wor k
as effectively as possible when there is ade-
quat e contact between th e tires and th e road
surface. Please pay special attention to th e
note s on tires , recommended minimum tire
tread depths, etc. ( Y
page 282).
In wintr y drivin g conditions, always use winte r
tires (M+ S tires )a nd if necessary, snow chains.
Only in this way will the driving safety systems
described in this section work as effectively as
possible.
ABS (Anti-lock Braking System)
General information
ABS regulates brake pressure in such a way that
the wheels do not lock when you brake. This
allows you to continue steering the vehicle when
braking. The �% ABS warning lamp in the instrument
cluster lights up when the ignition is switched
on. It goes out when the engine is running.
ABS works from a speed of about 5 mph
(8 km/h), regardless of road-surface conditions.
ABS works on slippery surfaces, even when you
only brake gently.
Important safety notes
i Observe the "Important safety notes" sec-
tion ( Y
page 60).
G WARNING
If ABS is faulty, the wheels could lock when
braking. The steerability and braking charac-
teristics may be severely impaired. Addition-
ally, further driving safety systems are deac-
tivated. There is an increased danger of skid-
ding and accidents.
Drive on carefully. Have ABS checked imme-
diately at a qualified specialist workshop.
When ABS is malfunctioning, other systems,
including driving safety systems, will also
become inoperative. Observe the information
on the ABS warning lamp ( Y
page 218) and dis-
play messages which may be shown in the
instrument cluster ( Y
page 189).
Braking X
If ABS intervenes: continue to depress the
brake pedal vigorously until the braking sit-
uation is over. X
To make a full brake application: depress
the brake pedal with full force.
If ABS intervenes when braking, you will feel a
pulsing in the brake pedal.
The pulsating brake pedal can be an indication
of hazardous road conditions, and functions as a
reminder to take extra care while driving.
BAS (Brake Assist System)
General information
BAS operates in emergency braking situations.
If you depress the brake pedal quickly, BAS
automatically boosts the braking force, thus
shortening the stopping distance.60
Driving safety systems
Safety
Page 63 of 318
Important safety notes
i Observ e th e "Importan t safet y notes" sec -
tion ( Y
page 60).
G WARNIN G
If BA S is malfunctioning , th e braking distanc e
in an emergenc y braking situation is
increased. Ther e is a ris k of an accident.
In an emergenc y braking situation , depress
th e brak e pedal wit h full force . AB S prevents
th e wheels from locking.
Braking X
Kee p th e brak e pedal firmly depressed until
th e emergenc y braking situation is over.
AB S prevents th e wheels from locking.
The brakes will function as usual once you
release th e brak e pedal . BA S is deactivated.
Active Brake Assist
General information
i Observ e th e "Importan t safet y notes" sec -
tion ( Y
page 60).
Active Brake Assist consist s of a distanc e warn -
ing function wit h an autonomous braking func-
tion and braking assistanc e appropriat e to th e
situation .
Active Brake Assist can help you to minimiz e th e
ris k of a collision wit h th e vehicl e traveling in
fron t or reduce th e effects of suc h a collision .
If Active Brake Assist detects that there is a ris k
of collision , you will be warned visually and
acoustically. If you do no t reac t to th e visual and
audible collision warning , autonomous braking
can be initiate d in critical situations. If you apply
th e brak e yourself in a critical situation , Adap-
tive Brake Assist support s you wit h braking
assistanc e appropriat e to th e situation .
Important safety notes
Detection of hazardous situation s can be par-
ticularly impaired by: R
there is dirt on th e sensor s or anythin g else
covering th e sensor sR
there is snow or heav y rainR
there is interferenc e by other radar source s R
there are stron g radar reflections, for exam-
ple in parking garages R
a narrow vehicl e is traveling in front, e.g. a
motorbike R
a vehicl e is traveling in fron t on a differen t lin eR
ne w vehicles or after servicing is carrie d out
on th e Active Brake Assist system
Observ e th e important safet y note s in th e
"Breaking-in notes" section ( Y
page 120).
Followin g damag e to th e fron t en d of th e vehicle,
hav e th e configuration and operation of th e
radar sensor checke d at a qualified specialist
workshop. This also applie s to collision s at low
speeds wher e no visible damag e to th e fron t of
th e vehicl e is apparent.
Activating/deactivating Active Brake Assist is active after every ignition
cycle.
You can activat e or deactivat e Active Brake
Assist ( Y
page 182) in th e on-board computer.
When deactivated, th e distanc e warning func-
tion and th e autonomous braking function are
also deactivated.
If Active Brake Assist is deactivated, th e �
Page 65 of 318
Braking assistance appropriate to the situation
can also detect stationary objects, up to vehicle
speeds of around 44 mph 70 km/h. X
Keep the brake pedal depressed until the
emergency braking situation is over.
ABS prevents the wheels from locking.
The brakes will work normally again if: R
you release the brake pedal. R
there is no longer any danger of a collision. R
no obstacle is detected in front of your vehi-
cle.
Braking assistance appropriate to the situation
is then deactivated.
Important safety notes
i Observe the "Important safety notes" sec-
tion for driving safety systems ( Y
page 60).
G WARNING
Adaptive Brake Assist does not react: R
to people or animals R
to oncoming vehicles R
to crossing traffic R
when cornering
As a result, Adaptive Brake Assist may not
intervene in all critical conditions. There is a
risk of an accident.
Always pay careful attention to the traffic sit-
uation and be ready to brake.
G WARNING
Adaptive Brake Assist cannot always clearly
identify objects and complex traffic situa-
tions.
In such cases, Adaptive Brake Assist might: R
intervene unnecessarily R
not intervene
There is a risk of an accident.
Always pay careful attention to the traffic sit-
uation and be ready to brake. Terminate the
intervention in a non-critical driving situation.
Due to the nature of the system, complex but
non-critical driving conditions may also cause
Active Brake Assist to intervene.
Even if Active Brake Assist is not available due to
a malfunction in the radar sensor system, the brake system is still available with full brake
boosting effect and BAS.
ESP ®
(Electronic Stability Program)
General notes
i Observe the "Important safety notes" sec-
tion ( Y
page 60).
ESP ®
monitors driving stability and traction, i.e.
power transmission between the tires and the
road surface.
If ESP ®
detects that the vehicle is deviating from
the direction desired by the driver, one or more
wheels are braked to stabilize the vehicle. The
engine output is also modified to keep the vehi-
cle on the desired course within physical limits.
ESP ®
assists the driver when pulling away on
wet or slippery roads. ESP ®
can also stabilize
the vehicle during braking.
ETS/4ETS (Electronic Traction System)
i Observe the "Important safety notes" sec-
tion ( Y
page 60).
ETS traction control is part of ESP ®
. On vehicles
with 4MATIC, 4ETS is part of ESP ®
.
Traction control brakes the drive wheels indi-
vidually if they spin. This enables you to pull
away and accelerate on slippery surfaces, for
example if the road surface is slippery on one
side. In addition, more drive torque is transfer-
red to the wheel or wheels with traction.
Traction control remains active, even if you
deactivate ESP ®
.
Important safety notes
i Observe the "Important safety notes" sec-
tion ( Y
page 60).
G WARNING
If ESP ®
is malfunctioning, ESP ®
is unable to
stabilize the vehicle. Additionally, further driv-
ing safety systems are deactivated. This
increases the risk of skidding and an accident.
Drive on carefully. Have ESP ®
checked at a
qualified specialist workshop.Driving safety systems 63
Safety Z
Page 67 of 318
R
Traction control is still activated. R
STEER CONTROL is no longer active R
ESP ®
still provides support when you brake
firmly.
Deactivating/activating ESP ®
(Mercedes ‑ AMG vehicles)Important safety notes
i Observe the "Important safety notes" sec-
tion ( Y
page 60).
You can select between the following states of
ESP ®
: R
ESP ®
is activated.R
SPORT handling mode is activated. R
ESP ®
is deactivated.
G WARNING
When SPORT handling mode is activated,
there is a greater risk of skidding and acci-
dents.
Only activate SPORT handling mode in the sit-
uations described in the following.
G WARNING
If you deactivate ESP ®
, ESP ®
no longer sta-
bilizes the vehicle. There is an increased risk
of skidding and an accident.
Only deactivate ESP ®
in the situations descri-
bed in the following.
In the following situations, it may be better to
activate SPORT handling mode or deactivate
ESP ®
: R
when using snow chains R
in deep snow R
on sand or gravel R
on specially designated roads when the vehi-
cle's own oversteering and understeering
characteristics are desired
Driving in SPORT handling mode or without
ESP ®
requires an extremely qualified and expe-
rienced driver.
i Activate ESP ®
as soon as the situations
described above no longer apply. ESP ®
will
otherwise not be able to stabilize the vehicle if the vehicle starts to skid or a wheel starts to
spin.
! Avoid spinning the driven wheels for an
extended period with ESP ®
deactivated. You
could otherwise damage the drivetrain.
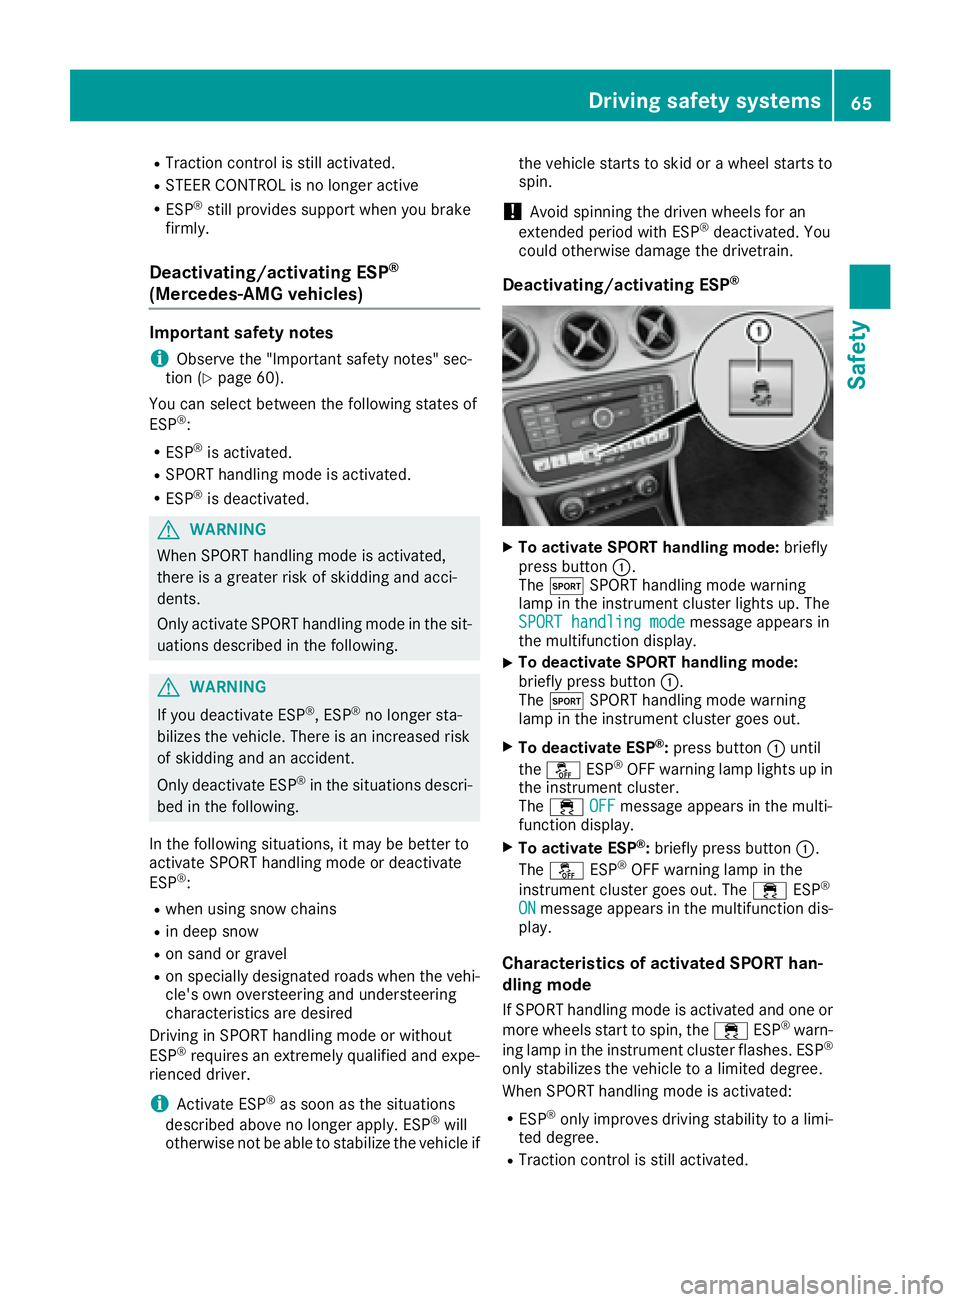
Deactivating/activating ESP ®
X
To activate SPORT handling mode: briefly
press button �C .
The �t SPORT handling mode warning
lamp in the instrument cluster lights up. The
SPORT handling mode
message appears in
the multifunction display. X
To deactivate SPORT handling mode:
briefly press button �C .
The �t SPORT handling mode warning
lamp in the instrument cluster goes out. X
To deactivate ESP ®
: press button �C until
the �
Page 68 of 318
R
The engine's torque is only restricted to a
limited degree and the drive wheels may start
to spin.
The spinning of the wheels results in a cutting
action for better traction on loose surfaces. R
ESP ®
still provides support when you brake
firmly.
Characteristics when ESP ®
is deactivatedIf ESP ®
is deactivated and one or more wheels
start to spin, the �
Page 69 of 318
This steering assistance is provided in particular
if: R
both right wheels or both left wheels are on a
wet or slippery road surface when you brake R
the vehicle begins to skid
Important safety notes
i Observe the "Important safety notes" sec-
tion ( Y
page 60).
No steering assistance is provided from STEER
CONTROL, if: R
ESP ®
is malfunctioningR
the steering is malfunctioning
If ESP ®
is malfunctioning, you will be assisted
further by the electrical power steering.
Protection against theft
Immobilizer The immobilizer prevents your vehicle from
being started without the correct SmartKey. X
To activate with the SmartKey: remove the
SmartKey from the ignition lock. X
To activate with KEYLESS-GO start-func-
tion or KEYLESS-GO: switch the ignition off
and open the driver's door. X
To deactivate: switch on the ignition.
When leaving the vehicle, always take the
SmartKey with you and lock the vehicle. Anyone
can start the engine if a valid SmartKey has been
left inside the vehicle.
i The immobilizer is always deactivated when
you start the engine.
In the event that the engine cannot be started
(yet the vehicle's battery is charged), the sys-
tem is not operational. Contact an authorized
Mercedes-Benz Center or call
1-800-FOR-MERCedes (in the USA) or
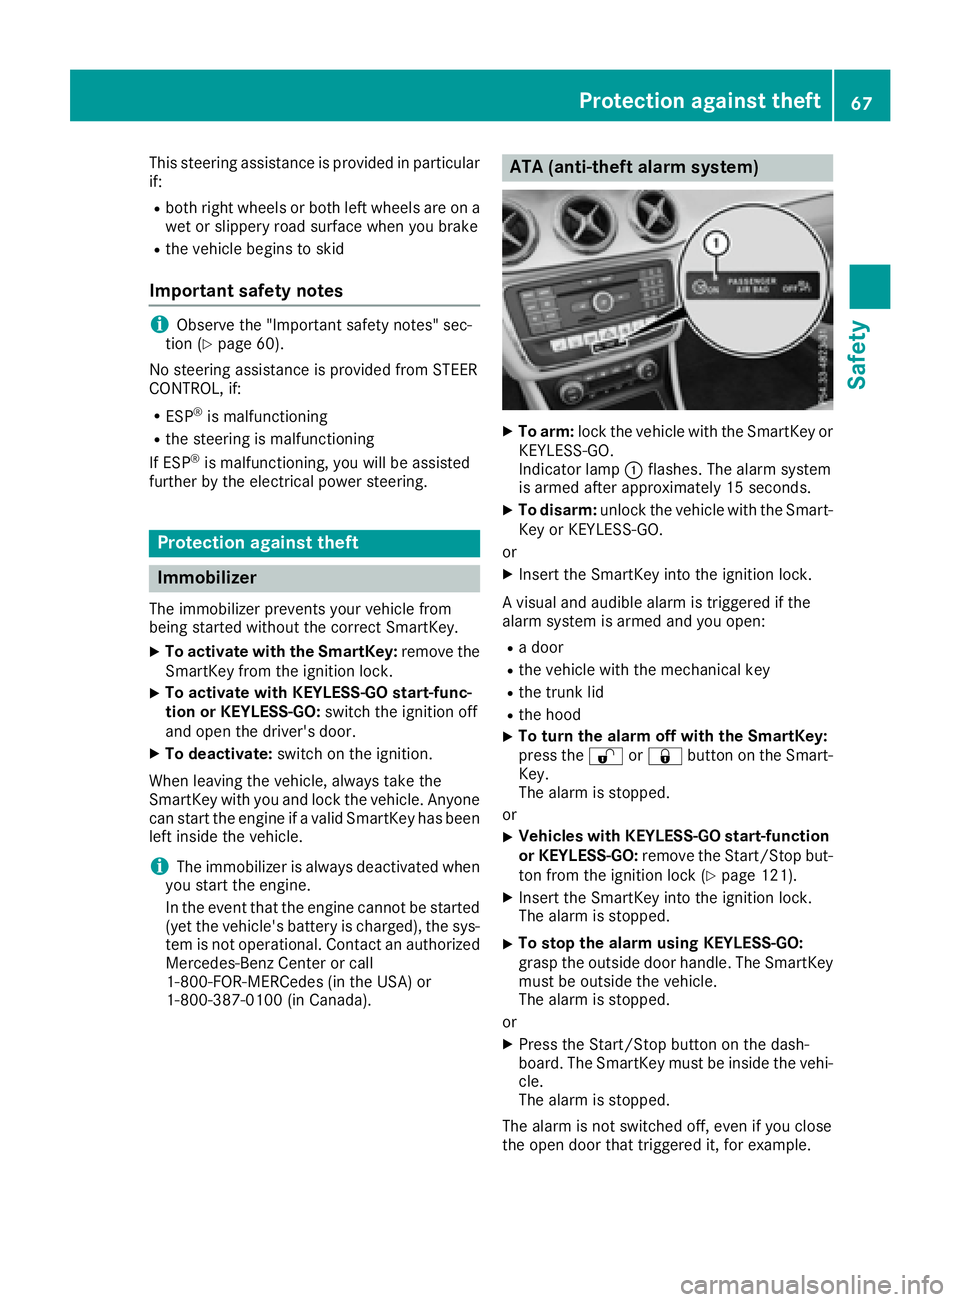
1-800-387-0100 (in Canada). ATA (anti-theft alarm system) X
To arm: lock the vehicle with the SmartKey or
KEYLESS-GO.
Indicator lamp �C flashes. The alarm system
is armed after approximately 15 seconds. X
To disarm: unlock the vehicle with the Smart-
Key or KEYLESS-GO.
or X
Insert the SmartKey into the ignition lock.
A visual and audible alarm is triggered if the
alarm system is armed and you open: R
a door R
the vehicle with the mechanical key R
the trunk lid R
the hood X
To turn the alarm off with the SmartKey:
press the �6 or �7 button on the Smart-
Key.
The alarm is stopped.
or X
Vehicles with KEYLESS-GO start-function
or KEYLESS-GO: remove the Start/Stop but-
ton from the ignition lock ( Y
page 121).X
Insert the SmartKey into the ignition lock.
The alarm is stopped. X
To stop the alarm using KEYLESS-GO:
grasp the outside door handle. The SmartKey
must be outside the vehicle.
The alarm is stopped.
or X
Press the Start/Stop button on the dash-
board. The SmartKey must be inside the vehi-
cle.
The alarm is stopped.
The alarm is not switched off, even if you close
the open door that triggered it, for example.Protection against theft 67
Safety Z
Page 78 of 318

Meanwhile, the fuel filler flap will not be locked
or unlocked.
You cannot unlock the vehicle centrally from the
inside if the vehicle has been locked with the
SmartKey or KEYLESS-GO.
You can open a door from inside the vehicle
even if it has been locked. You can open the rear
doors from inside the vehicle unless they are
secured by the child-proof lock ( Y
page 59).
If the vehicle has previously been locked with
the SmartKey from the outside, opening a door
from the inside will trigger the anti-theft alarm
system. Switch off the alarm ( Y
page 67).
If a locked door is opened from the inside, the
previous unlock status of the vehicle will be
taken into consideration if: R
the vehicle was locked using the locking but-
ton for the central locking, or R
if the vehicle was locked automatically
The vehicle will be fully unlocked if it had previ-
ously been fully unlocked. If only the driver's
door had been previously unlocked, only the
door which has been opened from the inside is
unlocked.
Automatic locking feature
X
To deactivate: press and hold button �C for
approximately five seconds until a tone
sounds. X
To activate: press and hold button �D for
approximately five seconds until a tone
sounds.
If you press one of the two buttons and do not
hear a tone, the relevant setting has already
been selected.
The vehicle is locked automatically when the
ignition is switched on and the wheels are turn-
ing. You could therefore lock yourself out if: R
the vehicle is being pushed. R
the vehicle is being towed. R
the vehicle is on a roller dynamometer.
You can also switch the automatic locking func-
tion on and off using the on-board computer
( Y
page 184).
Unlocking the driver's door (mechan-
ical key) If the vehicle can no longer be locked or
unlocked with the SmartKey or KEYLESS-GO,
use the mechanical key.
If you use the mechanical key to unlock and
open the driver's door, the anti-theft alarm sys-
tem will be triggered ( Y
page 67).X
Take the mechanical key out of the SmartKey
( Y
page 71). X
Insert the mechanical key into the lock of the
driver's door as far as it will go.
X
Turn the mechanical key counter-clockwise
as far as it will go to position �G .
The door is unlocked. X
Turn the mechanical key back and remove it. X
Insert mechanical key into the SmartKey
( Y
page 71).
Locking the vehicle (mechanical key)
If the vehicle can no longer be locked with the
SmartKey or KEYLESS-GO, use the mechanical
key. X
Open the driver's door. X
Close the front-passenger door, the rear
doors and the trunk lid.76
Doors
Opening and closing