2017 MERCEDES-BENZ C-Class reset
[x] Cancel search: resetPage 134 of 178
XTo select the required preset entry: turn the
controller.
XSlide9the controller.
An additional menu appears.
XTo select the Move Highlighted Station/Channeloption: turn and press the control-
ler.
The list of stored stations appears again.
XTo move the highlighted station to the new
position: turn the controller and press to con-
firm.
Deleting highlighted stations
XIn radio mode: slide 6the controller.
The radio menu bar appears.
XTo select Preset: turn and press the control-
ler.
XSelect Edit Station Preset.
XTo select the required preset entry: turn the
controller.
XSlide9the controller.
XTo select the Delete Highlighted Sta‐tion/Channeloption in the additional menu:
turn and press the controller.
XTo select Yes: turn and press the controller.
The highlighted station is deleted.
or
XTo select No: turn and press the controller.
The process is canceled.
iFrequencies have already been stored in the
multimedia system. There are 100 preset
positions available.
Activating/deactivating the station
presets display
You can use this function to change to the sta-
tion presets display.
Activating
XIn radio mode: slide 6the controller.
XTo select Preset: turn and press the control-
ler.
XTo select Station Preset View: On: turn
and press the controller.
The station preset display appears.
XTo switch between the stored stations: turn
the controller. Deactivating
XIn radio mode: slide
6the controller.
XTo select Preset: turn and press the control-
ler.
XTo select StationPresetView:Off: turn
and press the controller.
A view of the last waveband you listened to
appears.
Tagging music tracks
If an Apple®device is connected, the music
tracks and artist displayed in the radio text can be stored. You have the option of purchasing
this track using iTunes Store
®. Not all radio sta-
tions support this function.
XIn radio mode: slide 6the controller.
The radio menu bar appears.
XTo select: turn and press the control-
ler.
XSelect Tag This Track.
A message appears about storing the track
information.
Displaying station information
XIn radio mode: slide 6the controller.
The radio menu bar appears.
XTo select: turn and press the control-
ler.
XYou can determine whether or not the artist,
track or station name are shown in the main
display area with Oorª before Show
Sta‐tion Information.
Calling up sound settings
XIn radio mode: slide 6the controller.
The radio menu bar appears.
XTo select à: turn and press the controller.
The sound menu appears (Ypage 163).
132Calling up sound settings
Radio
Page 136 of 178
Registering satellite radio
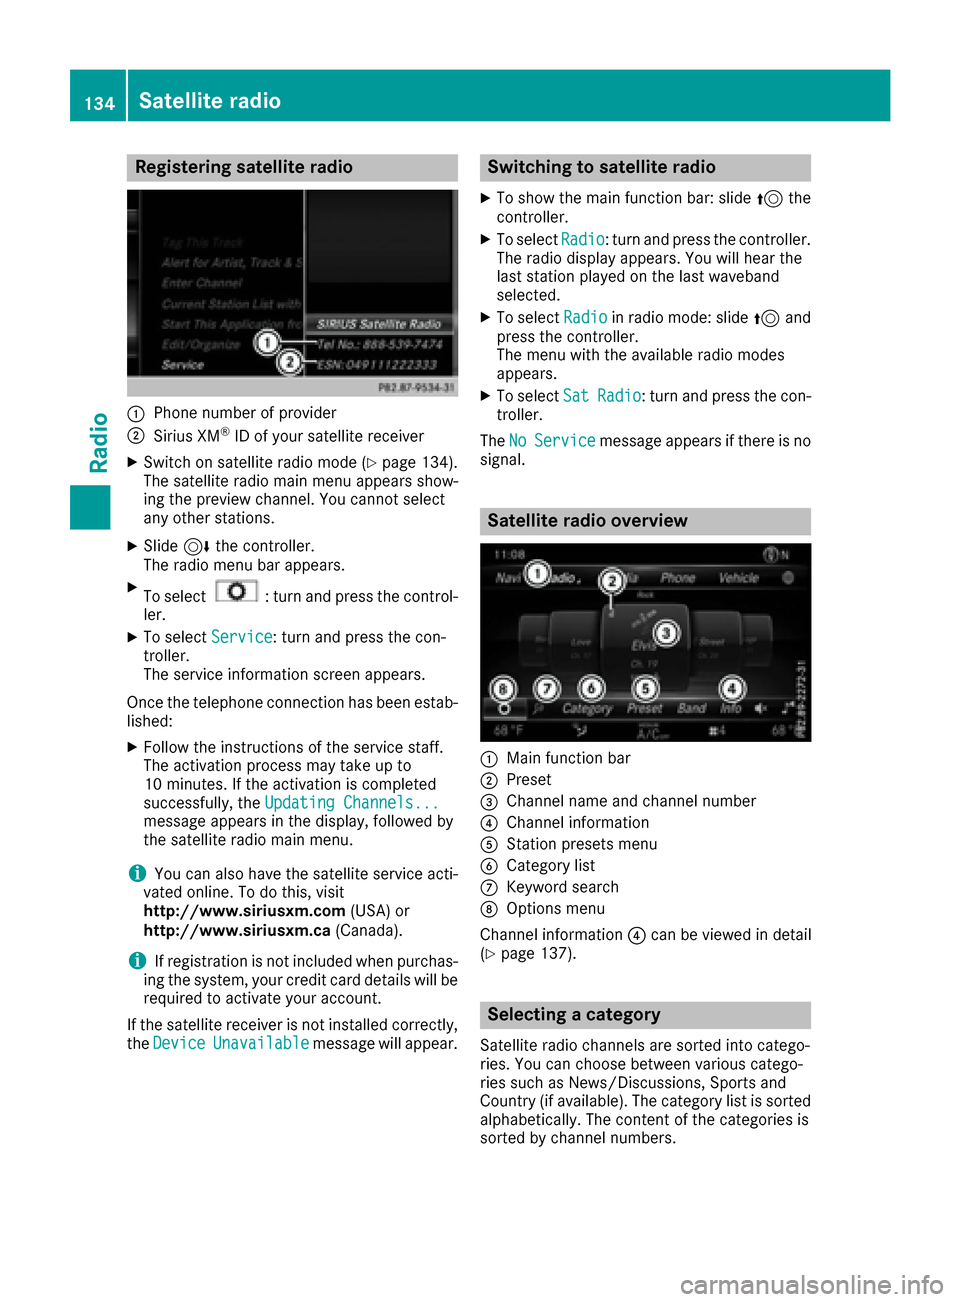
:Phone number of provider
;Sirius XM®ID of your satellite receiver
XSwitch on satellite radio mode (Ypage 134).
The satellite radio main menu appears show-
ing the preview channel. You cannot select
any other stations.
XSlide 6the controller.
The radio menu bar appears.
XTo select: turn and press the control-
ler.
XTo select Service: turn and press the con-
troller.
The service information screen appears.
Once the telephone connection has been estab-
lished:
XFollow the instructions of the service staff.
The activation process may take up to
10 minutes. If the activation is completed
successfully, the Updating Channels...
message appears in the display, followed by
the satellite radio main menu.
iYou can also have the satellite service acti-
vated online. To do this, visit
http://www.siriusxm.com (USA) or
http://www.siriusxm.ca (Canada).
iIf registration is not included when purchas-
ing the system, your credit card details will be
required to activate your account.
If the satellite receiver is not installed correctly,
the Device
Unavailablemessage will appear.
Switching to satellite radio
XTo show the main function bar: slide 5the
controller.
XTo select Radio: turn and press the controller.
The radio display appears. You will hear the
last station played on the last waveband
selected.
XTo select Radioin radio mode: slide 5and
press the controller.
The menu with the available radio modes
appears.
XTo select SatRadio: turn and press the con-
troller.
The No
Servicemessage appears if there is no
signal.
Satellite radio overview
:Main function bar
;Preset
=Channel name and channel number
?Channel information
AStation presets menu
BCategory list
CKeyword search
DOptions menu
Channel information ?can be viewed in detail
(
Ypage 137).
Selecting a category
Satellite radio channels are sorted into catego-
ries. You can choose between various catego-
ries such as News/Discussions, Sports and
Country (if available). The category list is sorted alphabetically. The content of the categories is
sorted by channel numbers.
134Satellite radio
Radio
Page 137 of 178
XTo call up the category list:selectCate‐
goryin the menu bar by turning and pressing
the controller.
The category list appears.
XTo select a category: turn the controller and
press to confirm.
The category selected is shown in the display.
You hear the channel last selected for this
category.
The #dot indicates the current setting.
At the beginning of the category list, the All
Channelscategory appears. This category
enables you to browse all available channels.
Selecting a channel
Channel search
XWhen the display/section window is selec-
ted, slide 8or9 the controller.
The multimedia system searches in both
directions (ascending and descending) and
stops at the next channel found in the selec-
ted category.
Entering channel numbers directly
XTo select: turn and press the control-
ler.
XTo select Direct Entry: turn and press the
controller.
An input menu appears.
XTo select a channel number: turn and press
the controller.
XThe multimedia system sets the selected
channel.
iYou can only select currently permitted dig-
its.
Selecting a channel via the satellite
radio station list
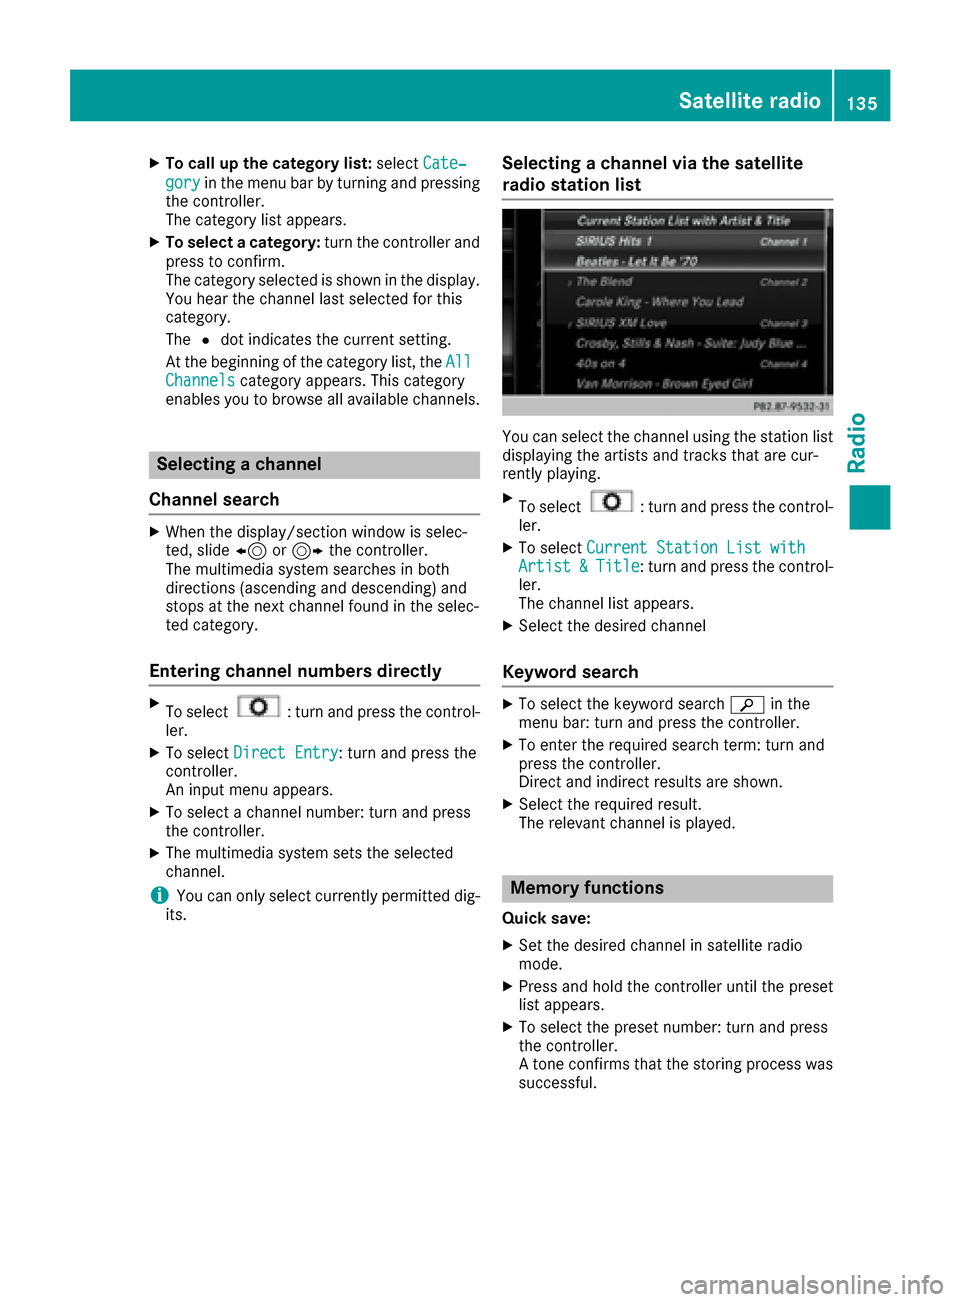
You can select the channel using the station list
displaying the artists and tracks that are cur-
rently playing.
XTo select: turn and press the control-
ler.
XTo select Current Station List withArtist&Title: turn and press the control-
ler.
The channel list appears.
XSelect the desired channel
Keyword search
XTo select the keyword search èin the
menu bar: turn and press the controller.
XTo enter the required search term: turn and
press the controller.
Direct and indirect results are shown.
XSelect the required result.
The relevant channel is played.
Memory functions
Quick save:
XSet the desired channel in satellite radio
mode.
XPress and hold the controller until the preset
list appears.
XTo select the preset number: turn and press
the controller.
A tone confirms that the storing process was
successful.
Satellite radio135
Radio
Page 138 of 178
Saving a channel using the edit function:
XIn satellite radio mode, slide6the control-
ler.
XTo select Preset: turn and press the control-
ler.
XTo select Edit Station Preset: turn and
press the controller.
The list of saved channels appears.
XTo select the preset: turn the controller and
press for about 2 seconds.
The newly saved channel overwrites the exist-
ing preset.
iThere are 100 presets available.
Presets menu view
You can use this function to change to the sta-
tion presets display.
Activating
XIn radio mode: slide 6the controller.
XTo select Preset: turn and press the control-
ler.
XTo select Station Preset View: On: turn
and press the controller.
The station preset display appears.
XTo switch between the stored stations: turn
the controller.
Deactivating
XIn radio mode: slide 6the controller.
XTo select Preset: turn and press the control-
ler.
XTo select StationPresetView:Off: turn
and press the controller.
A view of the last waveband you listened to
appears.
Music and sports alerts
General notes
This function makes it possible to store a pro-
gram alert for your favorite artists, tracks or
sporting events.
You can store up to 30 music and sports alerts
(favorites).
Music alerts can only be saved whilst a track is
being played. You can also specify sports alerts
via the menu option. The system then continu- ously searches through all the channels. If a
match is found with a saved message, you will
be informed. A window appears with the respec-
tive information.
Setting a music alert
XTo select: turn and press the control-
ler.
XTo select Alert for Artist, Track &SportsEvent: turn and press the controller.
A menu appears.
XSelect Add New Alert.
A window with a prompt appears.
XSelect ArtistorTrack.
The alert is set for the current artist or track.
The music alert window appears
XTo select Change ToorIgnore: turn and
press the controller.
If you select Change To
, the channel is
changed and the favorite artist or track is
played.
If you select Ignore
, the current channel will
continue playing.
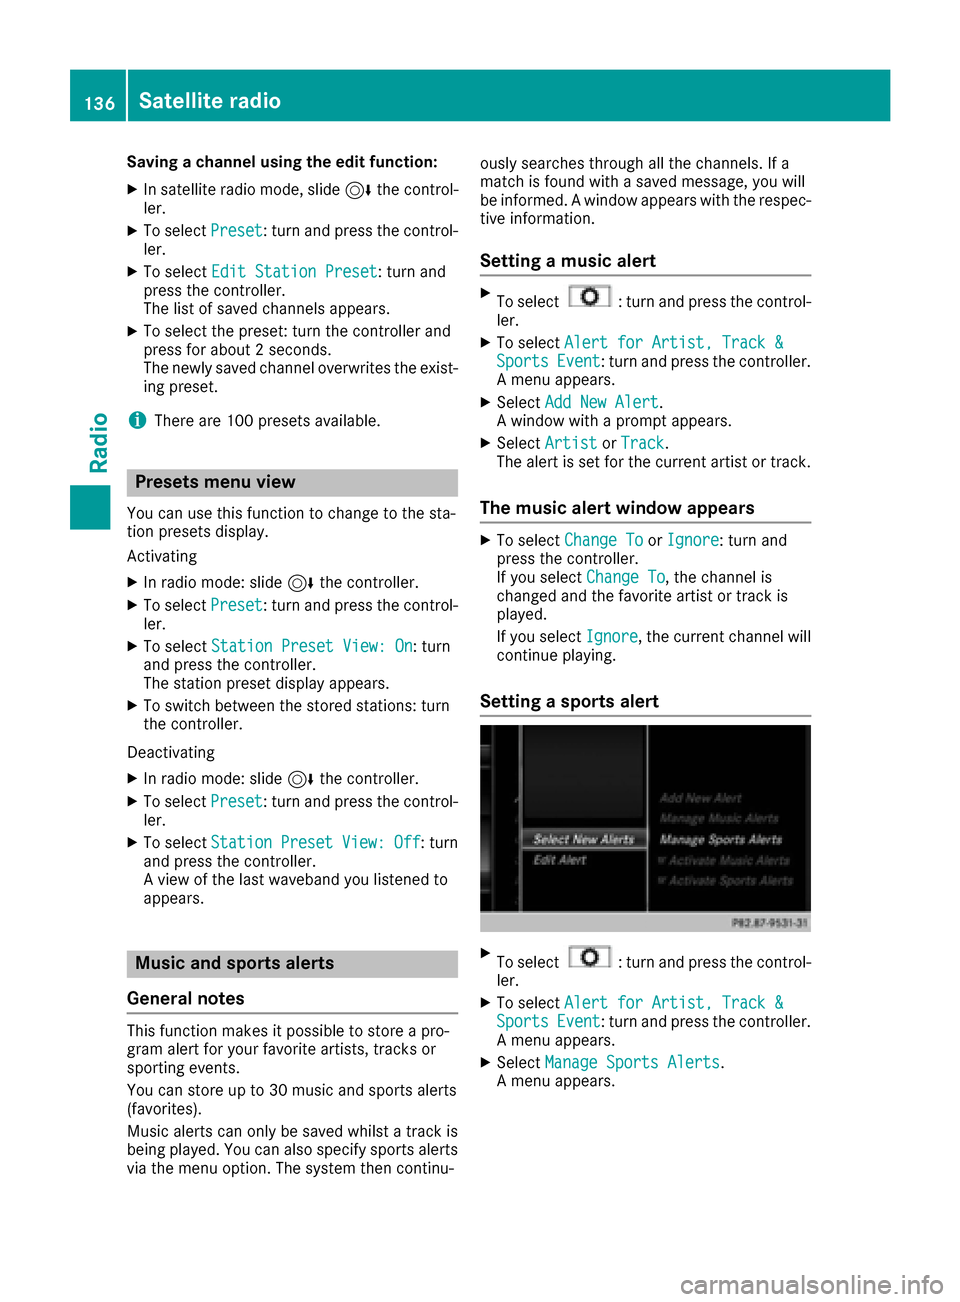
Setting a sports alert
XTo select: turn and press the control-
ler.
XTo select Alert for Artist, Track &SportsEvent: turn and press the controller.
A menu appears.
XSelect Manage Sports Alerts.
A menu appears.
136Satellite radio
Radio
Page 145 of 178
Selecting an active partition
XTo selectSelect Active Partition: turn
and press the controller.
With the Select
ActivePartitionoption,
you can select a partition in the USB data
medium.
Showing track information
XTo select Show Track Information: turn
and press the controller.
Ticking or removing the tick from the box in
front of Show Track Information
displays
or hides the information on the track, artist
and album in the main display field.
Saving files to Media Register
iWith the SaveFilestoMediaRegisteroption, you can transfer supported audio,
image or video files to the multimedia system
hard drive.
XTo select the Save Files to Media Reg‐isteroption: turn and press the controller.
A menu appears (Ypage 146).
Managing Media Register
XDelete or rename individual files in the Media
Register (Ypage 148).
XDelete all files in the Media Register
(Ypage 148).
XCall up information on the preset
(Ypage 149).
Stop and playback function
XTo pause playback: in audio/video mode,
slide 6the controller.
The media menu bar is shown.
XTo activate Ëin the media menu bar: turn
and press the controller.
Playback is interrupted here. The display
changes to Ì.
XTo continue playback: in audio/video mode,
slide 6the controller.
The media menu bar is shown.
XTo activate Ìin the media menu bar: turn
and press the controller.
Playback is continued from the point of inter- ruption. The symbol changes to Ë.
Selecting a track
Selecting using the current track list
XTo display the current track list: press the
controller in the basic display.
The category list appears.
XSelect the current track list.
XTo select a track: turn the controller and press
to confirm.
Selecting by skipping to a track
XTo skip forwards or backwards to a track: turn
or briefly slide 9or8 the controller in
the media basic display.
Search menu
XIn media mode, slide 6the controller.
The media menu bar is shown.
XTo select Search: turn and press the control-
ler.
The category list is shown.
XSelect a category, e.g. Genres.
Sub-categories appear with the selection of
the main category (depends on the multime-
dia system default settings and the music
tracks available).
XSelect a sub-category, for example Rock.
If the sub-category Rock
contains music
tracks, these will be displayed.
Gracenote®Media Database
General notes
This function is available in audio CD mode.
There is a version of
Gracenote®music recognition technology,
Emeryville, California, USA on the multimedia
system hard disk. You will recognize this by the
Audio/video mode143
Media
Z
Page 171 of 178

selected location. The data is supplied by the
nearest weather station.
Option 2: selecting the area in the
weather map
XCall up the weather map (Ypage 169).
XMove the weather map so that the crosshair is
over the desired area (Ypage 169).
XPress the controller.
The information chart shows the weather
forecast for the selected area. The data is
supplied by the nearest weather station.
Memory functions
Storing the area in the weather memory
You can save locations that are called up fre-
quently in ten preset positions (0, 1-9) in the
weather memory.
XIn the weather memory: select the area for
the weather forecast (Ypage 167).
The selected location appears at the top in the status bar.
XTo select Townin the information chart: turn
and press the controller.
XSelect Presets.
XSelect a preset using the controller.
XPress and hold the controller until you hear a
tone.
The area is entered on the selected preset.
Selecting an area from the weather
memory
XDirectly from the weather memory: select
Town
from the information chart: turn and
press the controller.
XSelect Presets.
XSelect the memory position which contains
the location you require.
The weather data for the selected area is dis-
played.
Weather map
Calling up the weather map
XTo select Mapin the information chart: turn
and press the controller.
The weather map is shown on a 500-mi (500-
km) scale. The crosshair highlights the
weather station that supplies the current
weather data.
Moving the weather map
XSlide 4 or1 the controller.
The weather map moves in the corresponding
direction under the crosshair.
Changing the scale
XTurn the controller.
The scale bar appears.
XTurn until the desired scale is set.
Showing/hiding the menu in the
weather map
XTo show: press the controller.
XTo hide:slide5the controller.
Selecting a weather station in the map
XMove the weather map and crosshair to the
desired position (Ypage 169).
XTo show the menu: press the controller.
XTo select Weather Table: press the control-
ler.
The weather data for the selected position is
received from the nearest weather station
and automatically displayed as a current-day
forecast.
Weather forecasts169
SIRIUS Weather