2017 MERCEDES-BENZ C-Class USB
[x] Cancel search: USBPage 62 of 178

Selecting a state/province
XTo switch to navigation mode:press the
Ø button.
XIf no route guidance is active, select Desti‐nation.
iIf route guidance is active, first slide6the
controller and show the menu.
XSelect Free Destination Search.
XTo select State/Province: slide5, turn
and press the controller.
States/provinces are sorted alphabetically.
XTo select a state/province: turn and press the
controller.
Using online search
Requirement (USA): mbrace must be activated
for Internet access (Ypage 119).
Requirement (Canada): a mobile phone is con-
nected to the multimedia system via Bluetooth
®
(Ypage 91) or USB (Ypage 155).
XTo switch to navigation mode: press the
Ø button.
XIf no route guidance is active, select Desti‐nation.
iIf route guidance is active, first slide6the
controller and show the menu.
XSelect Free Destination Search.
XTo select OnlineSearch: slide5, turn and
press the controller.
The search switches to the online functions.
Online search
XTo switch to navigation mode: press the
Ø button.
XIf no route guidance is active, select Desti‐nation.
iIf route guidance is active, first slide6the
controller and show the menu.
XSelect Online Search.
The search switches to the online functions.
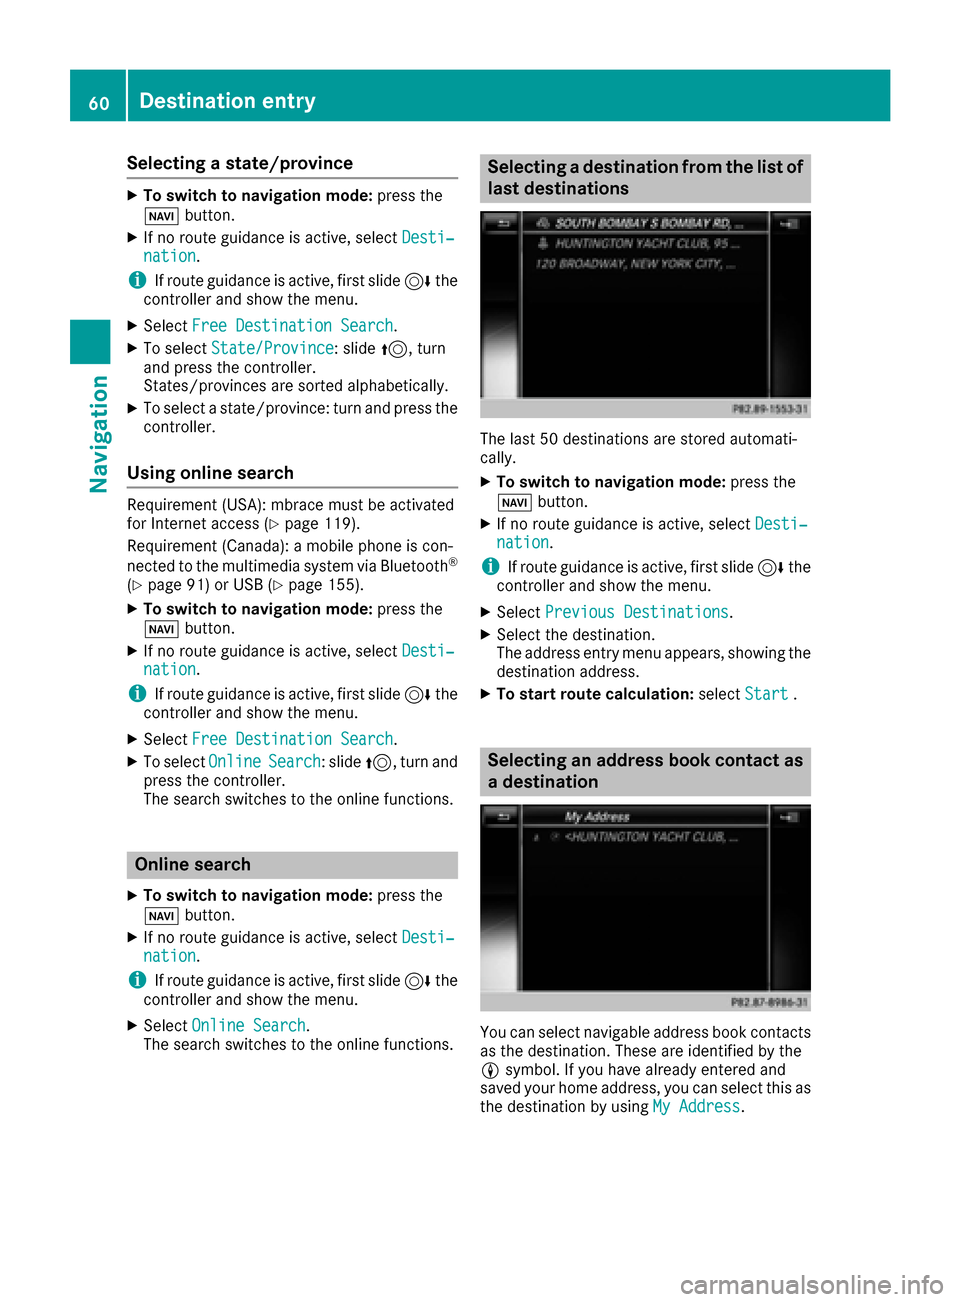
Selecting a destination from the list of
last destinations
The last 50 destinations are stored automati-
cally.
XTo switch to navigation mode: press the
Ø button.
XIf no route guidance is active, select Desti‐nation.
iIf route guidance is active, first slide6the
controller and show the menu.
XSelect Previous Destinations.
XSelect the destination.
The address entry menu appears, showing the
destination address.
XTo start route calculation: selectStart.
Selecting an address book contact as
a destination
You can select navigable address book contacts
as the destination. These are identified by the
Lsymbol. If you have already entered and
saved your home address, you can select this as
the destination by using My Address
.
60Destination entry
Navigation
Page 64 of 178

SelectionInstructions
Search By Name
The search looks for all
POIs on the digital map or
around one of the three
previously specified posi-
tions (
Ypage 62).
XTo selectSearch By Name: turn and press the controller.
XSelectAll POIsor a position for the POI search.
The search for POIs starts.
Search By Phone Num‐ber
All POIs with a telephone
number can be selected.
XTo select Search By Phone Number: turn and press the control-
ler.
The search for POIs starts.
Mercedes-Benz Ser‐vice
The search looks for
authorized Mercedes-
Benz Centers.
XTo select Mercedes-BenzService: turn and press the controller.
The search for POIs starts.
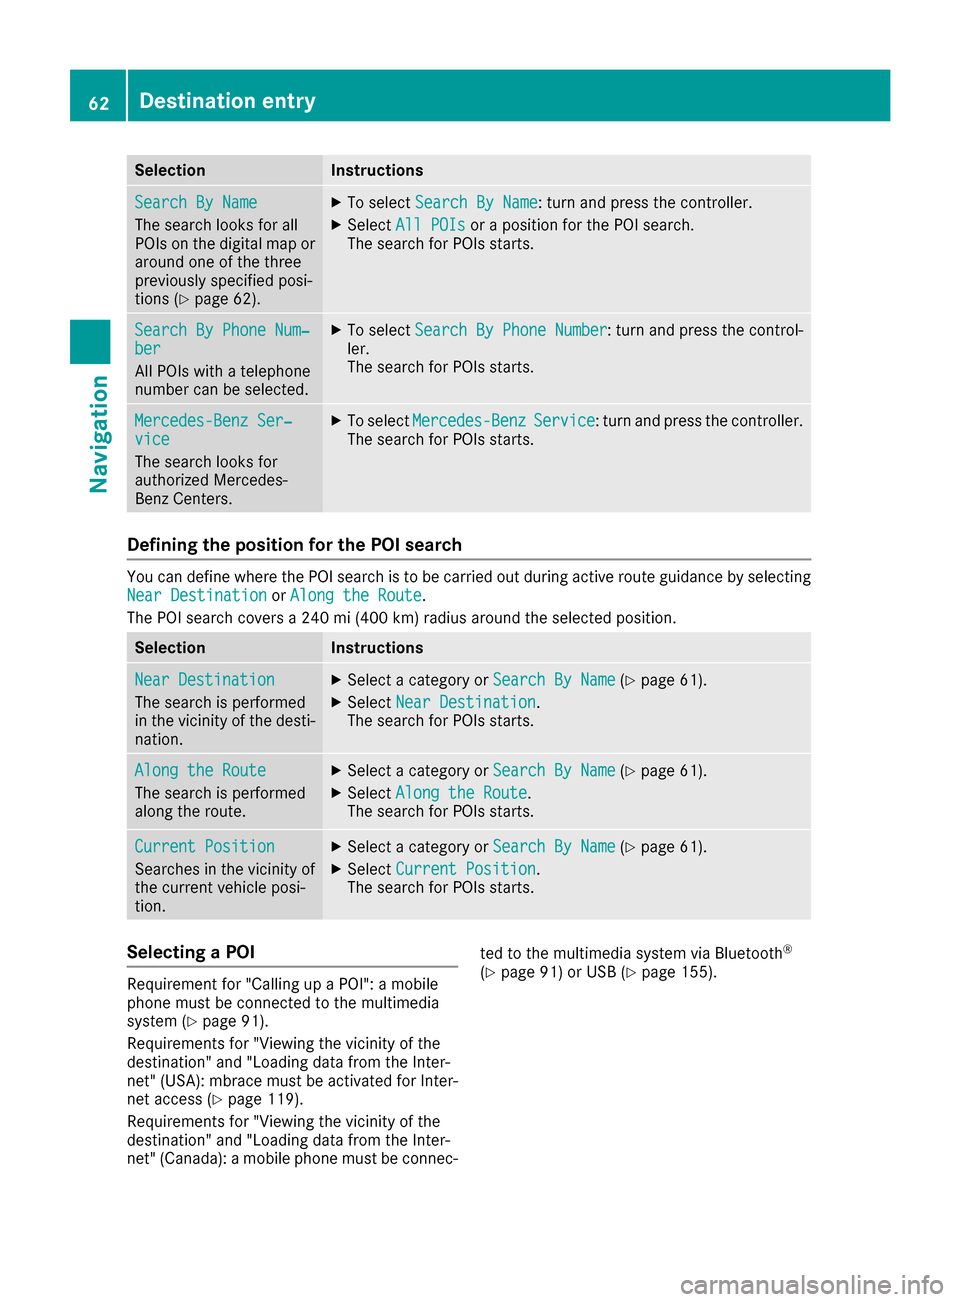
Defining the position for the POI search
You can define where the POI search is to be carried out during active route guidance by selecting
Near Destinationor Along the Route.
The POI search covers a 240 mi (400 km) radius around the selected position.
SelectionInstructions
Near Destination
The search is performed
in the vicinity of the desti-
nation.
XSelect a category or Search By Name(Ypage 61).
XSelectNear Destination.
The search for POIs starts.
Along the Route
The search is performed
along the route.
XSelect a category or Search By Name(Ypage 61).
XSelectAlong the Route.
The search for POIs starts.
Current Position
Searches in the vicinity of
the current vehicle posi-
tion.
XSelect a category or Search By Name(Ypage 61).
XSelectCurrent Position.
The search for POIs starts.
Selecting a POI
Requirement for "Calling up a POI": a mobile
phone must be connected to the multimedia
system (
Ypage 91).
Requirements for "Viewing the vicinity of the
destination" and "Loading data from the Inter-
net" (USA): mbrace must be activated for Inter-
net access (
Ypage 119).
Requirements for "Viewing the vicinity of the
destination" and "Loading data from the Inter-
net" (Canada): a mobile phone must be connec- ted to the multimedia system via Bluetooth
®
(Ypage 91) or USB (Ypage 155).
62Destination entry
Navigation
Page 68 of 178

Saving as a personal route
You can save a route including intermediate
destinations on the SD card.
Requirements: the SD card has the FAT data
system format (e.g. FAT32).
XInsert the SD memory card (Ypage 141).
XTo selectSave As Personal Routein the
intermediate destinations menu: press the
controller.
An input field appears.
XEnter a file name in the input field. Press OKto
confirm.
The route is saved to the SD memory card.
Searching for a gas station when the
fuel level is low
Requirement: the setting GasonReservemust
be enabled (Ypage 55).
If the fuel tank reserve level is displayed, you will
see the Reserve Fuel Would you like to
start a search for surrounding gasstations?message.
XTo select YesorNo: turn and press the con-
troller.
If you select Yes
: the gas station search
starts. When the search is complete, a list of
the gas stations available along the route or in
the vicinity is displayed.
If you select No
: the search is canceled.
XSelect the gas station.
The address of the gas station is displayed.
XTo selectStart: press the controller.
The selected gas station is entered into posi-
tion 1 of the intermediate destinations menu.
Route guidance begins.
If the intermediate destinations menu already
contains four intermediate destinations, a
prompt will be displayed, asking you whether you wish to enter the gas station into position
1. If you select Yes
, the gas station is trans-
ferred into the list and intermediate destina-
tion 4 is deleted.
Entering a destination from
Mercedes-Benz Apps
Requirement (USA): mbrace is activated for the
Mercedes-Benz Apps (Ypage 119). Requirement (Canada): a mobile phone is con-
nected to the multimedia system via Bluetooth
®
(Ypage 91) or USB (Ypage 155).
XTo switch to navigation mode:
press the
Ø button.
XIf no route guidance is active, select Desti‐nation.
iIf route guidance is active, first slide6the
controller and show the menu.
XSelect Mercedes-Benz Apps.
The list of Mercedes-Benz Apps appears.
Using geo-coordinates
XTo switch to navigation mode: press the
Ø button.
XIf no route guidance is active, select Desti‐nation.
iIf route guidance is active, first slide6the
controller and show the menu.
XSelect Geo-coordinates.
Geo-coordinates (longitude and latitude) are
entered in degrees, minutes and seconds.
XTo enter geo-coordinates: turn the control-
ler.
The value for degree, minute or second
changes.
XTo move the selection within the line: slide
1 the controller.
XTo move the selection between lines: slide
4the controller.
XTo confirm the value: press the controller.
XTo store geo-coordinates: selectSaveby
turning and pressing the controller.
The destination with the geo-coordinates can
be saved as:
Ra home address in the address book
Ra navigable address book contact
For further information on the address
book, see (
Ypage 103)
Ra personal destination on the SD card
(Ypage 80).
XTo start route calculation: selectStart
RouteGuidanceby turning and pressing the
controller.
66Destination entry
Navigation
Page 89 of 178

starter battery has insufficient power, the mul-
timedia system may switch off automatically.
This protects the battery. In order to prevent
this, a suitable power supply to the vehicle must
be maintained.
Navigation functions
Calling up the navigation system
menu
XTo switch to navigation mode:press the
ß button.
XTo show the menu: slide5the controller.
Navi
is highlighted in the main function bar.
XPress the controller.
The navigation menu appears.
XTurn the controller to display the navigation
functions one after another.
XTo change to the map: turn the controller until
Navigationis shown and then press the con-
troller.
Calling up the online map display
Requirement for online map display (USA):
mbrace must be activated for Internet access
(
Ypage 119).
Requirement for the online map display (Can-
ada): a mobile phone is connected to the multi-
media system via Bluetooth
®(Ypage 91) or
USB (Ypage 155).
XCall up the navigation menu (Ypage 87).
XTurn the controller until Online Map Dis‐playis brought to the front.
XPress the controller.
The online connection is established. Once
the connection is established, the Google
Maps™ map shows the vicinity of the current
vehicle position.
iAlternatively you can call up this function
using the touchpad (Ypage 23).
XTo exit the online map display: press the %
button.
Calling up the compass display
XCall up the navigation menu (Ypage 87).
XTurn the controller until Compassis brought to
the front.
XPress the controller.
The compass display provides the following
information:
RThe current direction of travel with bearing
(360 degree format) and compass direction
RLongitude and latitude coordinates in
degrees, minutes and seconds
RHeight (rounded off) above sea level
RNumber of GPS satellites from which a sig- nal can be received
iAlternatively you can call up this function
using the touchpad (Ypage 23).
XTo exit the compass display: press the %
button.
Drive information
XCall up the navigation menu (Ypage 87).
XTurn the controller until DriveInformationis brought to the front.
XPress the controller.
TheStarting Drive Information.
Please Wait...message appears.
Navigation functions87
Navigation
Z
Page 102 of 178

Phone book
Introduction
The phone book displays the contacts from the
address book which have a phone number.
The phone book of the mobile phone is auto-
matically displayed in the multimedia system
after the connection is established (default set-
ting). You can deactivate automatic calling up
(
Ypage 107).
In the phone book, you can:
RCreate new contacts (Ypage 101)
RAdd information to contacts (Ypage 102)
RSearch for contacts (Ypage 100)
RStore contacts (Ypage 102)
RDelete contacts (Ypage 102)
Further information on importing contacts
(
Ypage 108).
When you import, save, edit or add contacts,
they will be permanently saved in the multime-
dia system. These contacts will remain available
even when you connect the multimedia system
to a different mobile phone. You can view these contacts even without a mobile phone.
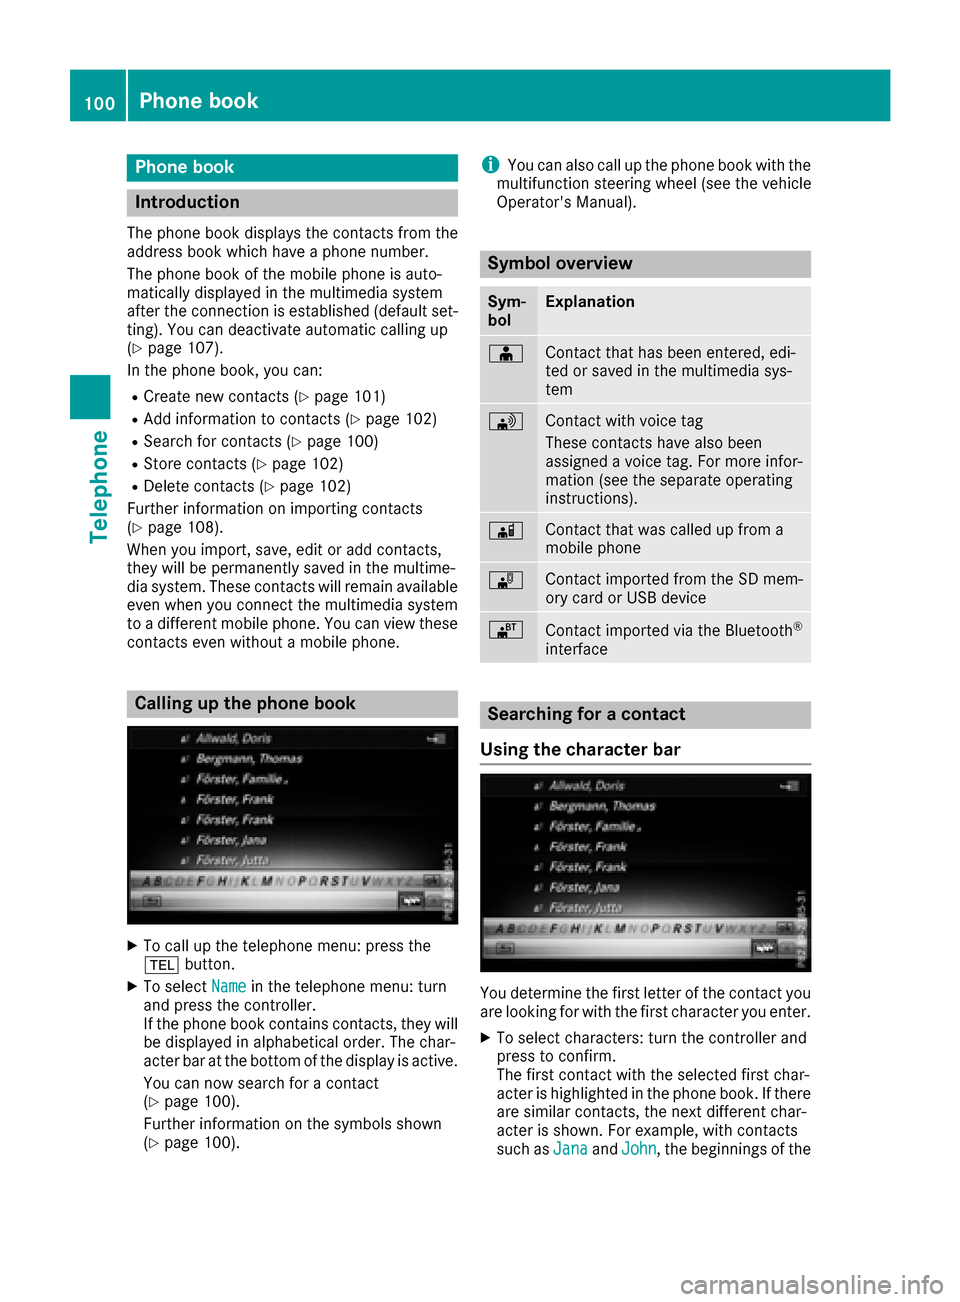
Calling up the phone book
XTo call up the telephone menu: press the
% button.
XTo select Namein the telephone menu: turn
and press the controller.
If the phone book contains contacts, they will
be displayed in alphabetical order. The char-
acter bar at the bottom of the display is active.
You can now search for a contact
(
Ypage 100).
Further information on the symbols shown
(
Ypage 100).
iYou can also call up the phone book with the
multifunction steering wheel (see the vehicle
Operator's Manual).
Symbol overview
Sym-
bolExplanation
ÆContact that has been entered, edi-
ted or saved in the multimedia sys-
tem
\Contact with voice tag
These contacts have also been
assigned a voice tag. For more infor-
mation (see the separate operating
instructions).
ÃContact that was called up from a
mobile phone
¯Contact imported from the SD mem-
ory card or USB device
®Contact imported via the Bluetooth®
interface
Searching for a contact
Using the character bar
You determine the first letter of the contact you
are looking for with the first character you enter.
XTo select characters: turn the controller and
press to confirm.
The first contact with the selected first char-
acter is highlighted in the phone book. If there
are similar contacts, the next different char-
acter is shown. For example, with contacts
such as Jana
andJohn, the beginnings of the
100Phone book
Telephone
Page 105 of 178

Closing the phone book
XTo select&from the character bar: turn the
controller and press to confirm.
or
XPress the %button.
Address book
Introduction
Always pay attention to traffic conditions.
Familiarize yourself with the address book func-
tions before beginning your journey.
You can use the multimedia system when the
road and traffic conditions permit. You could
otherwise become involved in an accident in
which you or others could be injured.
The address book displays all the contacts from
the various sources (mobile phone, memory
card, USB device, the phone book of the multi-
media system, navigation).
You can use the contacts to make telephone
calls, navigate and to write messages.
If a mobile phone is connected to the multimedia
system and automatic calling up is activated
(
Ypage 107), the mobile phone's contacts are
displayed in the address book. If you disconnect
the mobile phone from the multimedia system,
these contacts are no longer displayed in the
address book.
When you import, save, edit or add contacts,
they will be saved in the multimedia system.
These contacts will remain available even when
you connect the multimedia system to a differ-
ent mobile phone. You can view these contacts
even without a mobile phone.
iThe address book can store a total of 5000
contacts.
R2000 entries are reserved for permanently
saved contacts.
R3000 entries are reserved for contacts that
you can load from the mobile phone.
iBefore selling your vehicle, delete the con-
tacts saved in the multimedia system using
the reset function (
Ypage 42).
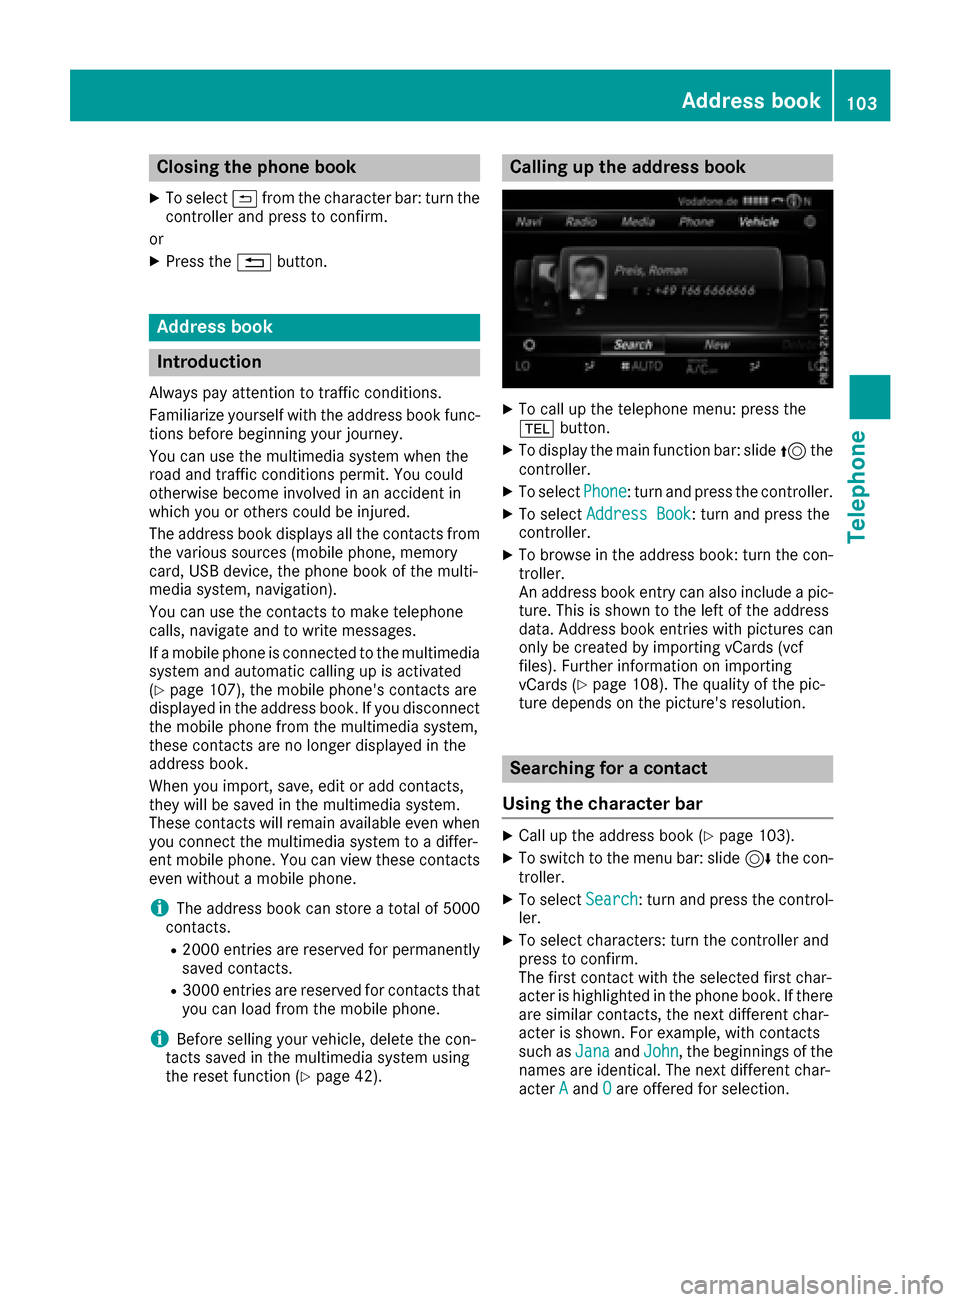
Calling up the address book
XTo call up the telephone menu: press the
% button.
XTo display the main function bar: slide 5the
controller.
XTo select Phone: turn and press the controller.
XTo select Address Book: turn and press the
controller.
XTo browse in the address book: turn the con- troller.
An address book entry can also include a pic-
ture. This is shown to the left of the address
data. Address book entries with pictures can
only be created by importing vCards (vcf
files). Further information on importing
vCards (
Ypage 108). The quality of the pic-
ture depends on the picture's resolution.
Searching for a contact
Using the character bar
XCall up the address book (Ypage 103).
XTo switch to the menu bar: slide 6the con-
troller.
XTo select Search: turn and press the control-
ler.
XTo select characters: turn the controller and
press to confirm.
The first contact with the selected first char-
acter is highlighted in the phone book. If there
are similar contacts, the next different char-
acter is shown. For example, with contacts
such as Jana
andJohn, the beginnings of the
names are identical. The next different char-
acter A
andOare offered for selection.
Address book103
Telephone
Z
Page 110 of 178

Importing contacts
Information and requirements
Contacts can be imported as vCards (vc ffiles). A
vCar dis an electronic business card. Amemory
card, US Bdevice or aBluetoot h
®connection
can be used for importing .
iUp to 2000 entries can be imported int oth e
address book . Amessage notifie syou when
th emaximum number is reached. In order to
be able to then import ne wcontacts, you have
to delet eexisting contact s (
Ypage 107).
SourceRequirements
Memory cardThe SD cardis inserted. It
contain simportable contact
details.
US BdeviceThe US Bdevice is inserted
int oth eUS Bport. It contain s
importable contact details.
Bluetoot h®
connection
If thesendin gof vCards is
supported via Bluetoot h®,
vCards can be received on
mobile phones or netbooks,
for example.
Bluetoot h
®must be activa-
te din th emultimedia system
and on th erespective device ;
see th emanufacturer' soper -
ating instructions.
iIf automatic calling up of th econtact sis
deactivated (Ypage 107), th eImportfro mPhoneoption is available.
Importing from the memory card or USB
device
Contacts imported from th ememory car dor
from aUS Bdevice are identifie dby th e¯
symbol.
The followin gcondition smust be fulfilled in
order to import vCards:
RvCards (vc ffiles) may be locate din th emain
directory or in folders. The multimedia system
allows for atargeted selection of th ecorre-
sponding directories.
RvCards must have th efile extension "vcf".
iThe multimedia system support svCards in
version s2. 1and 3.0.
XTo switch to th emen ubar in th etelephon e
men uor th eaddress book :slide 6thecon-
troller .
XTo select:tur nand press th econtrol -
ler .
XTo select Download Contacts:tur nand
press th econtroller .
XTo select FromMemory Car dorFro mUSBdevice:tur nand press th econtroller .
Receiving vCards via Bluetooth®
Multimedi asystem
XTo switch to th emen ubar in th etelephon e
men uor th eaddress book :slide 6thecon-
troller .
XTo select:tur nand press th econtrol -
ler .
XTo select Download Contacts:tur nand
press th econtroller .
XTo selectFromBluetoothDevice:tur nand
press th econtroller .
If th emultimedia system is connecte dto a
mobile phone, th econnection is terminated.
vCards can no wbe received by adevice (PC,
mobile phone) via Bluetoot h
®.
External device
XStart th edat atransfer ;see th emanufactur -
er' soperating instructions.
The number of vCards received is displayed in th emultimedia system.
Multimedi asystem
XTo cance lth etransfer :press th econtroller .
If amobile phon ewas connected, th econ-
nection to th emobile phon eis established
again .
108Address book
Telephone
Page 121 of 178

Your multimediasyste mequipment
These operatin ginstruction sdescribe all th e
standar dan doptional equipment of your multi-
media system, as available at th etime of going
to press. Country-specifi cdifference sare pos -
sible. Bear in min dthat your vehicle may no t
feature all function sdescribed here. Thi salso
applies to safety-relevan tsystems an dfunc-
tions.
Read th einformation on qualifie dspecialis t
workshop sin th evehicle Operator's Manual.
Important safet ynotes
GWARNING
If you operat einformation systems an dcom-
munication equipment integrated in th evehi-
cl e whil edriving, you will be distracted from
traffic conditions. You could also los econtro l
of th evehicle. There is aris kof an accident.
Only operat eth eequipment when th etraffic
situation permits. If you are no tsur ethat this
is possible, par kth evehicle payin gattention
to traffic condition san doperat eth eequip-
men twhen th evehicle is stationary.
You mus tobserv eth elegal requirements fo rth e
country in whic hyou are drivin gwhen operatin g
th esystem.
General notes
Connection difficulties whil eth evehi-
cle is in motion
The connection may be los tif:
Rth emobile phone networ kcoverage is insuf -
ficien t
Rthevehicle has moved into amobile phone
cell wit hno free channels
Rth eSI M car dused is no tcompatible wit hth e
networ kavailable
Function restrictions (Canada)
You will no tbe able to use th eMercedes-Ben z
Apps an dInternet connection ,or will no longer
be able to use them, or may hav eto wait befor e
usin gthem, in th efollowin gsituations:
Rwhen th emobile phone is switched of f
Rif your mobile phone has notbee nenable dfo r
Internet access
Rif th eBluetoot h®function is switched of fon
th emultimedia syste man dth edesire dphone
is suppose dto be connecte dvia Bluetoot h
®
Rif theBluetoot h®function is switched of fon
th emobile phone an dth ephone is suppose d
to be connecte dvia Bluetoot h
®
Rif themobile phone is no tconnecte dvia US B
an dth ephone is suppose dto be connecte d
via US B
Rif neither th emobile phone networ kno rth e
mobile phone allo wsimultaneous use of a
phone an dan Internet connection
Rif th emobile phone has no tbee nenable dfo r
Internet access via Bluetoot h®and/or USB
The driver is no tpermitte dto cal lup websites
whil edrivin gan duse of th eMercedes-Ben z
Apps is restricted.
iIt is possible that you may no tbe able to
receiv ecalls when an Inte rnet connection is
active .Thi sdepends on th emobile phone an d
th emobile phone networ kused .
Conditions for access
USA: to use Mercedes-Ben zApps an dInternet
access ,mbrace mus tbe activated an dopera-
tional. Furthermore, mbrace mus tbe activated
fo rMercedes-Ben zApps an dInternet access .
Tak enote of th econnection priorities .An emer-
gency cal lhas th ehighes tpriority. Whe n aser-
vic ecall, e.g. abreakdown servic ecal lor th eMB
Info Call, is active ,an emergency cal lcan still be
initiated. Aservic ecall, on th eother hand, has
priorit yover acurren tInternet connection .
Therefore, you canno testablis han Internet con-
nection durin g aservic ecall.
Canada: amobile phone mus tbe connecte dvia
Bluetoot h
®(Ypage 91) or US B (Ypage 155)
wit hth emultimedia system. Furthermore, you
need avali dmobile servic econtrac twit h a data
Conditions for access119
Online and Internet functions
Z