2017 MAZDA MODEL 6 display
[x] Cancel search: displayPage 6 of 46

4
Key
Emergency Engine Stop
Pushing and holding the START/STOP ENGINE button or repeatedly pushing
the button while the engine is running will turn the engine OFF. Use only in
case of an emergency.
If the START/STOP ENGINE button indicator light flashes AMBER, this
could indicate a problem with the engine starting system. You may not
be able to start the engine or switch the ignition to ACC or ON. Have your
vehicle inspected at an Authorized Mazda Dealer as soon as possible.
NOTE: The engine may not start if the key cannot be detected. The Key
Indicator Light may flash RED or “Key not detected” may be displayed if the key
is placed in the cup holder.
Starting the Engine
STARTING THE ENGINE WITH
ACCELERATED WARM-UP SYSTEM (AWS)
The Mazda6 is equipped with SKYACTIV combustion technology.
This technology includes AWS (Accelerated Warm-up System) for
optimal emission performance during cold starting conditions.
NOTE: You can drive the vehicle during AWS activation, no need to wait.
While Carrying the Key…
• Start the engine by pushing the START/STOP
EN
GINE button while pushing the clutch pedal
(M/ T) or the brake pedal (A / T).
•
Wha
t you will notice? On start-up, the engine
speed and sound are higher (1500 RPM) for less
than one minute to quickly bring the catalyst to
efficient operating temperature. The RPM will reduce
to idle once the temperature is achieved. This is
normal engine operation under cold-start conditions.
•
What
this does? This heats up the catalytic converter faster to reduce
emissions and allows Mazda to use an exhaust header on the engine (to
improve efficiency and horsepower).
•
Shu
t the engine OFF by making sure the vehicle is in Park (A / T) and
setting the parking brake, then push the START/STOP ENGINE button.
•
Act
ivate Accessories (ACC ) by pushing the START/STOP ENGINE
button once without pushing the clutch or brake pedal.
•
Tur
n the ignition to the ON position by pushing the START/STOP
ENGINE button twice without pushing the clutch or brake pedal.START/STOP
Indicator Light
www.MazdaUSA.com
Page 9 of 46

7
Multi-Information Display
MULTI-INFORMATION DISPLAY (if equipped)
Toggle the INFO button on the steering wheel up or down to cycle through
different types of information.Push the center of
the INFO button to make selections.
Current Fuel Economy, Trip Meter A,
Average Fuel Economy, Outside Temperature, Odometer,
Distance-to-Empty, Fuel Gauge Warning Message,
Outside Temperature,
Odometer, Distance-to-Empty,
Fuel Gauge
* Displayed only when
a warning occurs.
Current Fuel Economy,
Trip Meter B,
Average Fuel Economy, Outside Temperature, Odometer,
Distance-to-Empty, Fuel Gauge Compass,
Outside Temperature,
Odometer, Distance-to-Empty,
Fuel Gauge
** Displayed only while vehicle is being driven.
Engine Coolant,
Temperature Gauge,
Maintenance Monitor, Outside Temperature, Odometer,
Distance-to-Empty, Fuel Gauge i-ACTIVSENSE,
Outside Temperature,
Odometer, Distance-to-Empty,
Fuel Gauge
Push and hold the center of the INFO button
to reset the currently displayed feature such
as Average MPG.
DISPLAY SCREENS
Multi-Information Display
Push INFO button
*
**
Push INFO button
Push INFO button
Push INFO button
Push INFO button
Push INFO button
NOTE: New
screen items are
in bold
Page 10 of 46

8
Multi-Information Display
Auto-Dimming Mirror
• Auto-dimming will automatically darken your rearview mirror and outside
dr
iver’s mirror to reduce headlight glare from vehicles behind you.
•
Aut
o-dimming is activated every time the engine is started.
NOTE:
In addition to the auto-dimming mirror’s rear light sensor, there is also a
front light sensor (not shown). Do not place or hang any objects over the front or rear
mirror light sensors; otherwise, the auto-dimming mirror will not operate properly.
HomeLink®
• This feature provides a convenient way to replace up to three
tr
ansmitters such as garage door openers, home lighting remotes
and other radio frequency devices.
•
Ref
er to your Owner’s Manual for complete programming details.
NOTE:
Genuine Mazda Accessory Auto-Dimming Mirror with Compass and
HomeLink® is available at your Authorized Mazda Dealer.
AUTO-DIMMING MIRROR AND HOMELINK®
On Off
AUTO-DIMMING MIRROR AND HOMELINK®
Auto-Dimming
Indicator LightAuto-Dimming
On
HomeLink®Rear
Light
SensorAuto-Dimming
Off
F R O N T S E AT S
Headrests
For your safety, the front seats are equipped with active headrests that are
not adjustable forward or backward, only up and down. An active headrest
is designed to move forward in the event of a collision to close the gap
between your head and the headrest (to reduce the possibility of whiplash).
Seats and Mirrors
www.MazdaUSA.com
Page 14 of 46

12
Mazda Connect Infotainment System Mazda Connect Settings
MAZDA CONNECT SETTINGS (if equipped)
To view the different setting screens:
1 Mov
e the commander switch to the left or right to change tabs.
2 Whe
n the desired tab is highlighted, push the knob of the
commander switch down.
3 Tur
n the dial of the commander switch to scroll down the list.
NOTE: If there is a scroll bar on the right side, there are more items farther down.
Use System to change the
brightness of the Display
between Day (bright), Night
(dim), and AUTO (switches
from Day to Night when
headlights are turned ON).
See illumination dimmer (pp. 35-36).
Safety Settings
Sound Settings
Vehicle Settings
System Settings
Device Settings
Display Settings
www.MazdaUSA.com
Page 16 of 46

14
VOICE CONTROL (if equipped)
Voice control is activated by pushing the TALK button on the steering
wheel and speaking a command. Voice commands usually contain a verb
(action word) followed by a noun. Common verbs are “Go to” and “Play”.
Commander/Voice Control
NOTE: After becoming familiar with the system, you can skip the voice prompts
by pushing the TALK button again.
SOME COMMON VOICE COMMANDS ARE:
• Call “name” mobile
• Dial “number”
•
Ad
dress-pause-“street
address, city, state”
•
He
lp •
Ca
ncel
•
Go Ba
ck or Previous
•
Next o
r Skip
•
Tu
torial
•
Scro
ll/Page Down
•
Scro
ll/Page Up•
Turn
Display/Screen Off
•
Sele
ct “line number”
(ex: “Select Four” or
“Select Line Four”
•
Dis
play Clock
Go to (and one of the following):
•
Home
•
Ent
ertainment
•
Nav
igation
•
Co
mmunication
•
Set
tings •
Me
ssages
•
Con
tacts
•
Em
ail
•
Ph
one
•
Call
History•
Tex
t
•
AM/F
M
•
XM
• CD
•
Bl
uetooth•
AUX
• US
B
•
Pa
ndora
•
Ah
a
•
St
itcher
Play (and one of the following):
•
AM/F
M
•
XM <
channel
number> •
CD
•
Bl
uetooth
•
AUX
• US
B
•
Pa
ndora•
Ah
a
•
St
itcher
•
Song
•
Pl
aylist
•
Ar
tist•
Al
bum
•
Ge
nre
•
Fo
lder
TA L K
www.MazdaUSA.com
Page 17 of 46

15
PAIRING YOUR BLUETOOTH® PHONE OR AUDIO DEVICE
(if equipped)
Bluetooth
®
Pairing Instructions:
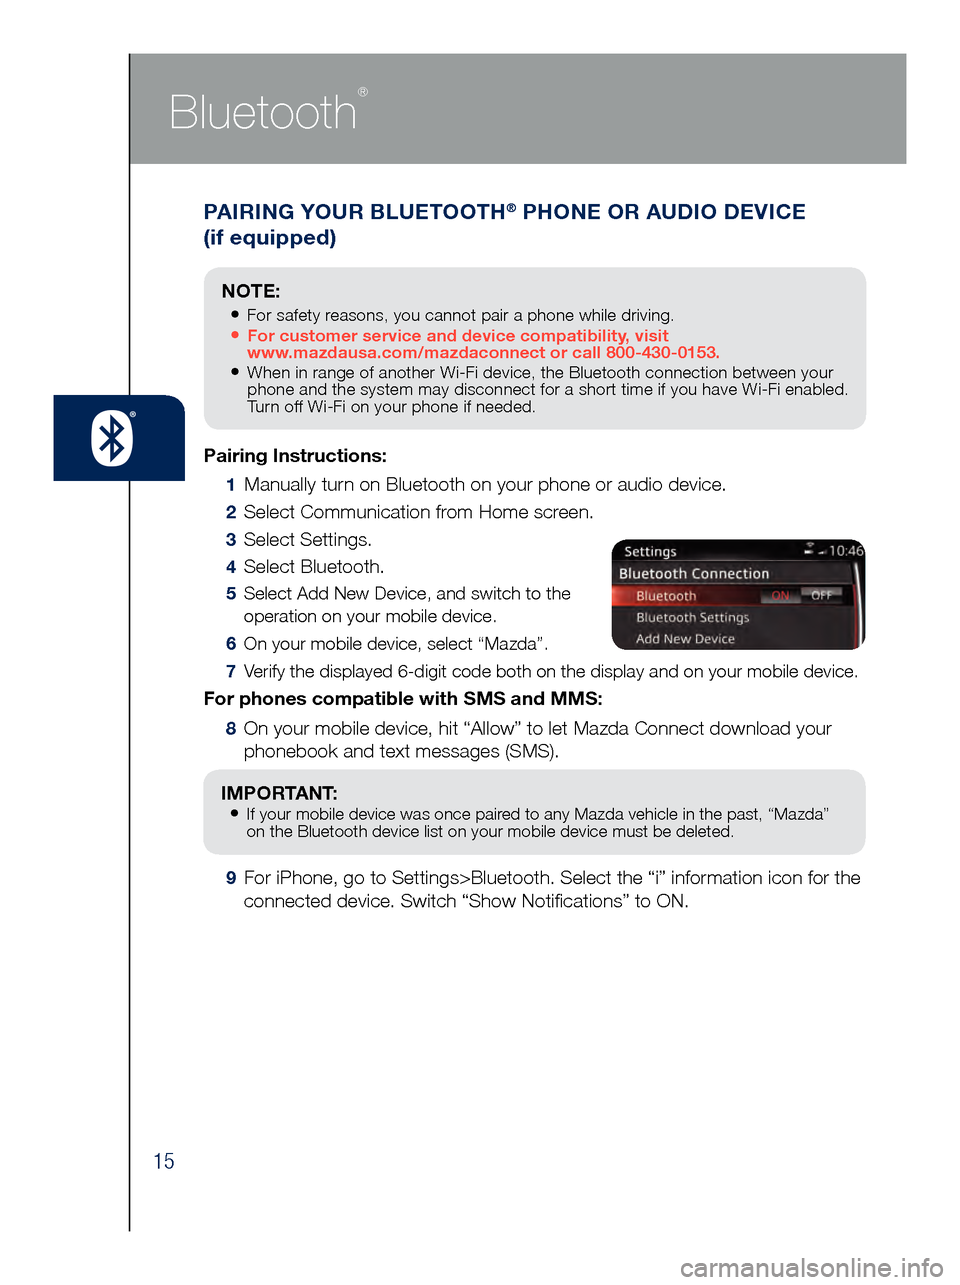
1 Manually turn on Bluetooth on your phone or audio device.
2 Select Communication from Home screen.
3 Select Settings.
4 Select Bluetooth.
5 Select Add New Device, and switch to the
operation on your mobile device.
6 On your mobile device, select “Mazda”.
7 Verify the displayed 6-digit code both on the display and on your mobile \
device.
For phones compatible with SMS and MMS:
8 On your mobile device, hit “Allow” to let Mazda Connect download y\
our
phonebook and text messages (SMS).
IMPORTANT: • If your mobile device was once paired to any Mazda vehicle in the past, “Mazda”
on the Bluetooth device list on your mobile device must be deleted.
9 For iPhone, go to Settings>Bluetooth. Select the “i” information i\
con for the
connected device. Switch “Show Notifications” to ON.
NOTE:
• For safety reasons, you cannot pair a phone while driving.• For customer service and device compatibility, visit
www.mazdausa.com/mazdaconnect or call 800-430-0153.
• When in range of another Wi-Fi device, the Bluetooth connection between your
phone and the system may disconnect for a short time if you have Wi-Fi enabled.
Turn off Wi-Fi on your phone if needed.
Page 18 of 46

16
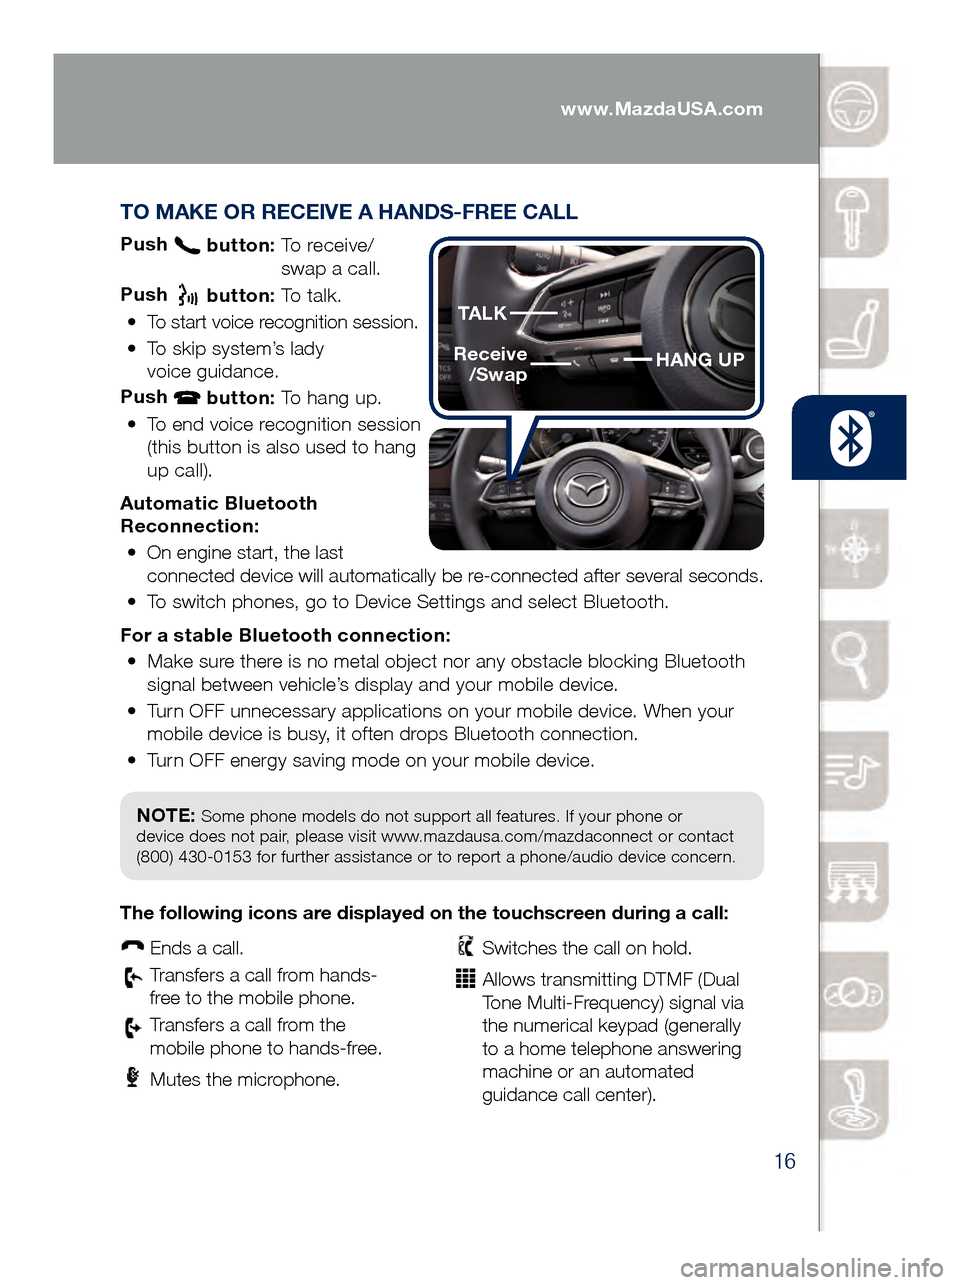
TO MAKE OR RECEIVE A HANDS-FREE CALL
Push button: To receive/
swa p a call.
Push
button: To talk.
•
To start voice recognition session.
•
To skip system’s lady
voice guidance.
Push
button: To hang up.
•
To end voice recognition session
(this button is also used to hang
up call).
Automatic Bluetooth
Reconnection: •
On engine start, the last
connected device will automatically be re-connected after several seconds.
•
To switch phones, go to Device Settings and select Bluetooth.
For a s
table Bluetooth connection:
•
Make sure there is no metal object nor any obstacle blocking Bluetooth
signal between vehicle’s display and your mobile device.
•
Turn OFF unnecessary applications on your mobile device. When your
mobile device is busy, it often drops Bluetooth connection.
•
Turn OFF energy saving mode on your mobile device.
PAIRING YOUR BLUETOOTH® PHONE OR AUDIO DEVICE
(if equipped)
NOTE: Some phone models do not support all features. If your phone or
device does not pair, please visit www.mazdausa.com/mazdaconnect or contact
(800) 430-0153 for further assistance or to report a phone/audio device concern.
The following icons are displayed on the touchscreen during a call:
Ends a call.
Transfers a call from hands‐
fr ee to the mobile phone.
Transfers a call from the
mobile phone to hands‐fr ee.
Mutes the microphone.
Switches the call on hold.
Allows transmitting DTMF (Dual
Tone Multi‐Frequency) signal via
the numerical keypad (generally
to a home telephone answering
machine or an automated
guidance call center).
HANG UP
TALK
Receive
/Swap
www.MazdaUSA.com
Page 19 of 46

17
Navigation System
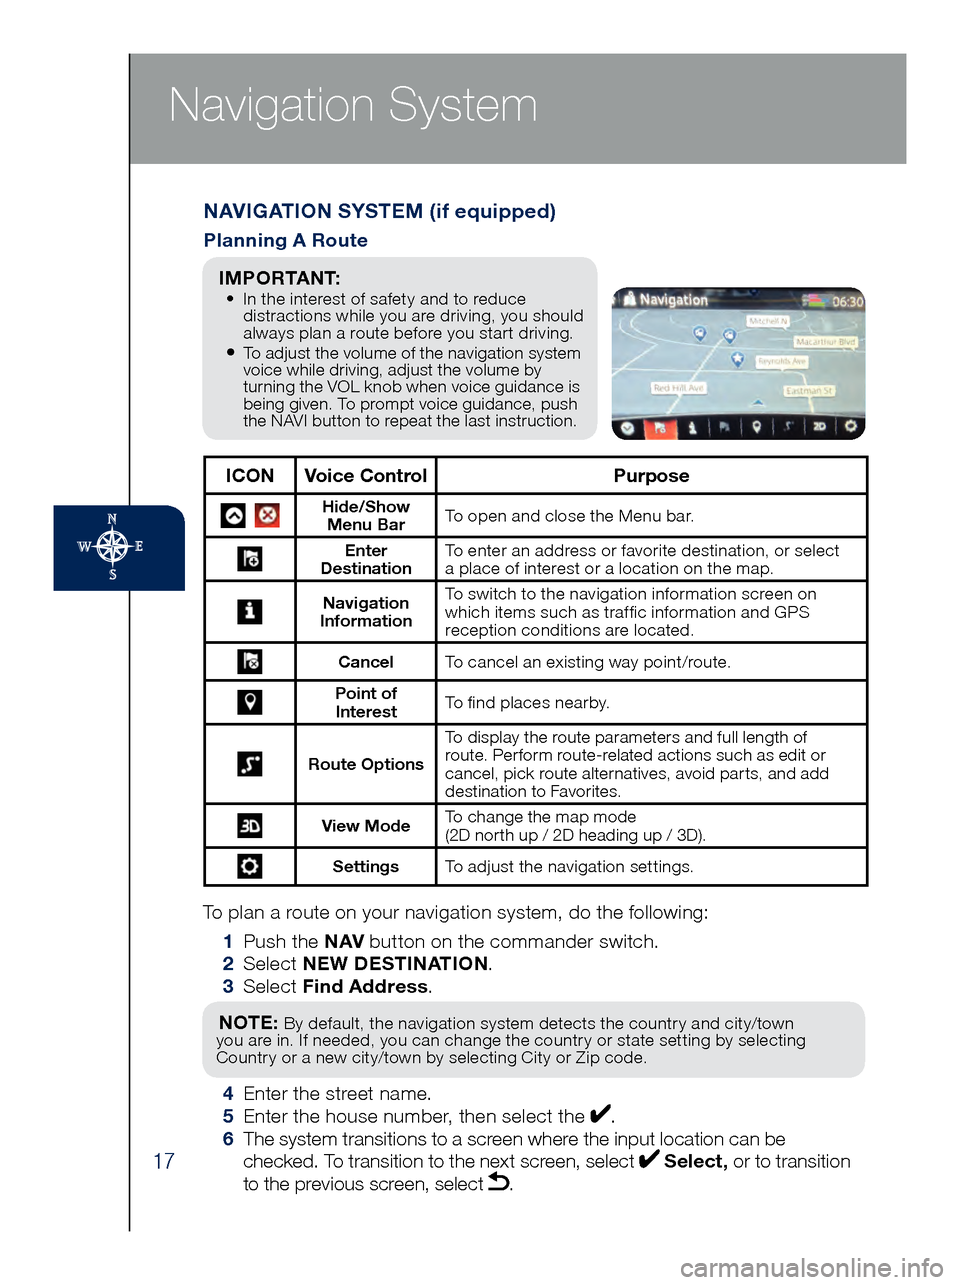
To plan a route on your navigation system, do the following:
1 Pus
h the NAV button on the commander switch.
2 Se
lect NEW DESTINATION .
3 Se
lect Find Address .
NOTE: By default, the navigation system detects the country and city/town
you are in. If needed, you can change the country or state setting by selecting
Country or a new city/town by selecting City or Zip code.
4 Enter the street name. 5 Ent
er the house number, then select the . 6
The s
ystem transitions to a screen where the input location can be
checked. To transition to the next screen, select
Select, or to transition
to the previous screen, select .
NAVIGATION SYSTEM (if equipped)
Planning A Route
ICON Voice Control Purpose
Hide/Show
Menu Bar To open and close the Menu bar.
Enter
Destination To enter an address or favorite destination, or select
a place of interest or a location on the map.
Navigation
Information To switch to the navigation information screen on
which items such as traffic information and GPS
reception conditions are located.
Cancel To cancel an existing way point/route.
Point of
Interest To find places nearby.
Route Options To display the route parameters and full length of
route. Perform route-related actions such as edit or
cancel, pick route alternatives, avoid parts, and add
destination to Favorites.
View Mode
To change the map mode
(2D north up / 2D heading up / 3D).
Settings
To adjust the navigation settings.
I M P O R TA N T: • In the interest of safety and to reduce
dis
tractions while you are driving, you should
always plan a route before you start driving.
• To adjust the volume of the navigation system
voice while driving, adjust the volume by
turning the VOL knob when voice guidance is
being given. To prompt voice guidance, push
the NAVI button to repeat the last instruction.