2017 LINCOLN CONTINENTAL ESP
[x] Cancel search: ESPPage 221 of 584
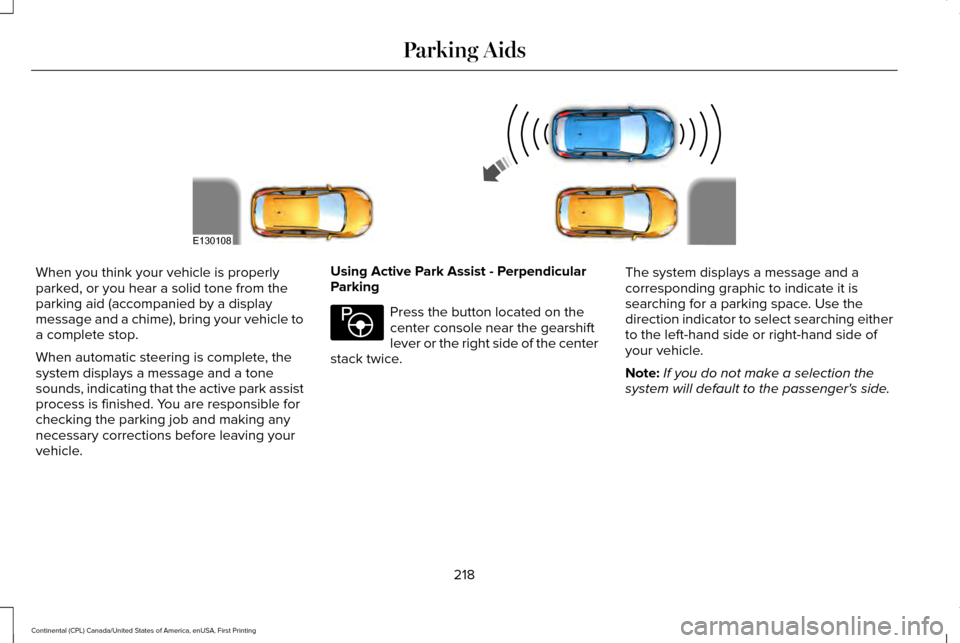
When you think your vehicle is properly
parked, or you hear a solid tone from the
parking aid (accompanied by a display
message and a chime), bring your vehicle to
a complete stop.
When automatic steering is complete, the
system displays a message and a tone
sounds, indicating that the active park assist
process is finished. You are responsible for
checking the parking job and making any
necessary corrections before leaving your
vehicle.
Using Active Park Assist - Perpendicular
Parking Press the button located on the
center console near the gearshift
lever or the right side of the center
stack twice. The system displays a message and a
corresponding graphic to indicate it is
searching for a parking space. Use the
direction indicator to select searching either
to the left-hand side or right-hand side of
your vehicle.
Note:
If you do not make a selection the
system will default to the passenger's side.
218
Continental (CPL) Canada/United States of America, enUSA, First Printing Parking AidsE130108 E146186
Page 223 of 584
When you shift the transmission into reverse
(R), with your hands off the wheel (and
nothing obstructing its movement), your
vehicle steers itself into the space. The
system displays instructions to move your
vehicle back and forth in the space.
When you think your vehicle is properly
parked, or you hear a solid tone from the
parking aid (accompanied by a display
message and a chime), bring your vehicle to
a complete stop.
When automatic steering is complete, the
system displays a message and a tone
sounds, indicating that the active park assist
process is finished. You are responsible for
checking the parking job and making any
necessary corrections before leaving your
vehicle.
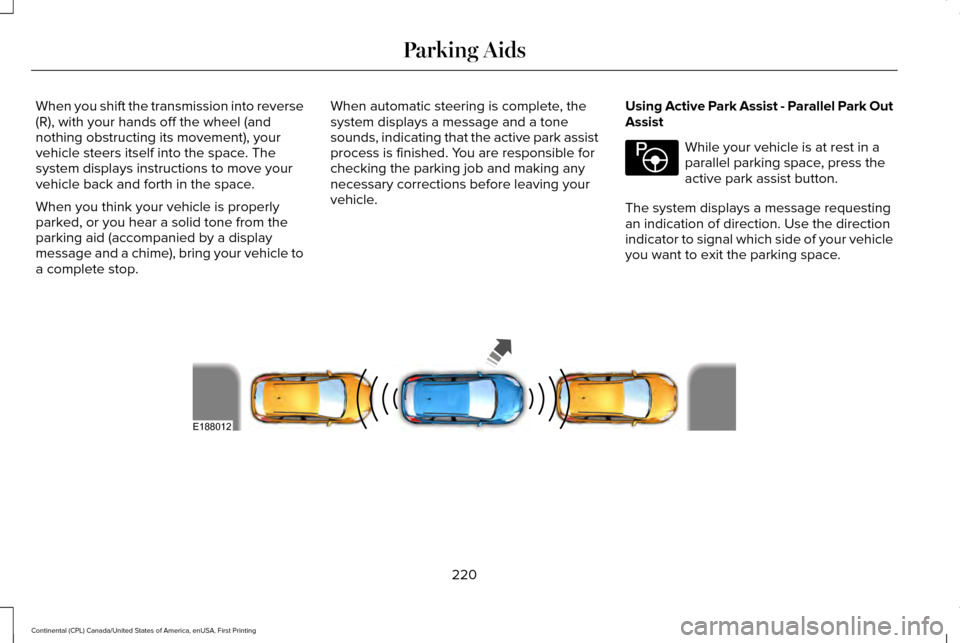
Using Active Park Assist - Parallel Park Out
Assist While your vehicle is at rest in a
parallel parking space, press the
active park assist button.
The system displays a message requesting
an indication of direction. Use the direction
indicator to signal which side of your vehicle
you want to exit the parking space. 220
Continental (CPL) Canada/United States of America, enUSA, First Printing Parking AidsE146186 E188012
Page 224 of 584
The system determines the clearance to the
front and rear of your vehicle and
automatically steers your vehicle out of a
parallel parking space (hands-free) while you
control the accelerator, gearshift and brakes.
The system visually and audibly guides you
to enter traffic.
After the system has directed your vehicle
past the adjacent vehicle or object, it guides
you to take control of the steering to
complete the exit from the parking spot.
Note:
If the clearance in front of your vehicle
allows easy departure, the Parallel Park Out
Assist feature might not be available.
Note: You are responsible for controlling
your vehicle and making sure the path is
clear prior to pulling into traffic. Note:
This system is not intended to assist
in exiting perpendicular parking spaces,
damages to your vehicle may occur.
Note: If your vehicle speed exceeds 3 mph
(5 km/h) or the maneuver is interrupted
(driver input), the system switches off and
you need to take full control of your vehicle.
Deactivating the Active Park Assist
Feature
Manually deactivate the system by:
• Pressing the active park assist button
during an active maneuver.
• Grabbing the steering wheel during an
active maneuver. •
Driving above approximately
22 mph
(35 km/h) for 30 seconds during an active
park search.
• Driving above approximately
6 mph
(10 km/h) during automatic steering.
• Switching off the traction control system.
Certain vehicle conditions can also
deactivate the system, such as:
• Traction control has activated.
• There is an anti-lock brake system
activation or failure.
If a problem occurs with the system, a
warning message displays accompanied by
a tone. Occasional system messages may
occur in normal operation. For recurring or
frequent system faults, contact an authorized
dealer to have your vehicle serviced.
Troubleshooting the System The system does not look for a space
The traction control system may be off.
The transmission is in reverse (R). Your vehicle must be moving forward to be able to detect a parking space.
221
Continental (CPL) Canada/United States of America, enUSA, First Printing Parking Aids
Page 229 of 584

Rear Camera Delay
Selectable settings for this feature are ON
and OFF.
The default setting for the rear camera delay
is OFF.
When shifting the transmission out of reverse
(R) and into any gear other than park (P), the
camera image remains in the display until:
•
Your vehicle speed sufficiently increases.
• You shift your vehicle into park (P).
360 DEGREE CAMERA (If Equipped) WARNINGS
The 360 degree camera system still
requires the driver to use it in
conjunction with looking out of the windows,
and checking the interior and exterior mirrors
for maximum coverage. You may not see objects that are close
to either corner of the bumper or under
the bumper due to the limited coverage of
the camera system. WARNINGS
Use caution when turning camera
features on or off when the
transmission is not in park (P). Make sure
your vehicle is not moving. At all times, you are responsible for
controlling your vehicle, supervising
the system and intervening, if required.
Failure to take care may result in the loss of
control of your vehicle, serious personal
injury or death. Note:
Use caution using the 360 view when
any of the doors are ajar. If a door is ajar,
the camera will be out of position and the
video image may be incorrect.
The 360 degree camera system consists of
front, side and rear cameras. The system:
• Allows you to see what is directly in front
or behind your vehicle.
• Provides cross traffic view in front and
behind your vehicle. •
Allows you to see a top-down view of the
area outside your vehicle, including the
blind spots.
• Provides visibility around your vehicle to
you in parking maneuvers such as:
•Centering in a parking space.
• Obstacles near vehicle.
• Parallel parking. The front camera enable button is
located near the display screen
and turns on the front camera
when your vehicle is not in reverse (R).
Using the System
Note: The 360 degree camera system turns
off when your vehicle is in motion at low
speed, except when in reverse (R).
The front and rear cameras have multiple
screens which consist of: normal view with
360, normal view, and split view. When in
park (P), neutral (N) or drive (D), only the front
images display when you press the button.
When in reverse (R), only the rear images
display.
226
Continental (CPL) Canada/United States of America, enUSA, First Printing Parking AidsE205884
Page 234 of 584
WARNINGS
Do not use tire sizes other than those
recommended because this can affect
the normal operation of the system. Failure
to do so may result in a loss of vehicle
control, which could result in serious injury. Note:
It is your responsibility to stay alert,
drive safely and be in control of the vehicle
at all times.
The system adjusts your vehicle speed to
maintain the set gap between you and the
vehicle in front of you in the same lane. You
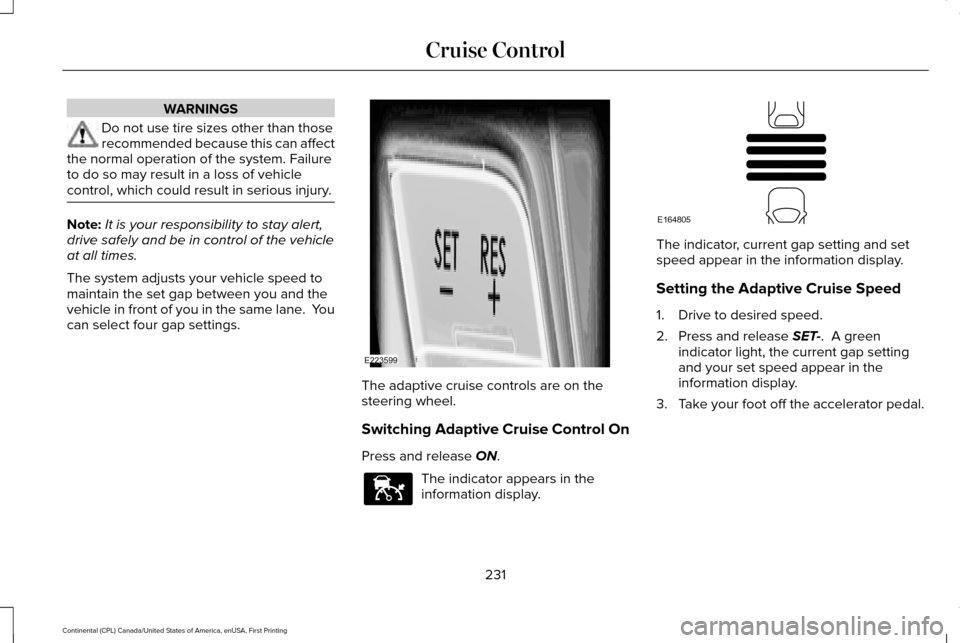
can select four gap settings. The adaptive cruise controls are on the
steering wheel.
Switching Adaptive Cruise Control On
Press and release ON.
The indicator appears in the
information display. The indicator, current gap setting and set
speed appear in the information display.
Setting the Adaptive Cruise Speed
1. Drive to desired speed.
2. Press and release
SET-. A green
indicator light, the current gap setting
and your set speed appear in the
information display.
3. Take your foot off the accelerator pedal.
231
Continental (CPL) Canada/United States of America, enUSA, First Printing Cruise ControlE223599 E144529 E164805
Page 236 of 584
Following a Vehicle to a Complete Stop
If your vehicle follows a vehicle to a complete
stop and remains stationary for less than
three seconds, your vehicle automatically
accelerates from a stationary position to
follow the vehicle ahead.
If your vehicle follows a vehicle to a complete
stop and remains stationary for more than
three seconds, you must press and release
the RES+ button or the accelerator pedal to
accelerate from a stationary position and
follow the vehicle ahead.
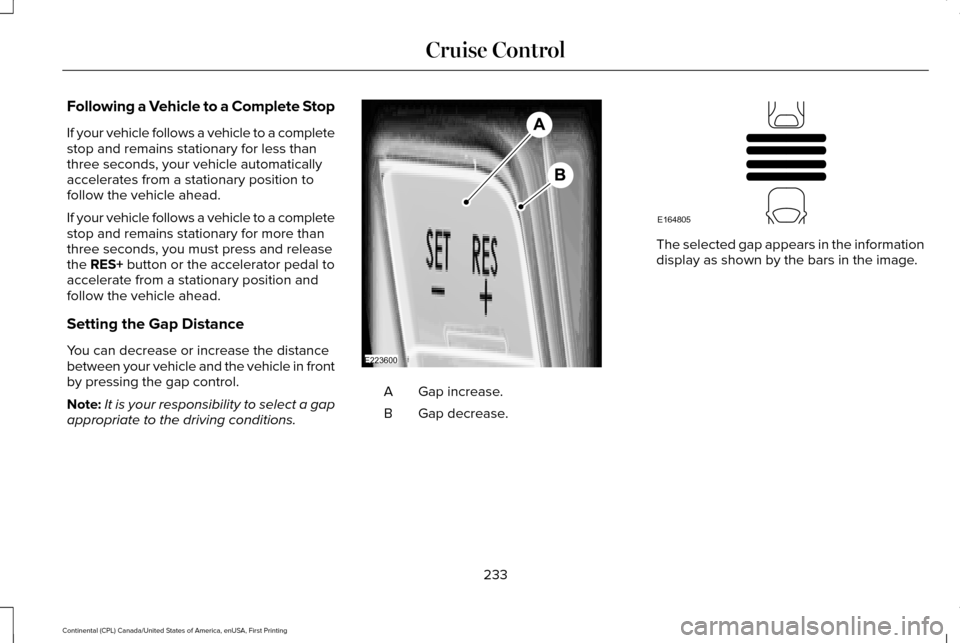
Setting the Gap Distance
You can decrease or increase the distance
between your vehicle and the vehicle in front
by pressing the gap control.
Note: It is your responsibility to select a gap
appropriate to the driving conditions. Gap increase.
A
Gap decrease.
B The selected gap appears in the information
display as shown by the bars in the image.
233
Continental (CPL) Canada/United States of America, enUSA, First Printing Cruise ControlE223600 E164805
Page 238 of 584
Changing the Set Speed
•
When you select km/h as the display
measurement in the information display
the set speed changes in approximately
1 km/h increments. When you select mph
as the display measurement in the
information display the set speed
changes in approximately 1 mph
increments.
• Press the accelerator or brake pedal until
you reach the desired speed. Press and
release RES+ or SET-.
• Press and hold
RES+ or SET-. Release
the control when you reach the desired
speed. The set speed changes in
approximately 5 mph/10 km/h increments.
The system may apply the brakes to slow
the vehicle to the new set speed. The set
speed displays continuously in the
information display when the system is
active.
Canceling the Set Speed
Press and release
CAN or tap the brake
pedal. The set speed does not erase. The
last set speed displays with a strikethrough. Resuming the Set Speed
Press and release
RES. Your vehicle speed
returns to the previously set speed and gap
setting. The set speed displays continuously
in the information display when the system
is active.
Note: Only use resume if you are aware of
the set speed and intend to return to it.
Automatic Cancellation
Automatic cancellation can occur if:
• The tires lose traction.
• You apply the parking brake.
Hilly Condition Usage
Note: An audible alarm sounds and the
system shuts down if it applies brakes for an
extended period of time. This allows the
brakes to cool. The system functions
normally again when the brakes have
cooled. Select a lower gear during prolonged
downhill driving on steep slopes, such as
mountainous areas, when the system is
active. In such situations, the system needs
additional engine braking to reduce the load
on the vehicle
’s regular brake system to
prevent the brakes from overheating.
Switching Adaptive Cruise Control Off
Press and release
OFF when the system is
in stand by mode or switch the ignition off.
Note: You erase the set speed and gap
setting when you switch the system off.
Detection Issues WARNING
On rare occasions, detection issues
can occur due to the road
infrastructures, for example bridges, tunnels
and safety barriers. In these cases, the
system may brake late or unexpectedly. At
all times, you are responsible for controlling
your vehicle, supervising the system and
intervening, if required. 235
Continental (CPL) Canada/United States of America, enUSA, First Printing Cruise Control
Page 241 of 584

Due to the nature of radar technology, it is
possible to get a blockage warning and not
be blocked. This can happen, for example,
when driving in sparse rural or desert
environments. A false blocked condition
either self clears or clears after a key cycle.
Switching to Normal Cruise Control
WARNING
Normal cruise control will not brake
when your vehicle is approaching
slower vehicles. Always be aware of which
mode you have selected and apply the
brakes when necessary. You can manually change from adaptive
cruise control to normal cruise control
through the information display. The cruise control indicator light
replaces the adaptive cruise
control indicator light if you select
normal cruise control. The gap setting does
not display, the system does not
automatically respond to vehicles ahead and
automatic braking is not active. The system
remembers the last setting when you start
your vehicle.
238
Continental (CPL) Canada/United States of America, enUSA, First Printing Cruise ControlE71340