Page 230 of 724
2304-3. Operating the lights and wipers
■Temporarily lowering sensor sensitivity
The sensitivity of the sensor can be temporarily lowered.
Turn the engine switch off while the following conditions are met.
• The headlight switch is in or .
• The headlight switch lever is in high beam position.
• Automatic High Beam switch is on.
Turn the engine switch to IGNITION ON mode.
Within 5 seconds after , repeat pulling th e headlight switch lever to the original
position then pushing it to the high beam po sition quickly 9 times, then leave the lever
in high beam position.
Automatic High Beam (head lights) may turn on even the vehicle is stopped.
WARNING
■Limitations of the Automatic High Beam
Do not rely on the Automatic High Beam. Al ways drive safely, taking care to observe
your surroundings and turning high beam on or off manually if necessary.
1
2
32
Page 234 of 724
2344-3. Operating the lights and wipers
Wiper intervals can be adjusted when intermittent operation is selected.
Increases the intermittent windshield
wiper frequency
Decreases the intermittent wind-
shield wiper frequency
Washer/wiper dual operation
The wipers will automatically operate a
couple of times afte r the washer squirts.
Vehicles with headlight cleaners: When
the engine switch is in IGNITION ON
mode and the headlights are on, if the
lever is pulled, th e headlight cleaners
will operate once. After this, the head-
light cleaners will operate every 5th
time the lever is pulled.
5
6
7
Page 236 of 724

2364-3. Operating the lights and wipers
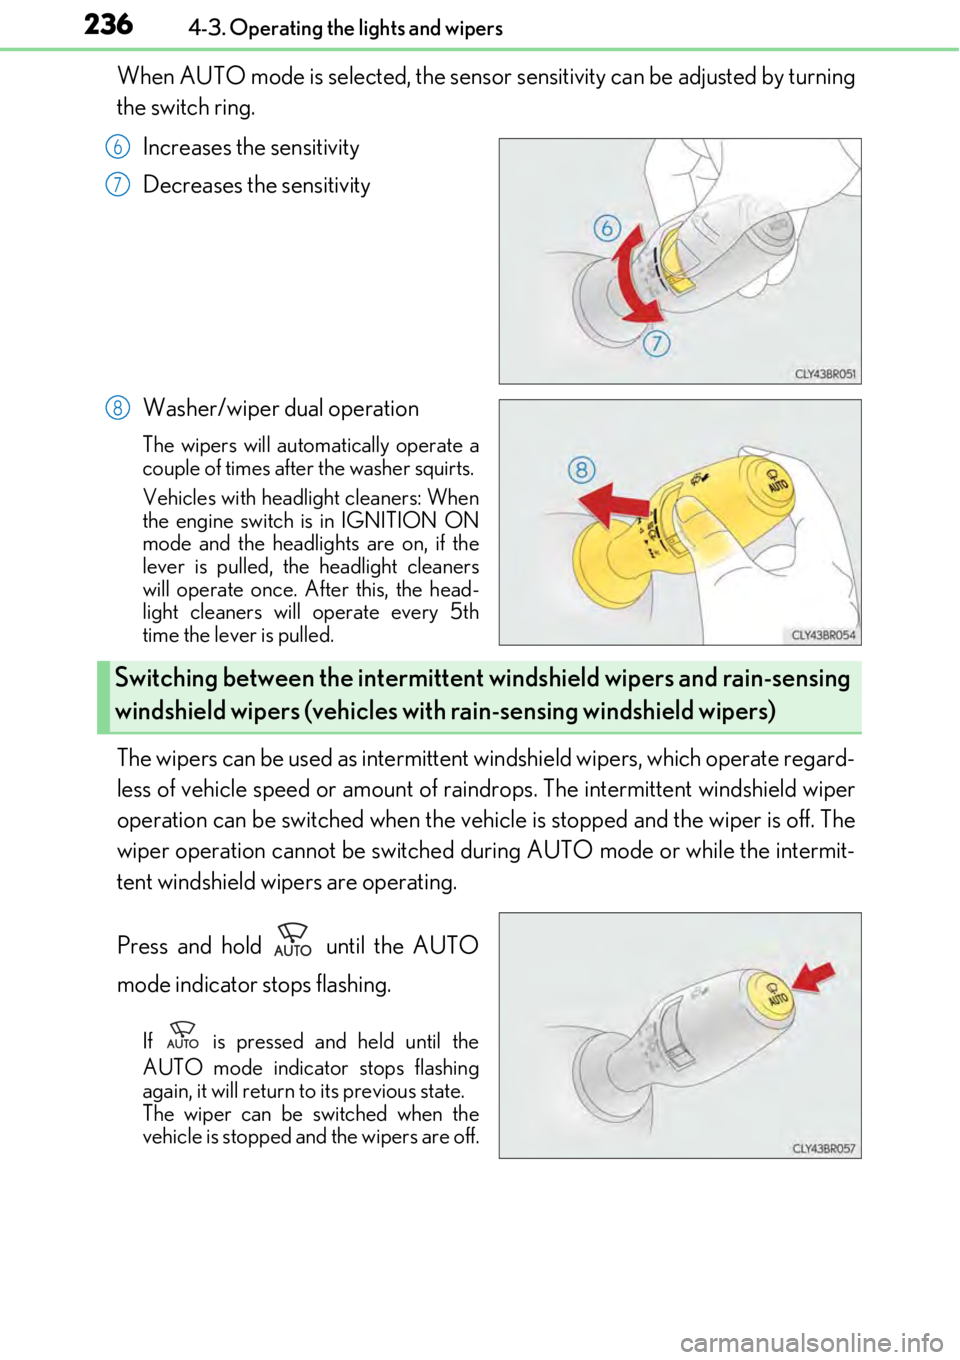
When AUTO mode is selected, the sensor sensitivity can be adjusted by turning
the switch ring.
Increases the sensitivity
Decreases the sensitivity
Washer/wiper dual operation
The wipers will automatically operate a
couple of times afte r the washer squirts.
Vehicles with headlight cleaners: When
the engine switch is in IGNITION ON
mode and the headlights are on, if the
lever is pulled, th e headlight cleaners
will operate once. After this, the head-
light cleaners will operate every 5th
time the lever is pulled.
The wipers can be used as intermittent windshield wipers, which operate regard-
less of vehicle speed or amount of rain drops. The intermittent windshield wiper
operation can be switched wh en the vehicle is stopped and the wiper is off. The
wiper operation cannot be switched duri ng AUTO mode or while the intermit-
tent windshield wi pers are operating.
Press and hold until the AUTO
mode indicator stops flashing.
If is pressed and held until the
AUTO mode indicator stops flashing
again, it will return to its previous state.
The wiper can be switched when the
vehicle is stopped and the wipers are off.
6
7
8
Switching between the intermittent windshield wipers and rain-sensing
windshield wipers (vehicles with rain-sensing windshield wipers)
Page 239 of 724

2394-3. Operating the lights and wipers
4
Driving
■The windshield wiper and washer can be operated when
The engine switch is in IGNITION ON mode.
■Dripping prevention wiper sweep
After performing a washing and wiping operation several times, the wipers operate one
more time after a short delay to prevent dripping.
However, this final wiper operation will not be performed while driving.
■Effects of vehicle speed on wiper operation (vehicles with rain-sensing windshield wip-
ers)
Vehicle speed affects the following even when the wipers are not in AUTO mode.
●Intermittent wiper interval
●Wiper operation when the washer is being used (delay until drip prevention wiper
sweep occurs)
With low speed windshield wi per operation selected, wiper operation will be switched
from low speed to intermittent wiper operation only when the vehicle is stationary.
■Raindrop sensor (vehicles with rain-sensing windshield wipers)
●If the wiper is turned to AUTO mode wh ile the engine switch is in IGNITION ON
mode, the wipers will operate once to show that AUTO mode is activated.
●If the temperature of the raindrop sensor is 185°F (85°C) or higher, or -22°F (-30°C)
or lower, automatic operation may not occur. In this case, operate the wipers in any
mode other than AUTO mode.
■When the windshield wipers are in tempor ary operation (vehicles with rain-sensing
windshield wipers)
AUTO mode cannot be activa ted even if is pressed.
■If no windshield washer fluid sprays
Check that the washer nozzles are not blocked if there is washer fluid in the windshield
washer fluid reservoir.
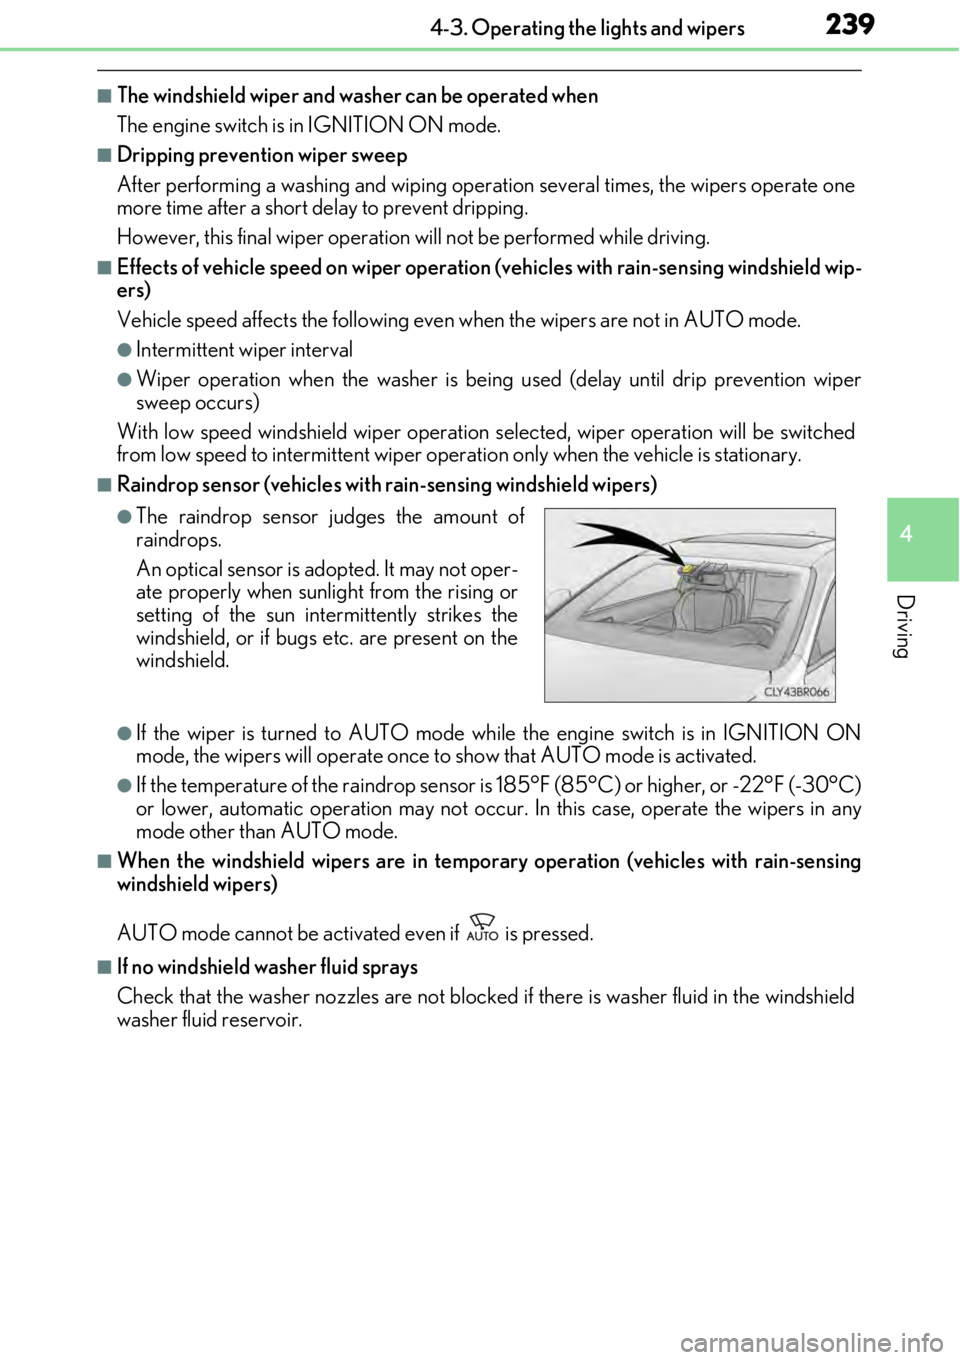
●The raindrop sensor judges the amount of
raindrops.
An optical sensor is adopted. It may not oper-
ate properly when sunlight from the rising or
setting of the sun inte rmittently strikes the
windshield, or if bugs etc. are present on the
windshield.
Page 241 of 724

241
4
Driving
4-4. Refueling
●Close both side doors and windows, and turn the engine switch off.
●Confirm the type of fuel.
■Fuel types
→P. 658
■Fuel tank opening for unleaded gasoline
To help prevent incorrect fueling, your vehi cle has a fuel tank opening that only accom-
modates the specia l nozzle on unleaded fuel pumps.
Opening the fuel tank cap
Perform the following steps to open the fuel tank cap:
Before refueling the vehicle
WARNING
■When refueling the vehicle
Observe the following precautions while refueling the vehicle. Failure to do so may
result in death or serious injury.
●After exiting the vehicle and before opening the fuel door, touch an unpainted metal
surface to discharge any static electricity. It is important to discharge static electricity
before refueling because sparks resulting fr om static electricity can cause fuel vapors
to ignite while refueling.
●Always hold the grips on the fuel tank cap and turn it slowly to remove it.
A whooshing sound may be heard when the fu el tank cap is loosened. Wait until the
sound cannot be heard before fully removing the cap. In hot weather, pressurized fuel
may spray out the filler neck and cause injury.
●Do not allow anyone that has not discharged static electricity from their body to come
close to an open fuel tank.
●Do not inhale vaporized fuel.
Fuel contains substances th at are harmful if inhaled.
●Do not smoke while refueling the vehicle.
Doing so may cause the fuel to ignite and cause a fire.
●Do not return to the vehicle or touch any pe rson or object that is statically charged.
This may cause static electricity to build up, resulting in a possible ignition hazard.
■When refueling
Observe the following precautions to prevent fuel overflowing from the fuel tank:
●Securely insert the fuel nozzle into the fuel filler neck.
●Stop filling the tank after the fuel nozzle automatically clicks off.
●Do not top off the fuel tank.
Page 253 of 724
2534-5. Using the driving support systems
4
Driving
Pressing the button changes the vehi-
cle-to-vehicle distance as follows:Long
Medium
Short
The vehicle-to-vehicle distance is set
automatically to long mode when the
engine switch is turned to IGNITION
ON mode.
If a vehicle is running ahead of you, the pr eceding vehicle mark will also be displayed.
Select a distance from the table below. Note that the distances shown corre-
spond to a vehicle speed of 50 mph (8 0 km/h). Vehicle-to-vehicle distance
increases/decreases in acco rdance with vehicle speed.
Changing the vehicle-to-vehicle distance (vehicle-to-vehicle distance
control mode)
Preceding
vehicle mark
1
2
3
Vehicle-to-vehicle distance settings (vehicle-to-vehicle distance con-
trol mode)
Distance optionsVehicle-to-vehicle distance
LongApproximately 160 ft. (50 m)
MediumApproximately 130 ft. (40 m)
ShortApproximately 100 ft. (30 m)
Page 255 of 724

2554-5. Using the driving support systems
4
Driving
When constant speed control mode is selected, your vehicle will maintain a set
speed without controlling the vehicle-to-veh icle distance. Select this mode only
when vehicle-to-vehicle distance control mode does not function correctly due
to dirt, etc.
Press the “ON/OFF” button to acti-
vate the cruise control.
Press the button again to deactivate the
cruise control.
Switch to constant speed control
mode.
(Push the lever forward and hold for
approximately 1 second.)
Cruise control indicator will come on.
When in constant speed control mode, to re turn to vehicle-to-vehicle distance con-
trol mode, push the lever forward agai n and hold for approximately 1 second.
After the desired speed has been set, it is not possible to return to vehicle-to-vehicle
distance control mode.
If the engine switch is turned off and then turned to IGNITION ON mode again, the
vehicle will automatically return to vehi cle-to-vehicle distance control mode.
Adjusting the speed setting: →P. 252
Canceling and resuming the speed setting: →P. 254
■Dynamic radar cruise control can be set when
●The shift lever is in D.
●Range 4 or higher of D has been selected by using the paddle shift.
●Vehicle speed is above approximately 30 mph (50 km/h).
■Accelerating after setting the vehicle speed
The vehicle can accelerate by operating the accelerator pedal. After accelerating, the
set speed resumes. However, during vehicle-to-vehicle distance control mode, the vehi-
cle speed may decrease below the set speed in order to maintain the distance to the pre-
ceding vehicle.
Selecting constant speed control mode
1
2
Page 264 of 724
2644-5. Using the driving support systems
Press the LDA switch to activate the
system.
The LDA indicator and lane lines will
come on.
Press the switch again to turn the LDA
system off.
The LDA system will remain on or off
even if the engine switch is turned to
IGNITION ON mode.
●When the vehicle speed is approximately 32 mph (50 km/h) or more
●When the lane width is more than approximately 8.2 ft. (2.5 m)
●When driving on a straight road or through a curve with a radius of more\
than
approximately 328 ft. (100 m)
Turning the LDA system on
Operating conditions