Page 157 of 584
ES350_OM_OM33C68U_(U)
1554-2. Driving procedures
4
Driving
Stop the vehicle.
Set the parking brake (→P. 164), and shift the shift lever to P.
Press the engine switch.
Release the brake pedal and check that “POWER ON” on the multi-informa-
tion display is off.
Modes can be changed by pressing the engine switch with brake pedal released.
(The mode changes each time the switch is pressed.)
Off*
The emergency flashers can be used.
ACCESSORY mode
Some electrical components such as the
audio system can be used.
“POWER ON” will be displayed on the
multi-information display.
IGNITION ON mode
All electrical components can be used.
“POWER ON” will be displayed on the
multi-information display.
*: If the shift lever is in a position other than P when turning off the engine, the
engine switch will be turned to ACCES-
SORY mode, not to off.
Stopping the engine
Changing engine switch modes
1
2
3
4
Page 159 of 584

ES350_OM_OM33C68U_(U)
1574-2. Driving procedures
4
Driving
■When the steering lock cannot be released
■Steering lock motor overheating prevention
To prevent the steering lock motor from overheating, the motor may be suspended if the
engine is turned on and off repeatedly in a short period of time. In this case, refrain from
operating the engine. After about 10 seconds, the steering lock motor will resume func-
tioning.
■When “Check Access System with Elec. Key” is displayed on the multi-information dis-
play
The system may be malfunctioning. Have the vehicle inspected by your Lexus dealer
immediately.
■If the electronic key battery is depleted
→ P. 4 5 7
■Operation of the engine switch
●If the switch is not pressed shortly and firmly, the engine switch mode may not change
or the engine may not start.
●If attempting to restart the engine immediately after turning the engine switch off, the
engine may not start in some cases. After turning the engine switch off, please wait a
few seconds before restarting the engine.
■If the smart access system with push-button start has been deactivated in a customized
setting
→ P. 5 0 4
■Odometer and trip meter display
When the engine switch is turned off, the odometer or trip meter display will extinguish
after approximately 30 seconds. “Steering Lock active” will be displayed on the
multi-information display.
Check that the shift lever is set in P. Press the
engine switch while turning the steering wheel
left and right.
Page 165 of 584
163
ES350_OM_OM33C68U_(U)4-2. Driving procedures
4
Driving
Turn signal lever
Right turn
Lane change to the right (move the
lever partway and then release it)
The right hand signals will flash 3 times.
Lane change to the left (move the
lever partway and then release it)
The left hand signals will flash 3 times.
Left turn
■Turn signals can be operated when
The engine switch is in IGNITION ON mode.
■If the indicator flashes faster than usual
Check that a light bulb in the front or re
ar turn signal lights has not burned out.
■If the turn signals stop flashing before a lane change has been performed
Operate the lever again.
■To discontinue flashing of the turn signals during a lane change
Operate the lever in the opposite direction.
■Customization
The number of times the turn signals flash during a lane change can be changed.
(→ P. 5 3 8 )
Operating instructions
1
2
3
4
Page 173 of 584
ES350_OM_OM33C68U_(U)
1714-3. Operating the lights and wipers
4
Driving
■Temporarily lowering sensor sensitivity
The sensitivity of the sensor can be temporarily lowered.Turn the engine switch off while the following conditions are met.
• The headlight switch is in or .
• The headlight switch lever is in high beam position.
• Automatic High Beam switch is on. Turn the engine switch to IGNITION ON mode.
Within 30 seconds after , repeat pulling the headlight switch lever to the original
position then pushing it to the high beam position quickly 10 times, then leave the
lever in high beam position.
If the sensitivity is changed, the Automati c High Beam indicator is turn on and off
three times.
Automatic High Beam (headlights) may turn on even the vehicle is stopped.
1
2
32
4
Page 192 of 584
190
ES350_OM_OM33C68U_(U)4-5. Using the driving support systems
■Enabling/disabling the pre-collision system
The pre-collision system can be enabled/disabled on (setting display)
(
→ P. 80) of the multi-information display.
The system is automatically enabled each time the engine switch is turned to IGNI-
TION ON mode.
If the system is disabled, the PCS
warning light will turn on and a mes-
sage will be displayed on the multi-
information display.
■Changing the pre-col lision warning timing
The pre-collision warning timing can be changed on (setting display)
( → P. 80) of the multi-information display.
The operation timing setting is retained when the engine switch is turned off.
Far
The warning will begin to operate
earlier than with the default timing.
Middle
This is the default setting.
Near
The warning will begin to operate
later than with the default timing.
Changing settings of th e pre-collision system
1
2
3
Page 213 of 584

ES350_OM_OM33C68U_(U)
2114-5. Using the driving support systems
4
Driving
This mode employs a radar sensor to detect the presence of vehicles up to
approximately 328 ft. (100 m) ahead, determines the current vehicle-to-vehicle
following distance, and operates to maintain a suitable following distance from
the vehicle ahead.
Note that vehicle-to-vehicle distance will close in when traveling on long downhill
slopes.
Example of constant speed cruising
When there are no vehicles ahead
The vehicle travels at the speed set by the driver. The desired vehicle-to-vehicle dis-
tance can also be set by operating the vehicle-to-vehicle distance button.
Example of deceleration cruising and follow-up cruising
When a preceding vehicle driving slower than the set speed appears
When a vehicle is detected running ahead of you, the system automatically deceler-
ates your vehicle. When a greater reduction in vehicle speed is necessary, the system
applies the brakes (the stop lights will come on at this time). The system will respond to
changes in the speed of the vehicle ahead in order to maintain the vehicle-to-vehicle
distance set by the driver. Approach warning warns you when the system cannot
decelerate sufficiently to prevent your vehicle from closing in on the vehicle ahead.
Example of acceleration
When there are no longer any preceding vehicles driving slower than the set
speed
The system accelerates until the set speed is reached. The system then returns to con-
stant speed cruising.
Driving in vehicle-to-vehicle distance control mode
1
2
3
Page 215 of 584

ES350_OM_OM33C68U_(U)
2134-5. Using the driving support systems
4
Driving
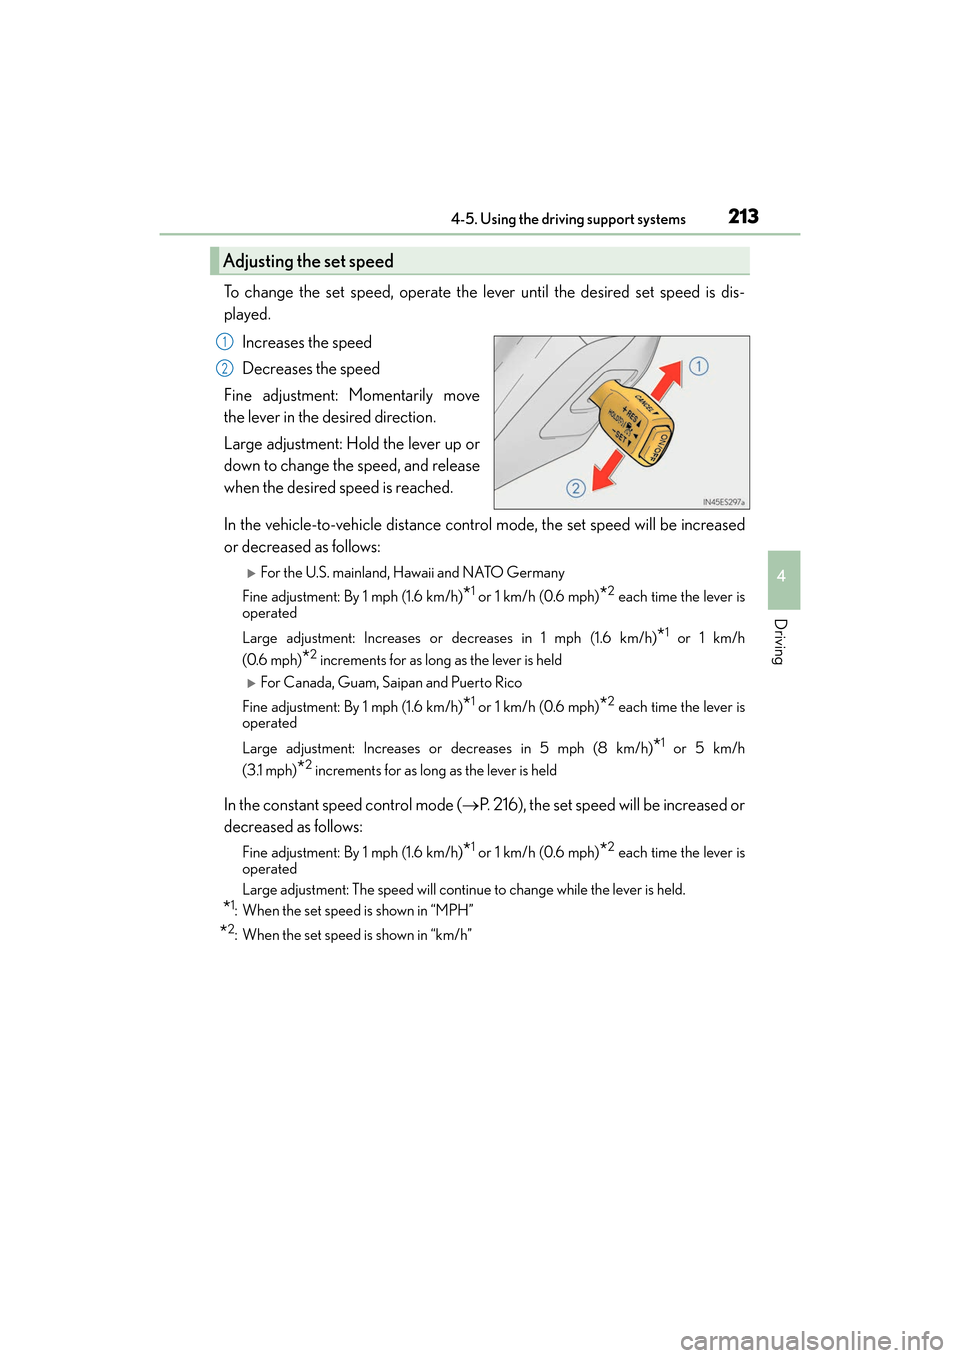
To change the set speed, operate the lever until the desired set speed is dis-
played.Increases the speed
Decreases the speed
Fine adjustment: Momentarily move
the lever in the desired direction.
Large adjustment: Hold the lever up or
down to change the speed, and release
when the desired speed is reached.
In the vehicle-to-vehicle distance control mode, the set speed will be increased
or decreased as follows:
�XFor the U.S. mainland, Hawaii and NATO Germany
Fine adjustment: By 1 mph (1.6 km/h)
*1 or 1 km/h (0.6 mph)*2 each time the lever is
operated
Large adjustment: Increases or decreases in 1 mph (1.6 km/h)
*1 or 1 km/h
(0.6 mph)
*2 increments for as long as the lever is held
�XFor Canada, Guam, Saipan and Puerto Rico
Fine adjustment: By 1 mph (1.6 km/h)
*1 or 1 km/h (0.6 mph)*2 each time the lever is
operated
Large adjustment: Increases or decreases in 5 mph (8 km/h)
*1 or 5 km/h
(3.1 mph)
*2 increments for as long as the lever is held
In the constant speed control mode ( →P. 216), the set speed will be increased or
decreased as follows:
Fine adjustment: By 1 mph (1.6 km/h)*1 or 1 km/h (0.6 mph)*2 each time the lever is
operated
Large adjustment: The speed will continue to change while the lever is held.
*1: When the set speed is shown in “MPH”
*2: When the set speed is shown in “km/h”
Adjusting the set speed
1
2
Page 223 of 584

ES350_OM_OM33C68U_(U)
2214-5. Using the driving support systems
4
Driving
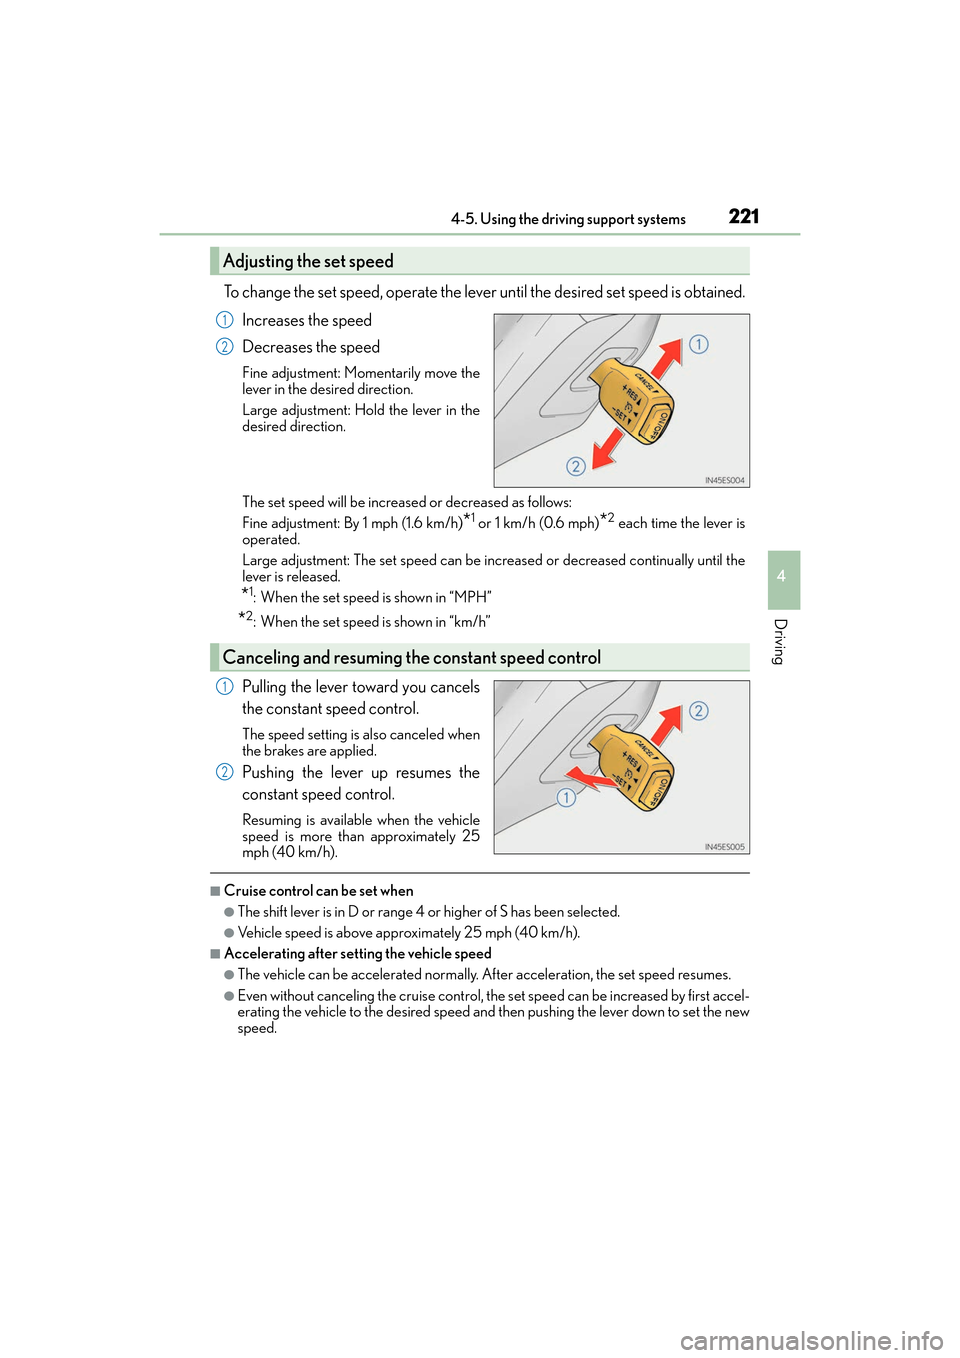
To change the set speed, operate the lever until the desired set speed is obtained.Increases the speed
Decreases the speed
Fine adjustment: Momentarily move the
lever in the desired direction.
Large adjustment: Hold the lever in the
desired direction.
The set speed will be increased or decreased as follows:
Fine adjustment: By 1 mph (1.6 km/h)
*1 or 1 km/h (0.6 mph)*2 each time the lever is
operated.
Large adjustment: The set speed can be increased or decreased continually until the
lever is released.
*1: When the set speed is shown in “MPH”
*2: When the set speed is shown in “km/h”
Pulling the lever toward you cancels
the constant speed control.
The speed setting is also canceled when
the brakes are applied.
Pushing the lever up resumes the
constant speed control.
Resuming is available when the vehicle
speed is more than approximately 25
mph (40 km/h).
■Cruise control can be set when
●The shift lever is in D or range 4 or higher of S has been selected.
●Vehicle speed is above approximately 25 mph (40 km/h).
■Accelerating after setting the vehicle speed
●The vehicle can be accelerated normally. After acceleration, the set speed resumes.
●Even without canceling the cruise control, the set speed can be increased by first accel-
erating the vehicle to the desired speed and then pushing the lever down to set the new
speed.
Adjusting the set speed
1
2
Canceling and resuming the constant speed control
1
2