Page 174 of 640

174
CT200h_OM_OM76215U_(U)4-3. Operating the lights and wipers
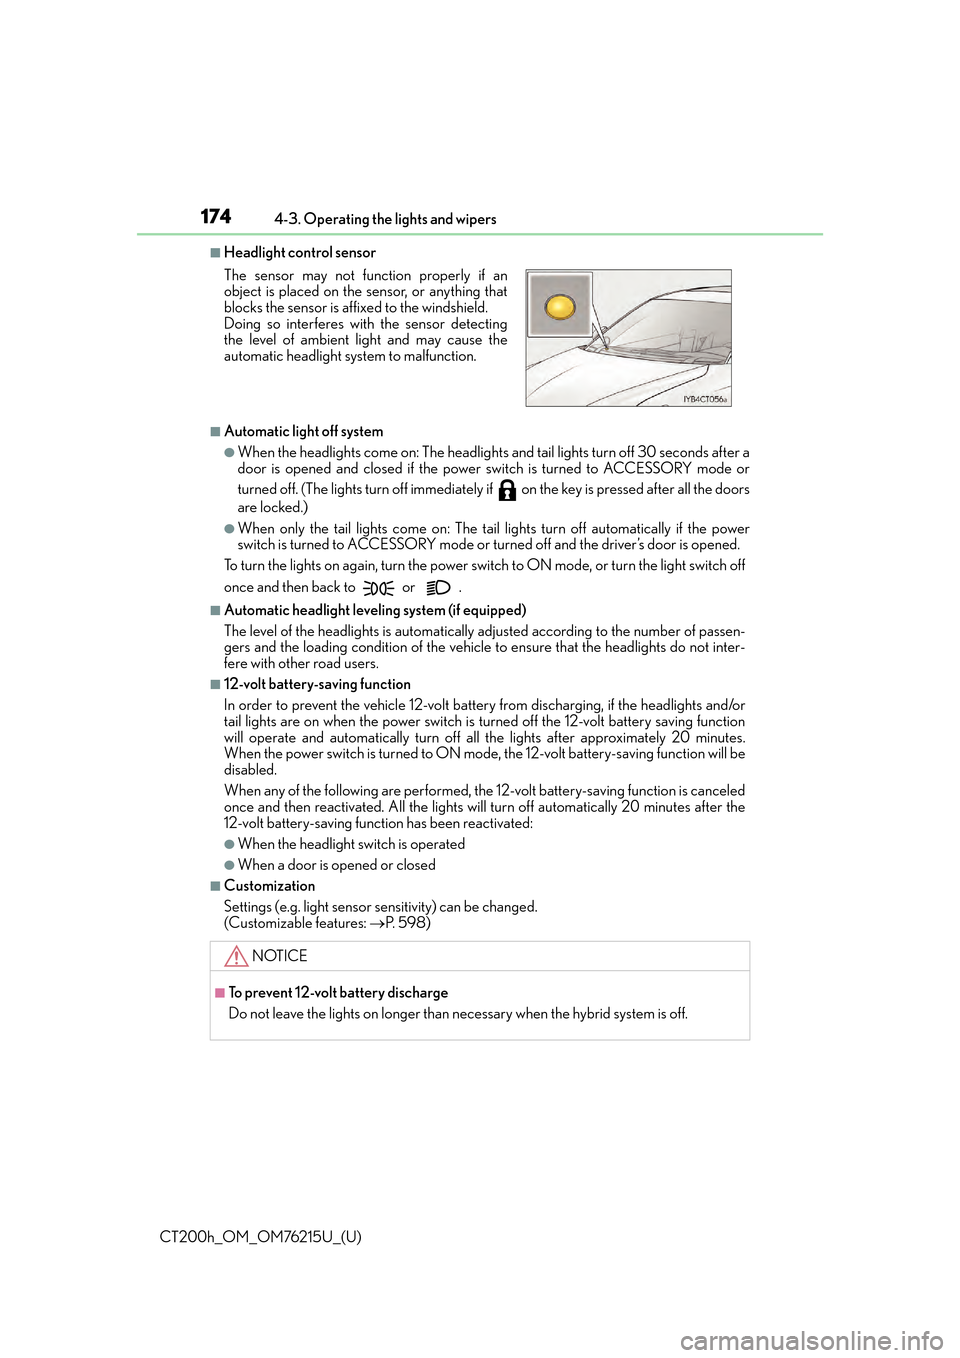
■Headlight control sensor
■Automatic light off system
●When the headlights come on: The headlights and tail lights turn off 30 seconds after a
door is opened and closed if the power
switch is turned to ACCESSORY mode or
turned off. (The lights turn off immediately if on the key is pressed after all the doors
are locked.)
●When only the tail lights come on: The tail lights turn off automatically if the power
switch is turned to ACCESSORY mode or turned off and the driver’s door is opened.
To turn the lights on again, turn the power switch to ON mode, or turn the light switch off
once and then back to or .
■Automatic headlight leveling system (if equipped)
The level of the headlights is automatically ad justed according to the number of passen-
gers and the loading condition of the vehicle to ensure that the headlights do not inter-
fere with other road users.
■12-volt battery-saving function
In order to prevent the vehicle 12-volt battery from discharging, if the headlights and/or
tail lights are on when the power switch is turned off the 12-volt battery saving function
will operate and automatically turn off all the lights after approximately 20 minutes.
When the power switch is turned to ON mode, the 12-volt battery-saving function will be
disabled.
When any of the following are performed, the 12-volt battery-saving function is canceled
once and then reactivated. All the lights w ill turn off automatically 20 minutes after the
12-volt battery-saving function has been reactivated:
●When the headlight switch is operated
●When a door is opened or closed
■Customization
Settings (e.g. light sensor se nsitivity) can be changed.
(Customizable features: P. 5 9 8 )
The sensor may not function properly if an
object is placed on the sensor, or anything that
blocks the sensor is affixed to the windshield.
Doing so interferes with the sensor detecting
the level of ambient light and may cause the
automatic headlight system to malfunction.
NOTICE
■To prevent 12-volt battery discharge
Do not leave the lights on longer than necessary when the hybrid system is off.
Page 181 of 640

CT200h_OM_OM76215U_(U)
1814-3. Operating the lights and wipers
4
Driving
The sensor sensitivity can be adjusted when “AUTO” is selected.
Increases the sensitivity
Decreases the sensitivity
Washer/wiper dual operation
The wipers will automatically operate
a couple of times after the washer
squirts.
Vehicles with headlight cleaners: If
the headlights are on, the headlight
cleaners will operate once.
■The windshield wipers and washer can be operated when
The power switch is in ON mode.
■Raindrop sensor (vehicles with rain-sensing windshield wipers)
●If the wiper switch is turned to the “AUTO” position while the power switch is in ON
mode, the wipers will operate once to show that AUTO mode is activated.
●If the temperature of the raindrop sensor is 194 F (90 C) or higher, or 5 F (-15 C) or
lower, automatic operation may not occur. In this case, operate the wipers in any mode
other than “AUTO”.
■If no windshield washer fluid sprays
Check that the washer nozzles are not blocked if there is washer fluid in the washer fluid
tank.
5
6
7
●The raindrop sensor judges the amount of
raindrops.
An optical sensor is ad opted. It may not oper-
ate properly when sunlight from the rising or
setting of the sun intermittently strikes the
windshield, or if bugs etc. are present on the
windshield.
Page 184 of 640
184
CT200h_OM_OM76215U_(U)4-3. Operating the lights and wipers
Ty p e B
Intermittent operation
Normal operation
Washer/wiper dual operation
Washer/wiper dual operation
■The rear window wiper and washer can be operated when
The power switch is in ON mode.
1
2
3
4
NOTICE
■When the rear window is dry
Do not use the wiper, as it may damage the rear window.
■When the washer fluid tank is empty
Do not operate the switch continually as the washer fluid pump may overheat.
Page 185 of 640
185
CT200h_OM_OM76215U_(U)4-3. Operating the lights and wipers
4
Driving
Headlight cleaner switch
Press the switch to clean the headlights.
■The headlight cleaners can be operated when
The power switch is in ON mode and
the headlight switch is turned on.
■Windshield washer linked operation
Only for the first time when the windshield washer is operated with the power switch in
ON mode and the headlights on, the headlight cleaners will operate once. ( P. 177)
: If equipped
Washer fluid can be sprayed on the headlights.
NOTICE
■When the washer fluid tank is empty
Do not press the switch continually as the washer fluid pump may overheat.
Page 186 of 640

186
CT200h_OM_OM76215U_(U)4-4. Refueling
Opening the fuel tank cap
●Close all the doors and windows, and turn the power switch off.
●Confirm the type of fuel.
■Fuel types
P. 5 8 6
■Fuel tank opening for unleaded gasoline
To help prevent incorrect fueling, your vehicle has a fuel tank opening that only accom-
modates the special nozzle on unleaded fuel pumps.
Perform the following steps to open the fuel tank cap.
Before refueling the vehicle
WA R N I N G
■When refueling the vehicle
Observe the following precautions while refu eling the vehicle. Failure to do so may
result in death or serious injury.
●After exiting the vehicle and before openin g the fuel door, touch an unpainted metal
surface to discharge any static electricity. It is important to discharge static electricity
before refueling because sparks resulting fr om static electricity can cause fuel vapors
to ignite while refueling.
●Always hold the grips on th e fuel tank cap and turn it slowly to remove it.
A whooshing sound may be heard when the fuel tank cap is loosened. Wait until the
sound cannot be heard before fully removing the cap. In hot weather, pressurized fuel
may spray out of the filler neck and cause injury.
●Do not allow anyone that has not discharged static electricity from their body to come
close to an open fuel tank.
●Do not inhale vaporized fuel.
Fuel contains substances th at are harmful if inhaled.
●Do not smoke while refueling the vehicle.
Doing so may cause the fuel to ignite and cause a fire.
●Do not return to the vehicle or touch any person or object that is statically charged.
This may cause static electricity to build up, resulting in a possible ignition hazard.
Page 194 of 640

194
CT200h_OM_OM76215U_(U)4-5. Using the driving support systems
Pressing the button changes the vehi-
cle-to-vehicle distance as follows:
Long
Medium
Short
The vehicle-to-vehicle distance is set
automatically to long mode when the
power switch is turned to ON mode.
If a vehicle is running ahead of you, the preceding vehicle mark will also be displayed.
Select a distance from the table below. Note that the distances shown corre-
spond to a vehicle speed of 50 mph (8 0 km/h). Vehicle-to-vehicle distance
increases/decreases in accordance with vehicle speed.
Pulling the lever toward you cancels
the Dynamic radar cruise control.
The speed setting is also canceled when
the brakes are applied.
Pushing the lever up resumes the
Dynamic radar cruise control and
returns vehicle speed to the set
speed.
Resuming is available when the vehicle
speed is more than approximately 25
mph (40 km/h).
Changing the vehicle-to-vehicle distance
Preceding vehicle mark
1
2
3
Vehicle-to-vehicle distance settings
Distance optionsVehicle-to-vehicle distance
LongApproximately 160 ft. (50 m)
MediumApproximately 130 ft. (40 m)
ShortApproximately 100 ft. (30 m)
Canceling and resuming the speed control
1
2
Page 196 of 640

196
CT200h_OM_OM76215U_(U)4-5. Using the driving support systems
When your vehicle is too close to a vehicle ahead, and sufficient automatic
deceleration via the Dynamic radar cruise control is not possible, the display will
flash and the buzzer will sound to alert th
e driver. An example of this would be if
another driver cuts in front of you while you are following a vehicle. Apply the
brakes to ensure an appropriate vehicle-to-vehicle distance.
■Warnings may not occur when
In the following instances, there is a po ssibility that the warnings will not occur:
●When the speed of the vehicle ahead matches or exceeds your vehicle
speed
●When the vehicle ahead is traveling at an extremely slow speed
●Immediately after the cruise control speed was set
●At the instant the accelerator is applied
Constant speed control mode differs from vehicle-to-vehicle distance control
mode. When constant speed control mode is selected, your vehicle will maintain
a set speed regardless of whether or not there are other vehicles in the lane
ahead.
Press the “ON-OFF” button to acti-
vate the cruise control.
Press the button again to deactivate the
cruise control.
Switch to constant speed control
mode.
(Push the lever forward and hold for
approximately one second.)
Cruise control indicator will come on.
When in constant speed control mode, to return to vehicle-to-vehicle distance con-
trol mode, push the lever forward agai n and hold for approximately 1 second.
After the desired speed has been set, it is not possible to return to vehicle-to-vehicle
distance control mode.
If the power switch is turned off and then turned to ON mode again, the vehicle will
automatically return to vehicle-to-vehicle distance control mode.
Adjusting the speed setting: P. 1 9 3
Canceling and resuming the speed setting: P. 1 9 4
Approach warning
Selecting conventional constant speed control mode
1
2
Page 209 of 640

CT200h_OM_OM76215U_(U)
2094-5. Using the driving support systems
4
Driving
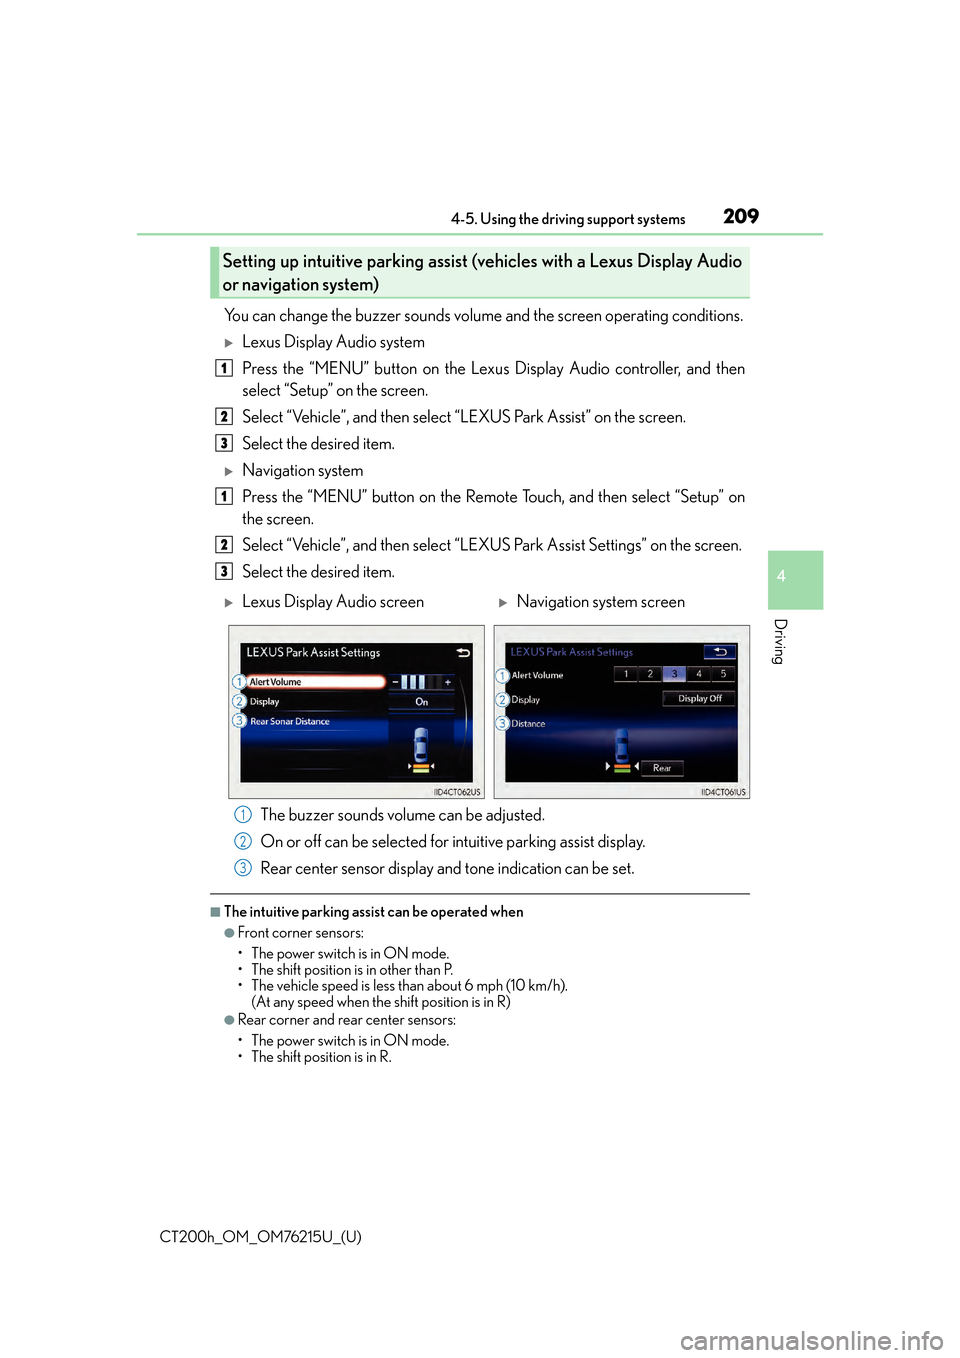
You can change the buzzer sounds volume and the screen operating conditions.
Lexus Display Audio system
Press the “MENU” button on the Lexus Display Audio controller, and then
select “Setup” on the screen.
Select “Vehicle”, and then select “LEXUS Park Assist” on the screen.
Select the desired item.
Navigation system
Press the “MENU” button on the Remote Touch, and then select “Setup” on
the screen.
Select “Vehicle”, and then select “LEXUS Park Assist Settings” on the screen.
Select the desired item.
The buzzer sounds volume can be adjusted.
On or off can be selected for intuitive parking assist display.
Rear center sensor display an d tone indication can be set.
■The intuitive parking assist can be operated when
●Front corner sensors:
• The power switch is in ON mode.
• The shift position is in other than P.
• The vehicle speed is less than about 6 mph (10 km/h).
(At any speed when the shift position is in R)
●Rear corner and rear center sensors:
• The power switch is in ON mode.
• The shift position is in R.
Setting up intuitive parking assist (v ehicles with a Lexus Display Audio
or navigation system)
1
2
3
1
2
3
Lexus Display Audio screenNavigation system screen
1
2
3